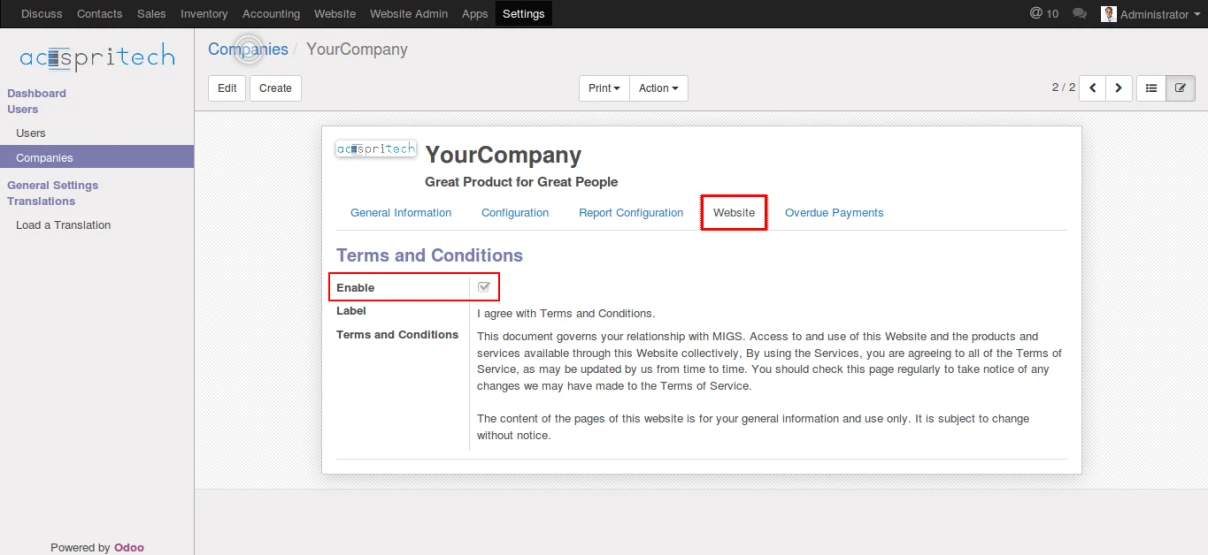
First we have to configure Terms & Conditions from company form.
Odoo 9 website terms and conditions configuration
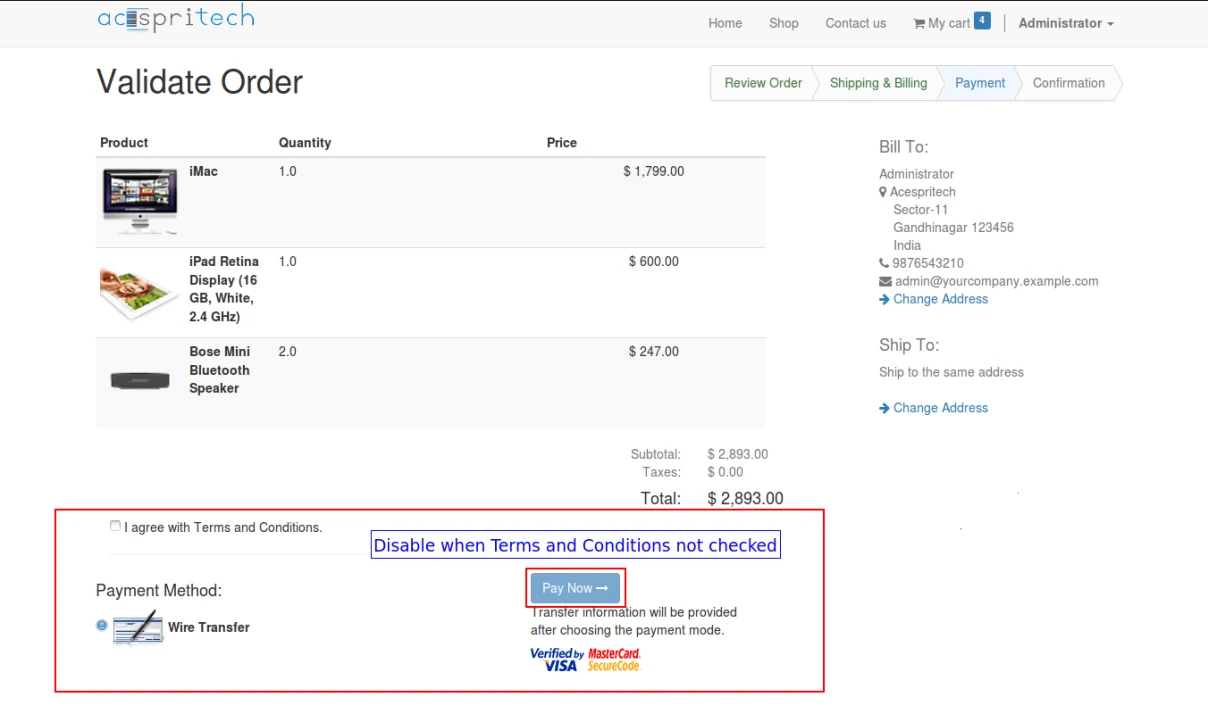
If Terms & Conditions feature is enable, then title and contents will be visible in Website Shop and user can not proceed for payment without agree with Terms & Conditions.
Disable Odoo Website Terms Conditions
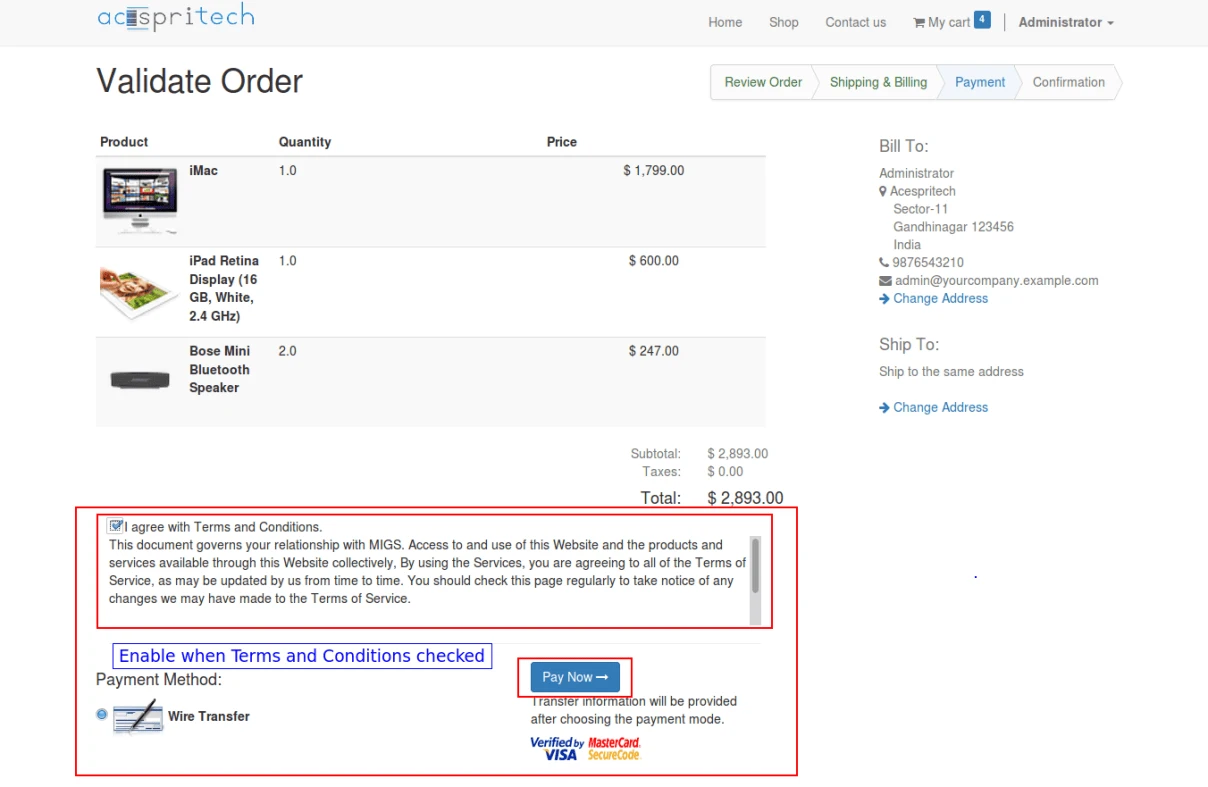
Description of Terms & Conditions will be visible after agree and user can make payment for order.
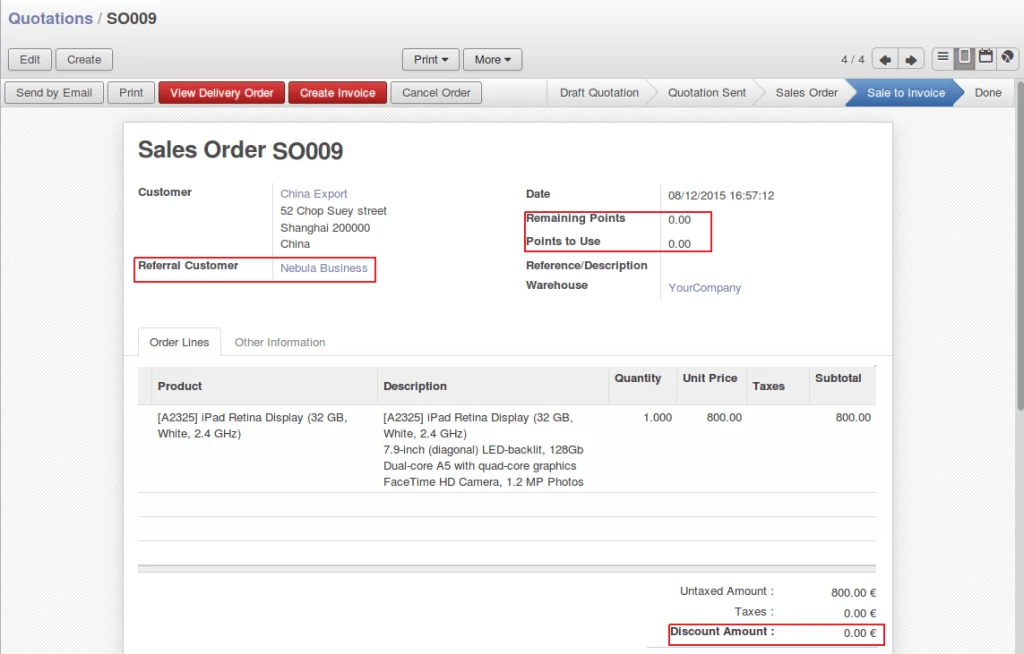
We have improved our existing loyalty system and make lots of enhancement. In new system, referral customer and employee will be tracked and get benefits of sales occurred from Sales Order or POS.
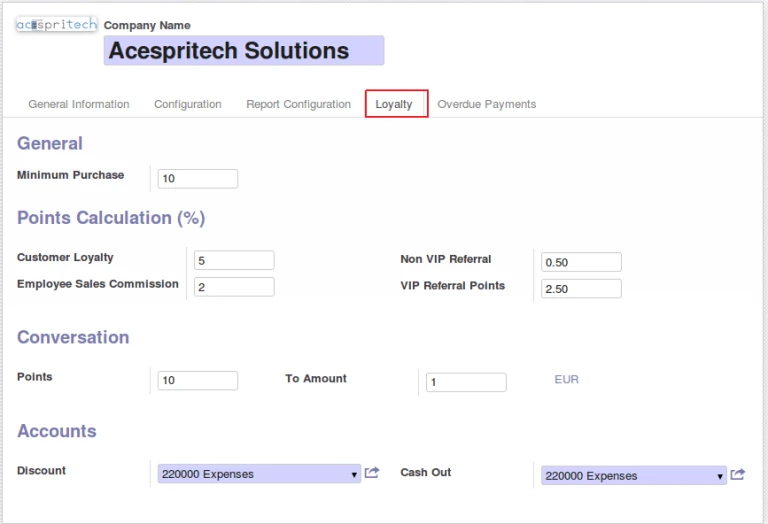
Loyalty point begin when customer start purchasing above Purchase Limit and then after customer will always get point on every purchase. In configuration, there are some general configuration for getting points for each one. It is easy to define accounts for discount and cash out.
Loyalty Global configuration
In Sales Order form, you can select Referral Customer and enter how many points to redeem. Redeem points will be automatically converted into discount amount.
Referral Sale Order
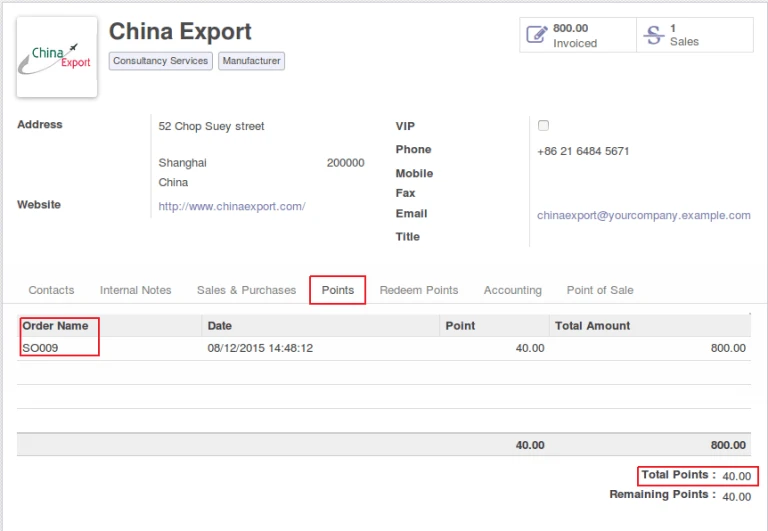
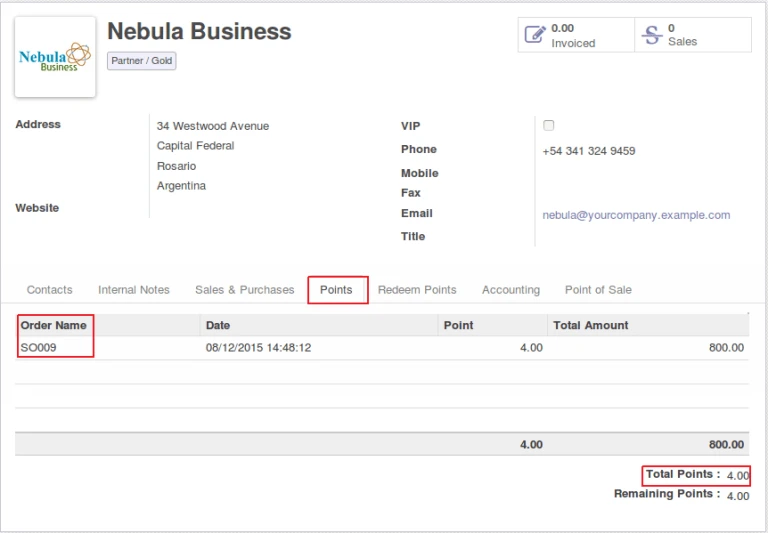
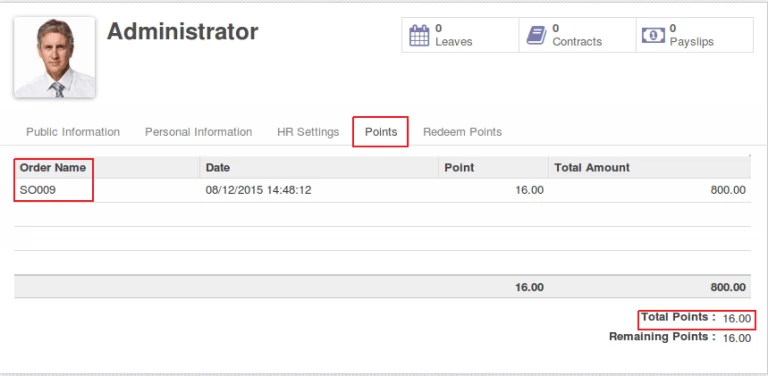
Points will be added in customer after invoice will be paid. (created from sales order).
Customer loyalty points
Referral customer and employee (sales person) will earn points.
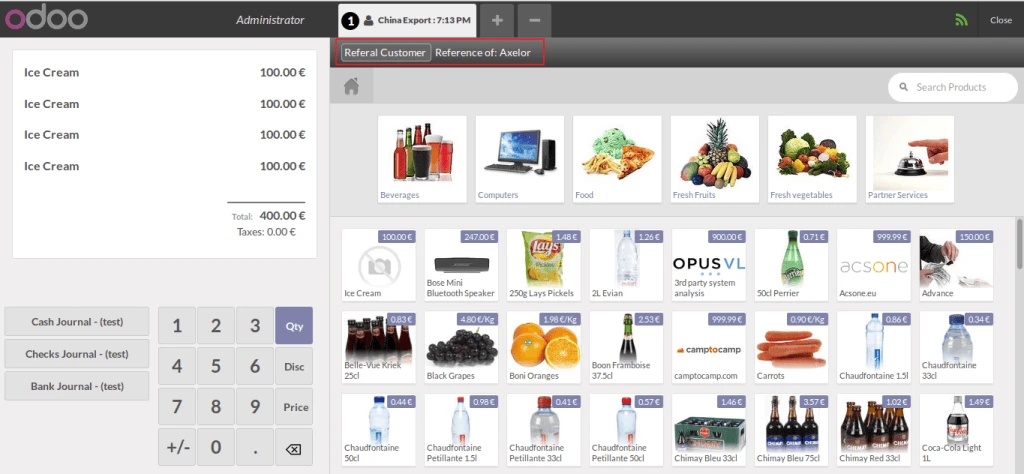
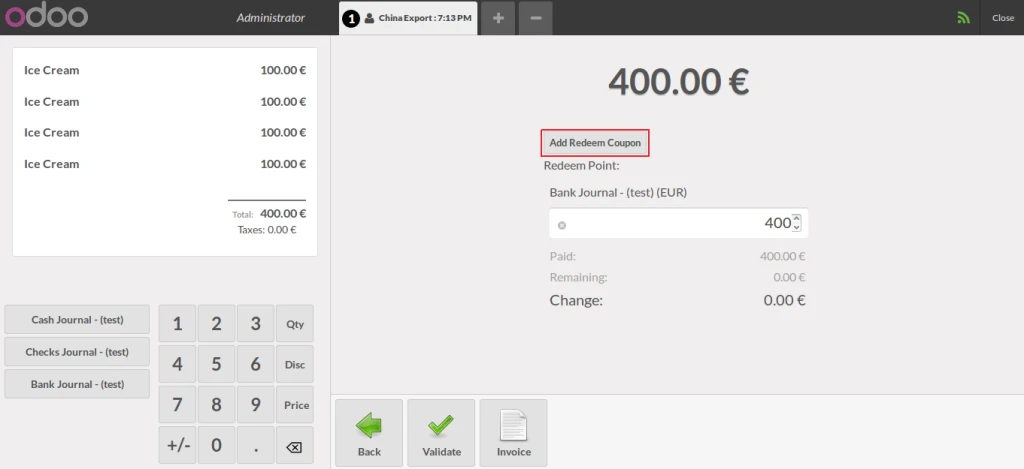
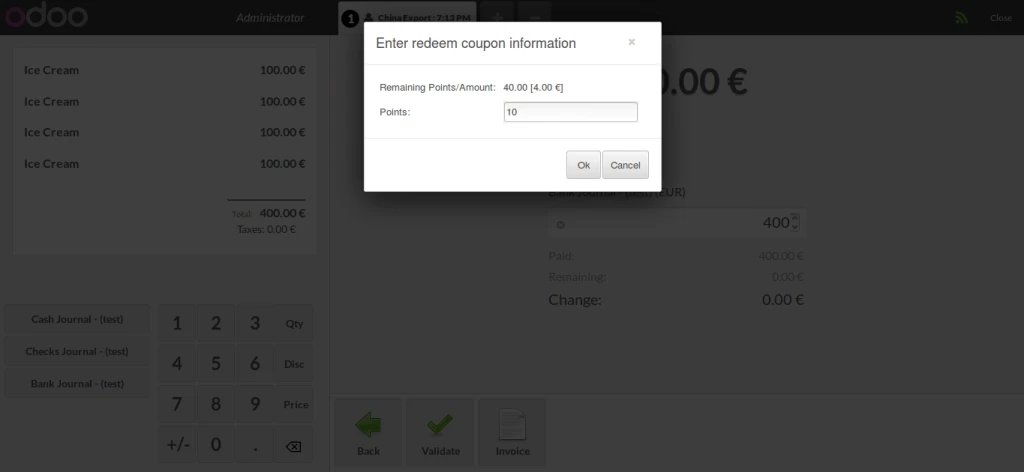
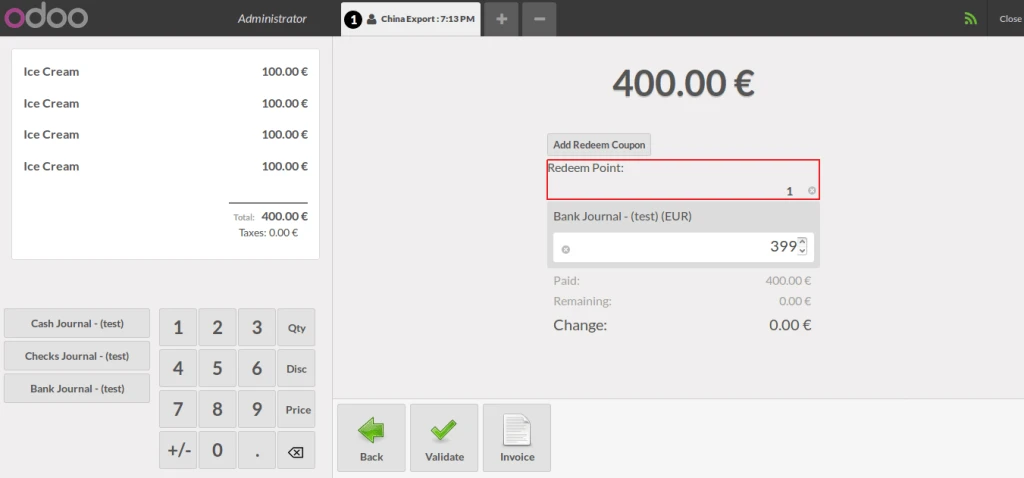
You can select Referral Customer from POS and redeem points.
POS Referral salePOS Payment with earned pointsPOS redeemPOS point to amount
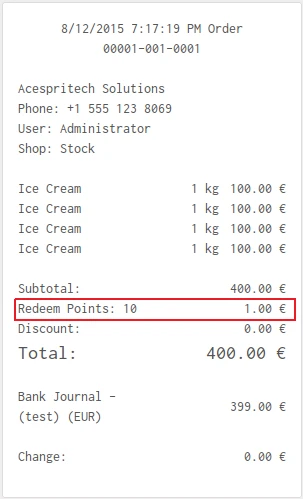
It will print redeem point in POS Receipt.
POS receipt with point information
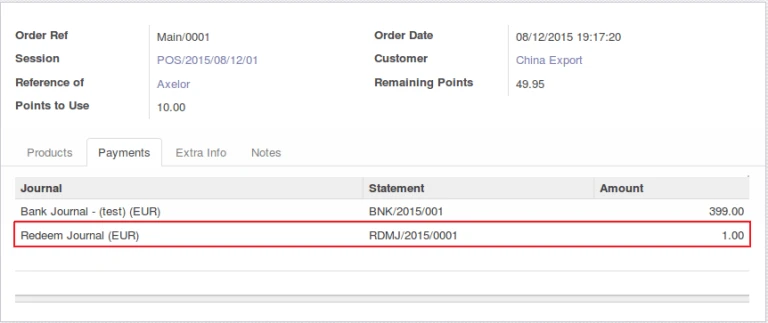
It will make separate journal entry for redeem points entered from POS.
POS Redeem journal
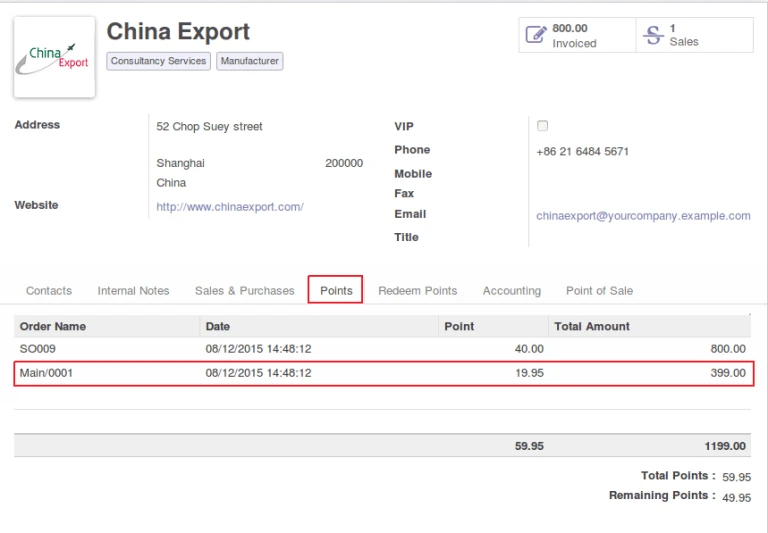
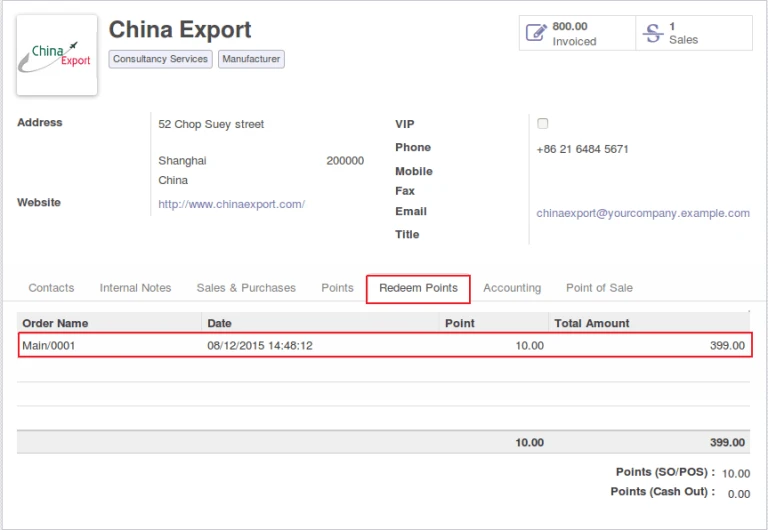
We can have all points information in customer form also like below images.
Points earned from POSOdoo customer’s redeemed point information
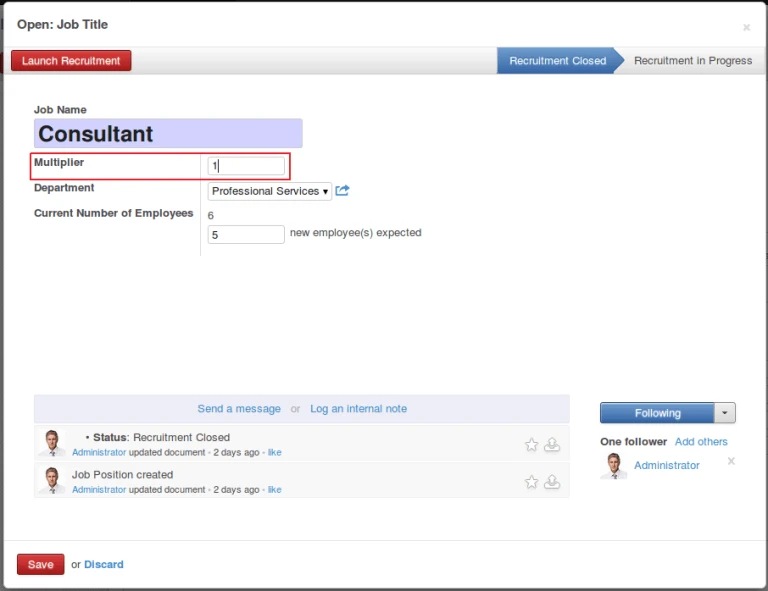
Employee will get commission amount in their salary as per their sales during a month and job position in company. Multiplier value will be use for calculation of monthly commission amount. Employee contract must have Working Schedule define.
Employee job position
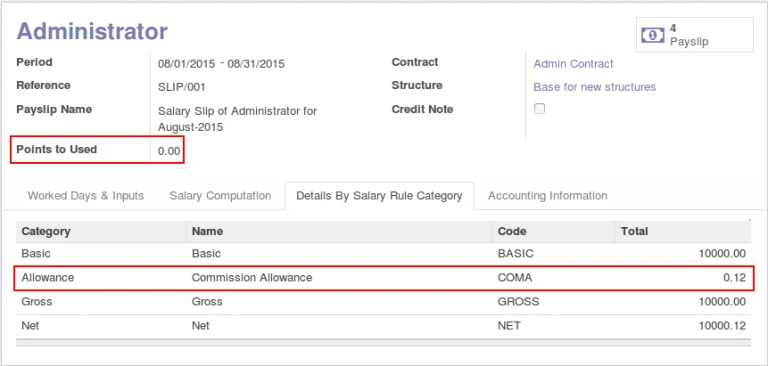
At time of creating employee payslip, employee points will be automatically selected and use in calculation.
Odoo hr payslip
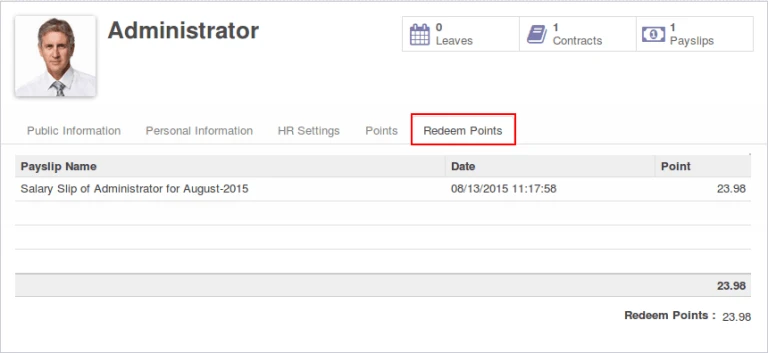
Once employee payslip is confirmed, we will have corresponding points entry in employee form.
Odoo hr employee redeem
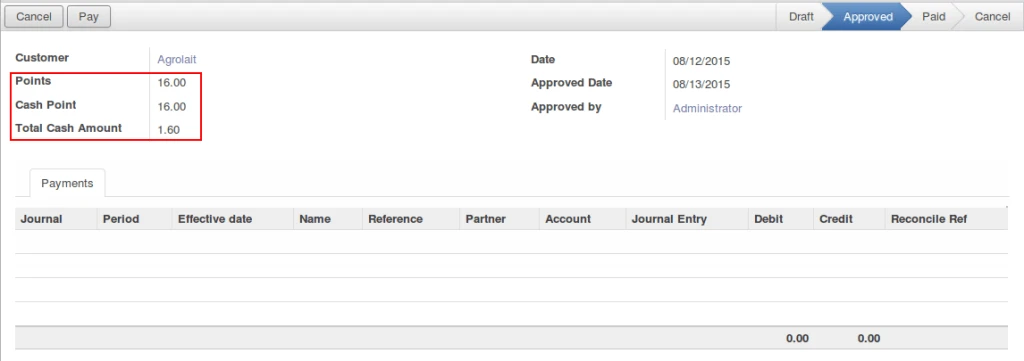
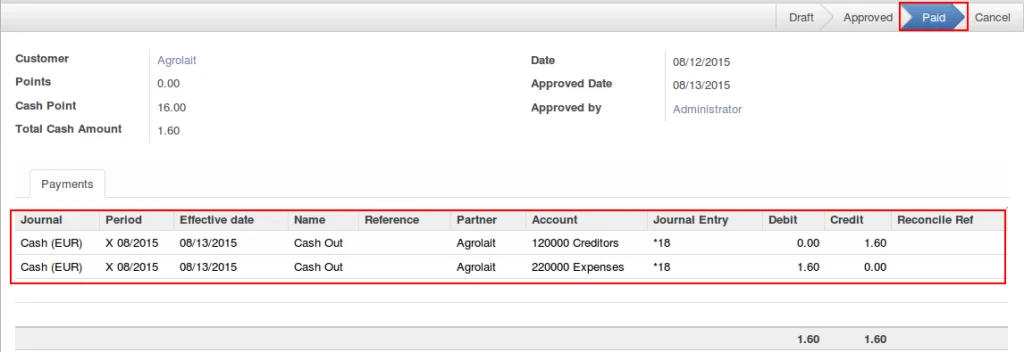
In this system, its possible to provide CASH amount to customer instead of discount during purchase and also generating valid accounting entries.
Cash out approvedCash out paid
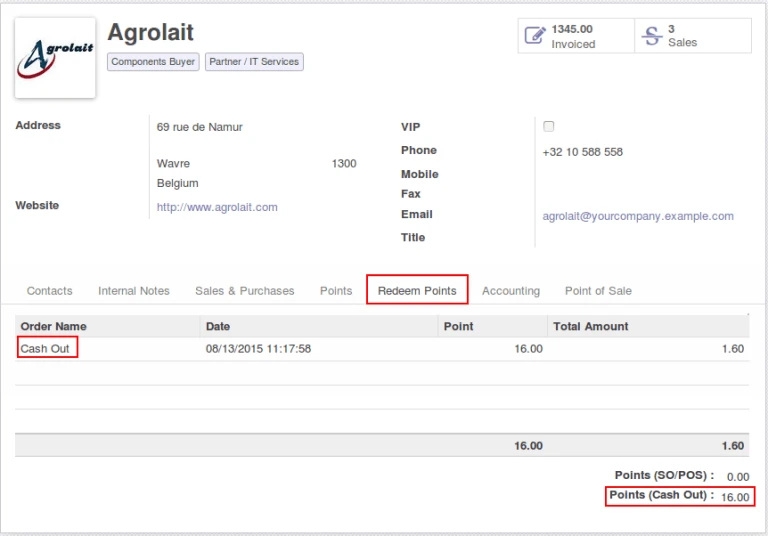
Cash Out will make entry same like redeem point for customer.
Odoo customer redeem
Share this:
Click to share on Facebook (Opens in new window)
Click to share on LinkedIn (Opens in new window)
Click to share on Twitter (Opens in new window)
Click to share on Reddit (Opens in new window)
Click to share on Tumblr (Opens in new window)
Click to share on Pocket (Opens in new window)
Click to share on Pinterest (Opens in new window)
More
Click to print (Opens in new window)
Click to email this to a friend (Opens in new window)
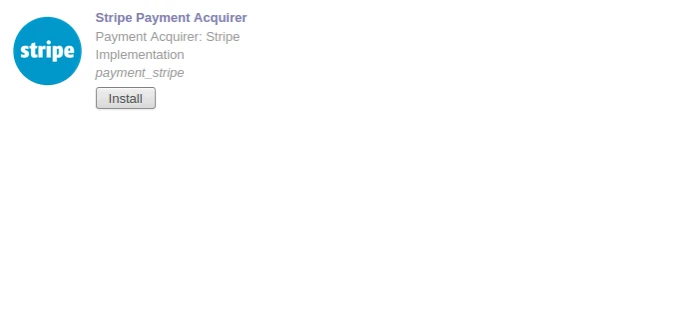
We have implemented Stripe integration for Odoo V8 with Payment Acquirer module which will automatically enable during sale, invoice and website process.
Odoo module list
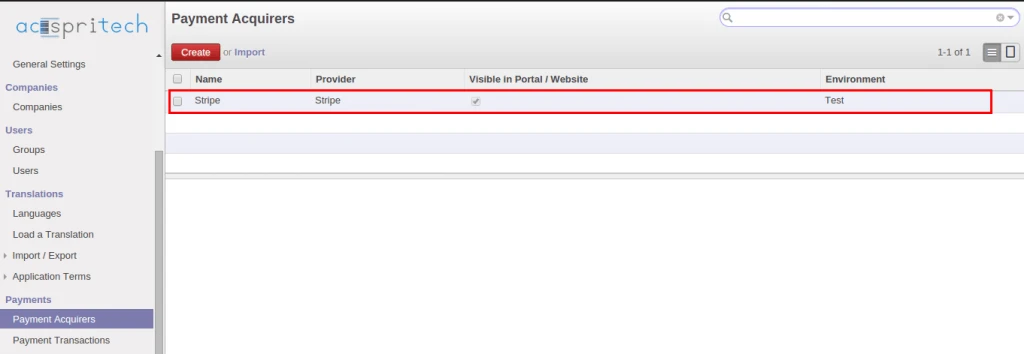
After installing this module, we can see new record for payment acquirer.
Odoo Payment Acquirer
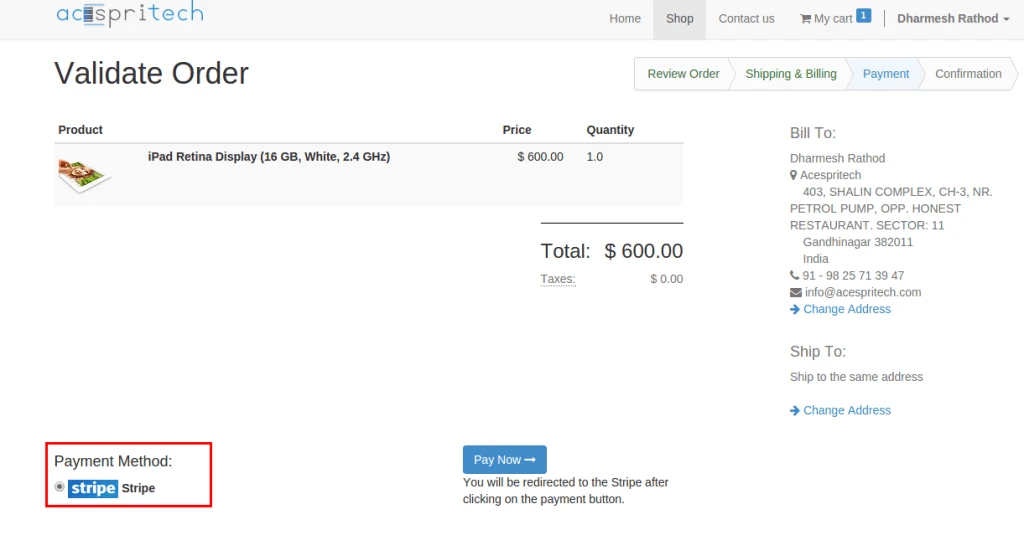
During payment process from Odoo website, stripe option will automatically appear.
Odoo website order
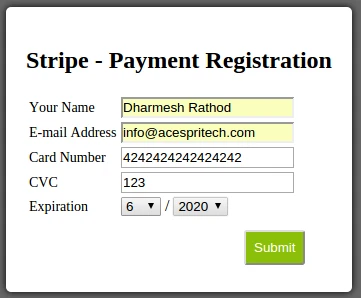
And it will switch another form to take card details from user.
Stripe payment registration
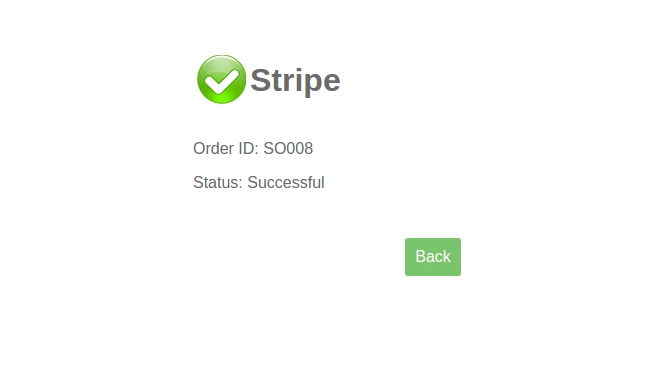
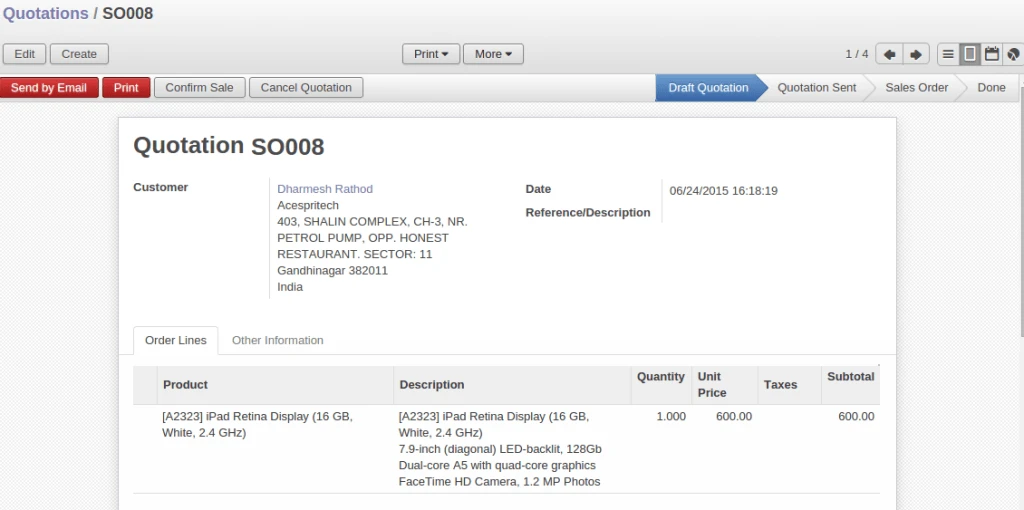
After successful transaction with Stripe server, it will display proper message and create sales order into Odoo.
Stripe payment responseOdoo sales order
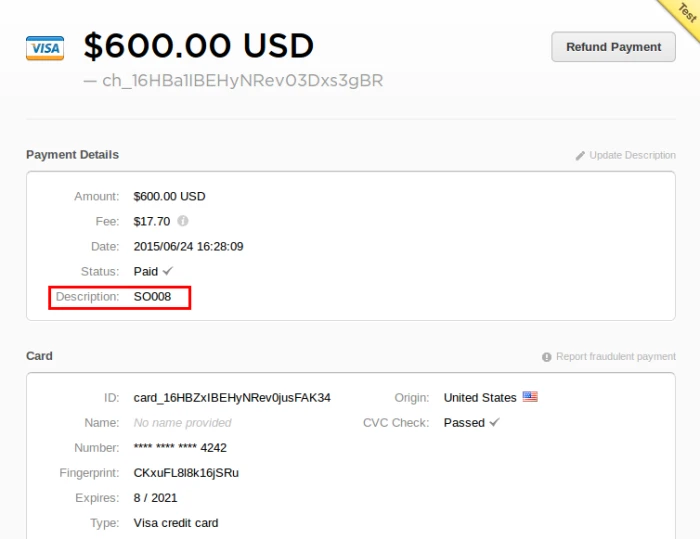
It will display transaction history into user’s stripe account also.
Stripe Transaction
Share this:
Click to share on Facebook (Opens in new window)
Click to share on LinkedIn (Opens in new window)
Click to share on Twitter (Opens in new window)
Click to share on Reddit (Opens in new window)
Click to share on Tumblr (Opens in new window)
Click to share on Pocket (Opens in new window)
Click to share on Pinterest (Opens in new window)
More
Click to print (Opens in new window)
Click to email this to a friend (Opens in new window)
We have implemented solution for allowing payment process via SagePay from OpenERP. We will see how this module is developed.
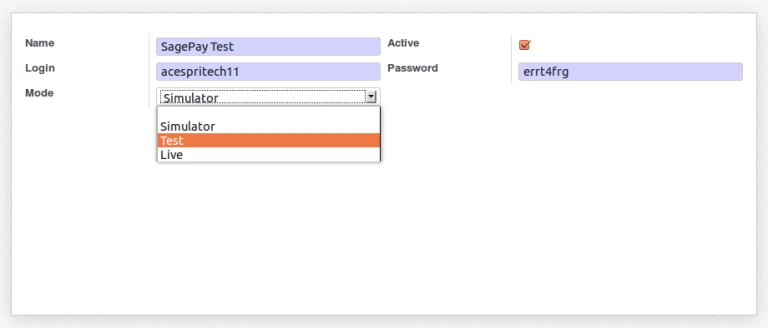
We will start from configuration of SagePay account information. It is very important to select appropriate “MODE” of SagePay account.
SagePay Configuration
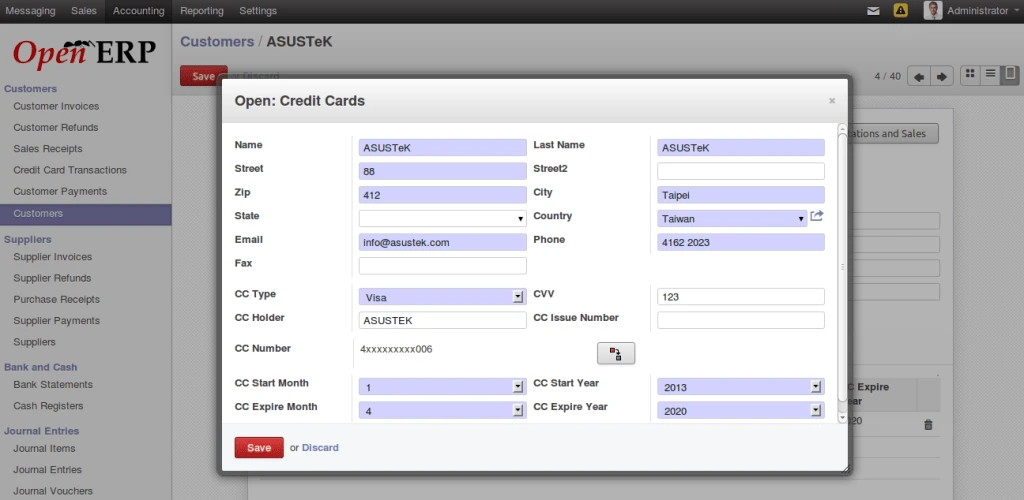
It is possible that customer may have more than one credit cards. We can configure credit card related information into Customer form itself. We are storing credit card number into database with encrypted format.
Credit Card Configuration
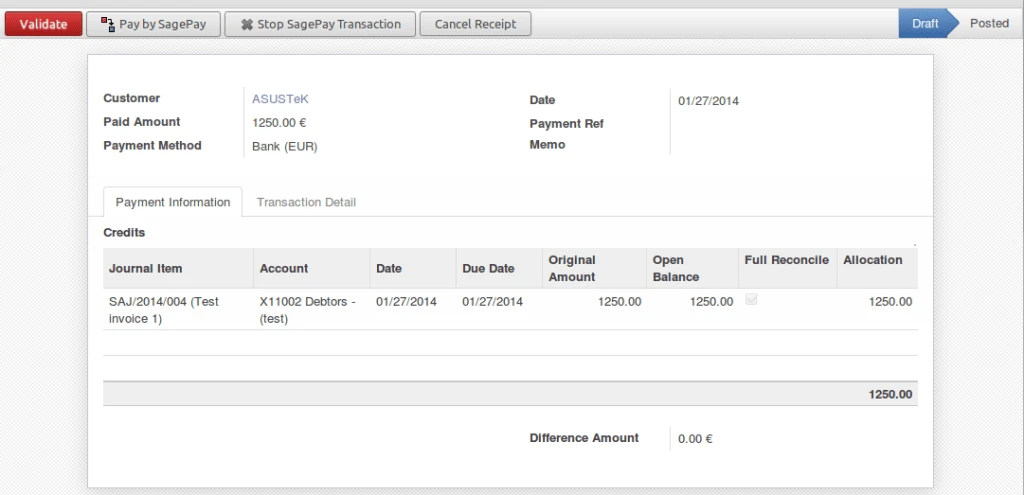
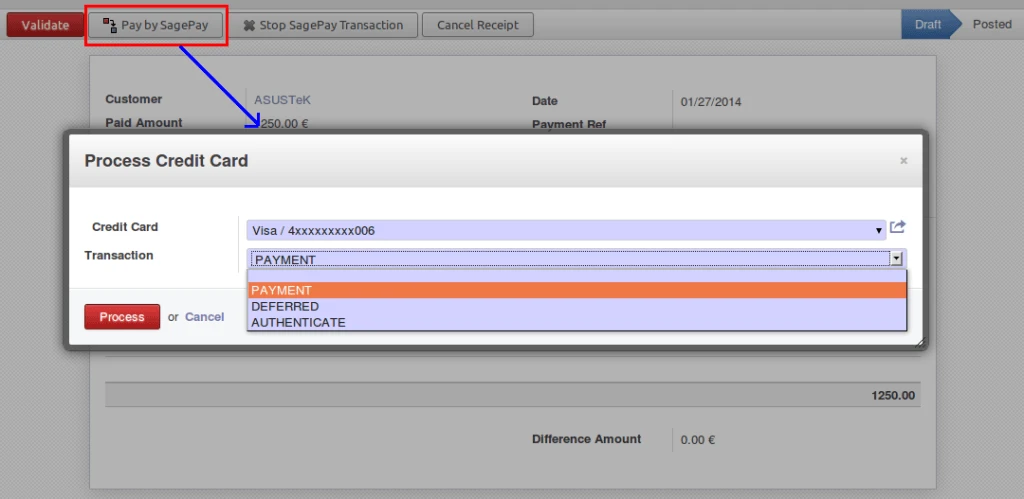
To process with sagepay, we have added option into OpenERP voucher form. We can easily make payment or stop it from here.
OpenERP Voucher
We are allowing to make three types of transactions with SagePay from OpenERP.
– Payment
– Deferred
– Authenticate
Further process will work according to selected transaction.
Payment Options
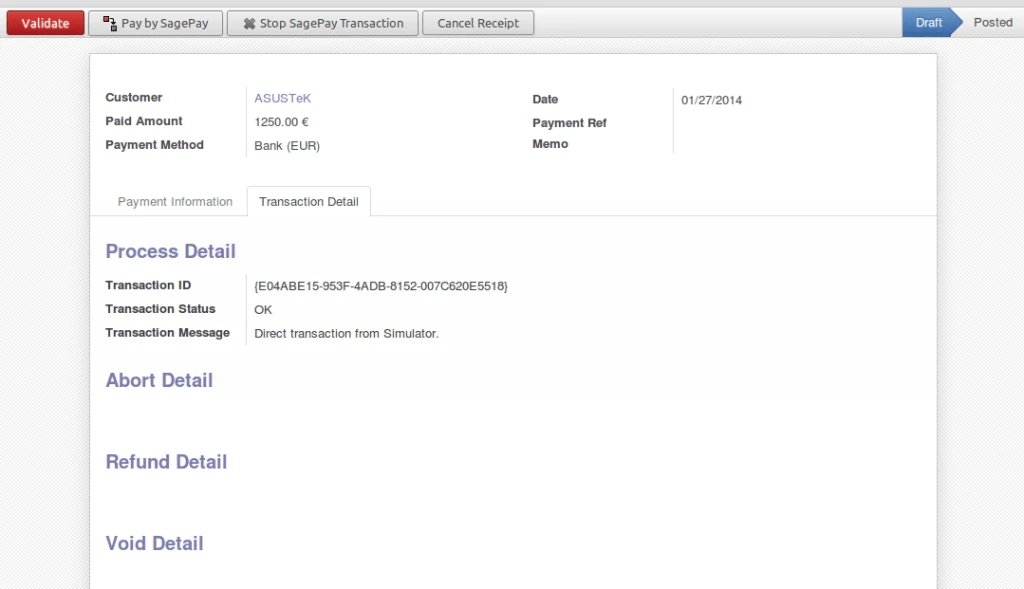
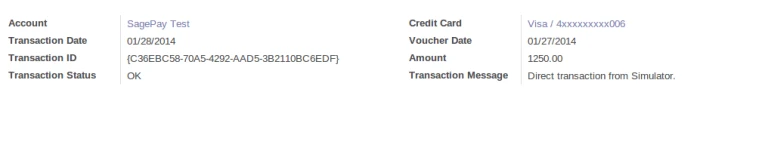
After making process, SagePay server will give response about transaction and we are storing that into database for future actions.
We are storing mainly following data:
– Transaction ID
– Transaction Status
– Transaction Message
Process Response
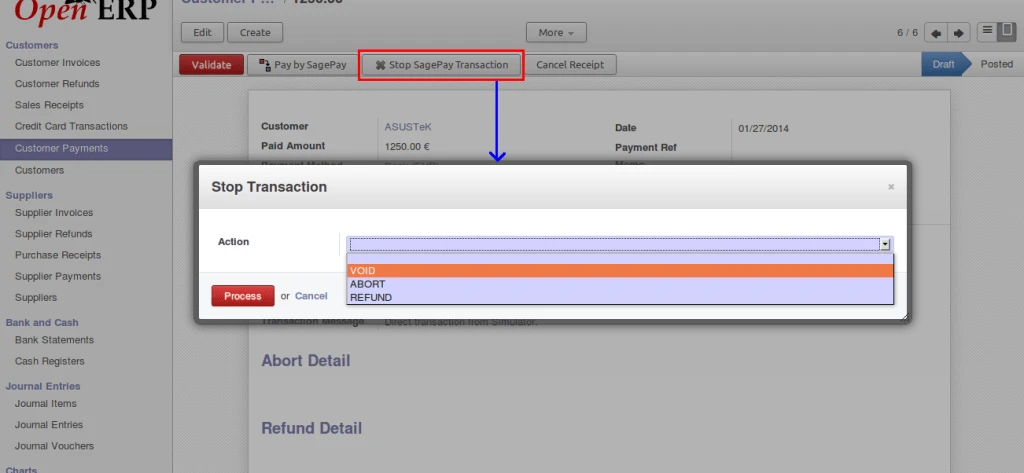
Now It is very easy to stop your transaction for any reason.
Stop Option
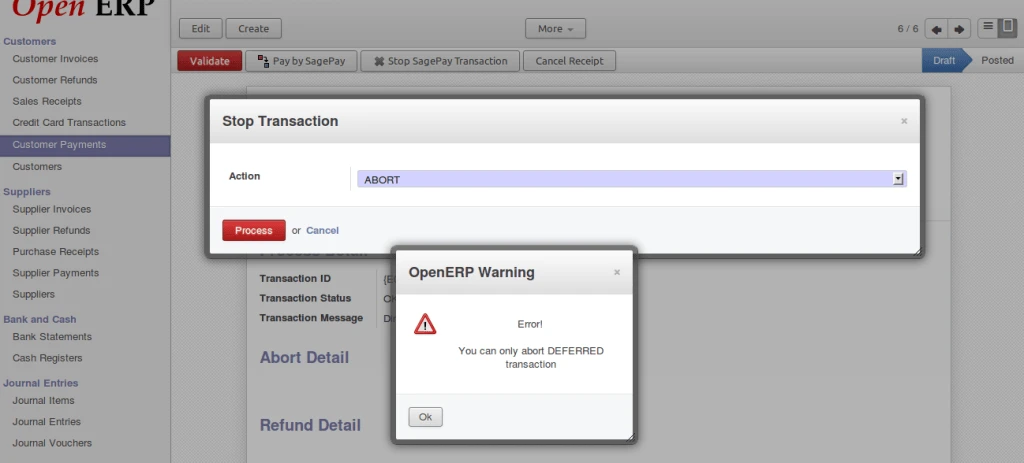
We are restricting user to make any invalid actions on transactions.
Error on abort payment
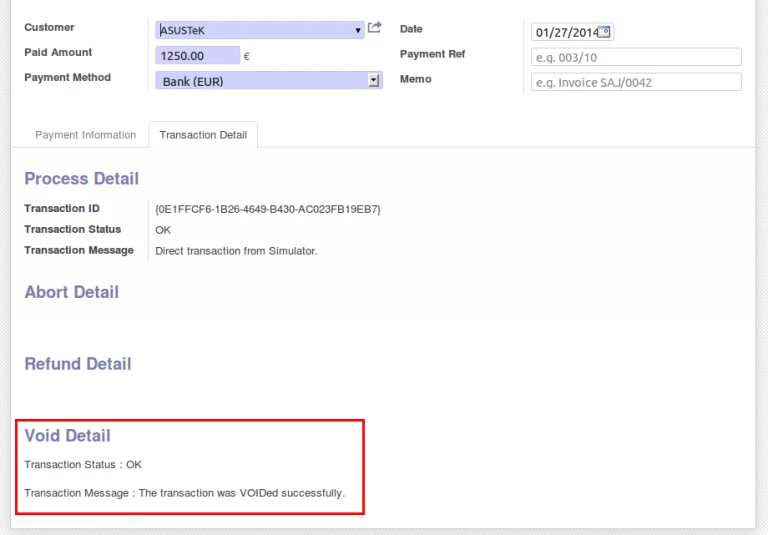
It is displaying VOID response from SagePay server. It is possible to perform on transactions which are registered with SagePay.
Void Message
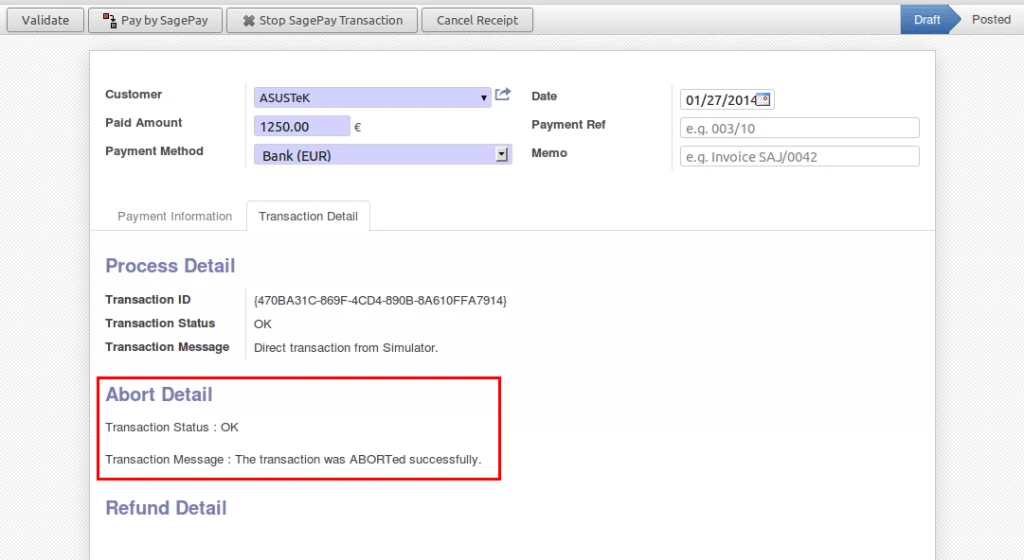
As mentioned above, it is possible to ABORT only DEFERRED transactions.
Deffered Abort
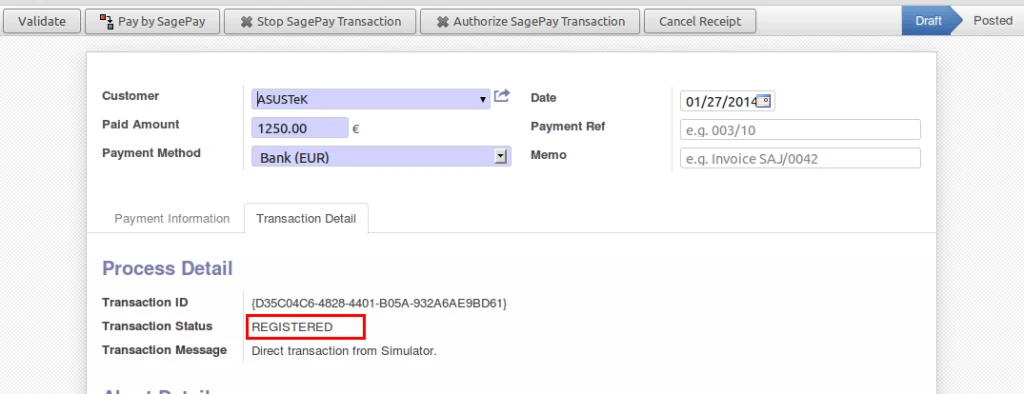
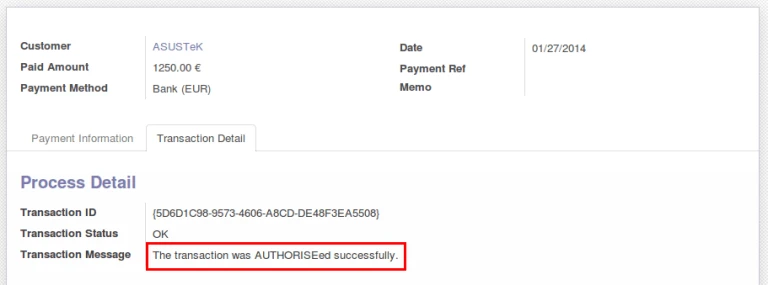
We are getting status “REGISTERED” for AUTHENTICATE type of transaction. And that transaction has to AUTHORIZE with SagePay.
Authenticate TransactionAuthorize Transaction
We are keeping record of each and every transaction with detail information in OpenERP.
Card History
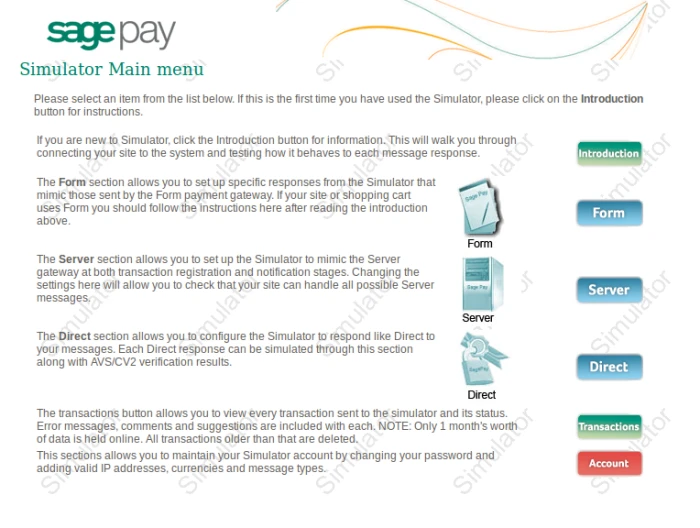
This is how SagePay Simulator page looking.
SagePay Home PAge
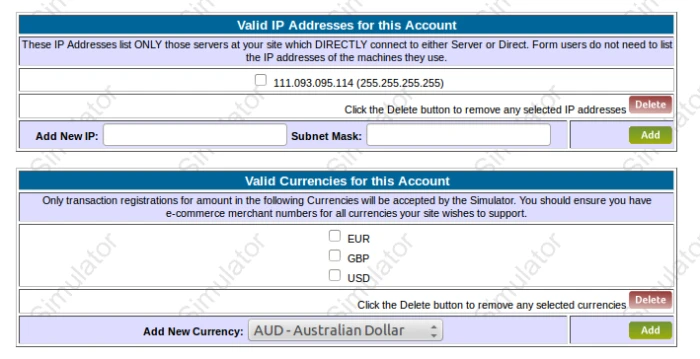
Here we have to Add IP address of our server or machine from where we are accessing our SagePay account through API. And also add appropriate Currency code for allowing transactions.
SagePay Website Amin
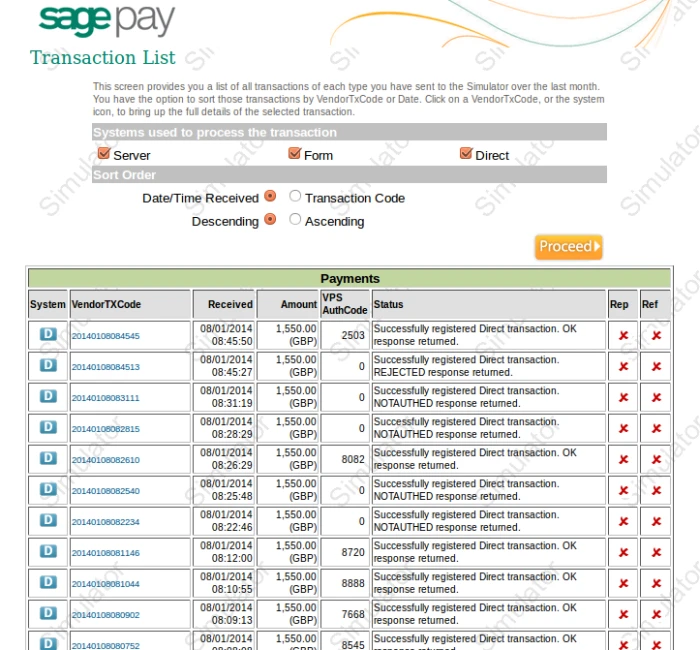
It is displaying list of transactions that is related with our account.
OpenERP Point of Sale has return product facility available from order Form view. But this feature is not available in POS interface. We have implemented very important feature – “Return products from POS Interface” so user don’t require to leave POS Interface to return the products.
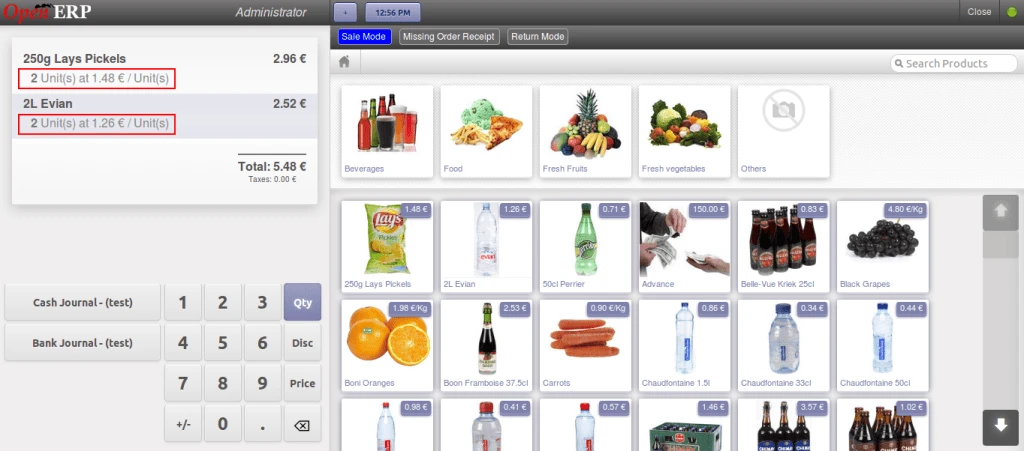
Below is the screen for normal SALE mode. We have created 3 different buttons to identify the order mode.
1. Sale Mode, is a normal mode
2. Missing Receipt Mode, in which if customer doesn’t have receipt but still salesman can return order so in this case only negative order will be generated.
3. Return Mode, to return the products by comparing with original order.
OpenERP POS Normal Sale Mode
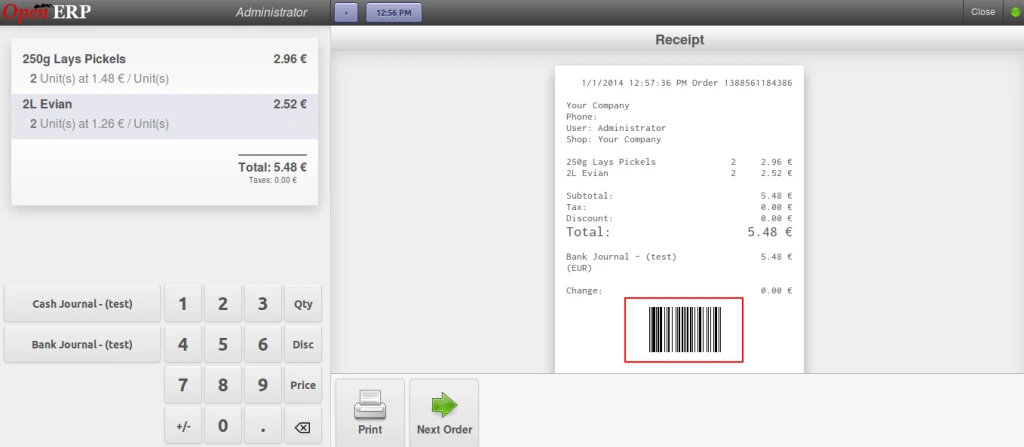
Once the order is placed, we can see barcode on receipt for that order number generated.
POS Normal Sale Receipt
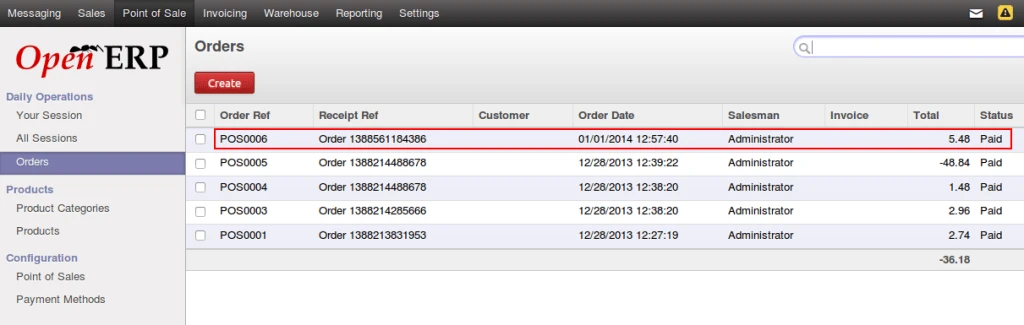
And here is the order which is generated from POS interface.
OpenERP POs Order Created
Now lets try to return the product from POS interface.
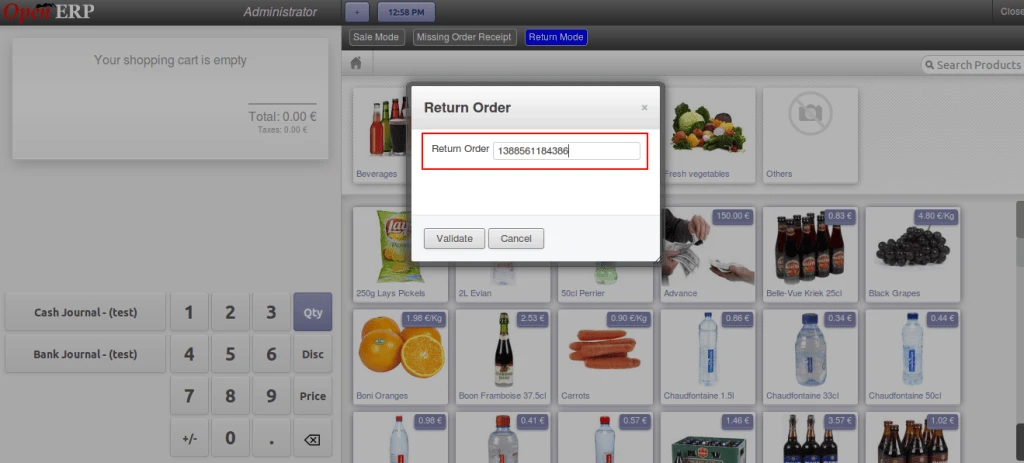
When we click on “Return Order” button, at that time this popup will open to enter order reference number.
Here in the image where we can enter order number using barcode or manually.
OpenERP POS Return Order Number
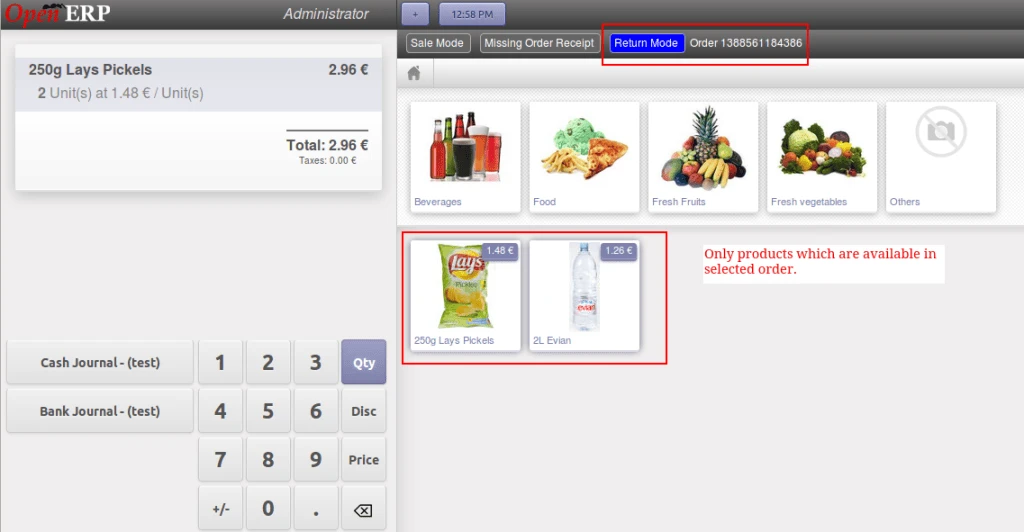
Once the exact order is found, then list of products will be loaded which are available in the selected order.
OpenERP POS Return Order Screen
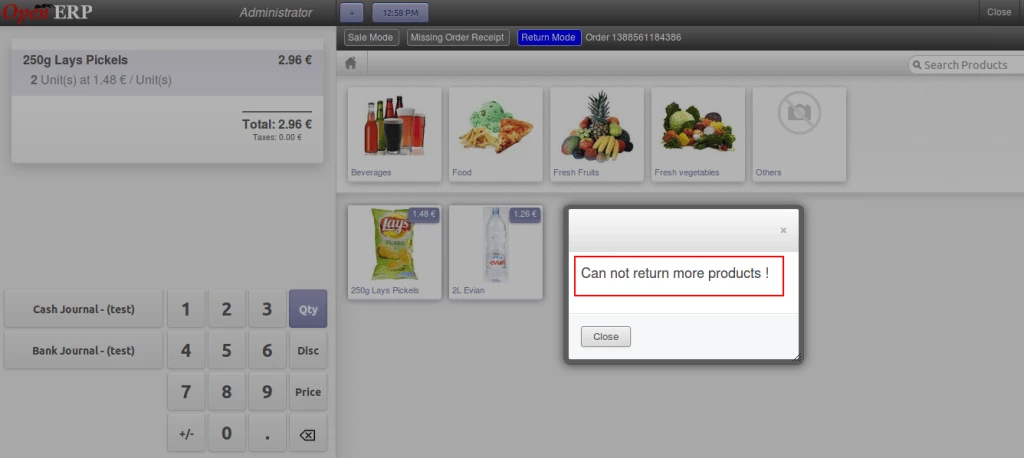
If we try to select more product quantity than selected order quantity then it will raise an warning message.
OpenERP POS Return Warning
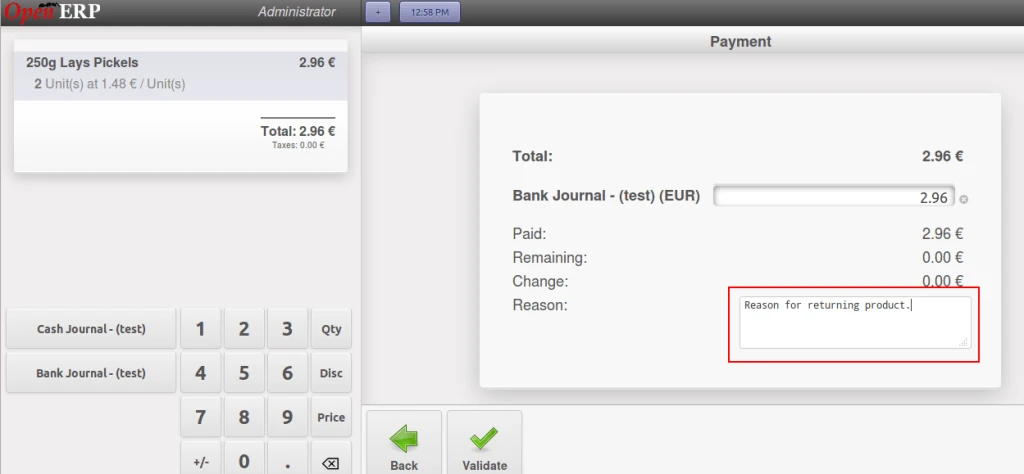
We can also mention any reason for returning products what customer specified.
OpenERP POS Return Payment Screen
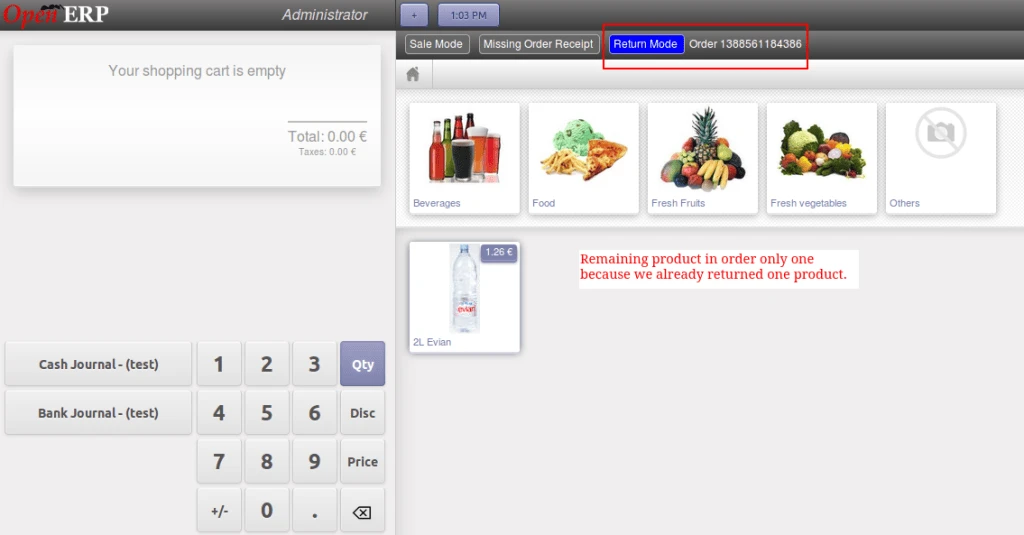
Once we complete partial return order then we can return the same order again for remaining product quantities displayed in following screen.
OpenERP POS Order Remaining Products
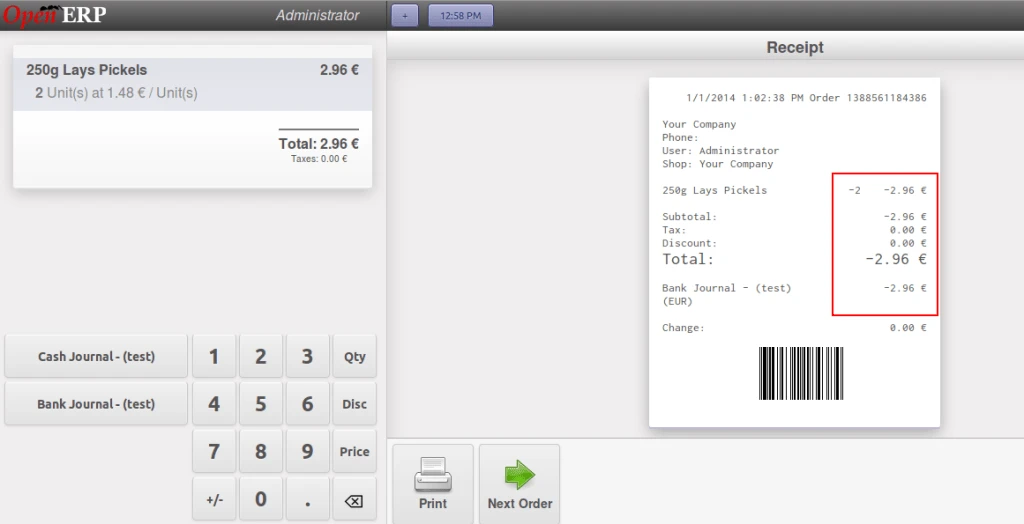
Here is the order return receipt in negative if we are returning products.
OpenERP POS Order Receipt
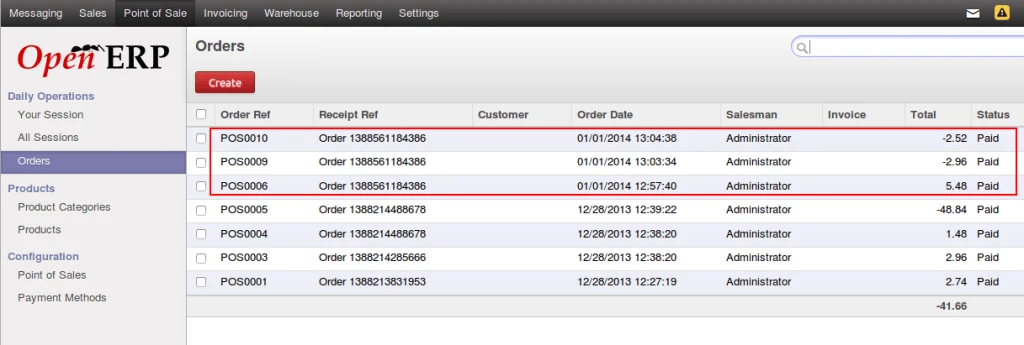
In order list we can see that main order and return orders have same order numbers with positive and negative values.
OpenERP POS Order List
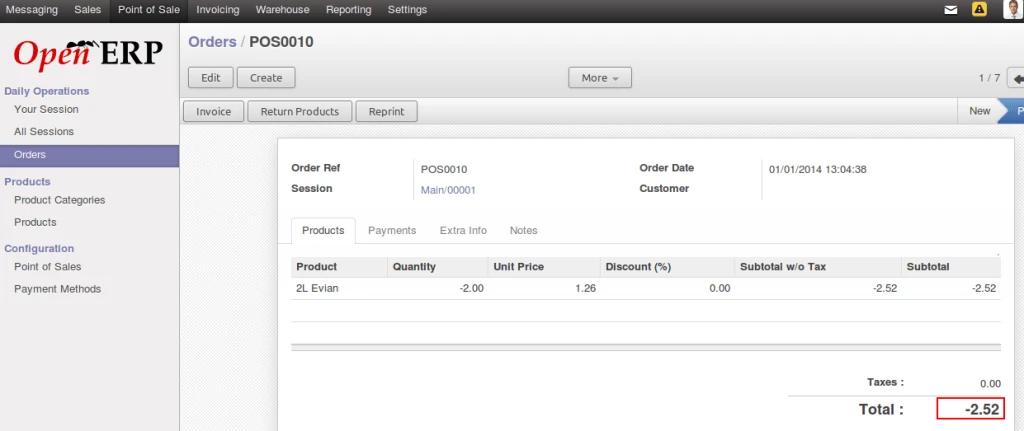
POS Order form with corresponding values.
OpenERP POS Return Order Form
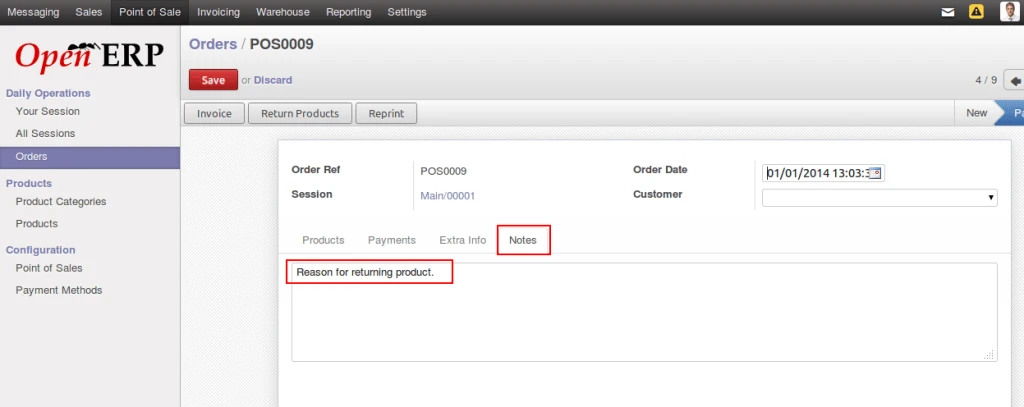
In “note” field, we can find reason which is entered during return products.
Recently we have made integration with OpenERP with Authorize.net for payment services. Now we have integrated OpenERP with another Payment services, BluePay. We can have more information from http://www.bluepay.com. With help of this module, it is very easy to process with credit card from OpenERP interface.
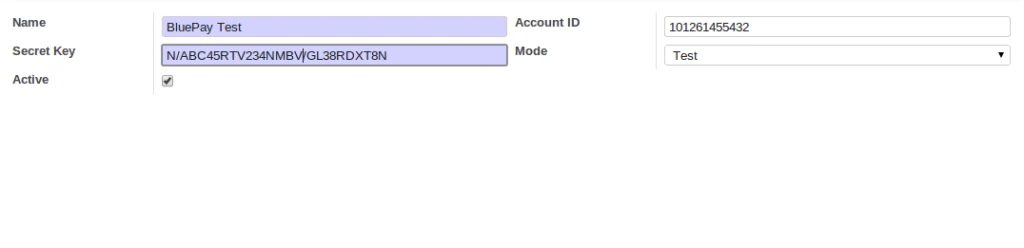
First of all we have to create account on BluePay and get required information and use those information to connect with BluePay from OpenERP. We have tested each transaction in TEST mode.
OpenERP BluePay Configuration
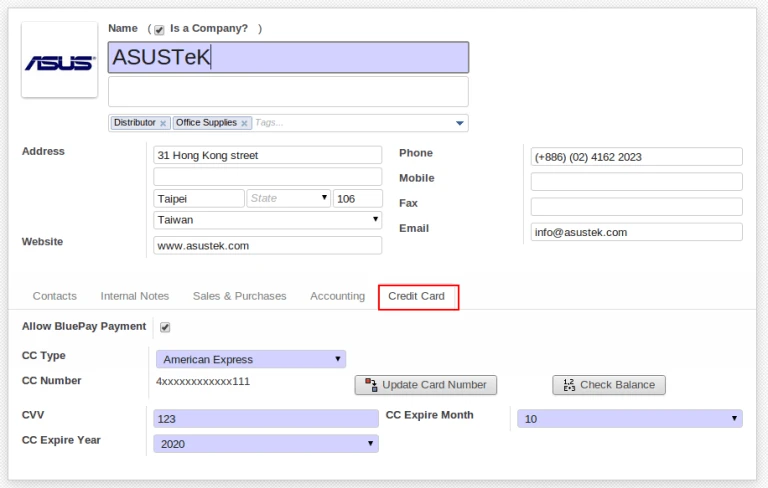
It requires credit card information to make transactions. We are storing required details into Customer form. We are using AES algorithm for securing credit card number into database.
OpenERP Customer Form
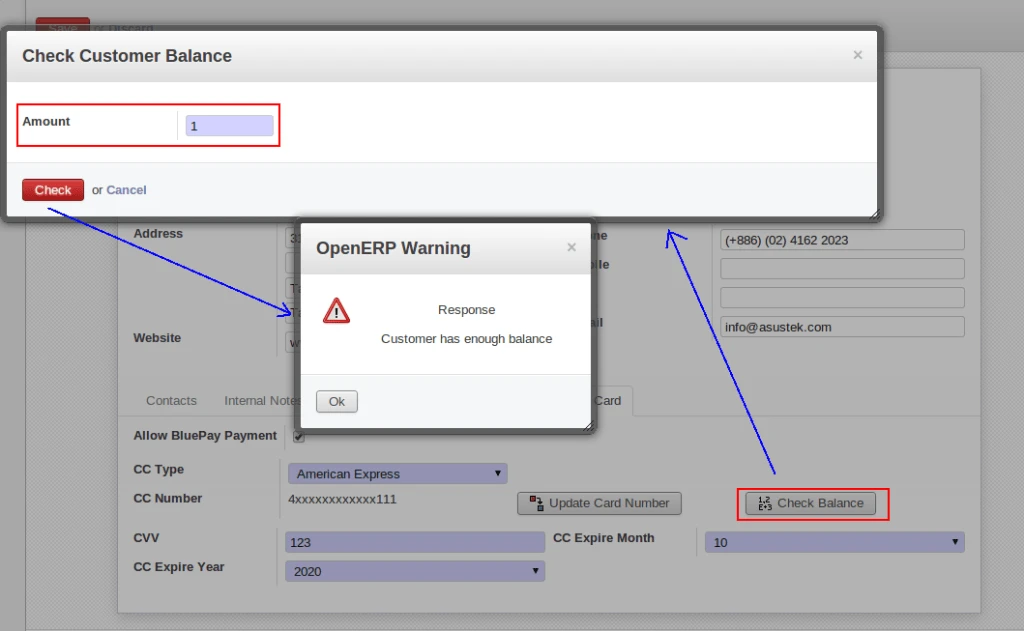
Sometimes it is require to know that customer has enough balance in his credit card or not. We are giving facility that user will enter amount that he has to check for particular customer and get relevant message.
Check Credit Card Balance
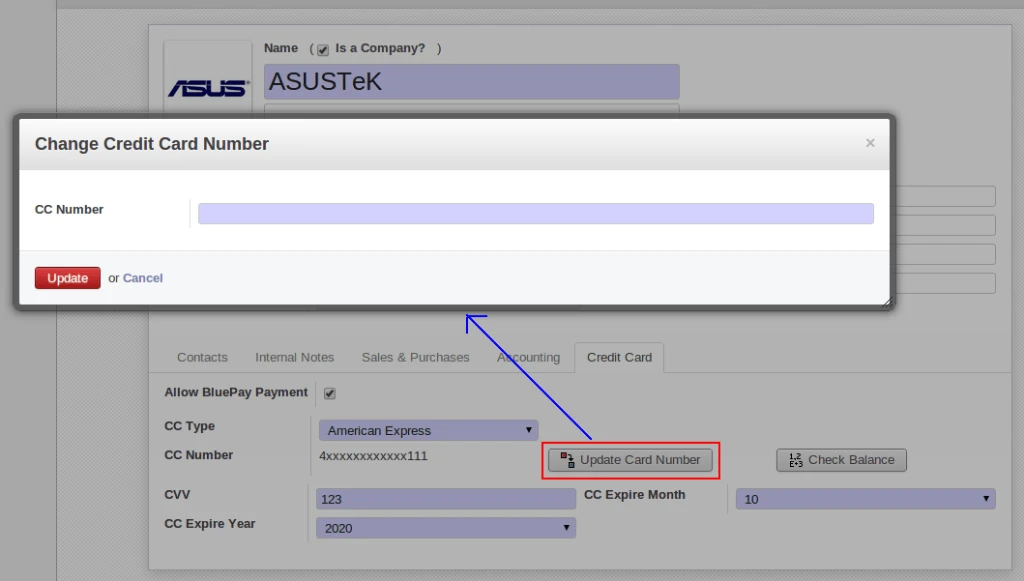
As we are storing credit card number in a secure way in database so it is not allow to change credit card number directly.
Check Credit Card Number
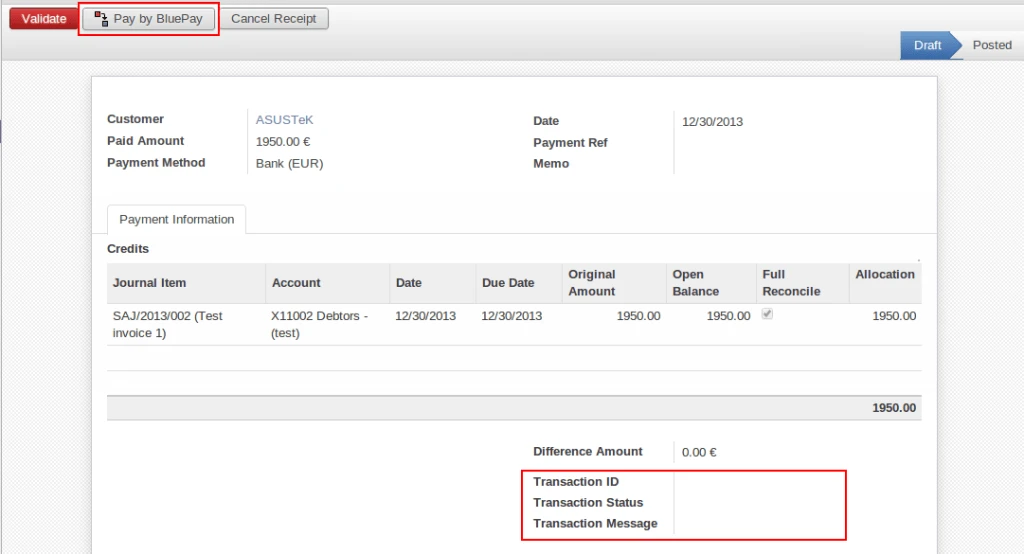
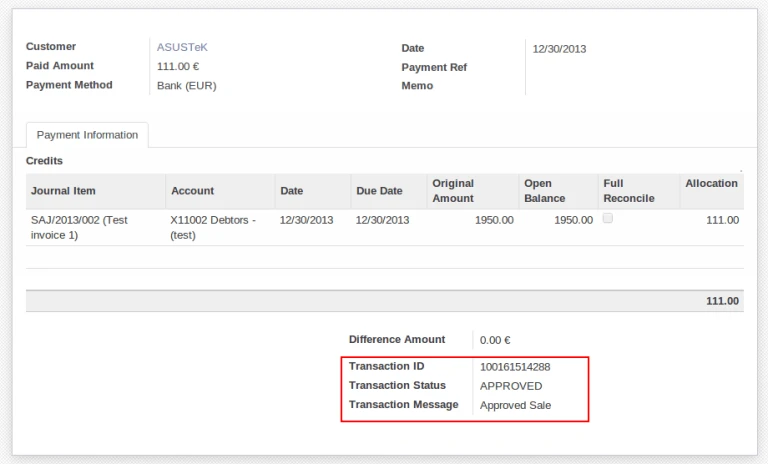
We have improved GUI of voucher for sending payment request to BluePay. It allows to send request only one time if it will succeed. And also stroing transaction related information into voucher for future purpose. It will cancel payment request with BluePay if we are going to cancel voucher.
OpenERP Account VoucherVoucher Process Completed
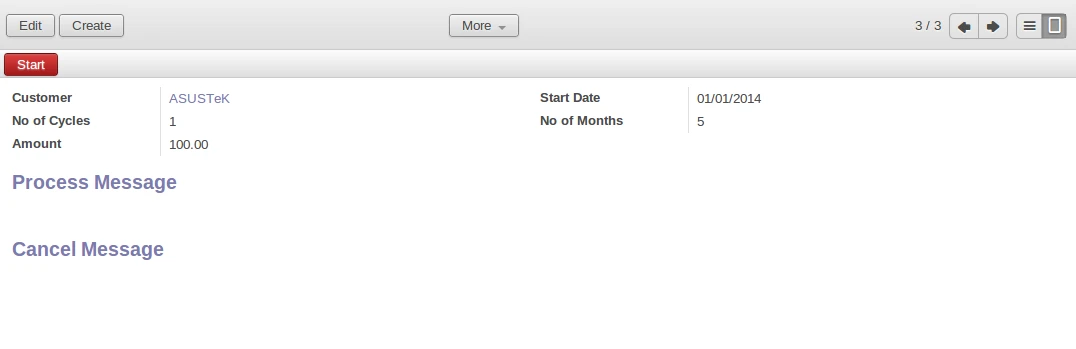
Sometimes it is require that customer wants to pay amount in installment. We are allowing to create recurring payment request with BluePay.
Recurrent Process
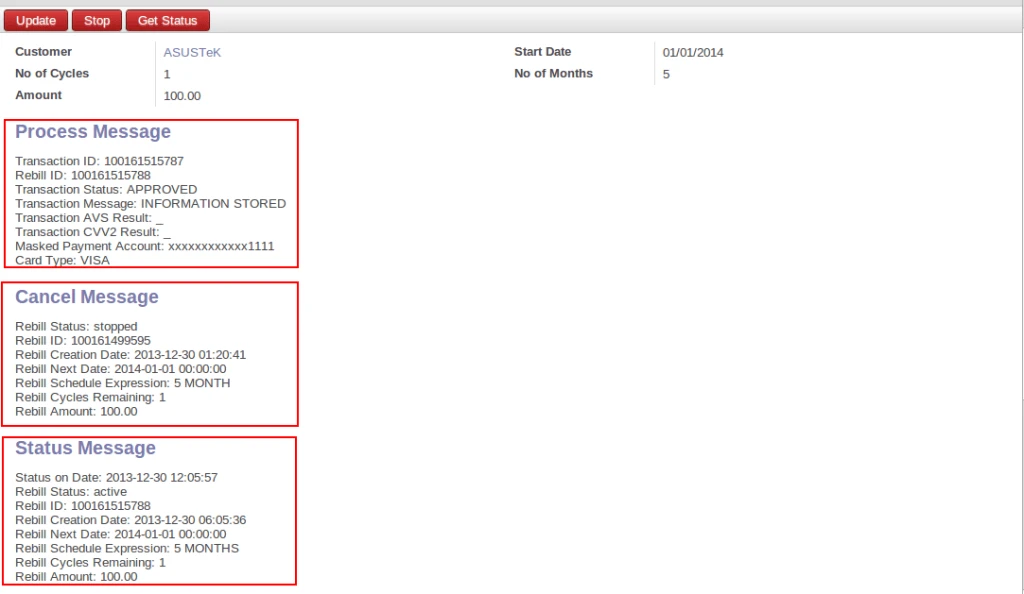
We are keeping track of messages for each and every transactions occur during recurring payment.
Recurrent Messages
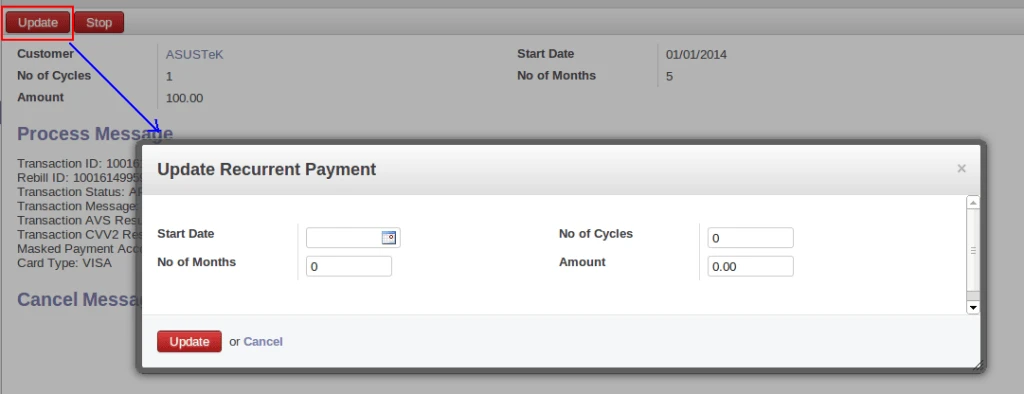
User can change any parameter during recurring payment process execution. And can cancel it also.
Update Recurrent Payment
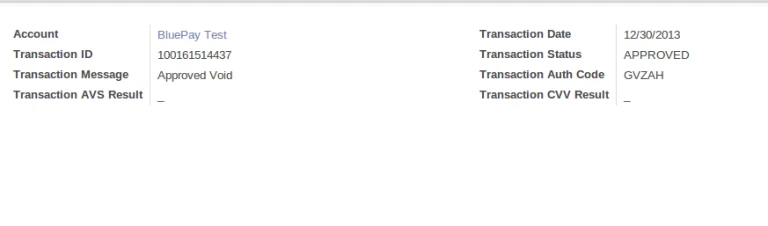
We are tracking details of each and every transactions with BluePay.
Transaction History
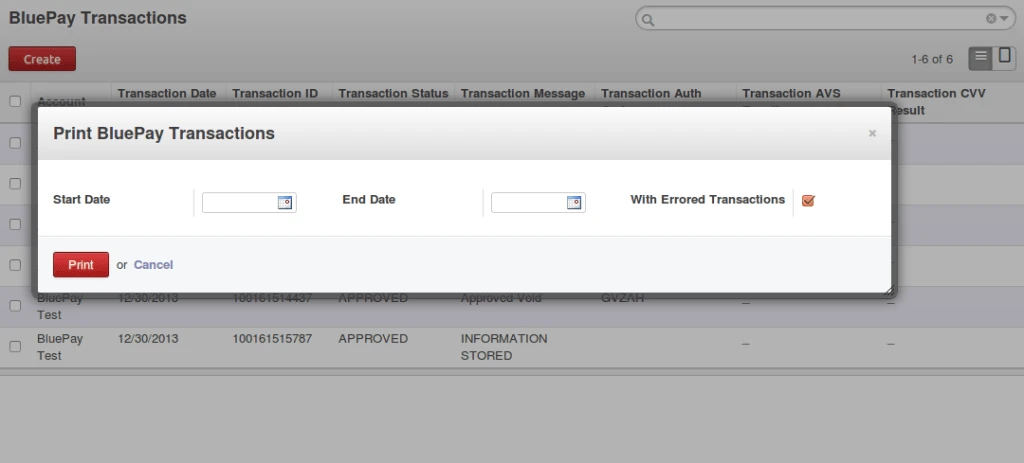
User can print transaction details on PDF report by entering date range and proper parameter selection.
We have implemented solution for allowing payment process via Authorize.Net from OpenERP. We are still improving this module by adding new functionalities. Currently we have implemented feature with Customer Invoice and Customer Invoice Refund.
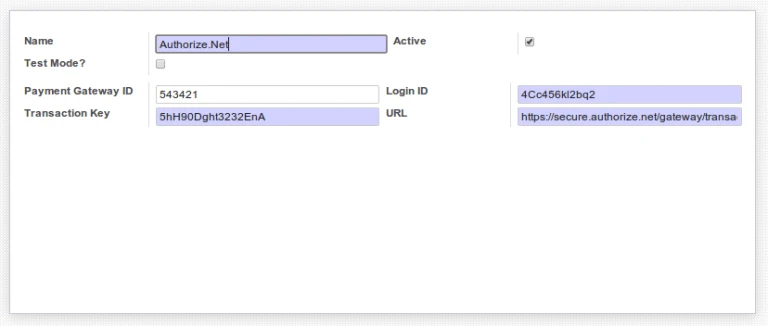
We have created account on Authorize.Net (https://sandbox.authorize.net/) and turn OFF TEST mode. We can get more information from here : http://developer.authorize.net/
In OpenERP, first we have to configure credentials for conneting with Authorize.Net. we are working on encryption/decryption of credit card information.
Authorize.net Configuration
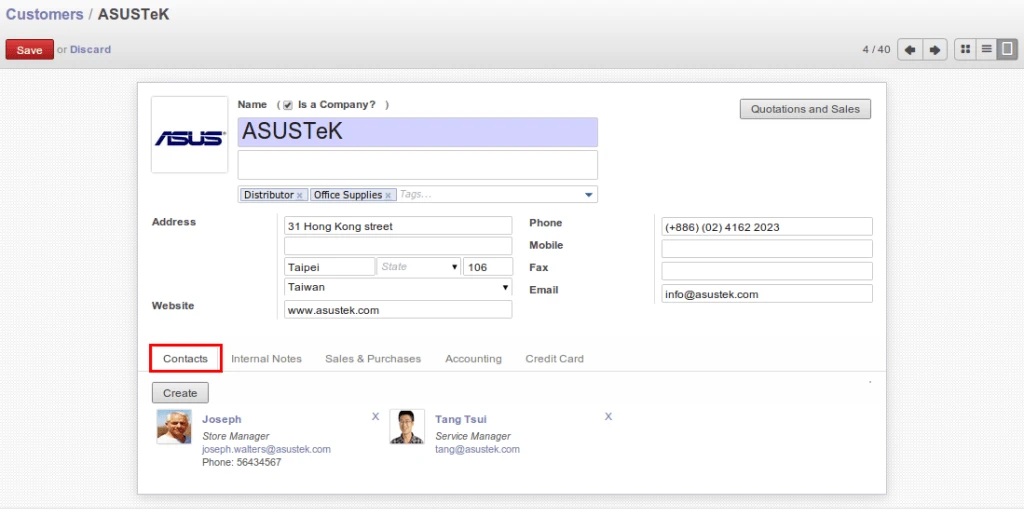
For payment process, it requires customer address information. We are directly taking “Invoice” type address information from customer.
OpenERP Customer Address
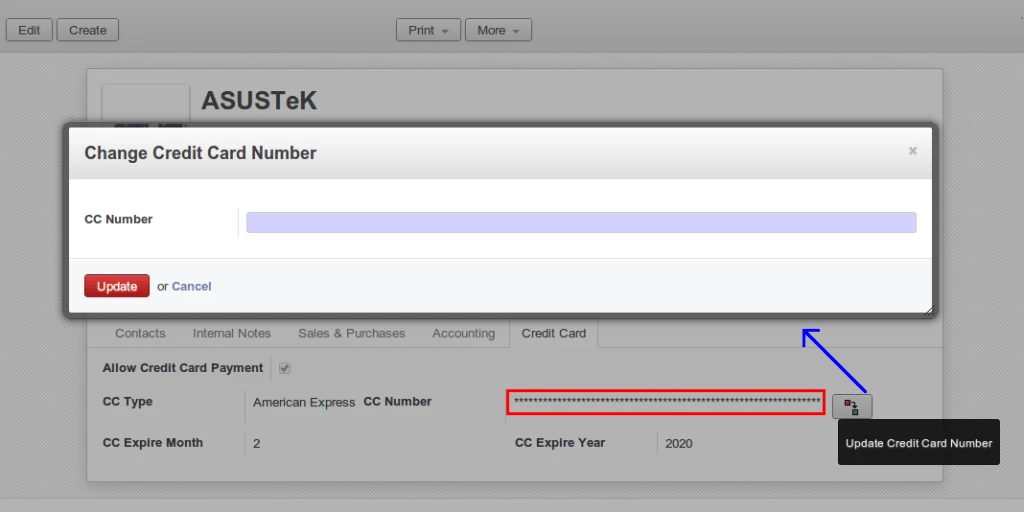
Also added new fields related to Credit Card information. Currently we are processing with only one credit card. In future we are going to add feature for defining more than one credit card and activating one of them or ask user to select anyone. If “Allow Credit Card Payment” is TRUE then it will allow to do process. This field is useful during automatic payment process by cron job.
In below screen, we can see that credit card number can be change and how it will look like.
Change Credit Card Number
Here we have used AES algorithm to store credit card information for security purpose. We are using this algorithm for encryption/decryption.
Credit Card Encryption
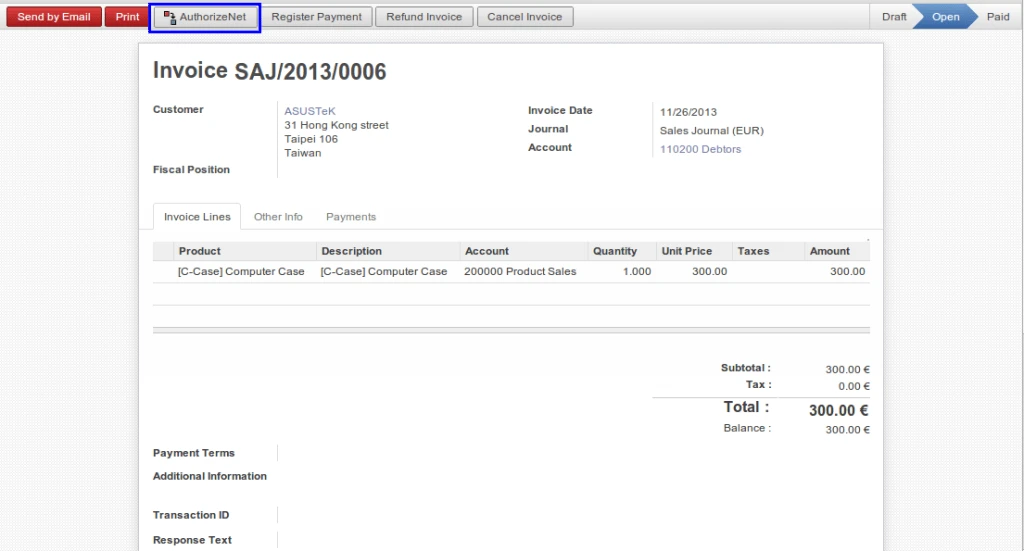
Currently we put option for payment in Customer Invoice and Refund Customer Invoice.
OpenERP Customer Invoice
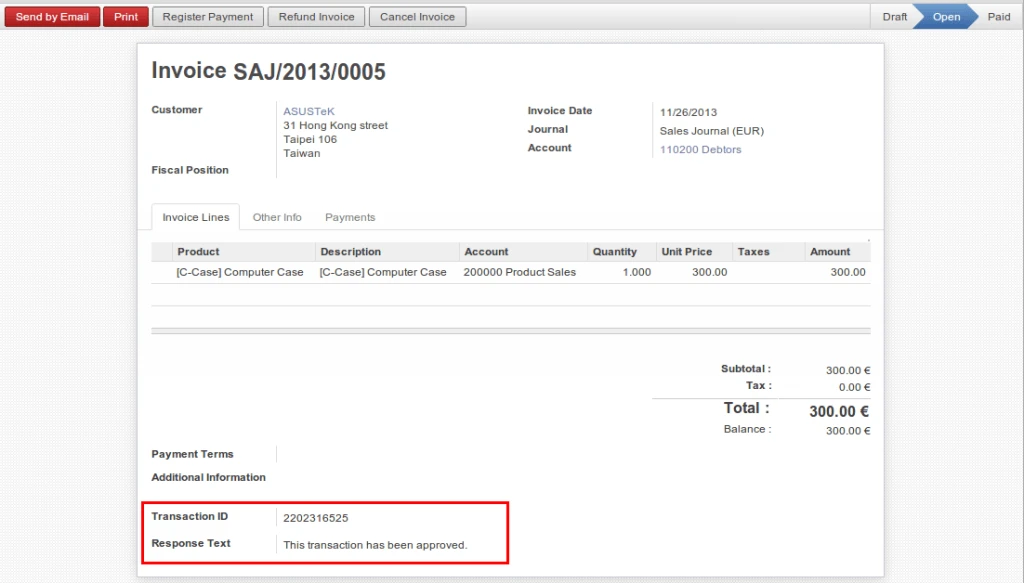
After payment procedure, OpenERP will get response from Authorize.Net with information like “Transaction ID”, “Response Text”.
OpenERP Customer Invoice Proceed
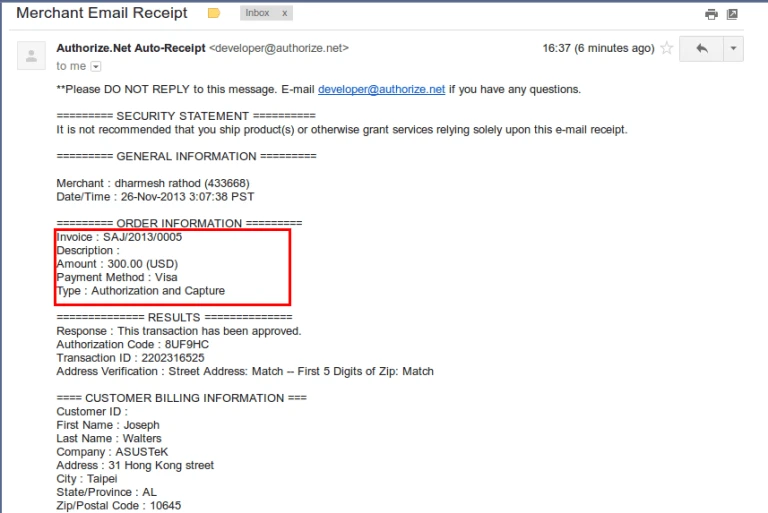
Company will get an email also once payment request is completed.
Authorize Payment Email
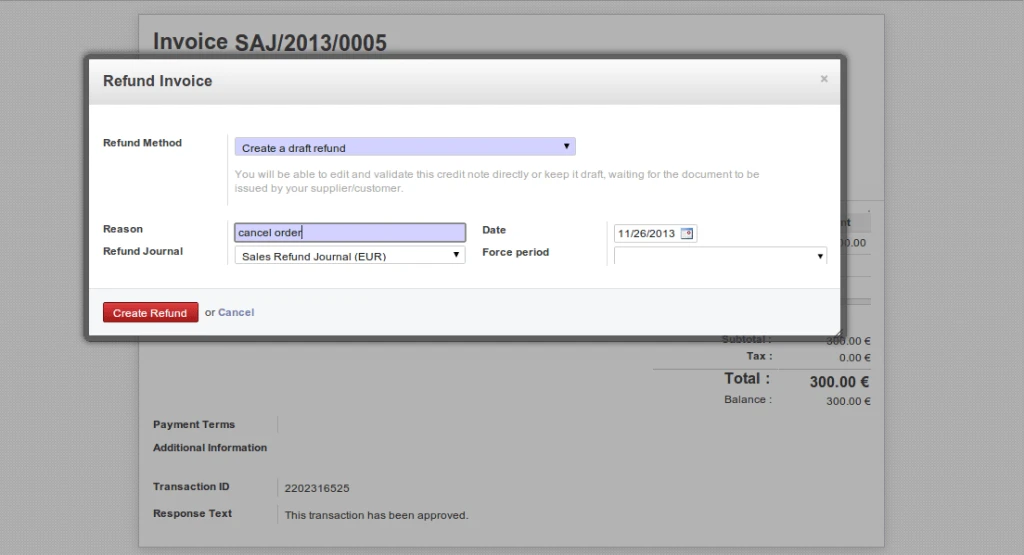
Sometimes, if we want to pay back to customer because of any reason. We have implemented feature that we can easily pay from Refund Invoice. But refund invoice has to be created from existing Customer Invoice only.
Refund Customer Invoice
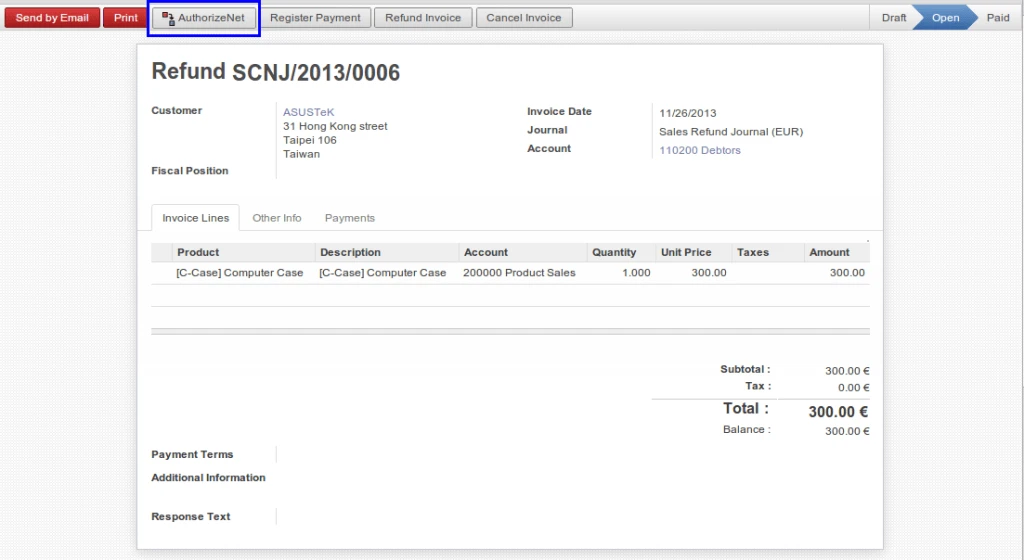
We can have the same process in Refund Customer Invoice also.
Refund Customer Invoice
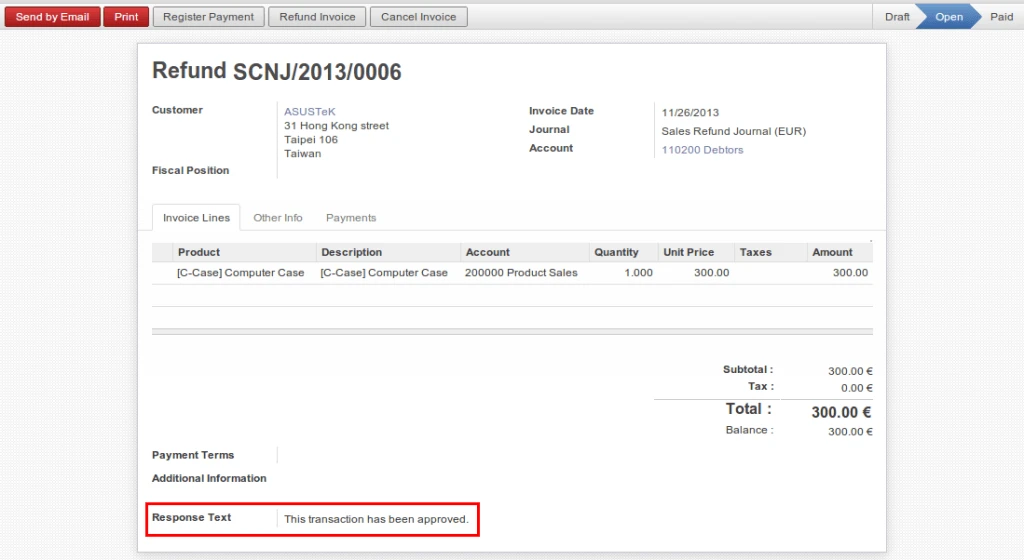
We will get same response during refund procedure if our transaction is completed successfully.
Refund Customer Invoice
We are going to implementing this feature for Voucher and POS.
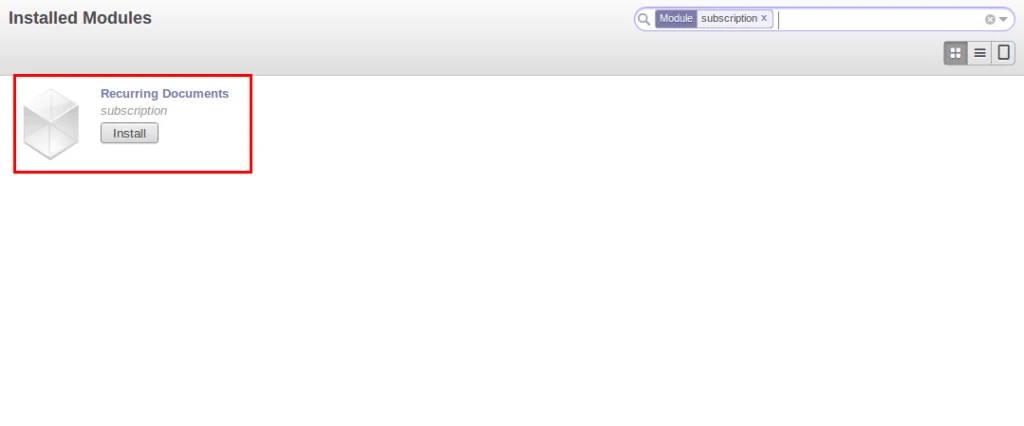
In our routine business life, sometimes it requires to generate some documents automatically. OpenERP has a great module for that kind of requirement and that is ‘Subscription’.
OpenERP Subscription Module
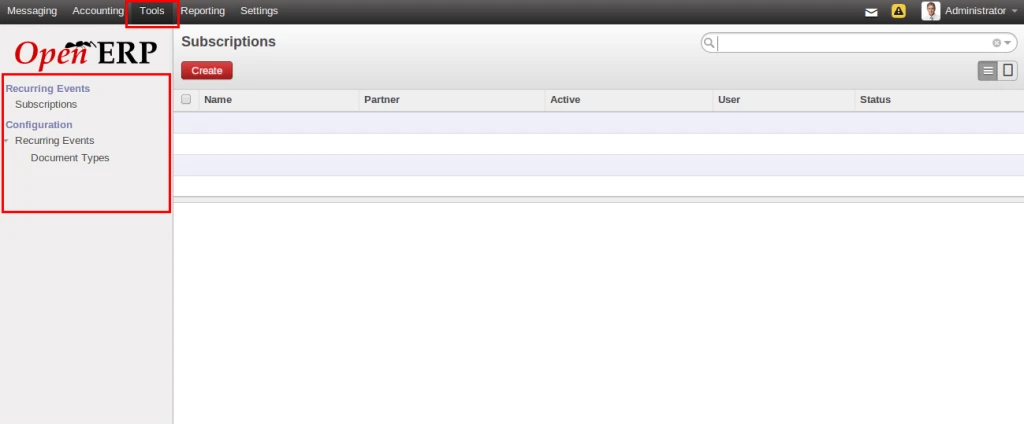
Once we install this module, we will have “Tools” on the top.
OpenERP Subscription menu
Lets check this by one example.
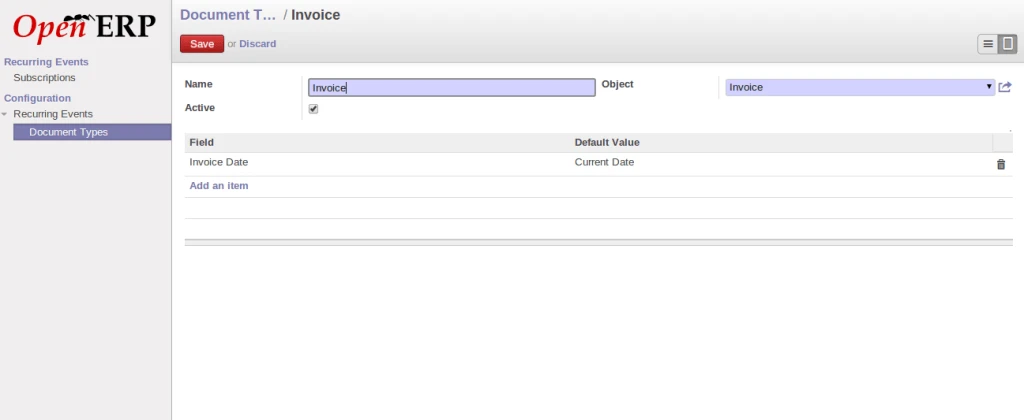
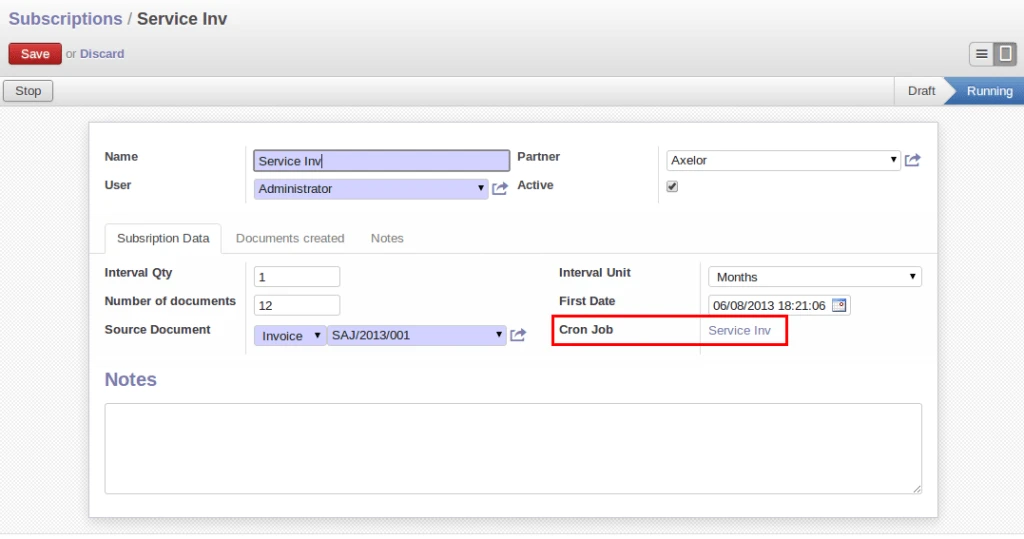
We have configured “Document Type” for Invoice subscription. We can have any objects as per our requirement. Here we are trying to create Invoice so when we create new invoice, it will take Invoice date as current date.
Document Type
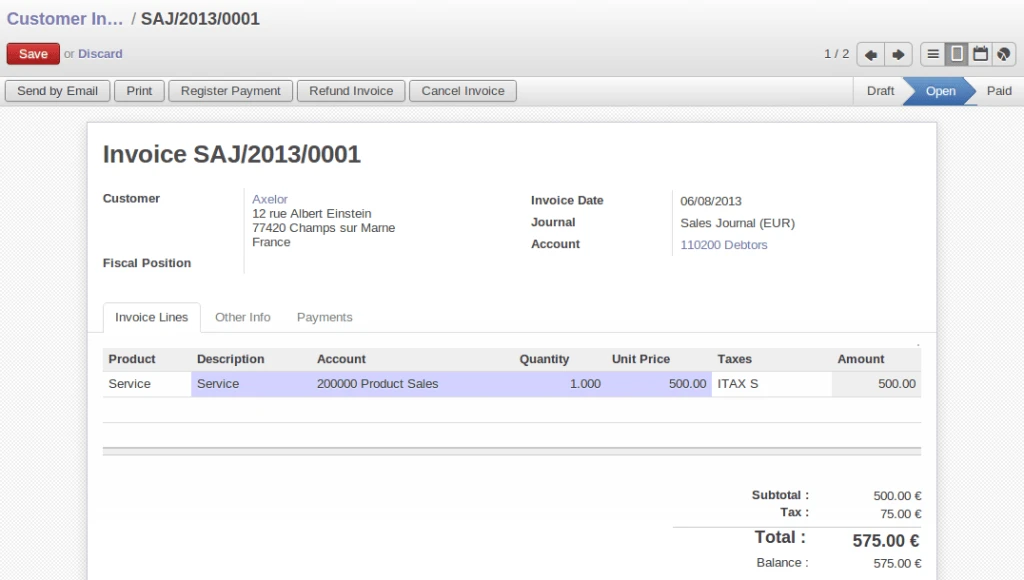
In below screen we can see that we have just created one customer invoice with predefined products and validate it. Now we will make recurrent on this document.
OpenERP Invoice
After above configuration, we are going to creat a subscription record now. We have configured something like, for selected invoice, it will create monthly invoices i.e. one copy per month. Once we click on Process button, Cron job has been created for this subscription record, and cron job will take care of this.
OpenERP Subscription Configuration
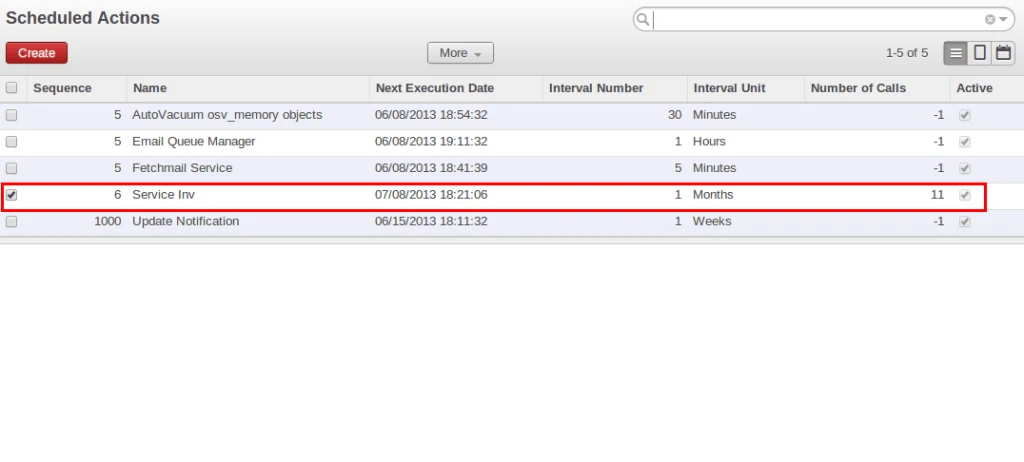
We can see schedular in the list that we have created in above screen.
OpenERP Subscription Schedular
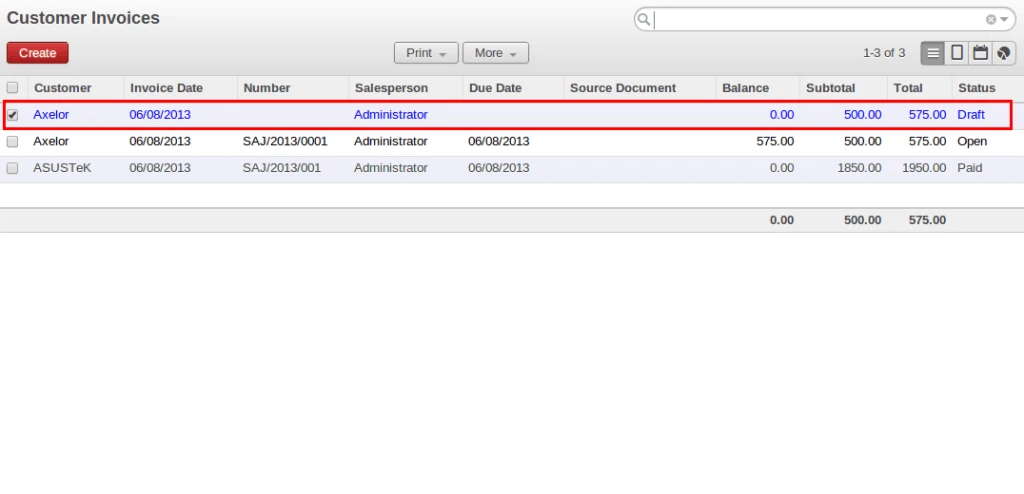
After above process, we can check in Invoice list view, and we will find new invoice created here. This way every month new Invoice will be created automatically.
How to configure multiple shops when we are dealing with OpenERP Point of Sale.
We may have multiple shops with single warehouse in such case we can have only one warehouse to manage all shops.
But sometimes its also require to manage stock per shop, in such case we can have multiple shops with multiple warehouses. So each warehouse will be used to manage shop wise stock entries.
Stock management configuration with the help of shop, warehouse and Point of Sale is explained in this blog.
We will start with one by one screens displayed below. We will assume that Sales, Point of Sale, Warehouse modules are installed and Database with demo data are installed.
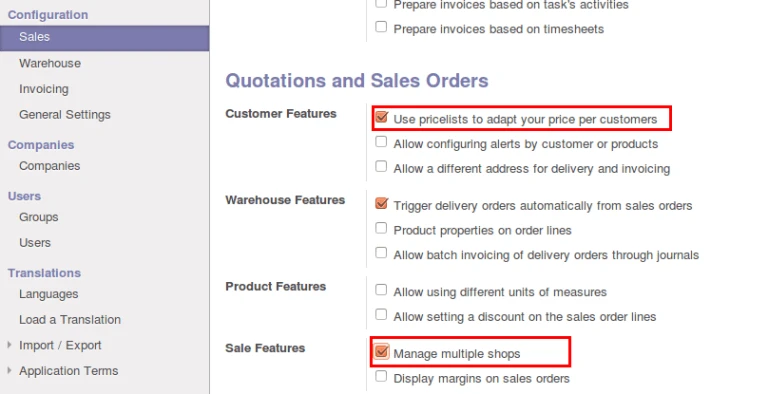
Here in below screen we can see that first of all, we have to eneble two options: Pricelist, Multiple shops. And just click on Apply button on the top.
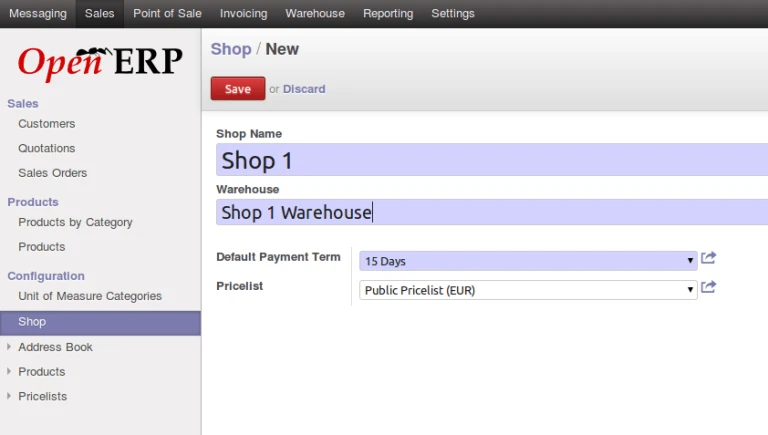
Now we will create new shop with new warehouse and pricelist applied as displayed in below screen.
OpenERP Shop Configuration for POS
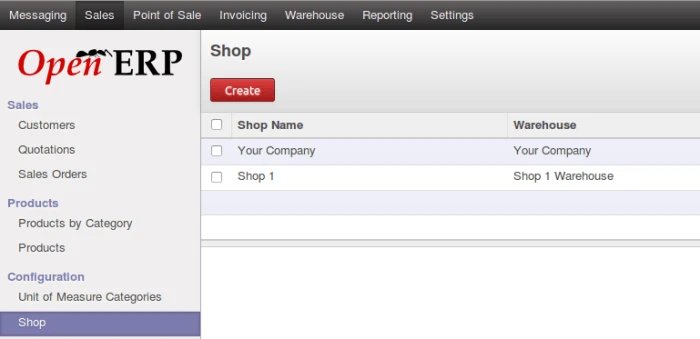
Now we can see, we have 2 shops configured. We will consider one is for Admin and another is for Demo user.
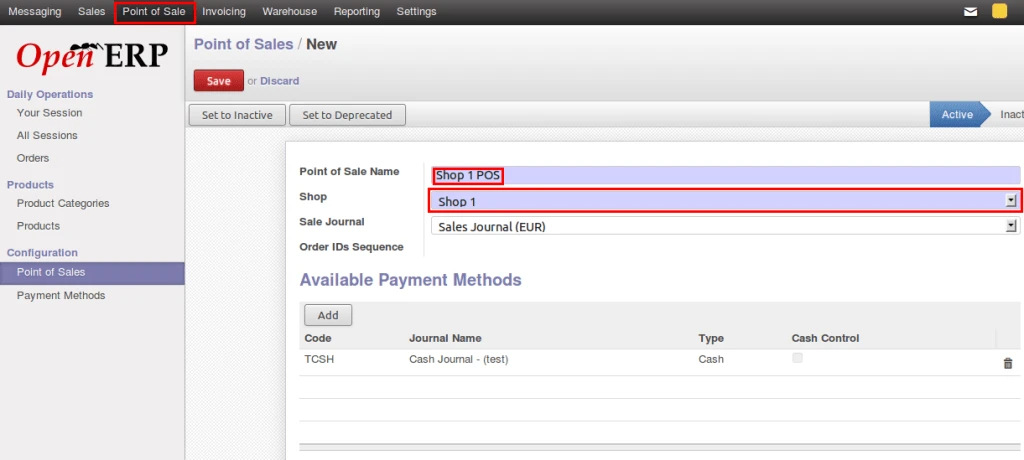
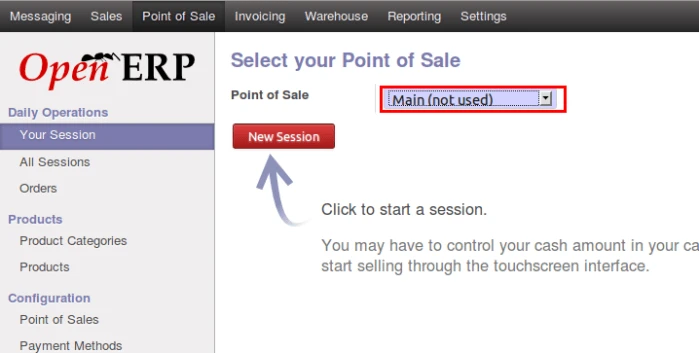
We can see in this screen, we have select Shop 1 which we have created and we have created new Point of Sale. So once we will save this, we will have two Point of Sale, one is Main (Default one) and second, we just created Shop 1.
Configure POS Shop
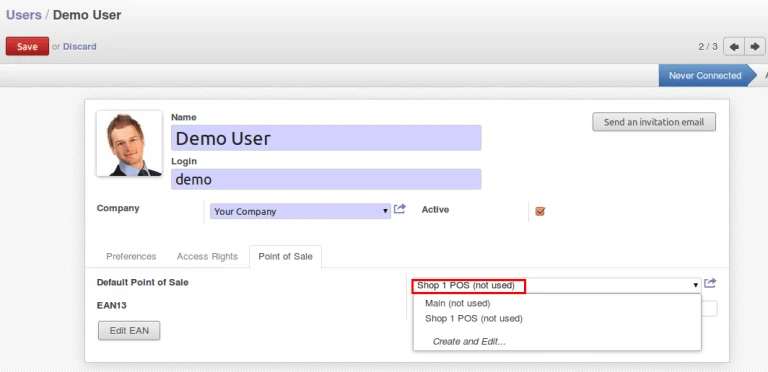
Now lets turn to User Form. We have to assign this both Point of Sale shop to different users. Please find in below screen. We have assigned “Main” to Admin, and “Shop1” to Demo User. So to access different shop, both user will select their own shop only.
Assign POS to user
We have two Point of Sale in this list. We will use with referenced user. We can restrict here that particular user can use his own shop only.
List of Point of Sale shop
So after this much configuration, we can login to different users and we can operate Point of Sale so stock will be managed individually.
Few points to be remember:
– Assign proper access rights to the users.
– We can use different Pricelist for different shop to make rate different.