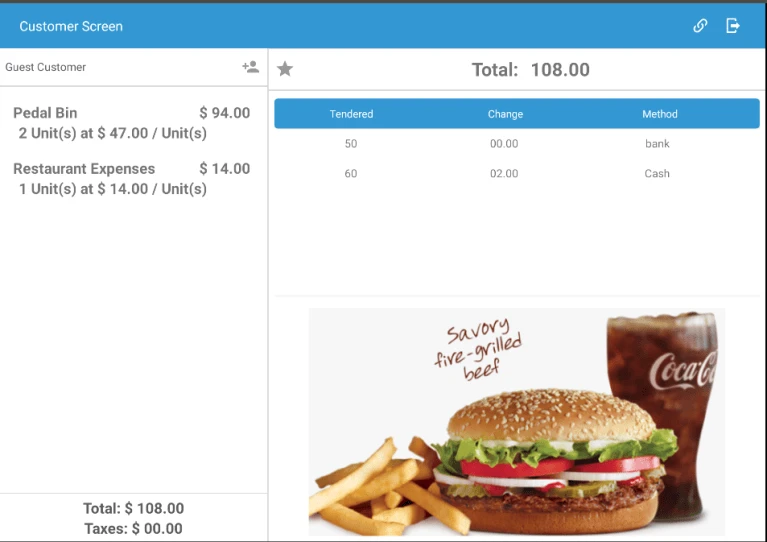
Scale Screen
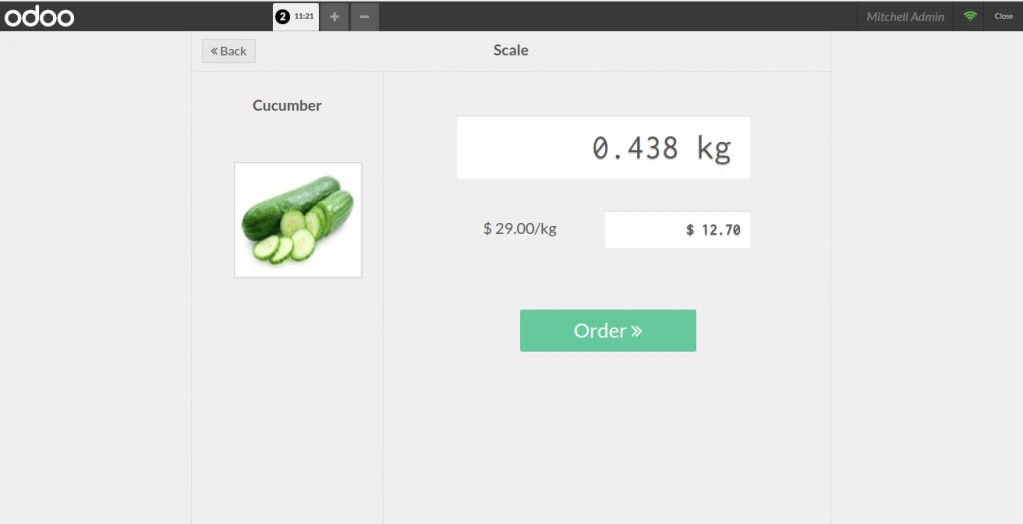
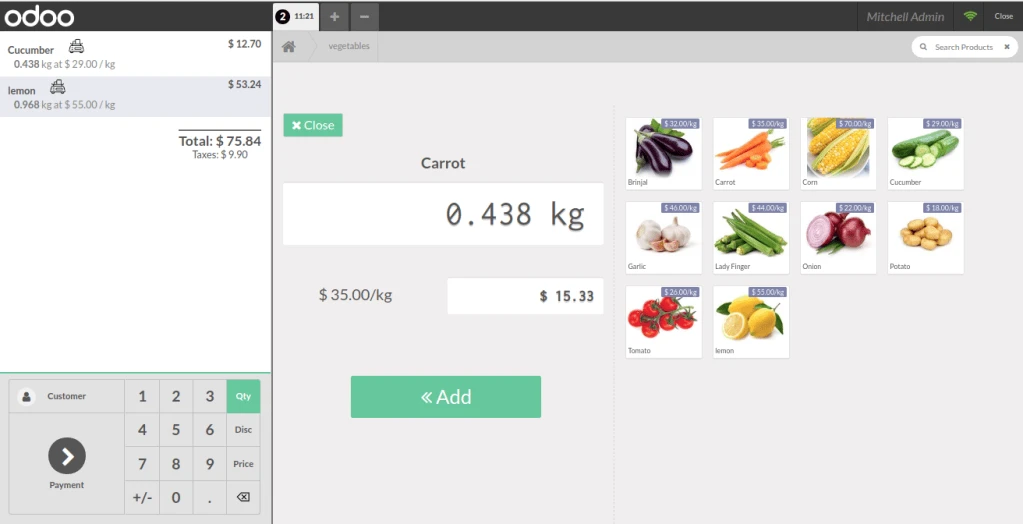
– You can set and change the weight for the product by clicking on the product or button in orderline.
Multi Scale Screen
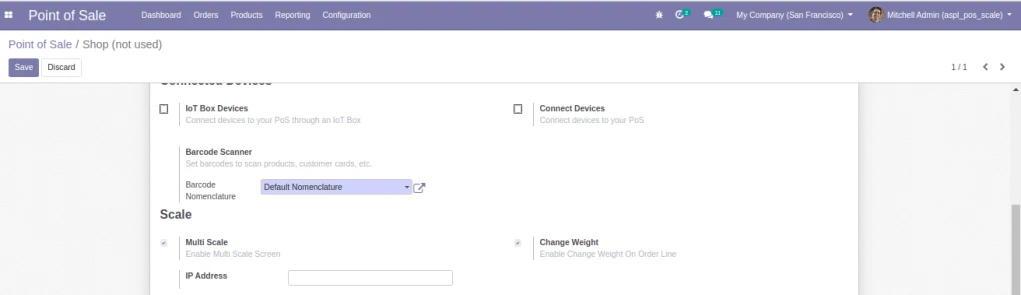
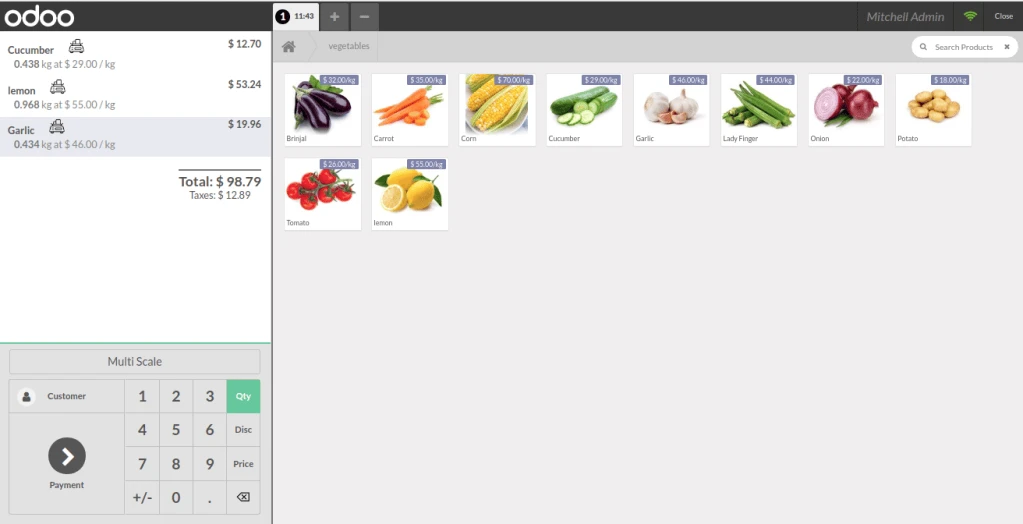
– Once you enable functionality of multiscale from point of sale configration then you can add multiple products to the cart directly as below.
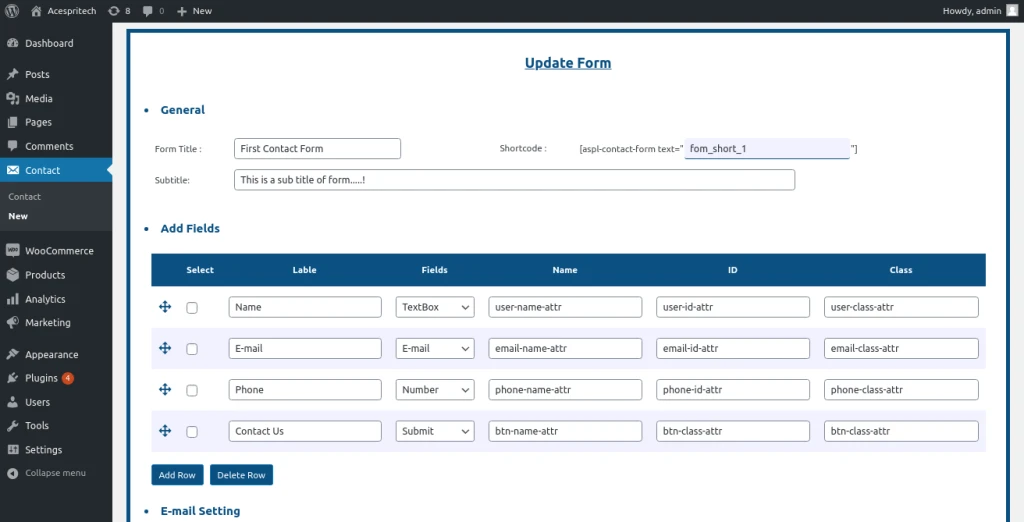
Contact Form is your completely free and completely expandable form builder plugin for WordPress. It makes it easy to set up and add forms to your WordPress website using shortcodes. Admin create custom forms for all your needs with as many fields as you like. Make your site more efficient from visitor input to email response times with contact form plugin.
Click here to download
Features:-
Easy row and column layouts.
Have a form ready to go in literally minutes.
Customizable email notifications from any form.
8+ field types with its class id and name also include select-option fields.
Drag and drop feature to make it easy to change form field positions.
It’s easy to add field’s labels, classes, id and name or other details.
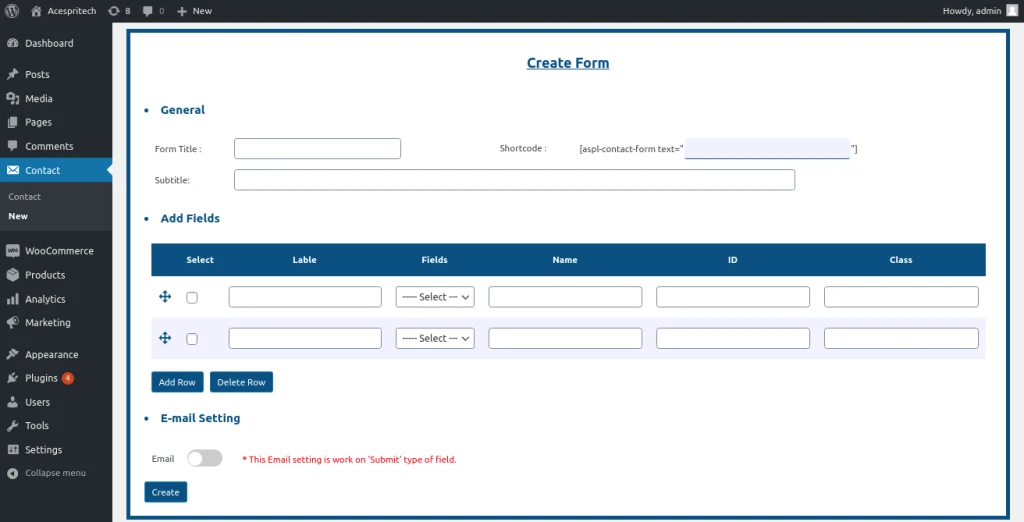
Create a new Contact Form
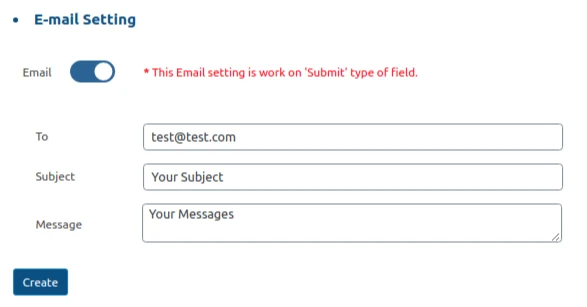
Email configuration
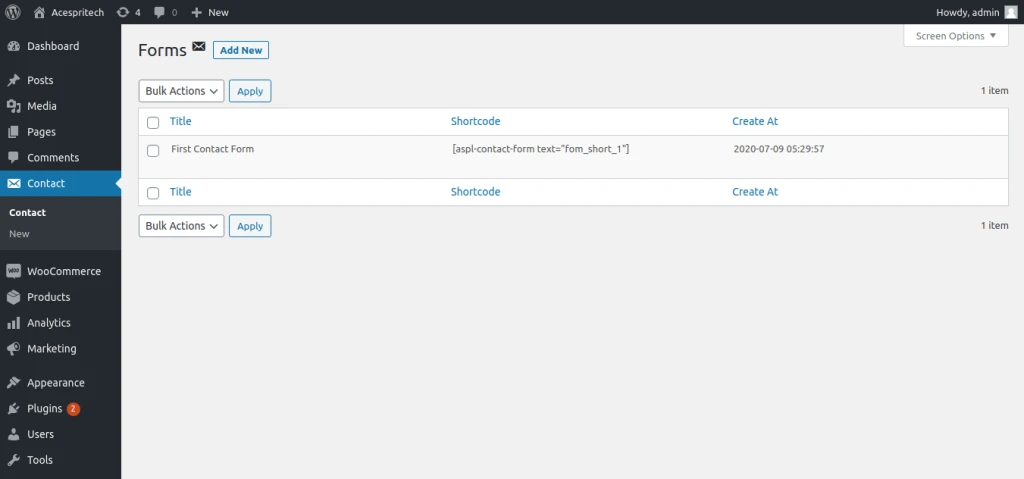
List table of Forms Data
Update Existing form data
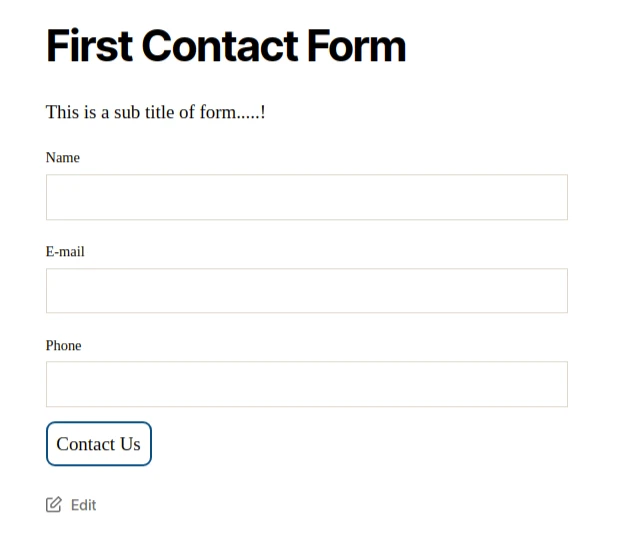
Frontend side form view
Share this:
Click to share on Facebook (Opens in new window)
Click to share on LinkedIn (Opens in new window)
Click to share on Twitter (Opens in new window)
Click to share on Reddit (Opens in new window)
Click to share on Tumblr (Opens in new window)
Click to share on Pocket (Opens in new window)
Click to share on Pinterest (Opens in new window)
More
Click to print (Opens in new window)
Click to email this to a friend (Opens in new window)
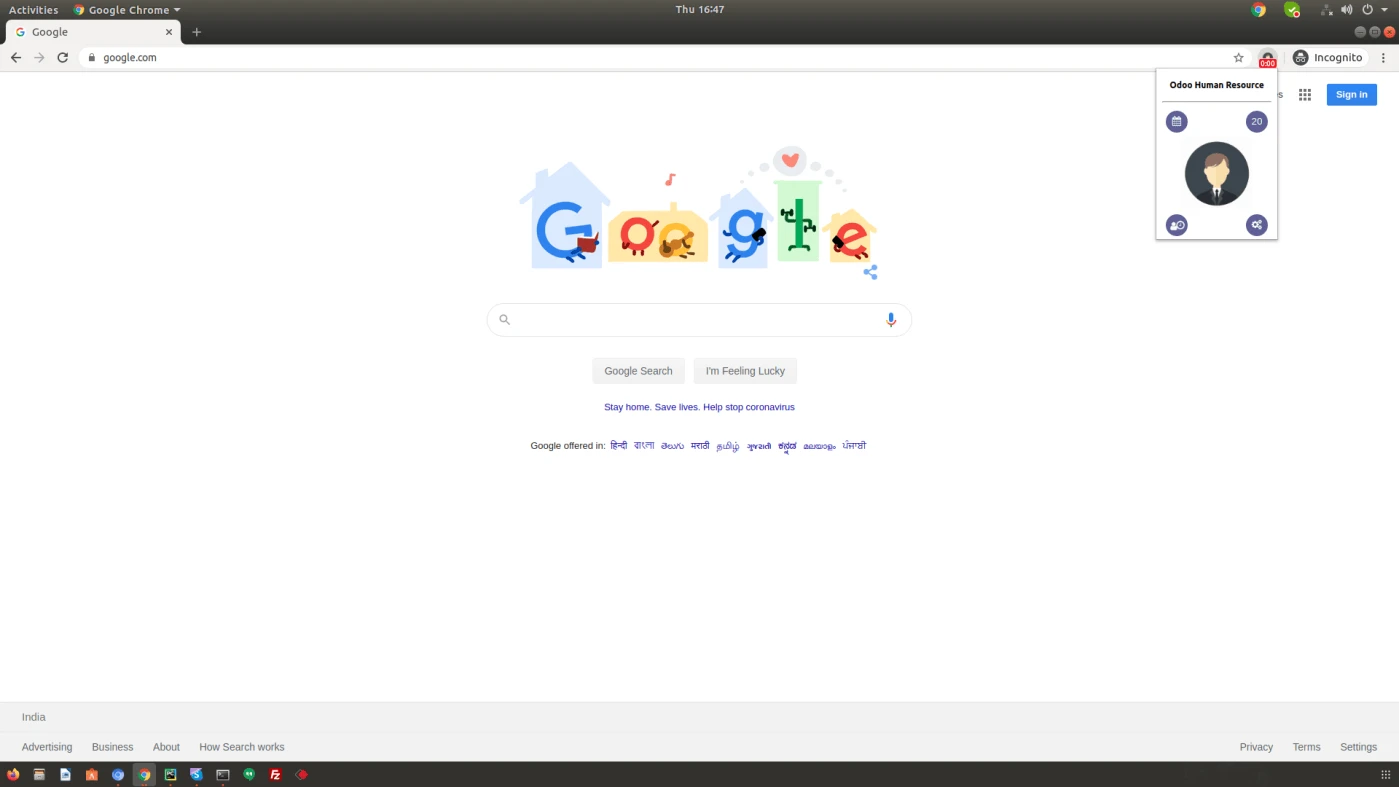
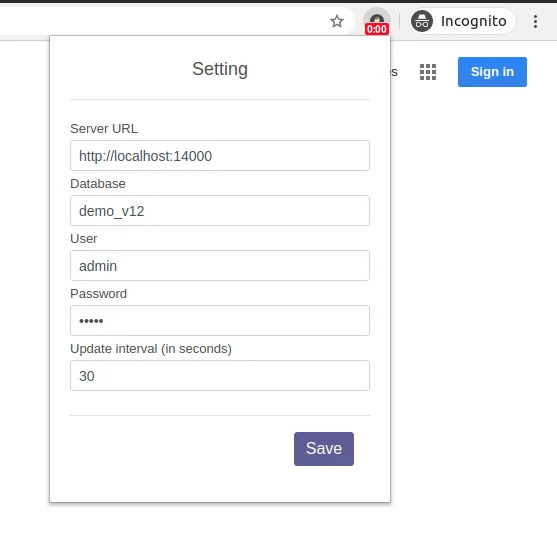
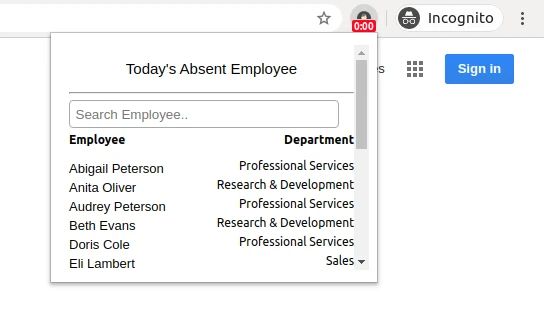
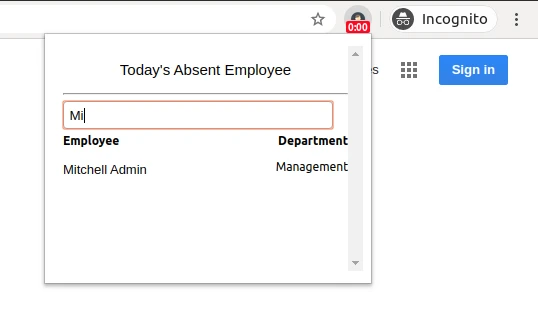
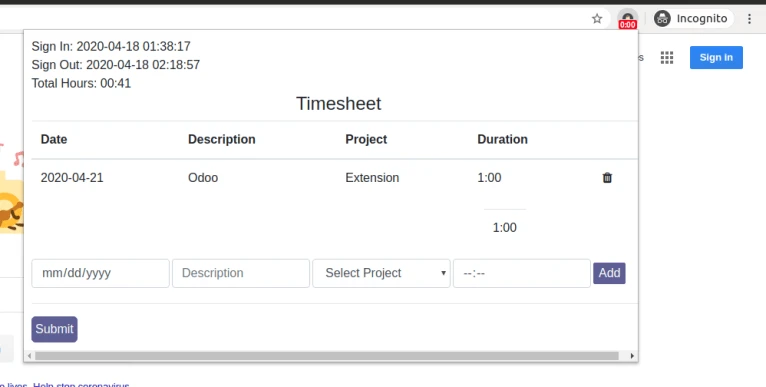
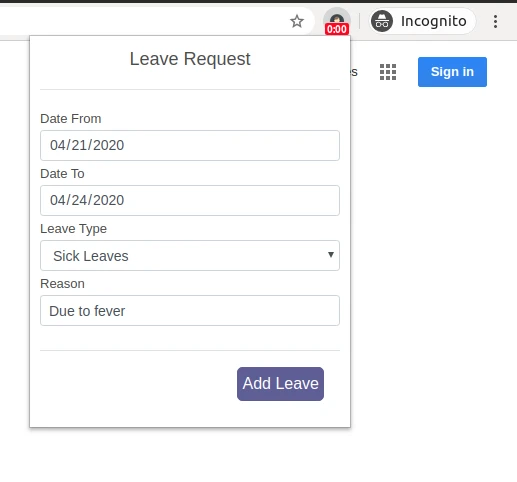
A chrome extension (browser extension), also called a plug-in, it enhanace browsing experience. This extension connects with Odoo ERP and simplify daily process with easy steps and simple user interface.
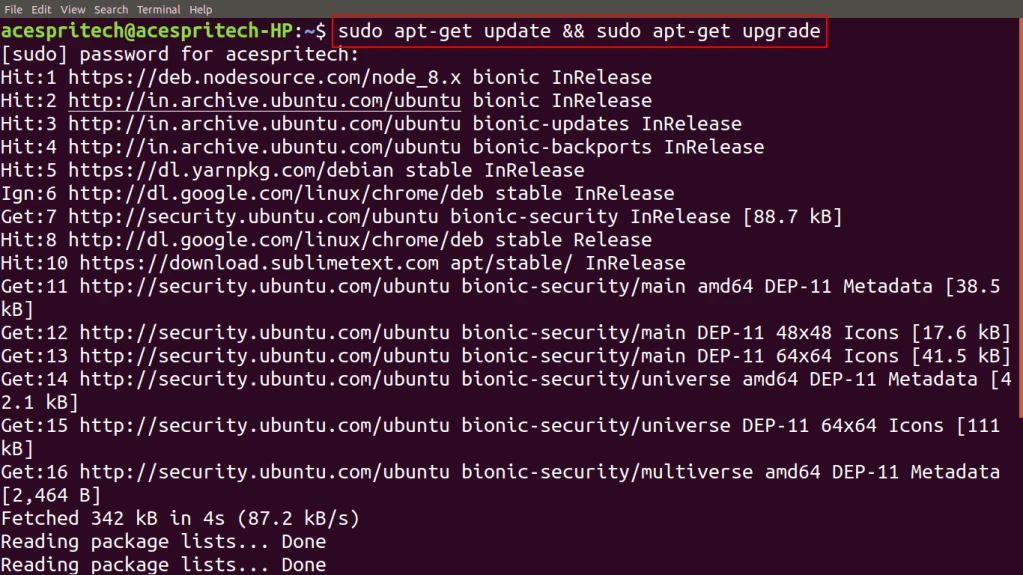
Step1: Use upgrade command to actually installs newer versions of the packages. sudo apt-get update && sudo apt-get upgrade
Update and Upgrade
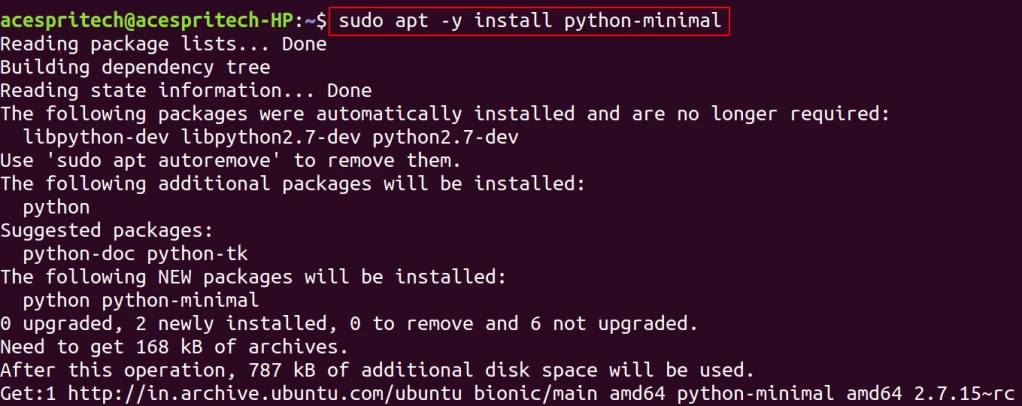
Step2: You have to install the following package. sudo apt -y install python-minimal
Python Minimal
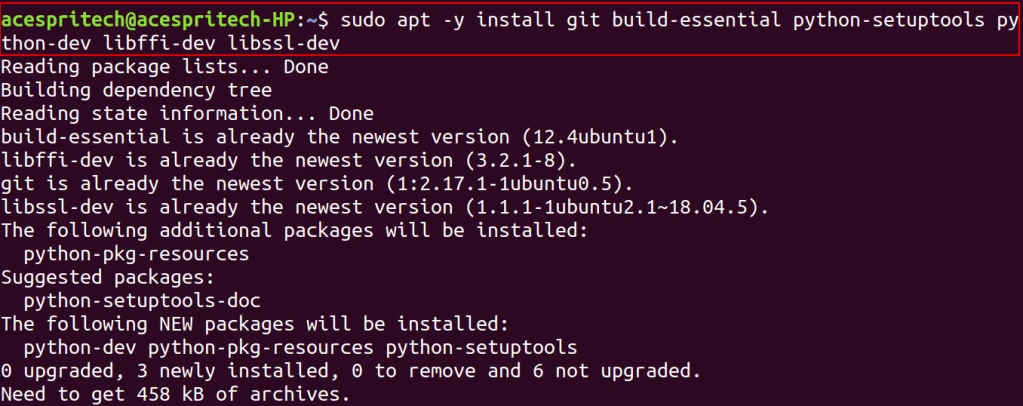
Step3 : You have to install the following dependancy. sudo apt -y install git build-essential python-setuptools python-dev libffi-dev libssl-dev
Python Setup Tools
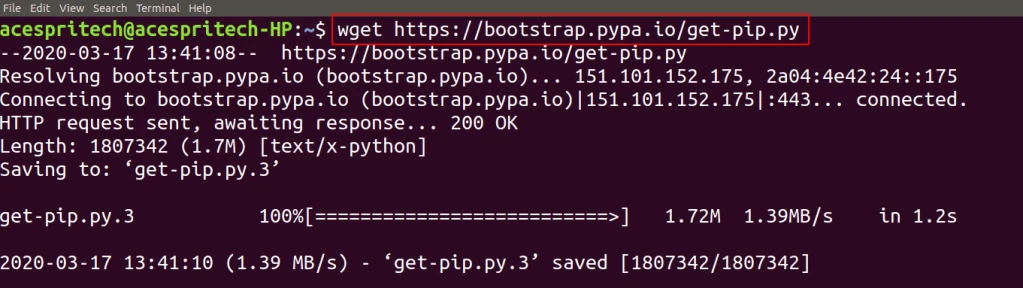
Step4: Now The next step is install pip3 package for python wget https://bootstrap.pypa.io/get-pip.py
Get Pip
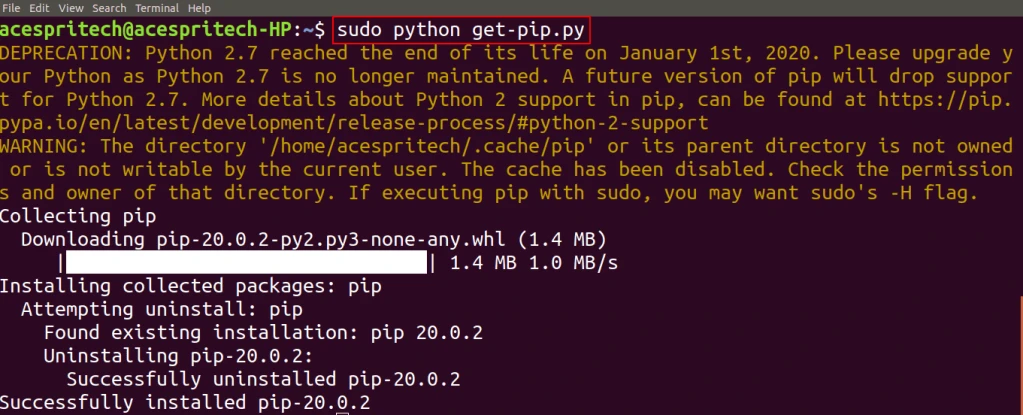
sudo python get-pip.py
Get Pip Install
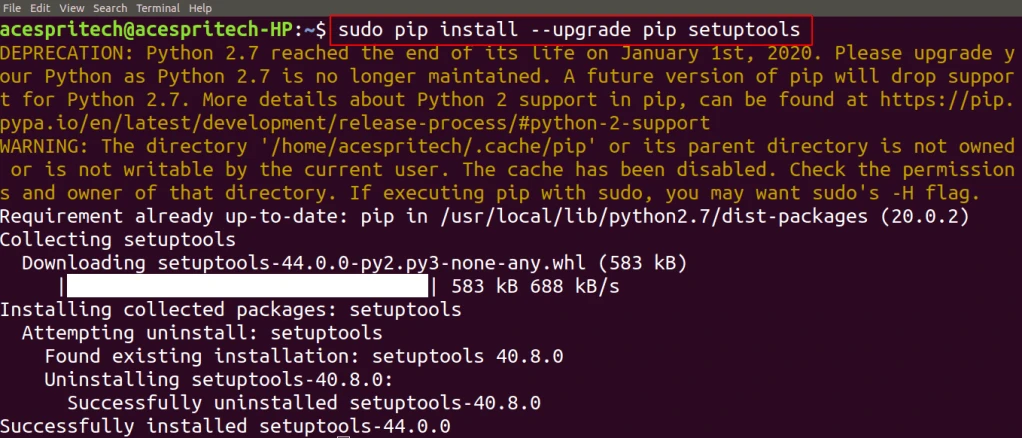
sudo pip install –upgrade pip setuptools
Setup Tools Update
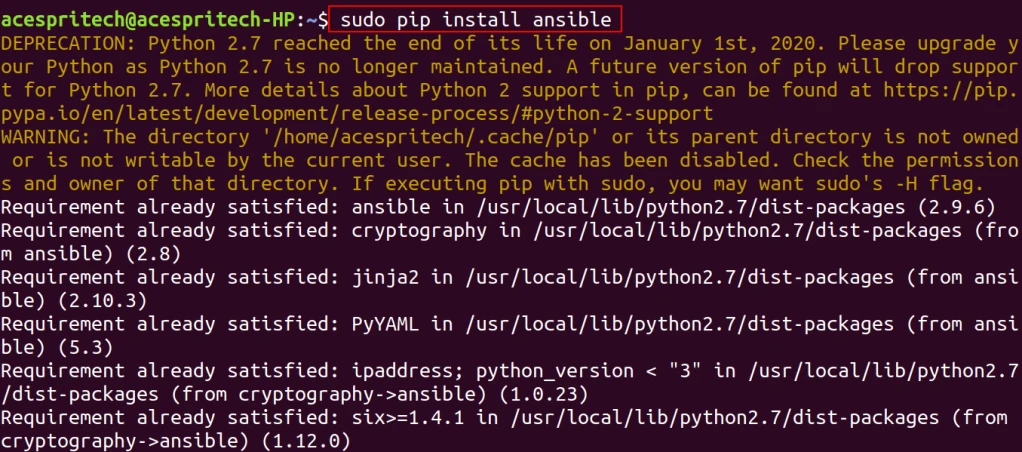
sudo pip install ansible
Ansible Install
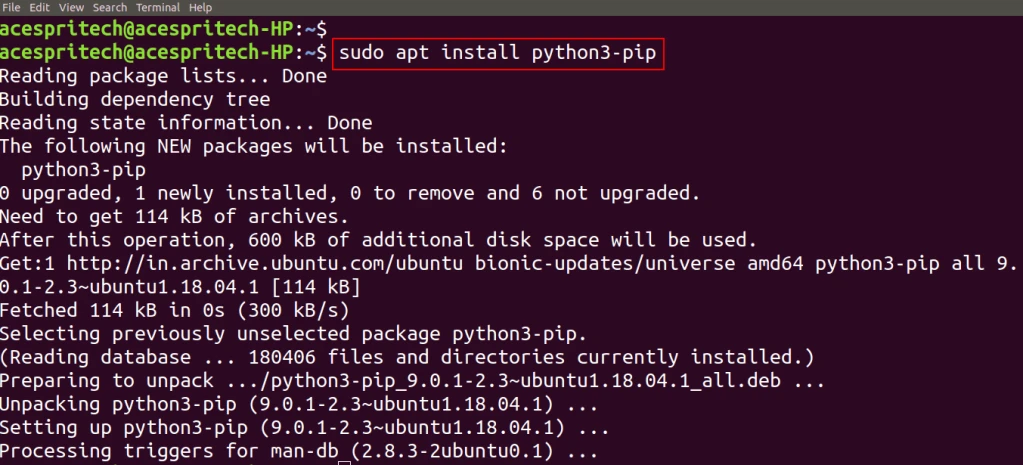
Step 5: Next to install python3 sudo apt install python3-pip
Python3 Pip
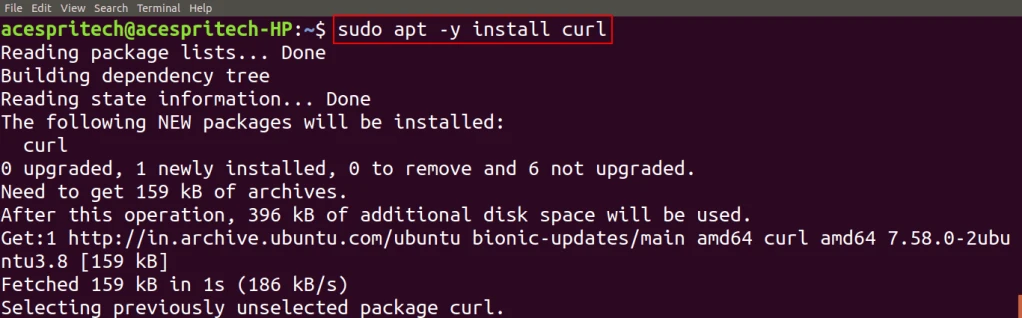
Step 6: Next step is to install curl sudo apt -y install curl
Curl Install
Step 7: Next you have to configure the yarn package repository. curl -sS https://dl.yarnpkg.com/debian/pubkey.gpg | sudo apt-key add –
Apt Key Add
echo “deb https://dl.yarnpkg.com/debian/ stable main” | sudo tee /etc/apt/sources.list.d/yarn.list
Yarn List
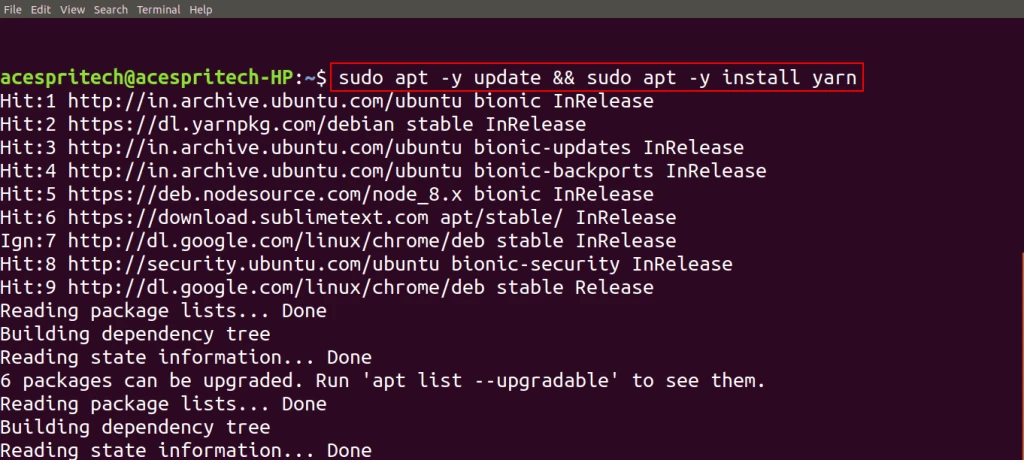
Step 8: Next following command to install yarn. sudo apt -y update && sudo apt -y install yarn
Update and Install Yarn
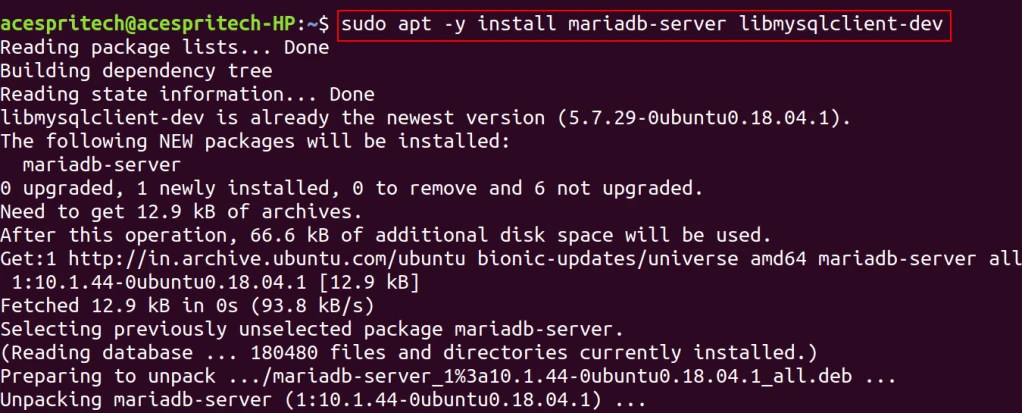
Step 9: Now next For install mariaDB you have to run following command sudo apt -y install mariadb-server libmysqlclient-dev
Install Mariadb
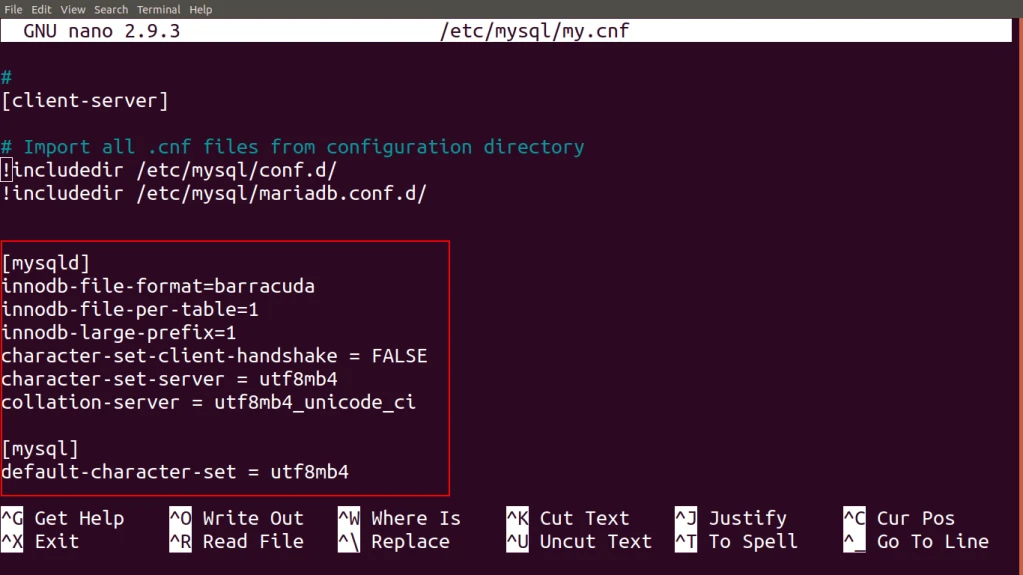
Step 10: Now next step is to update “my.conf” file for database.
For that to open file in command prompt in edit mode enter below command. sudo nano /etc/mysql/my.cnf
Step 11: Next, you have to restart MariaDB and enable it to auto start MariaDB at boot time. sudo systemctl restart mariaDB
Restart Mariadb
sudo systemctl enable mariaDB
Enable Mariadb
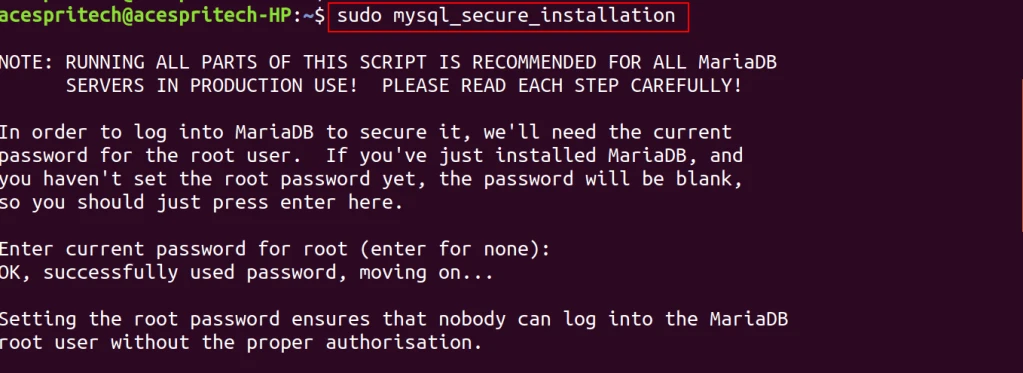
Step 12: Next, the mysql_secure_installation tool to configure additional security options. sudo mysql_secure_installation
Enter current password for root (enter for none): xxxxxx
Change the root password? [Y/n] n
Remove anonymous users? [Y/n] y
Disallow root login remotely? [Y/n] y
Remove test database and access to it? [Y/n] y
Reload privilege tables now? [Y/n] y
My Sql Secure Installation
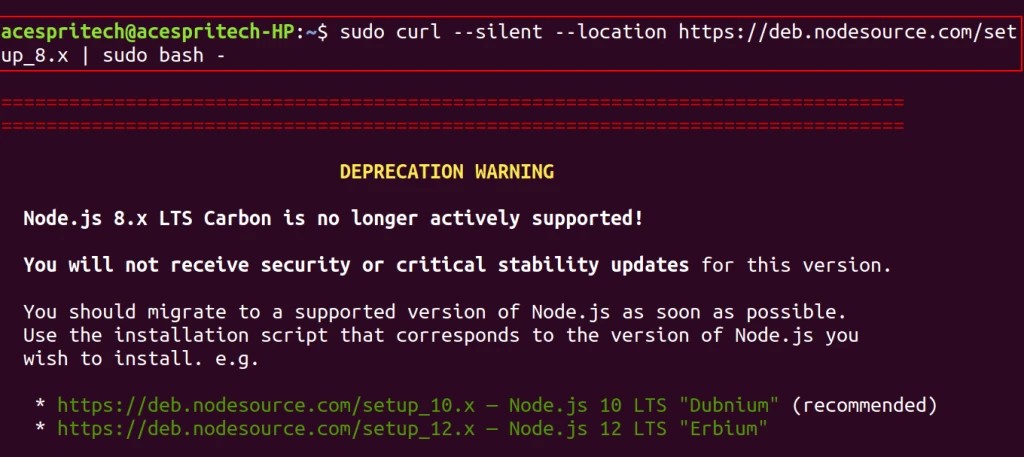
Step 13:you have to add the Node source Node.js 8.x respository. sudo curl –silent –location https://deb.nodesource.com/setup_8.x | sudo bash –
Curl Location
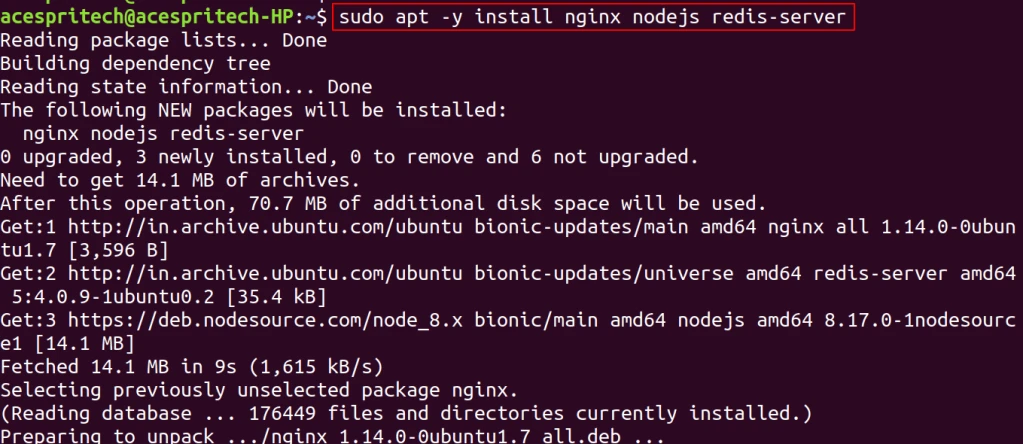
Step 14: To install Nginx, Node.js and Redis on Ubuntu, run the commands below. sudo apt -y install nginx nodejs redis-server
Install Nginx
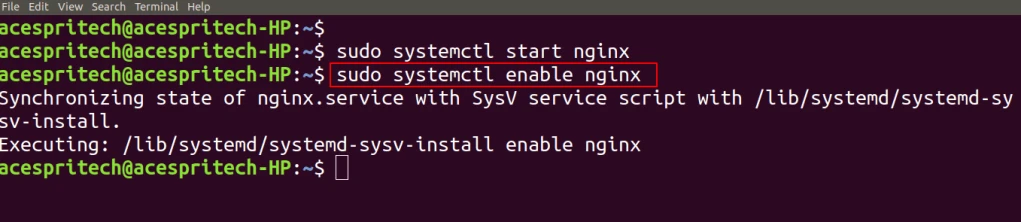
Step 15: Next step is to start and enable Nginx service to always start up with the boots. sudo systemctl start nginx Start Nginx sudo systemctl enable nginx Enable Nginx
Step 16: Start and enable Redis service to always start up with the boots. sudo systemctl start redis-server
Start Redis Server
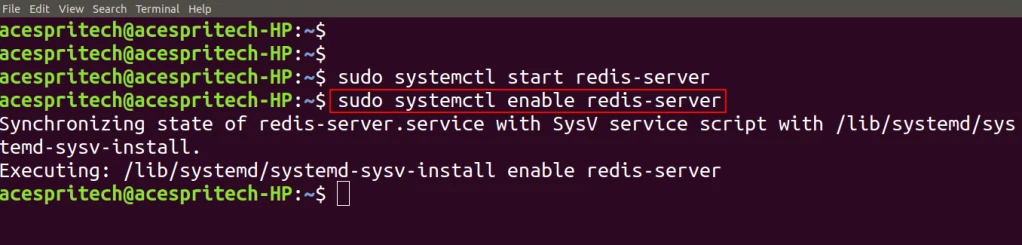
sudo systemctl enable redis-server
Enable Redis Server
Step 17: For installation and activation of virtual environment. sudo systemctl enable redis-server
Mkdir ERPNext
cd erpnext
CD ERPNext
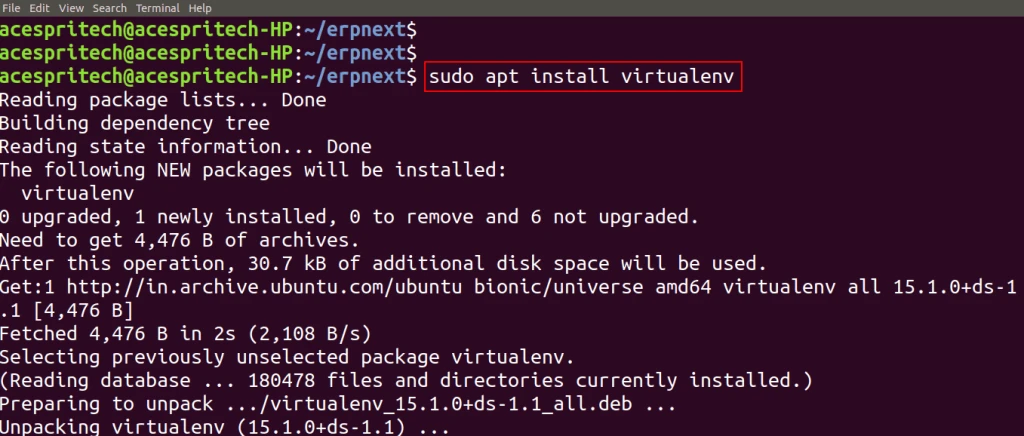
Run below command to install virtual environment sudo apt install virtualenv
Install Virtualenv
you need to create virtual environment on “erpnext” directory using the following command virtualenv .
Virtualenv
For activation of virtual environment. source ./bin/activate
Active Virtualenv
Step 18: Now Next step is to install bench and there dependencies. git clone https://github.com/frappe/bench bench-repo
Install Bench
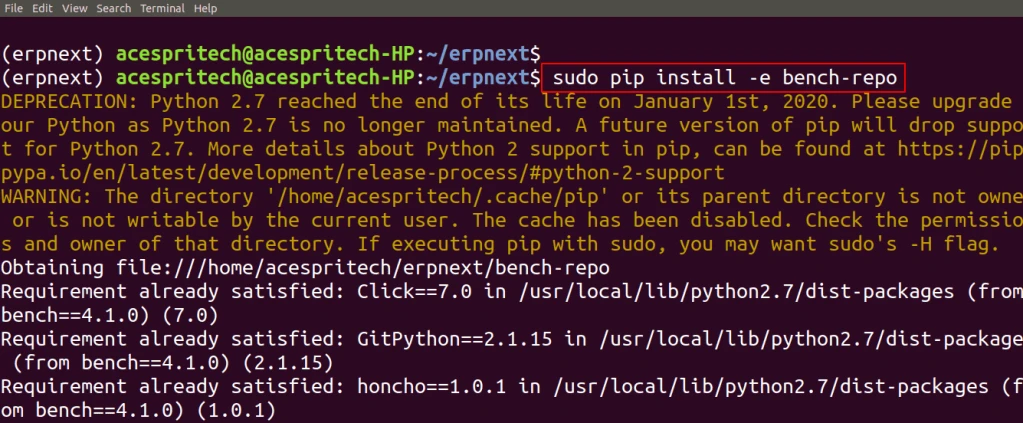
sudo pip install -e bench-repo Install Bench Repo
Step 19: The next step is to init command will create a bench directory with frappe framework installed. bench init –frappe-branch master –frappe-path https://github.com/frappe/frappe.git frappe-bench Continue reading →
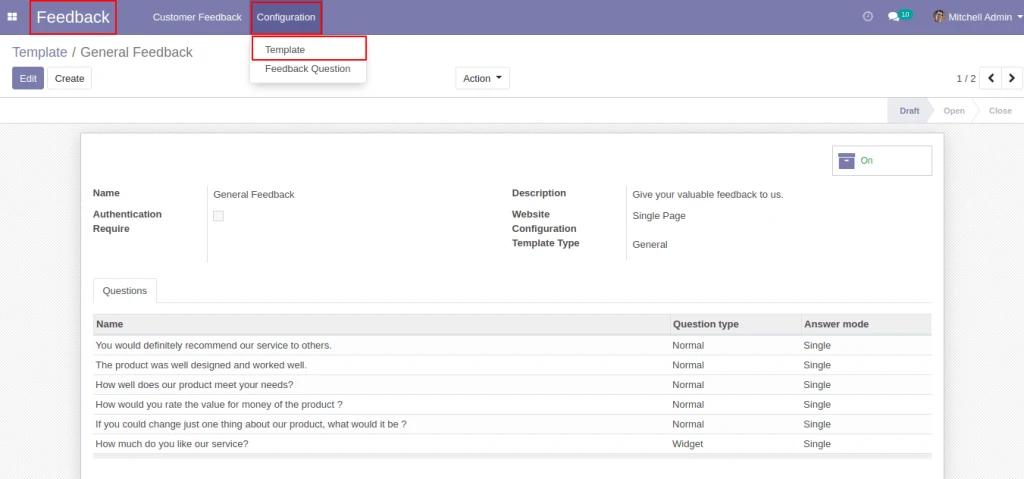
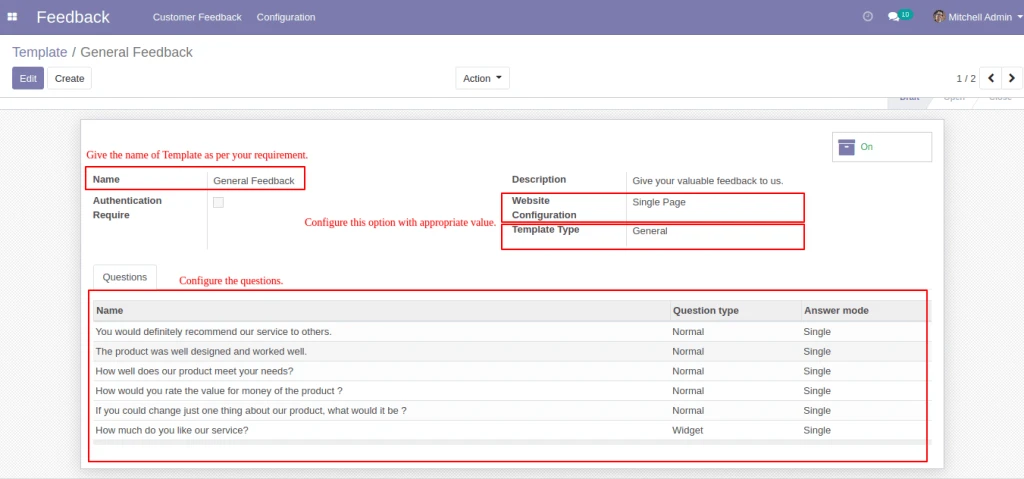
In Feedback > Configuration > Template, configure the template..
Feedback Template Configuration
Into Template configure all the option with appropriate value like Name, Website configuration, Template type and Questions. When you Select the Single Page in Website Configuration then all the Question will come in one page.
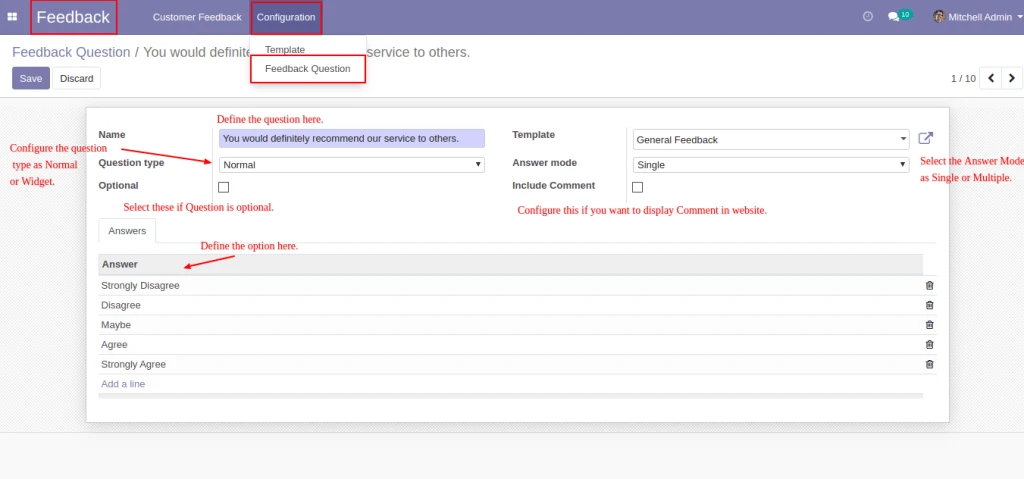
Template Question Configuration
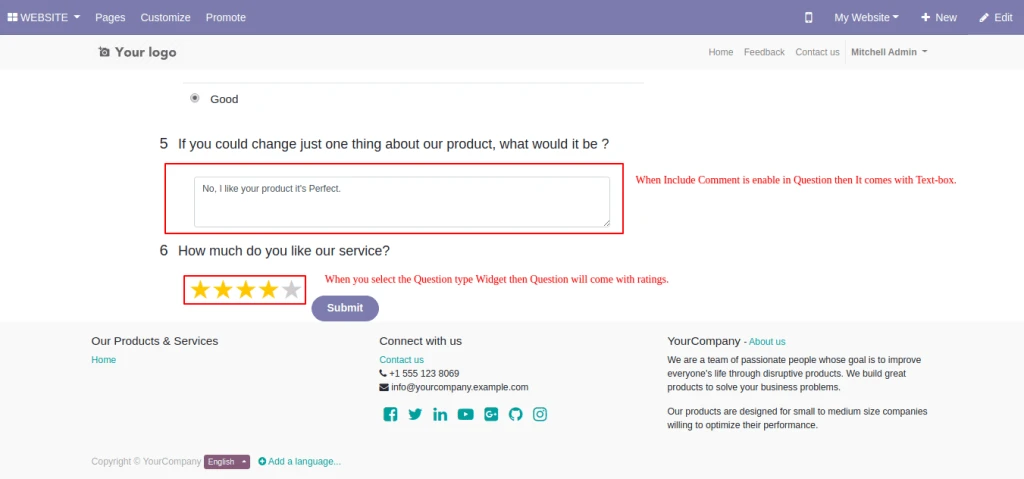
In Feedback > Configuration > Feedback Question, Configure the Question with appropriate value like Question, Template, Question type Normal or Widget, Answer Mode Single or Multiple, Question will Optional or Required and If you want to include the comment then enable the Include Comment option.
Feedback Question Configuration
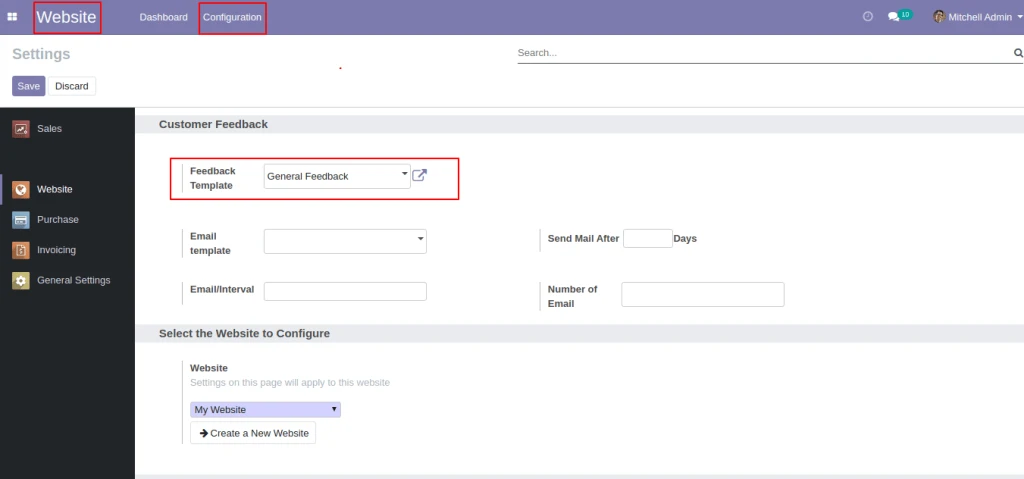
In Website > Configuration, under the Customer Feedback, set the option for Feedback Template. Based on this configuration the Feedback Questions are display.
Website Configuration
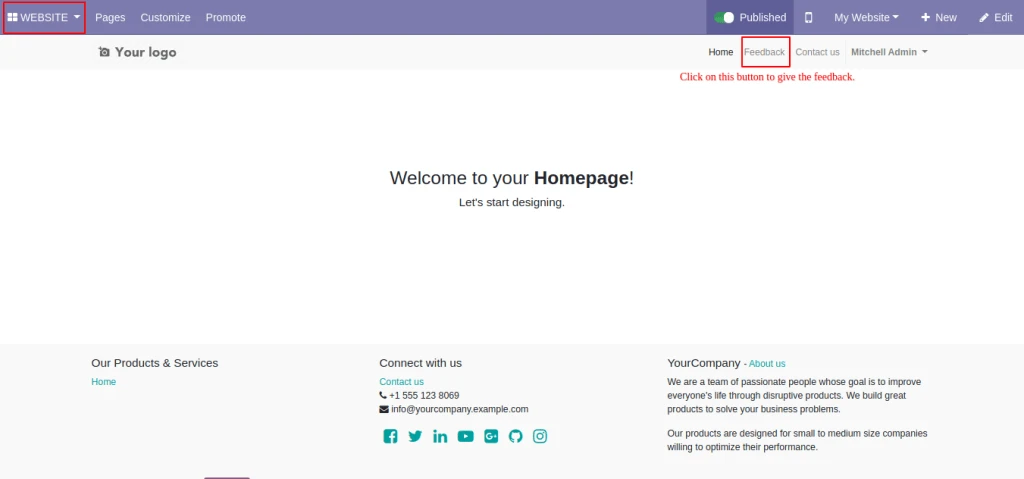
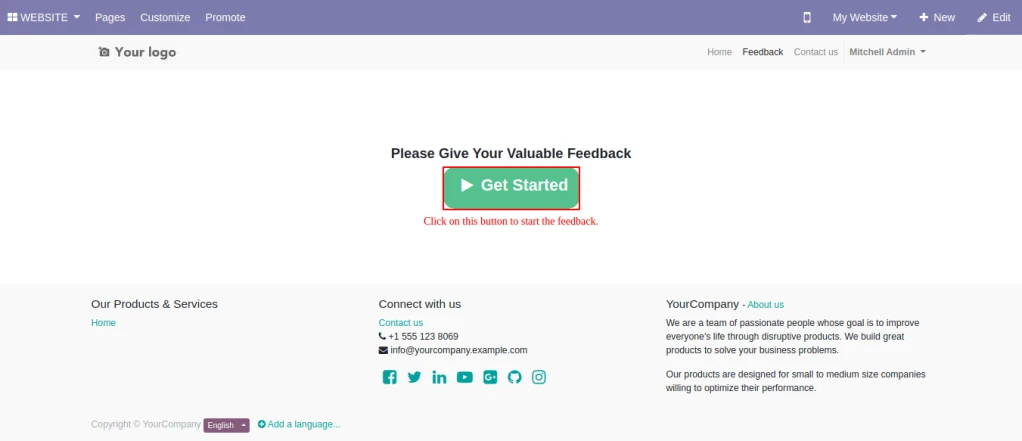
Now Go into the website and Click on “Feedback” Menu to Give the Feedback.
General Feedback Website
Now Click on “Get Started” Button to start feedback.
Feedback Get started
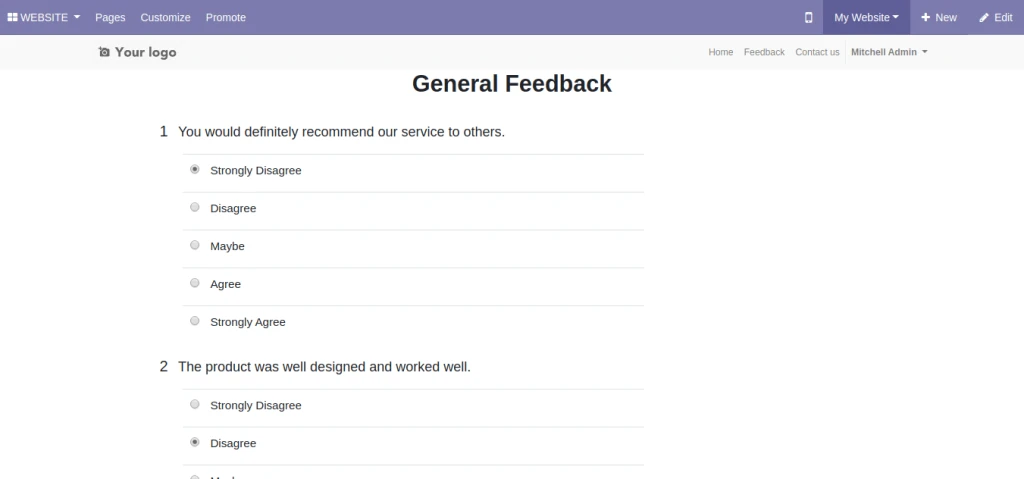
When you click on Get Started Button Question will come which you configure into the Template.
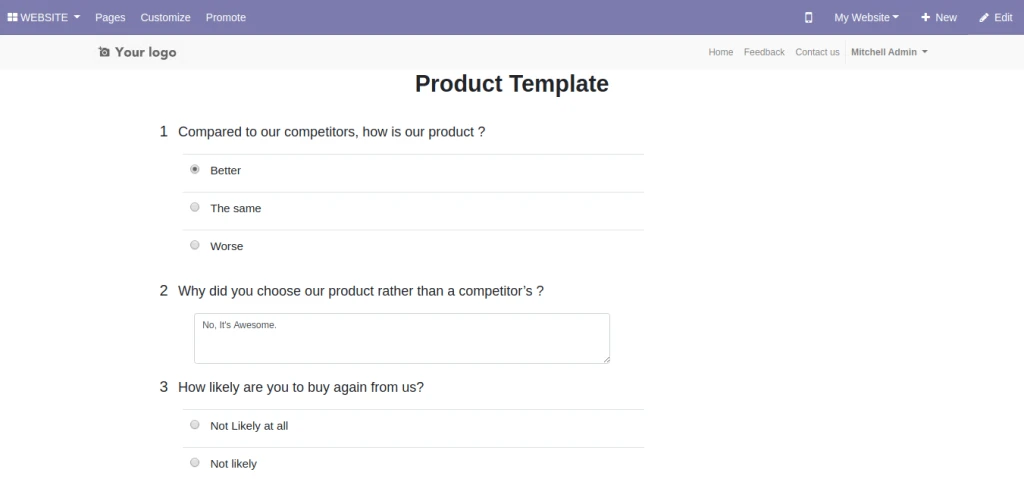
When you select the Question type Normal and Answer Mode Single Question Will come with radio button and you will submit only one answer.
Question Website
When you select the Question type Widget Question Will come with Ratings.
Question Website 2
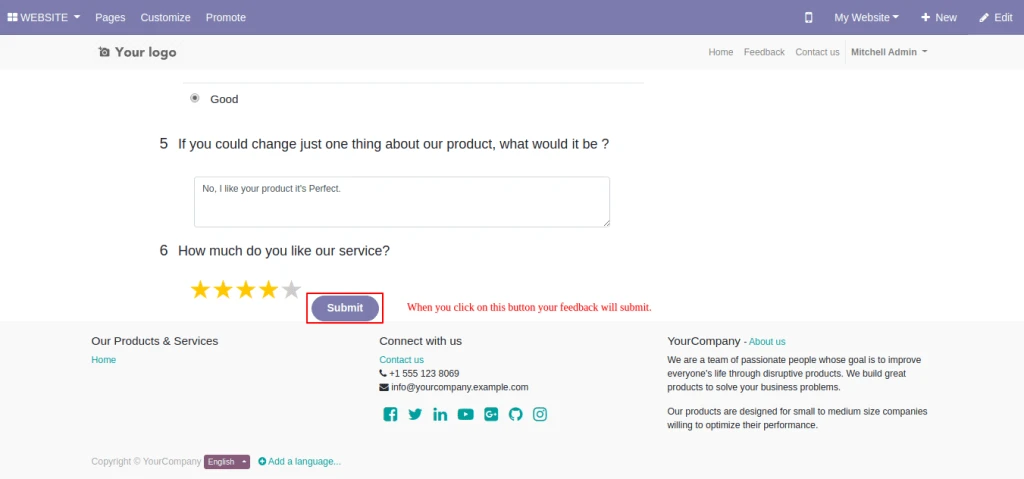
When you click on “Submit” button your feedback will submit.
Submit Feedback
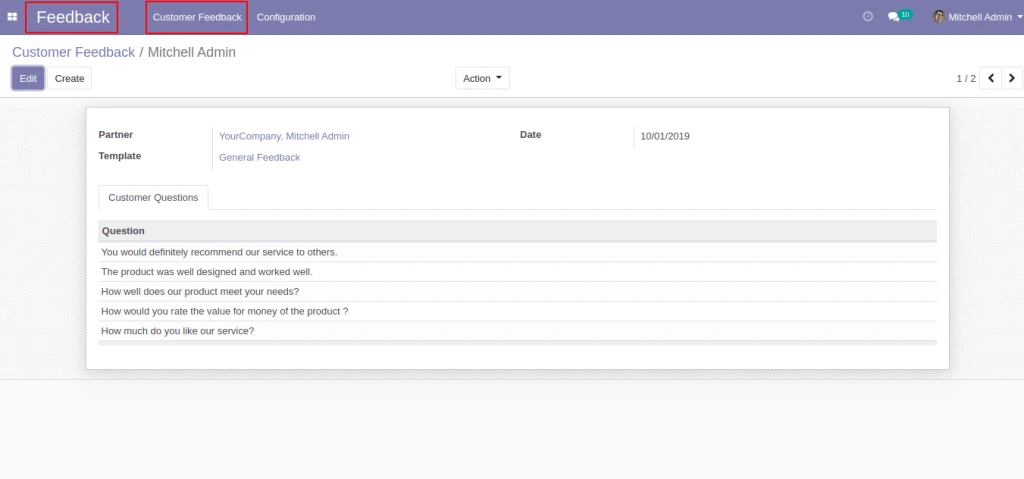
After Submitting the feedback it will Store into the Feedback > Customer Feedback.
Store Submit Feedback
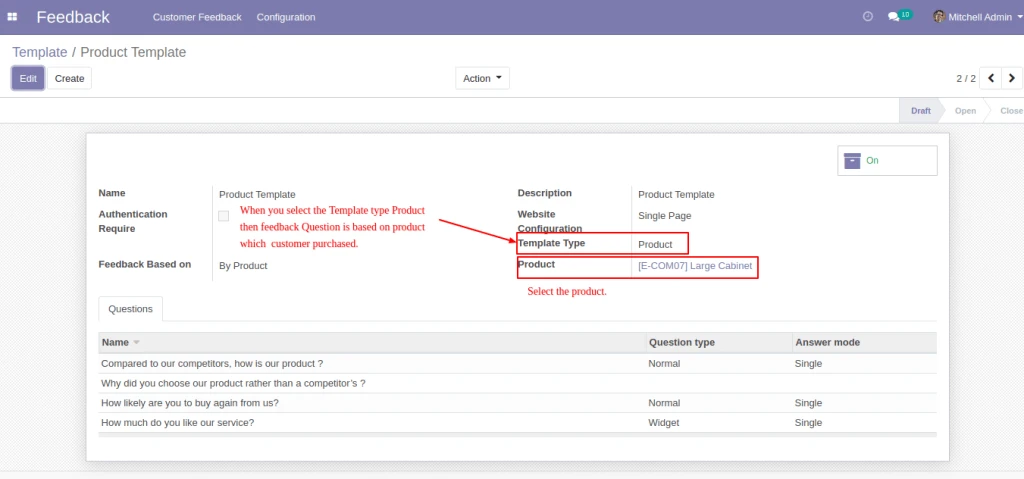
When you select the Template type as Product then feedback question will come based on Product.
Product Feedback Template
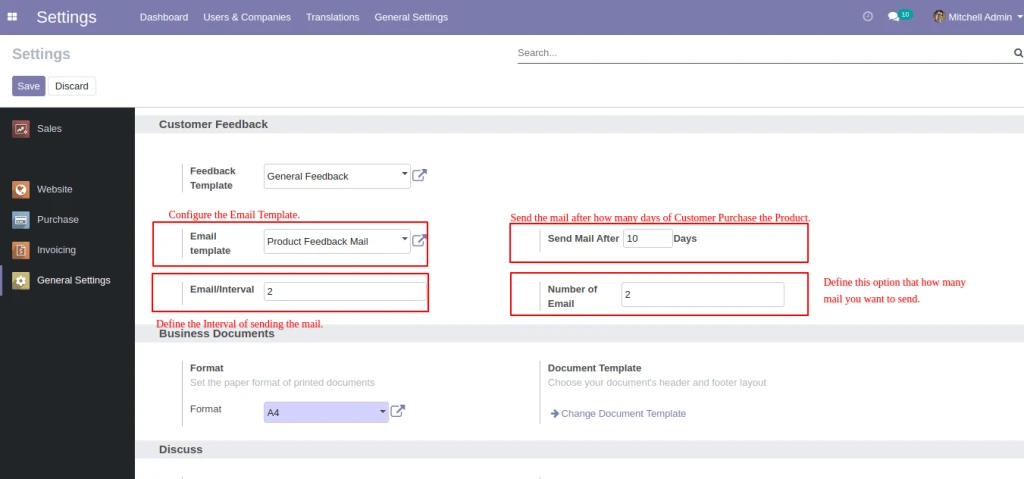
Configure the Mail template, Send mail after How many days of Customer Purchase the Product, Number of Mail that you want to Send and Interval and Cron will run everyday and send the mail to the customer based on your configuration and customer can give the feedback from mail.
Product Feedback Configuration
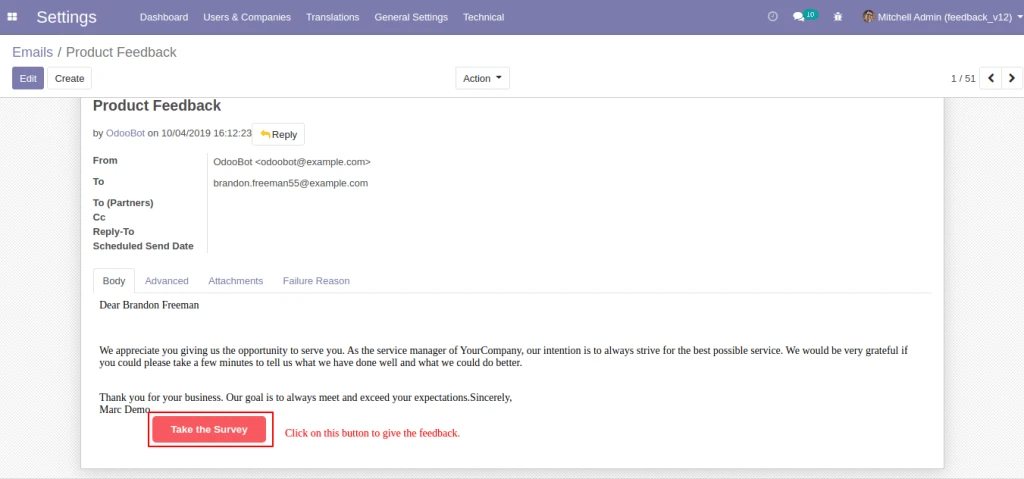
By clicking in Take the Survey button, Feedback will Started and after that same procedure will follow as General Feedback.
Customer Feedback Mail Feedback Get started Customer Product Feedback Answer