We have improved our existing loyalty system and make lots of enhancement. In new system, referral customer and employee will be tracked and get benefits of sales occurred from Sales Order or POS.
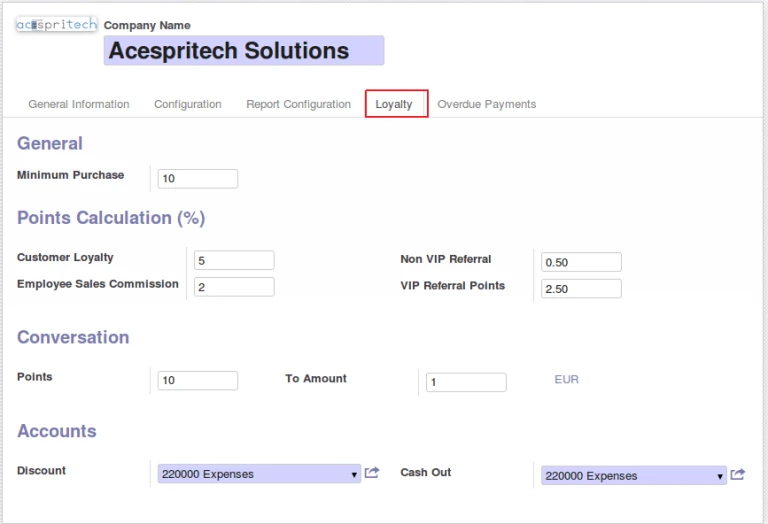
Loyalty point begin when customer start purchasing above Purchase Limit and then after customer will always get point on every purchase. In configuration, there are some general configuration for getting points for each one. It is easy to define accounts for discount and cash out.
Loyalty Global configuration
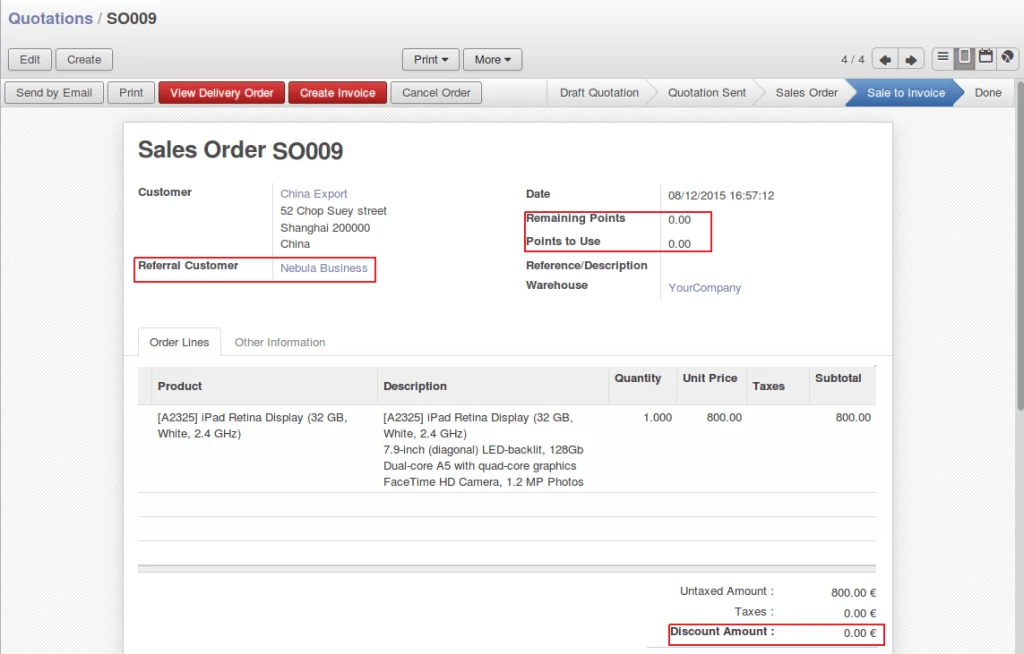
In Sales Order form, you can select Referral Customer and enter how many points to redeem. Redeem points will be automatically converted into discount amount.
Referral Sale Order
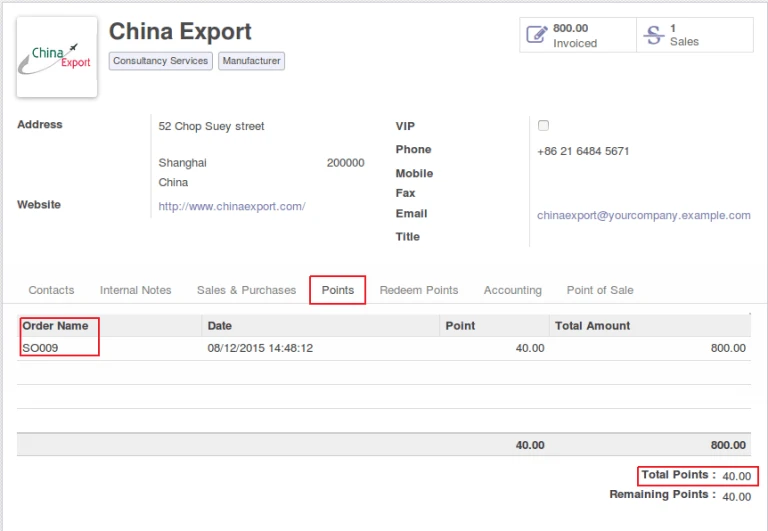
Points will be added in customer after invoice will be paid. (created from sales order).
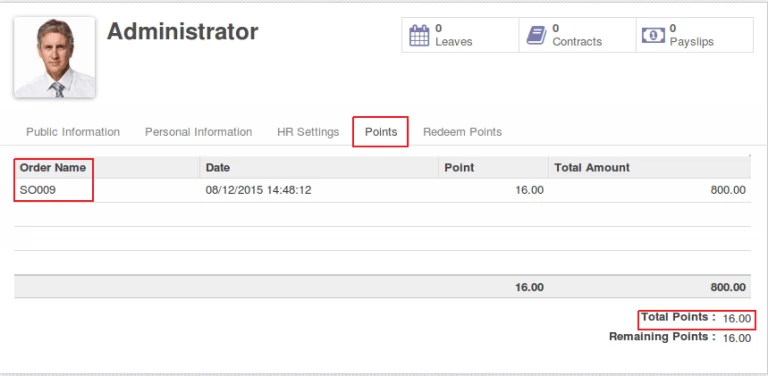
Customer loyalty points
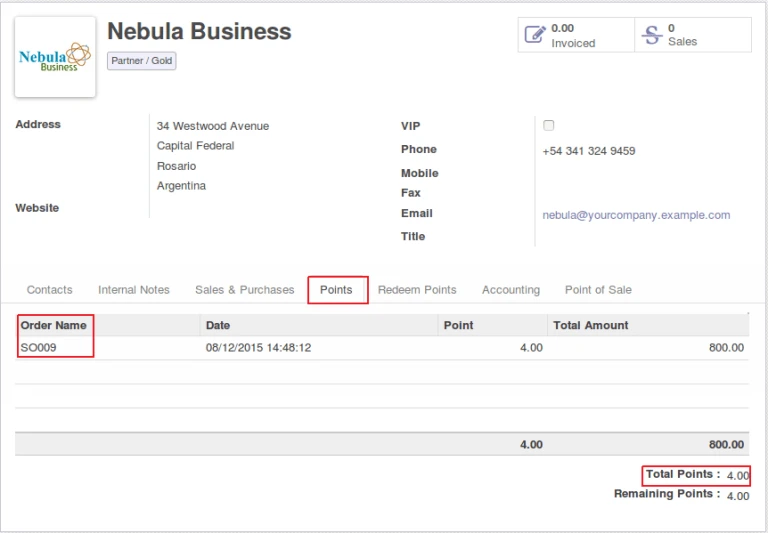
Referral customer and employee (sales person) will earn points.
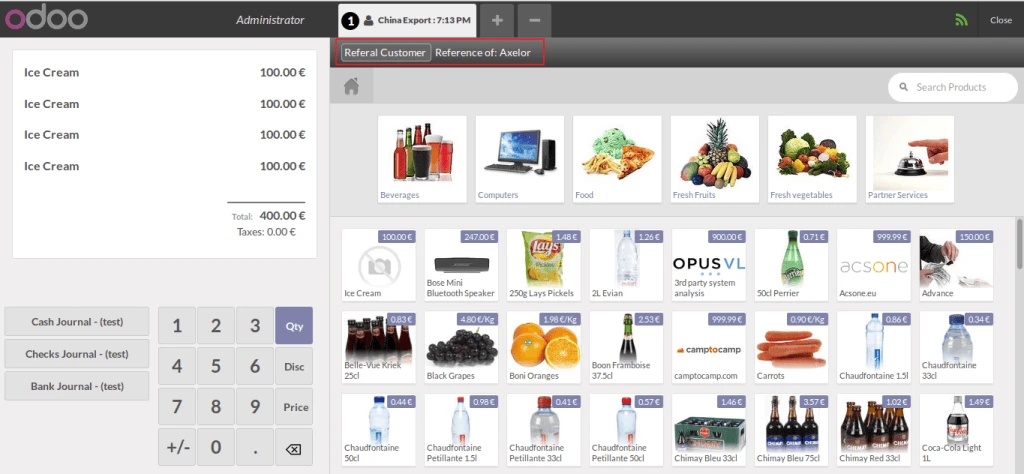
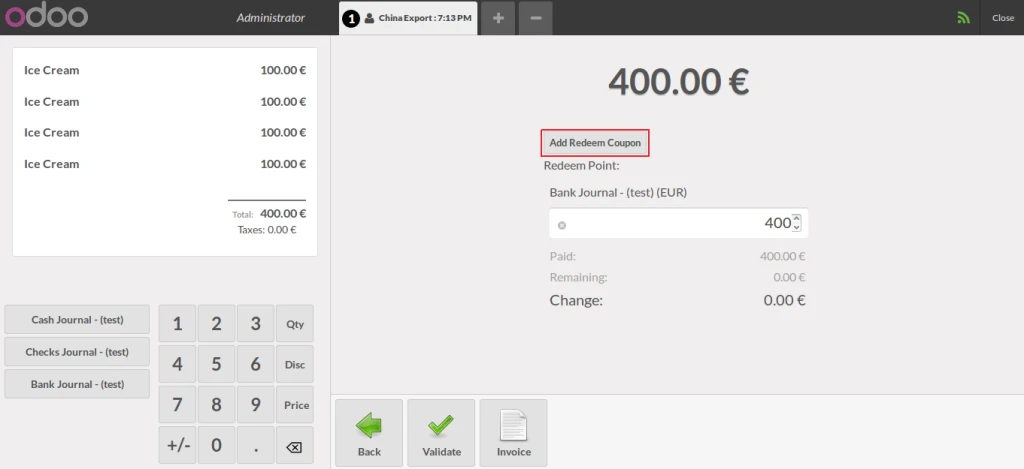
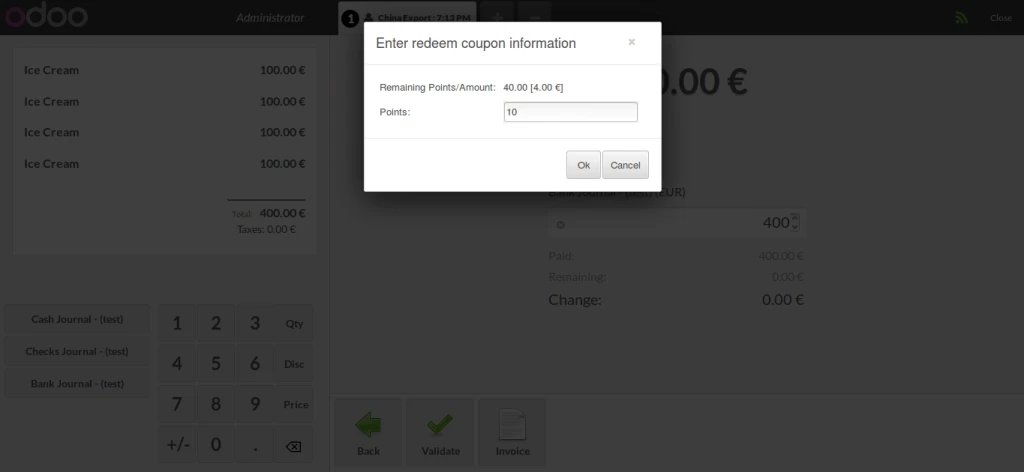
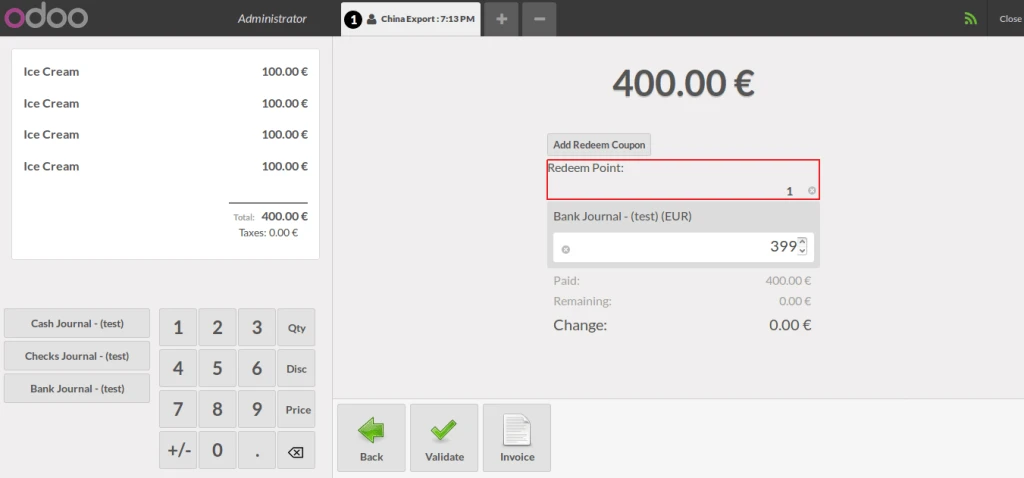
You can select Referral Customer from POS and redeem points.
POS Referral salePOS Payment with earned pointsPOS redeemPOS point to amount
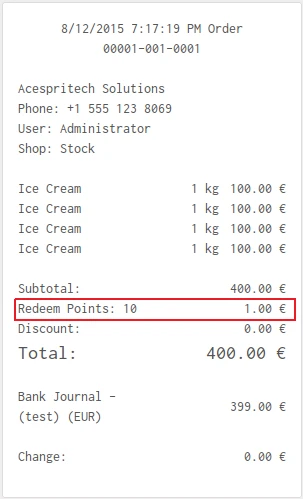
It will print redeem point in POS Receipt.
POS receipt with point information
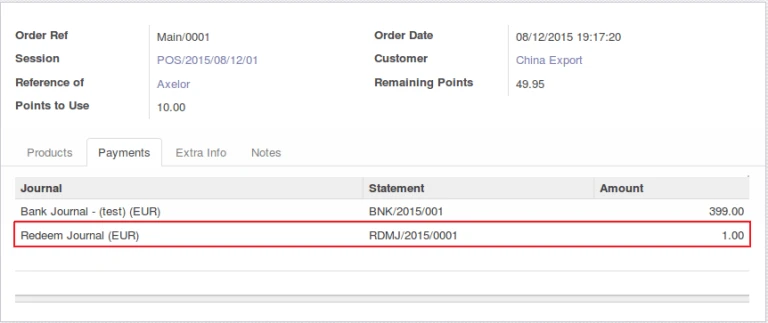
It will make separate journal entry for redeem points entered from POS.
POS Redeem journal
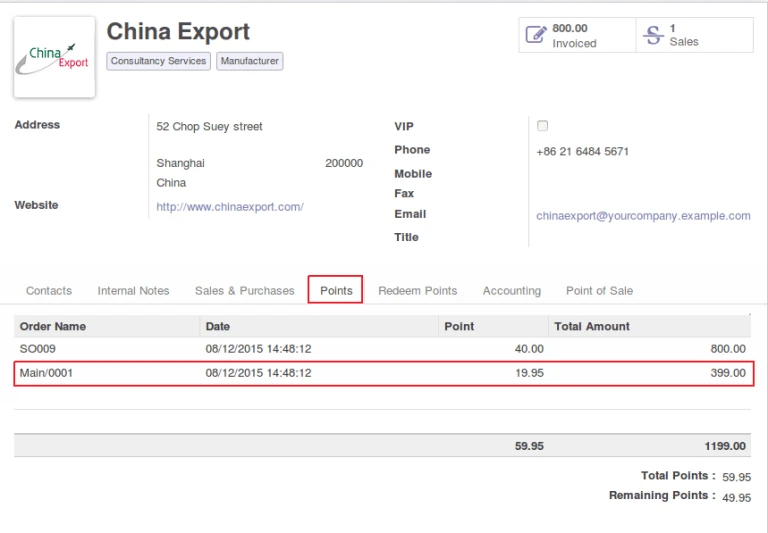
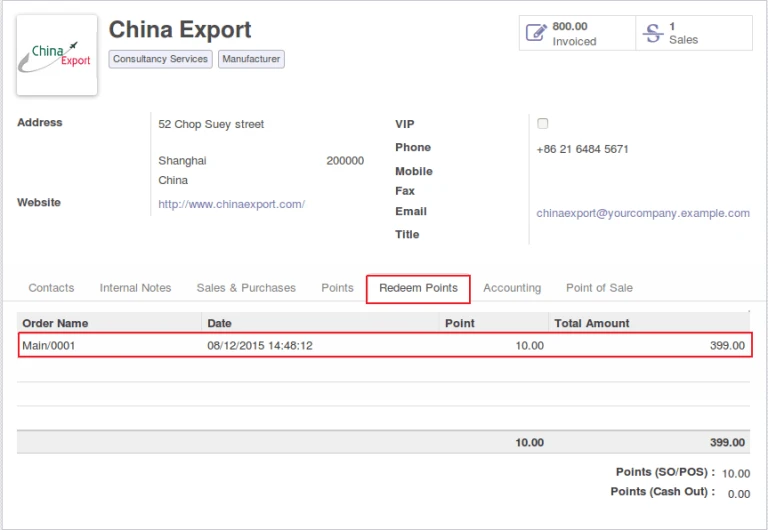
We can have all points information in customer form also like below images.
Points earned from POSOdoo customer’s redeemed point information
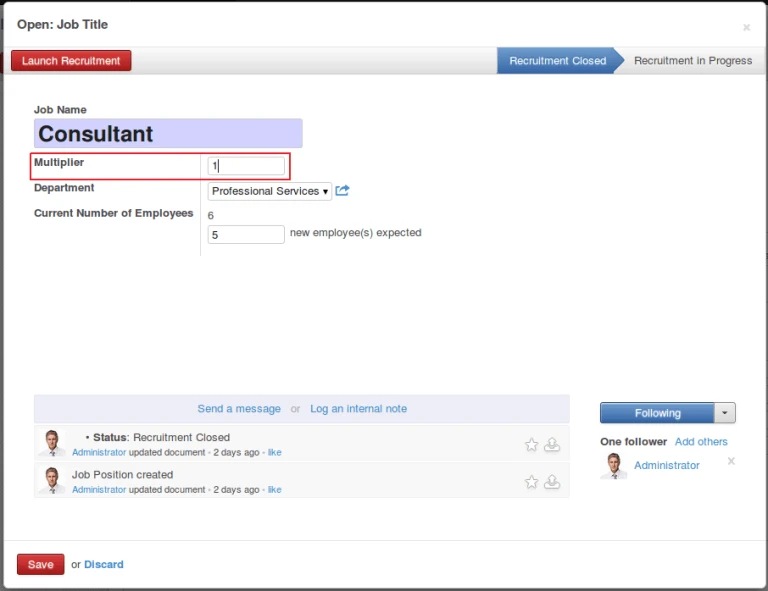
Employee will get commission amount in their salary as per their sales during a month and job position in company. Multiplier value will be use for calculation of monthly commission amount. Employee contract must have Working Schedule define.
Employee job position
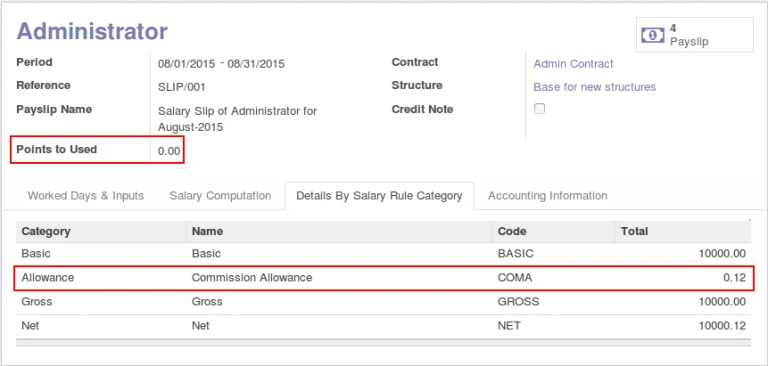
At time of creating employee payslip, employee points will be automatically selected and use in calculation.
Odoo hr payslip
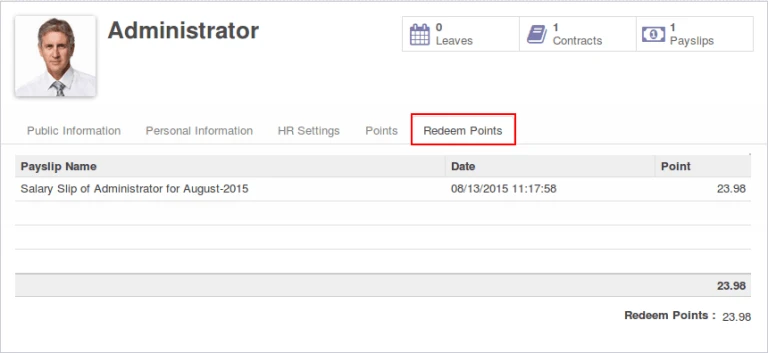
Once employee payslip is confirmed, we will have corresponding points entry in employee form.
Odoo hr employee redeem
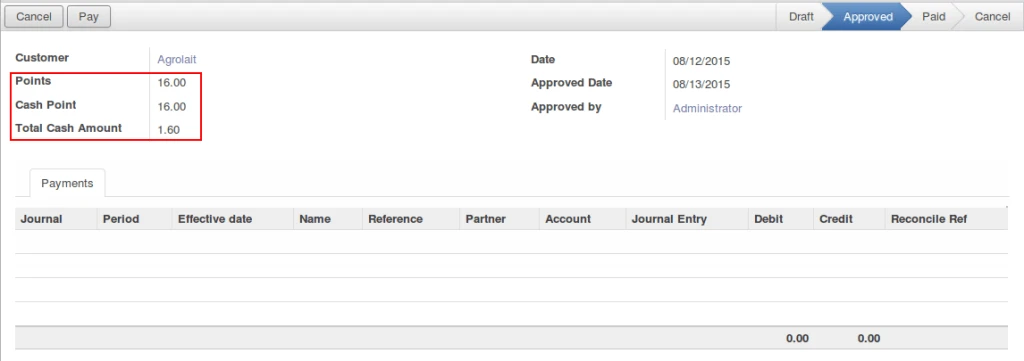
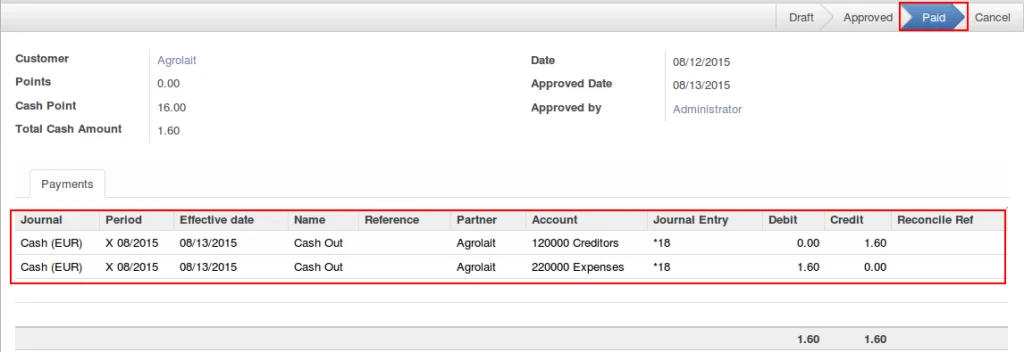
In this system, its possible to provide CASH amount to customer instead of discount during purchase and also generating valid accounting entries.
Cash out approvedCash out paid
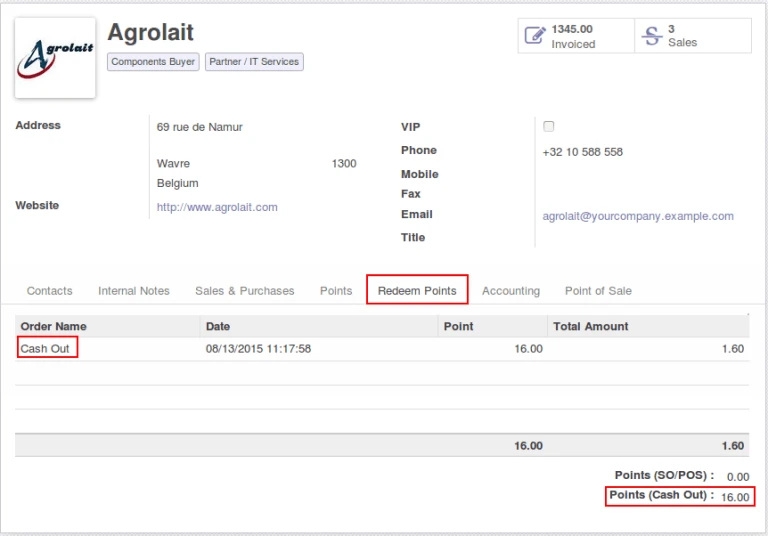
Cash Out will make entry same like redeem point for customer.
Odoo customer redeem
Share this:
Click to share on Facebook (Opens in new window)
Click to share on LinkedIn (Opens in new window)
Click to share on Twitter (Opens in new window)
Click to share on Reddit (Opens in new window)
Click to share on Tumblr (Opens in new window)
Click to share on Pocket (Opens in new window)
Click to share on Pinterest (Opens in new window)
More
Click to print (Opens in new window)
Click to email this to a friend (Opens in new window)
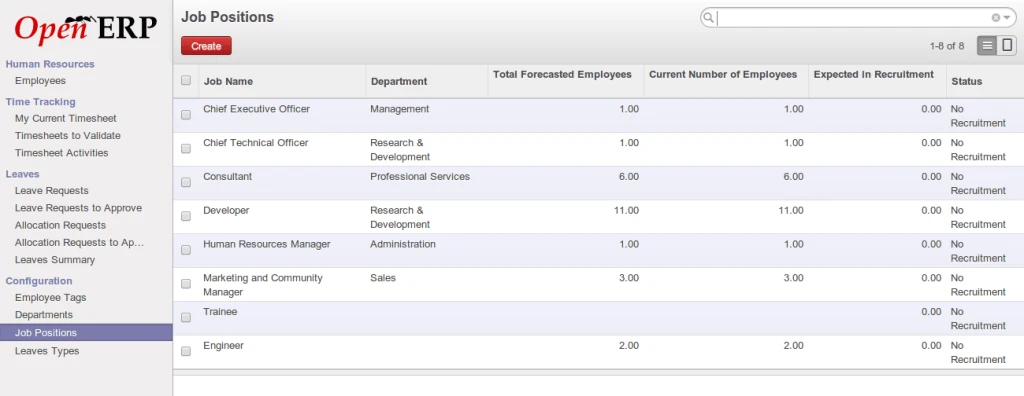
In many industries it requires to distribute work between employees as per their skills and availability. Without proper management, we never know that how many total working hours in our company according to designation or job position and how many in use and pending.
OpenERP Job Position
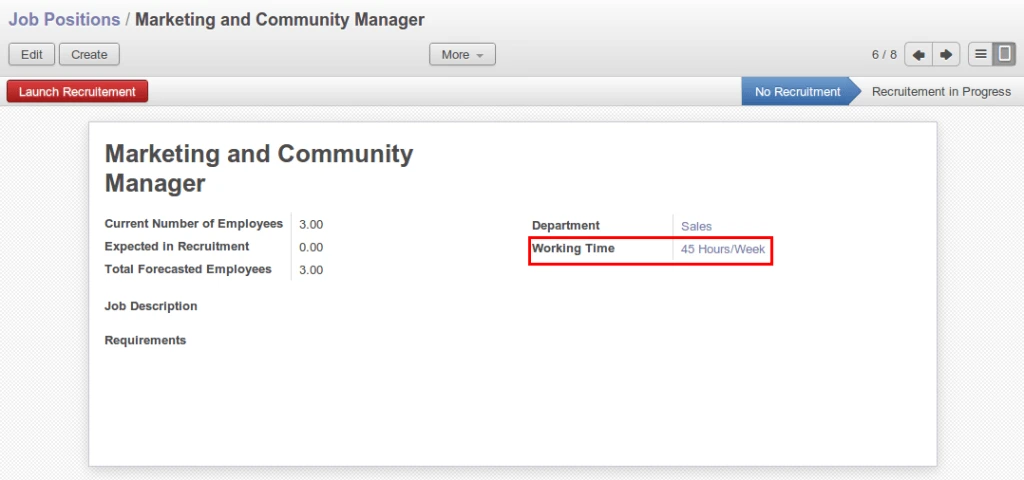
Here we are linking job position with working time.
Job Position Worktime
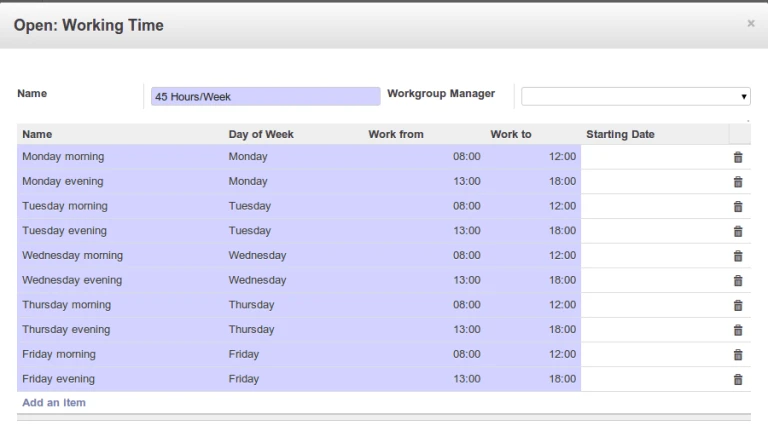
This is configuration detail of working time.
Working Time
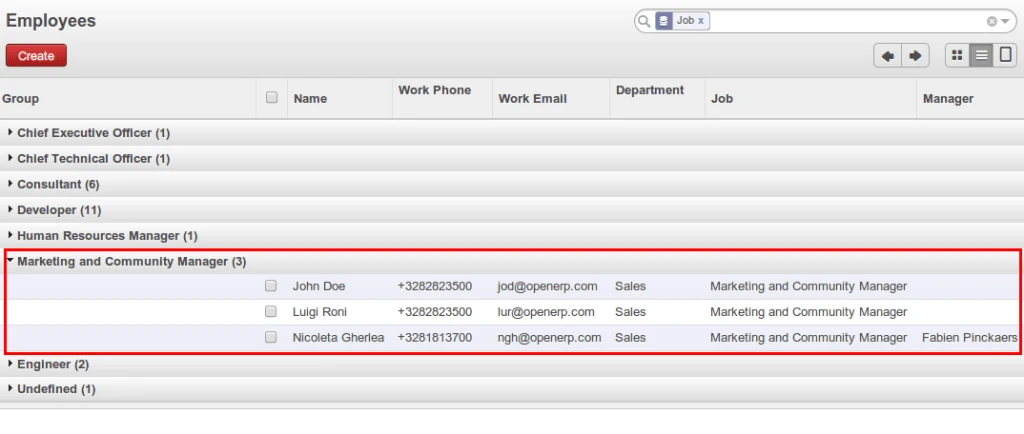
For our example, there are three employees related with Marketing job position.
OpenERP Employees
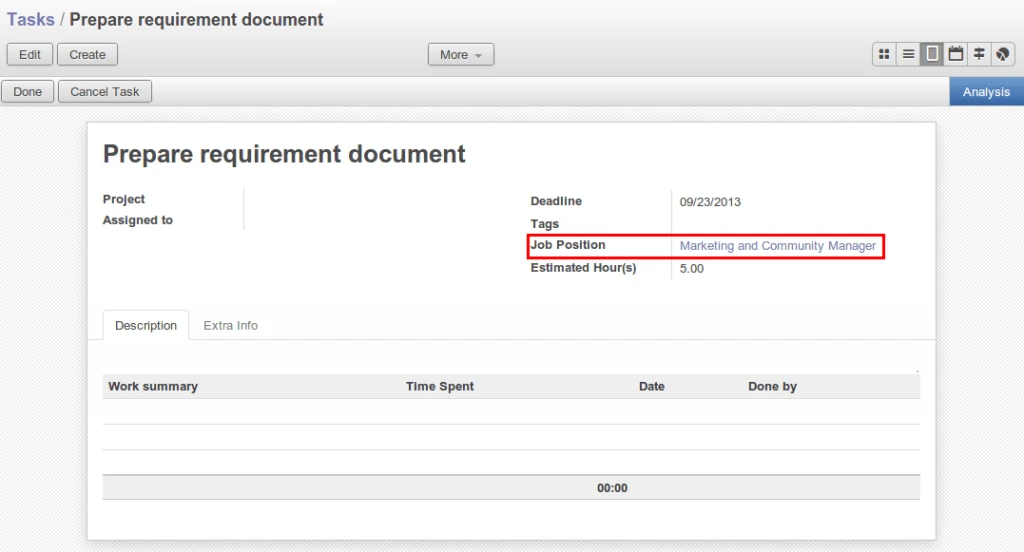
Now we are going to create Project Task for marketing employee. Still now this task is not assigned to any particular employee. This way we have created 2 Tasks.
OpenERP Project Task
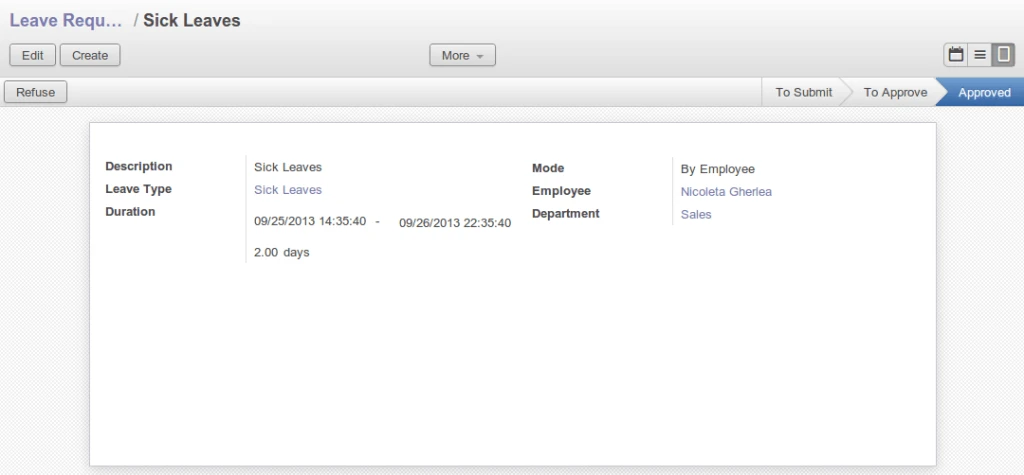
As you can see there is one approved leave request of employee who belongs to maketing designation.
OpenERP Leave Request
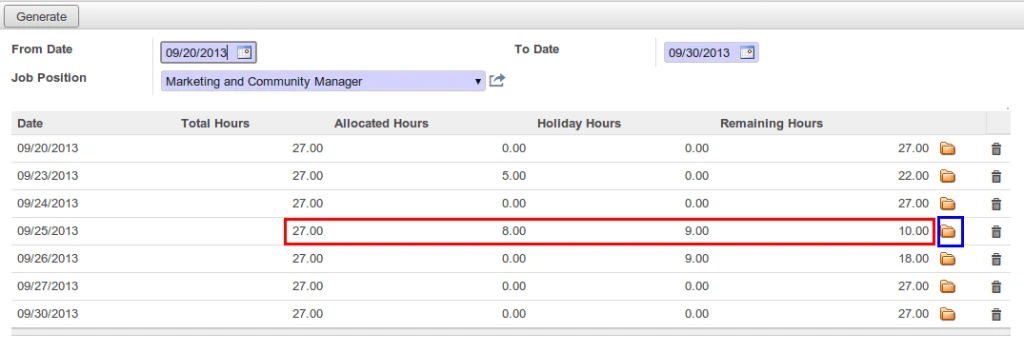
We can see now how many hours available with us for particular job position between some periods. There are total 3 employees related with that job position.
Working hours for 1 person for 1 day is 9 hours. so it is 9 * 3 = 27 hours for 3 persons.
Allocated Hours means total task hours assigned to that job position. Holiday Hours in below screen considered as approved leave of any employee related with that job position.
Job Position Status
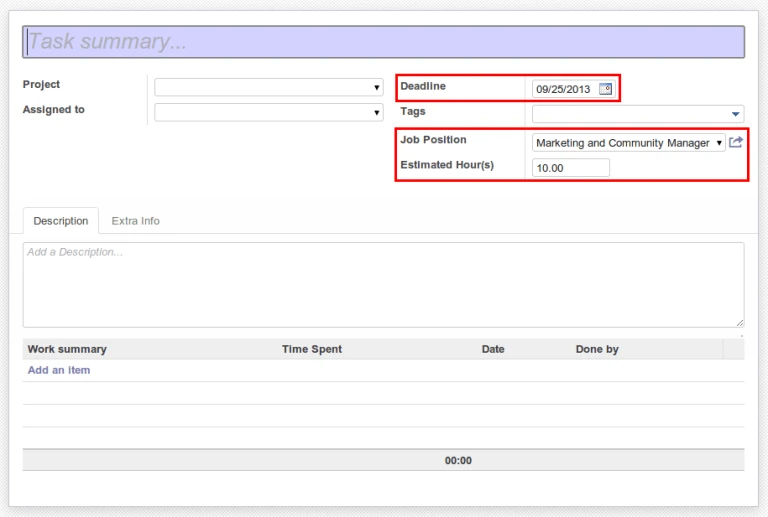
You can create directly task for remaining hours for same job position on particular date.
As we know OpenERP is such a strong and wide ERP and we can perform unbelievable implementation in it.
We have implemented a concept called ‘Roster Management’ which is mainly creating recurrent tasks of employees for certain projects and periods.
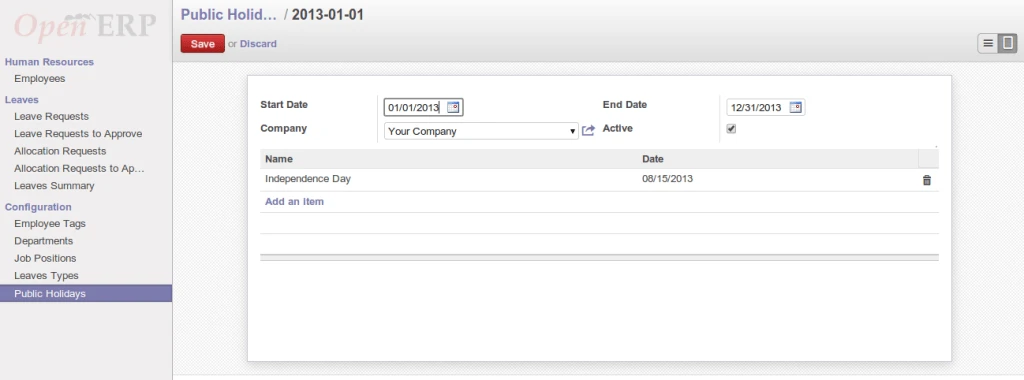
For any organization, it mainly require to define public holidays according to their country and region.
Public Holiday
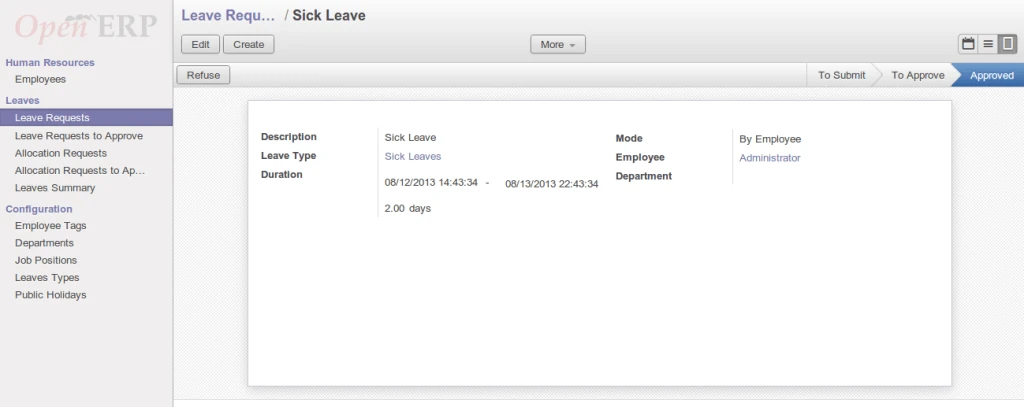
There is leave request by an employee which is already approved.
OpenERP Leave RequestGenerate Task
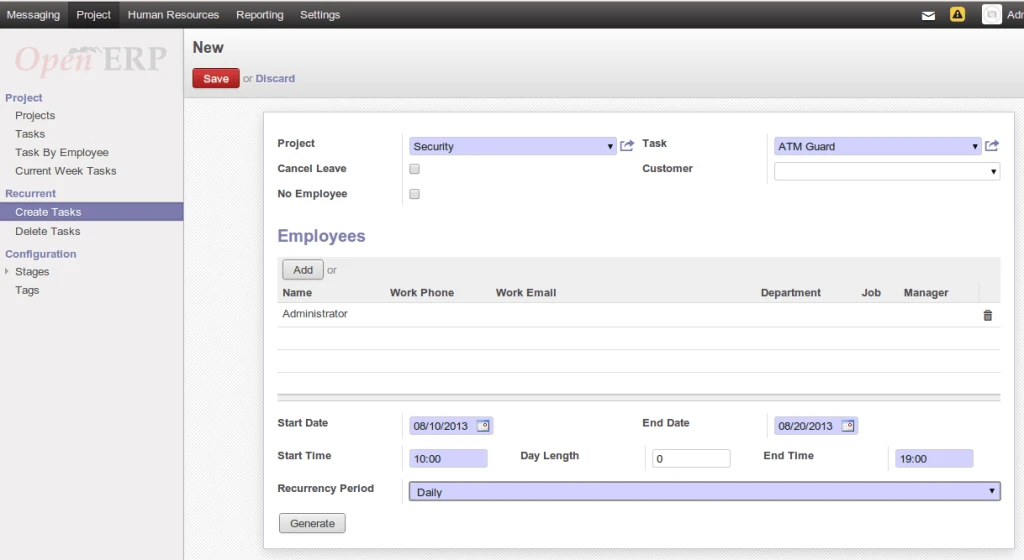
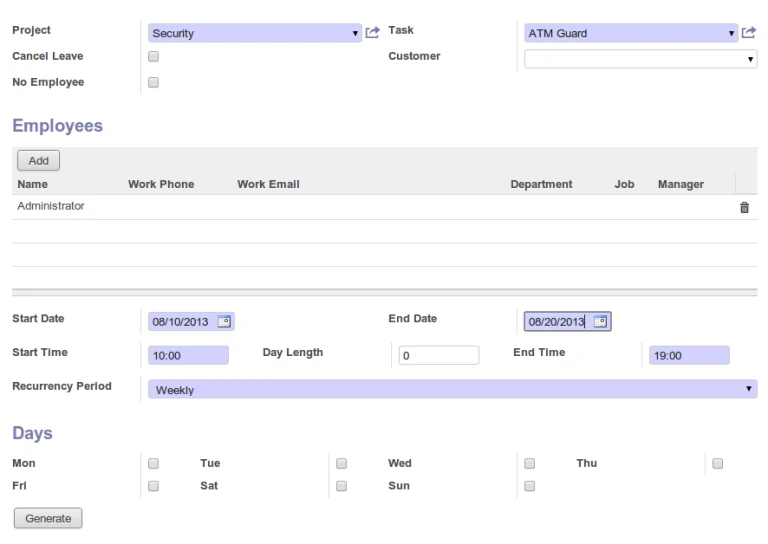
This is an important form for creating recurrent task.
Create Recurrent Task
Let’s check fields details here.
Cancel Leave – It will create task for employee and cancel employee leaves which are already approved and send an email to that particular employee also.
No Employee – It will create tasks without assigning any particular employee.
Start Date – This date will consider for starting date of creating task and check for employee leaves those already approved.
End Date – This date will consider for ending date of created task and check for employee leaves those already approved.
Start Time / End Time – Consider it for Task creation
Day Length – Sometimes task may span in more than 1 days. Default value is Zero.
Recurrency Period – Daily / Weekly / Monthly
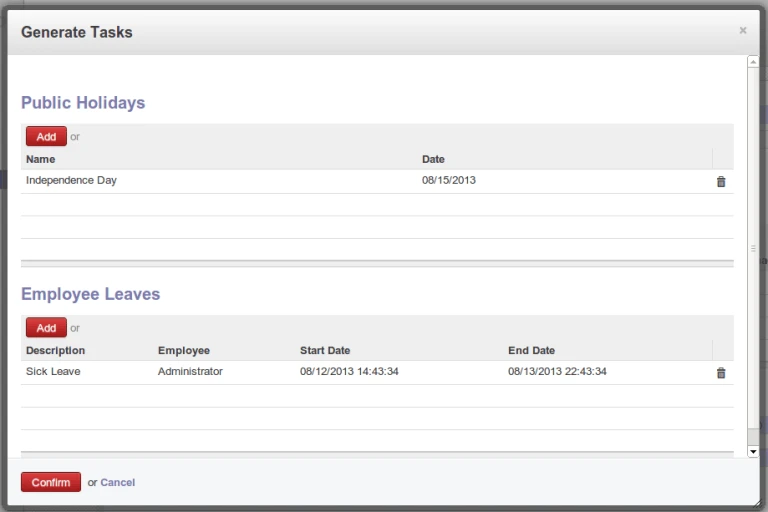
After click on Generate button, it will open following window. It will display Public Holidays as well as employee approved leaves. By default, it will not create any task for those dates which include in both sections. It will create task on holiday or leave if user remove it manually from list.
Generate Task
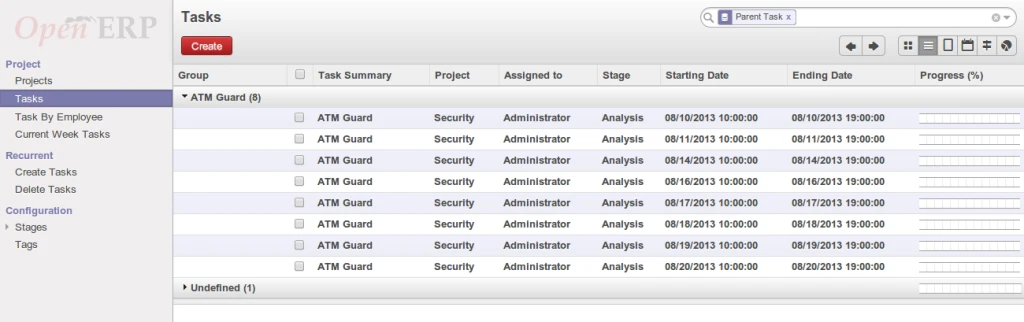
As you can see in following screen, there is no task created for 12, 13 and 15 date.
Recurrent Task
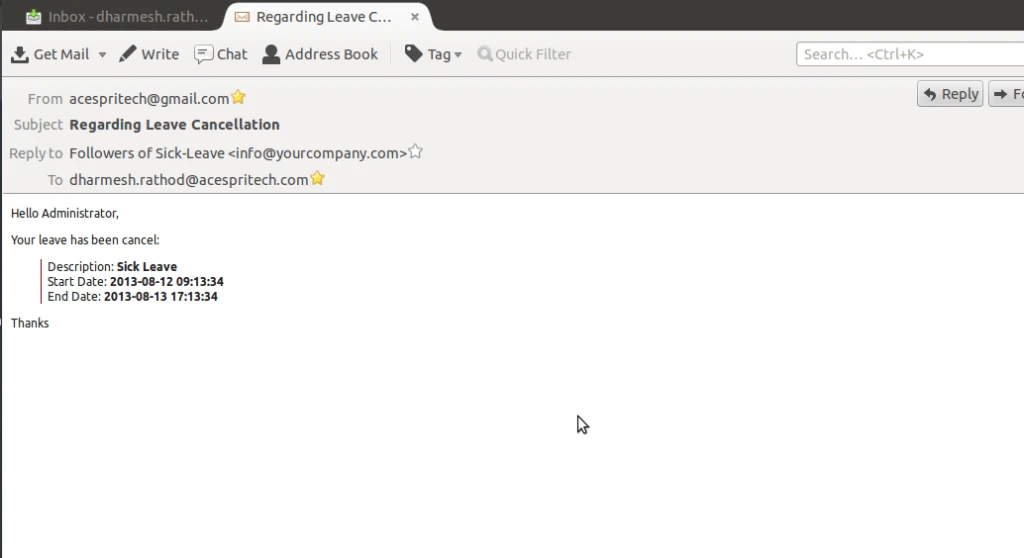
It is sending an email like below in case of employee leave has been cancel.
Cancel Leave Email
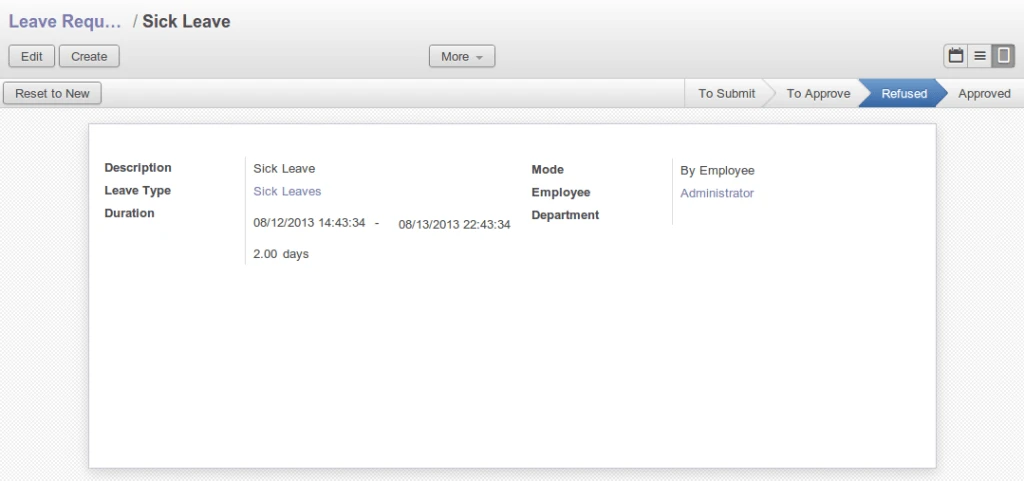
Employee’s cancelled leave
Refused Leave
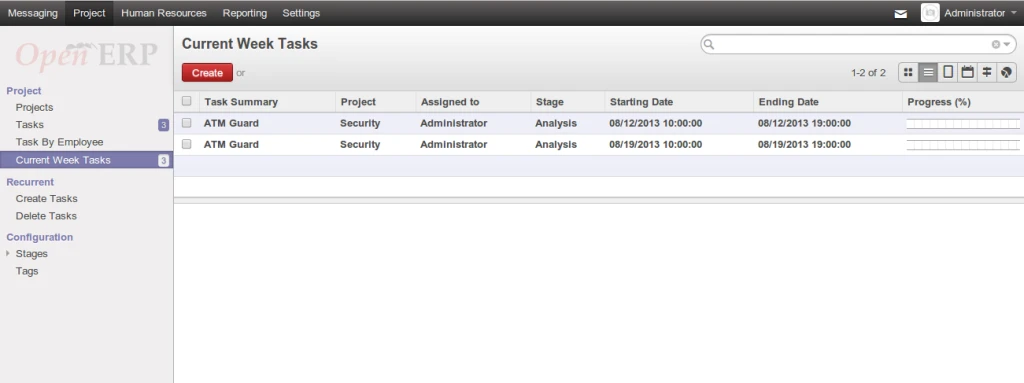
This menu display all tasks those start and end in current week. It consider week from Monday To Sunday.
Current Week Task
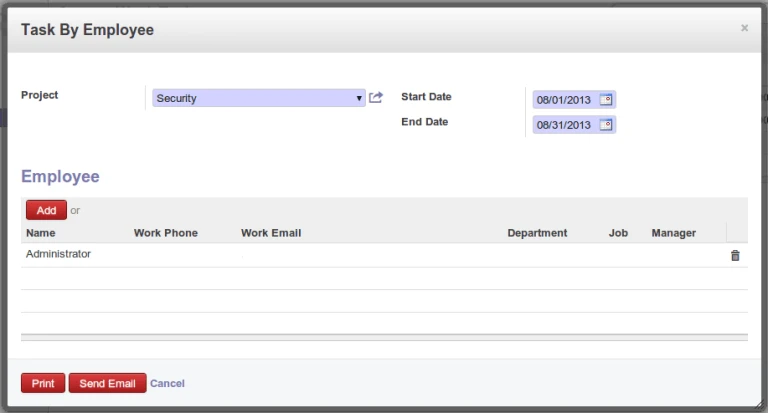
There is a facility to send an email or print tasks for employee for particular period.
Task by Employee
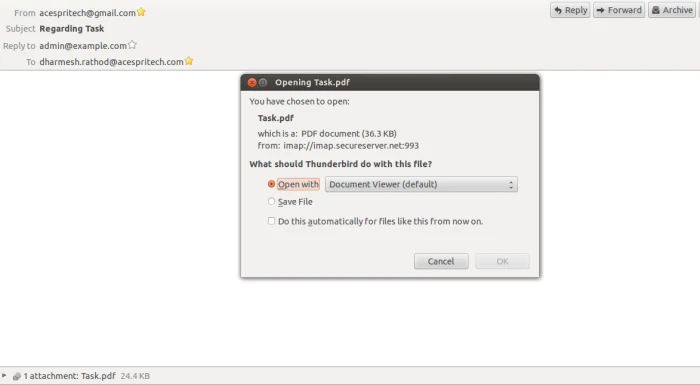
It is sending list of tasks in PDF file as a attachment to each employee on their working email address.
Task Email
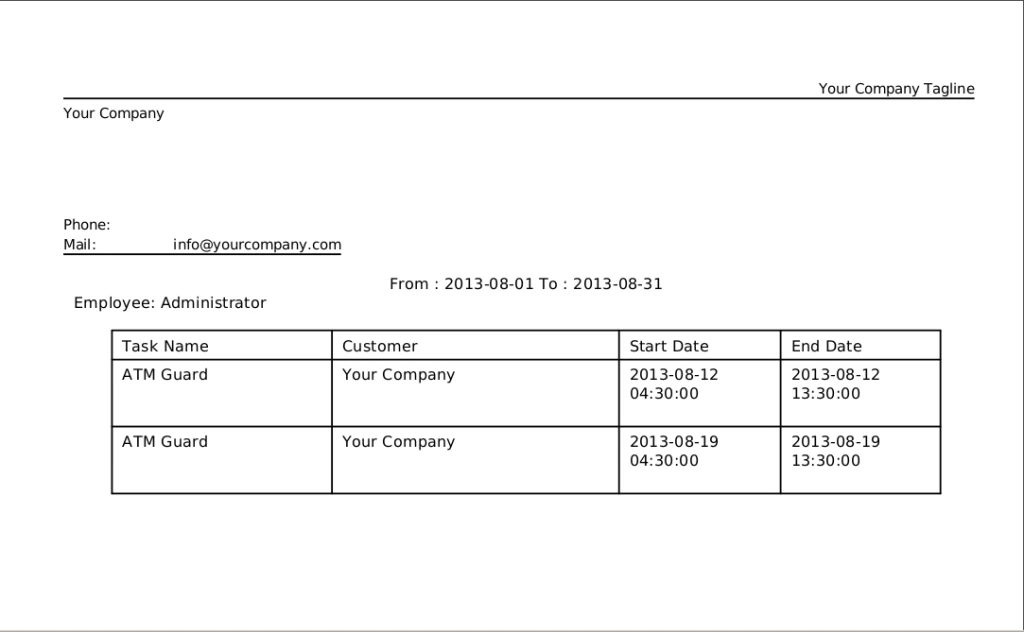
It is also possible to print in PDF report.
Employee Task Report
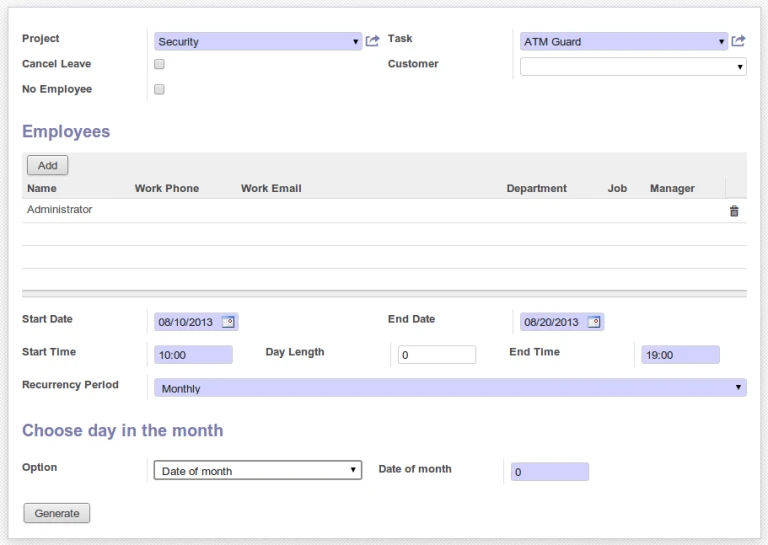
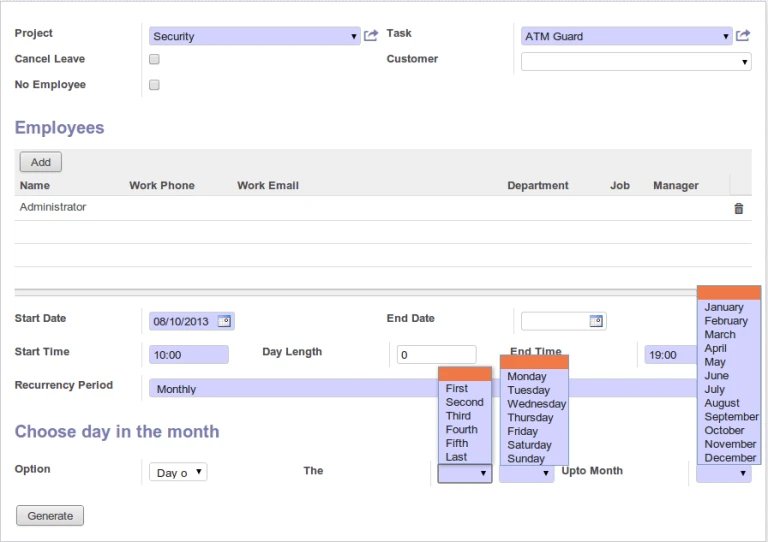
For monthly option we can have following:
– Date of Month
– Day of Month
Task DateMonthly Task
For weekly task creation, we have this following screen.