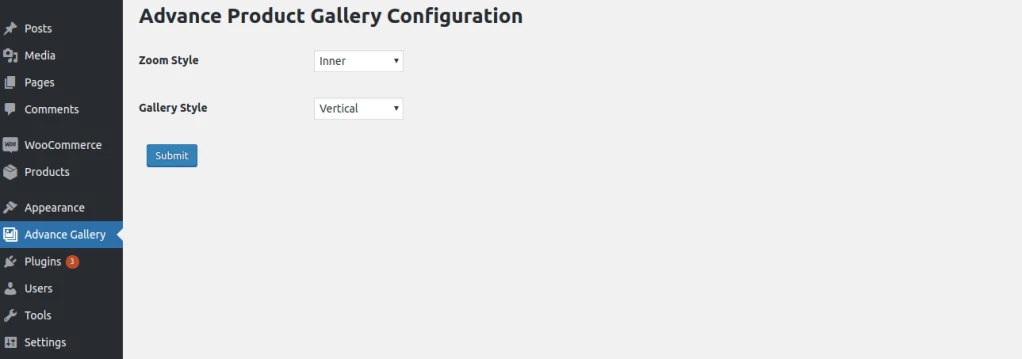
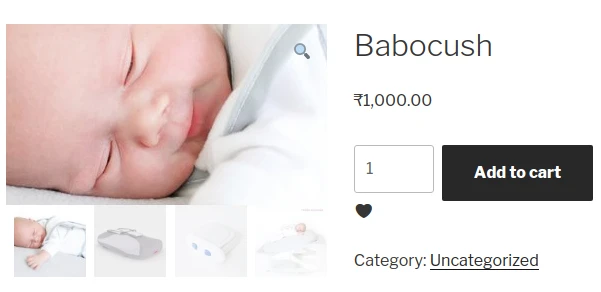
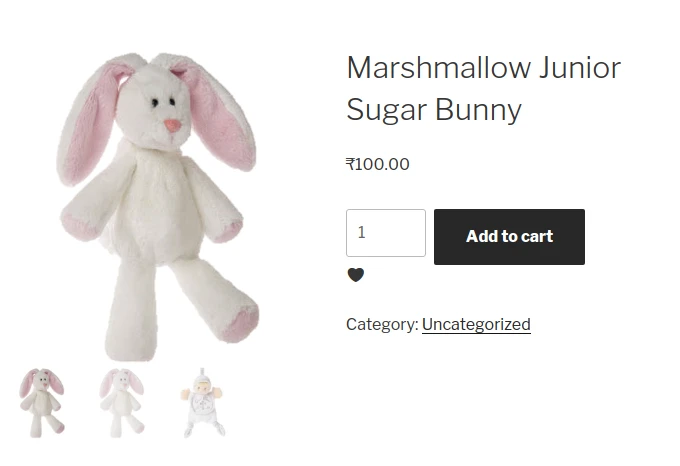
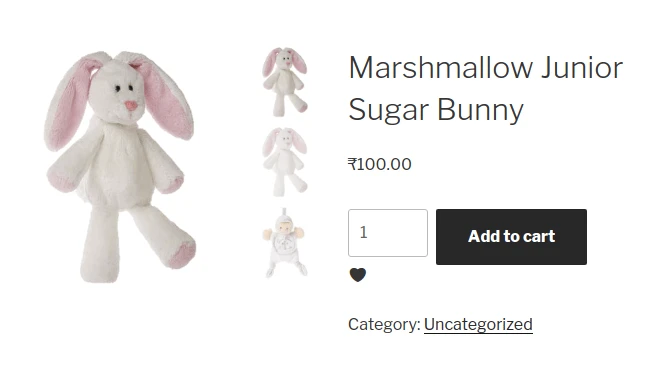
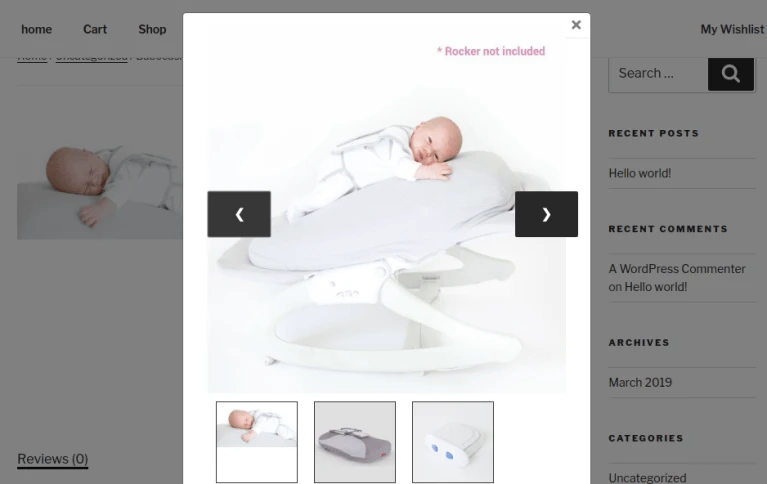
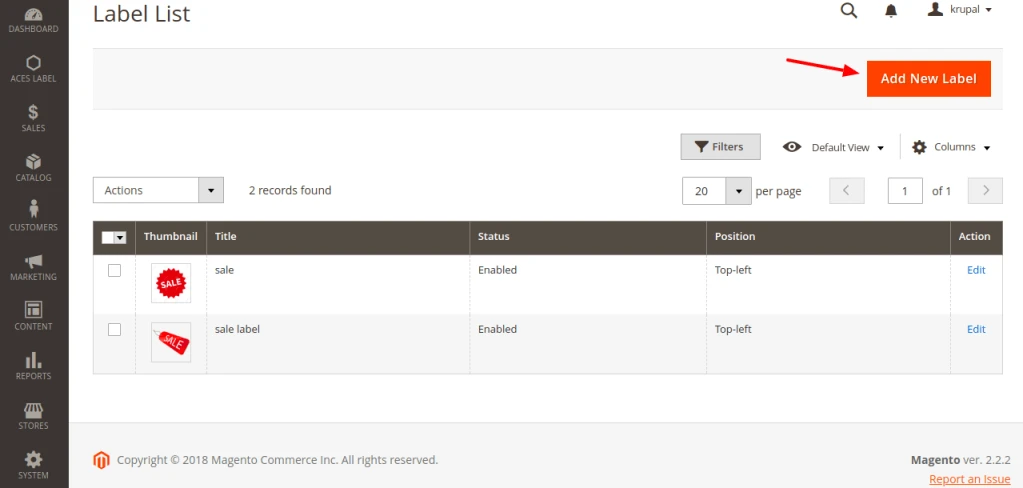
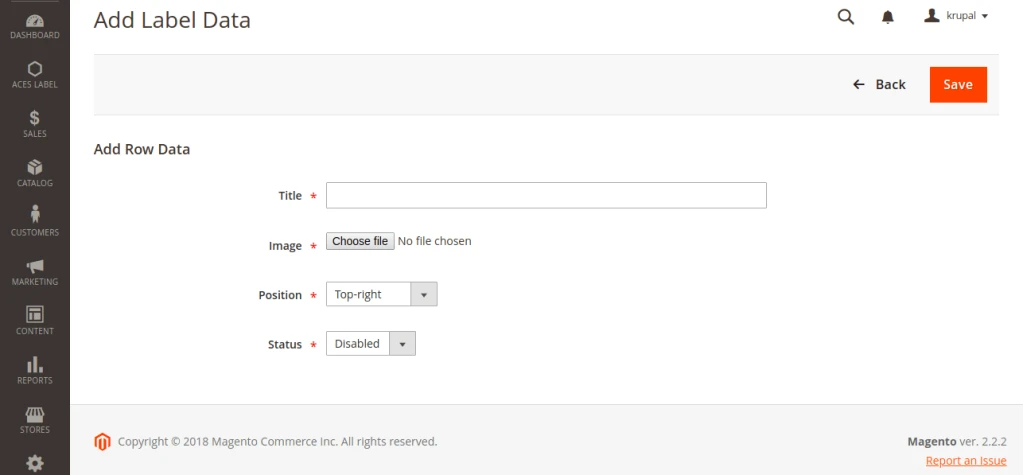
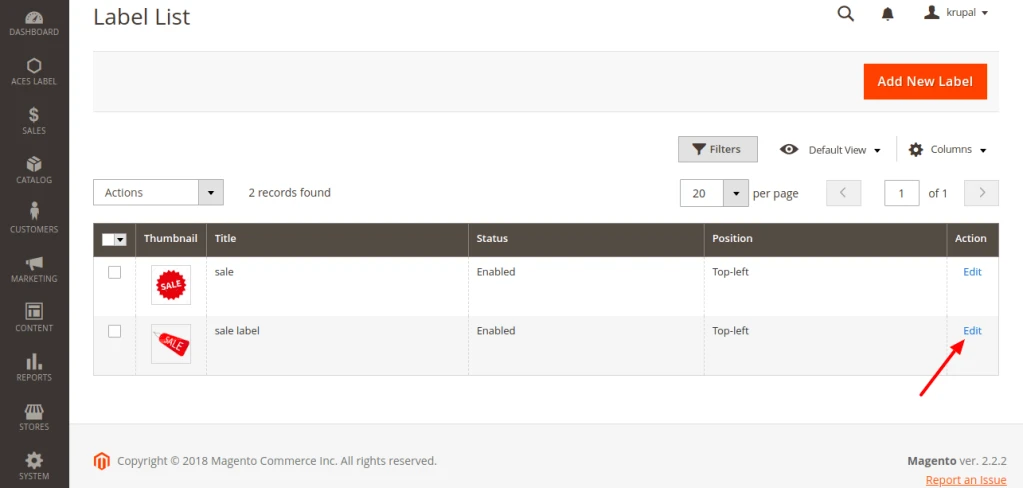
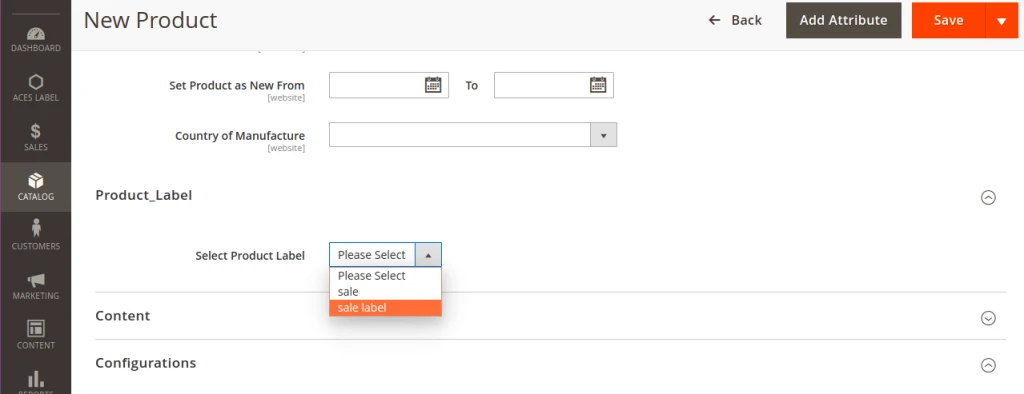
It is an extremely user-friendly WooCommerce product gallery plugin for your e-commerce site. This plugin is for change product gallery layout. Horizontal and vertical thumbnail gallery and provide inner and outer zoom effect for gallery images.
Make your website more attractive with badges inviting customers to buy. this
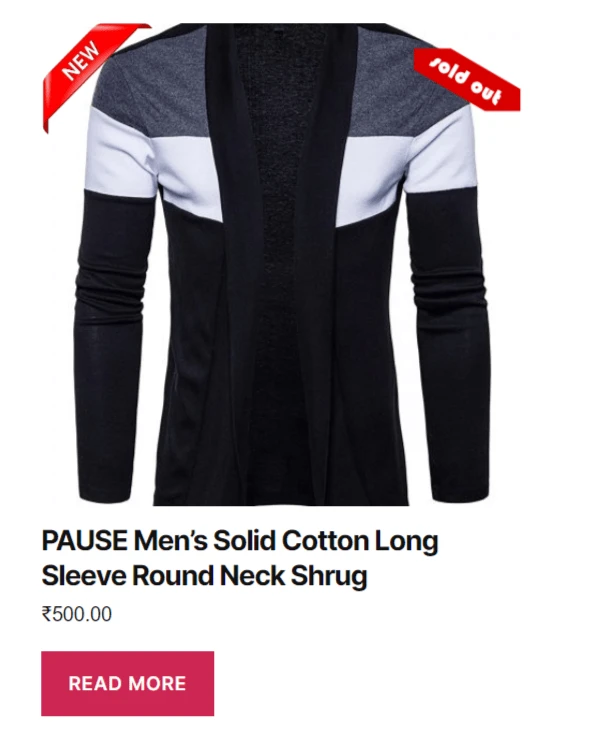
plugin helps to display product as ‘new’ label and product is ‘sold-out’. Admin
has an access to change Badges images and its position.
Click here to download
Features:-
Admin can include images of Badges.
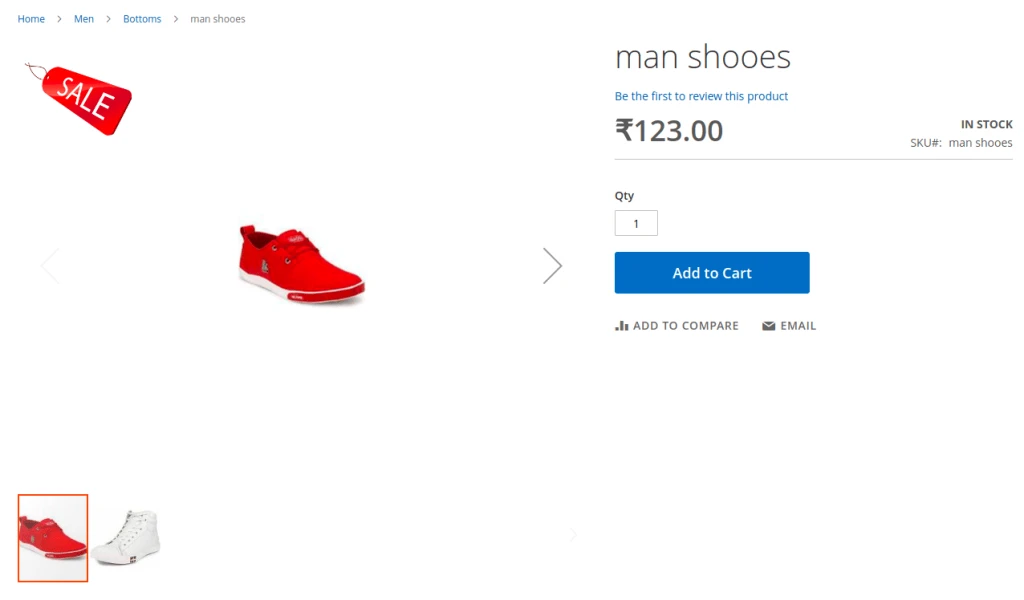
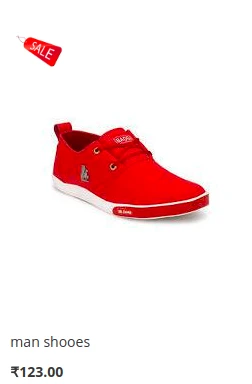
Badges display on the product image in a product loop – item.
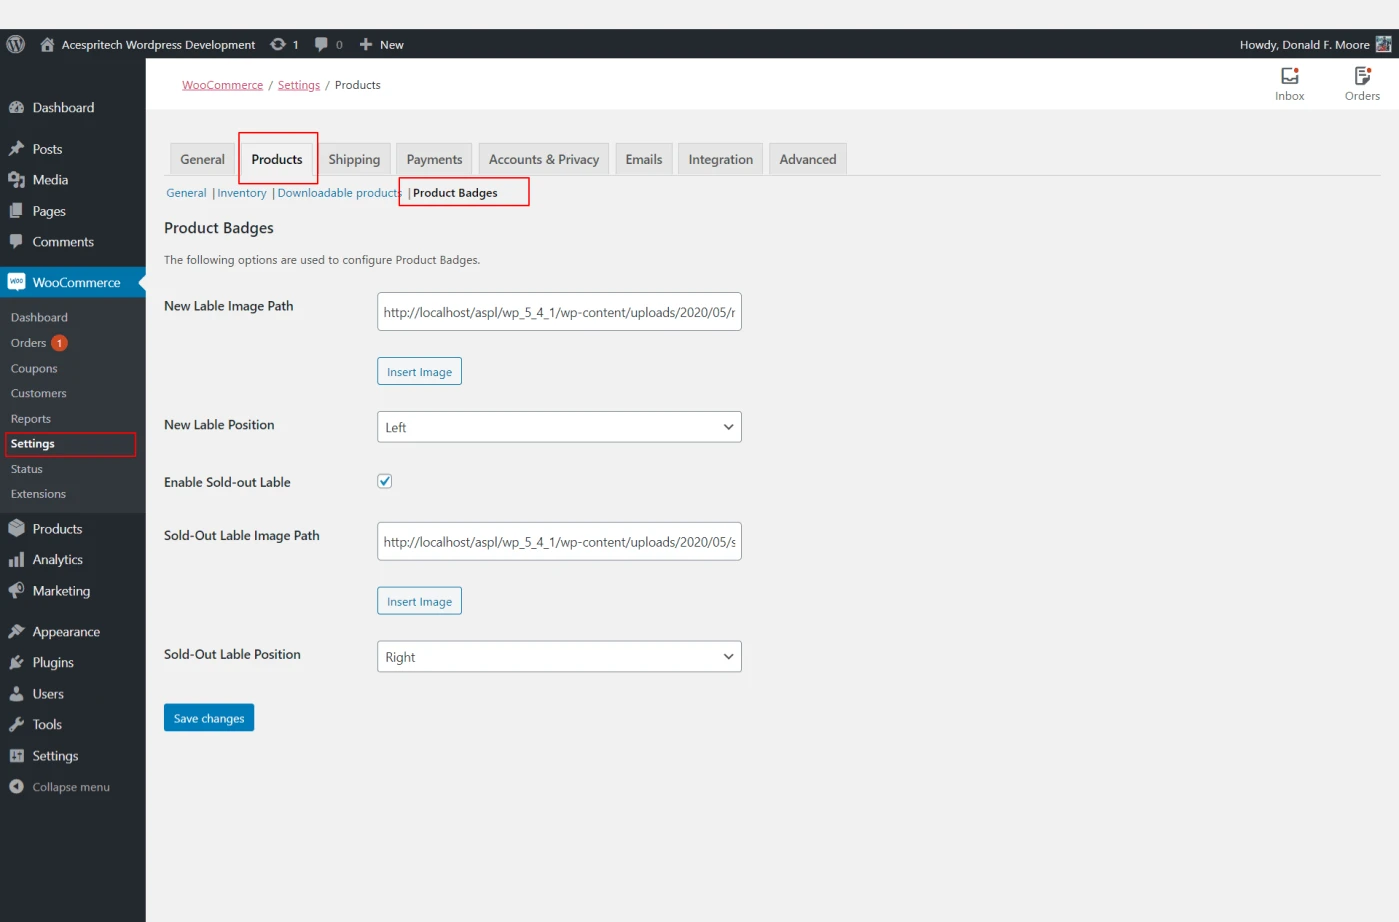
The admin has two options to set the position of Badges right side and left side.
The ‘sold-out’ functionality is display on product is out of stock and it’s enabled by setting.
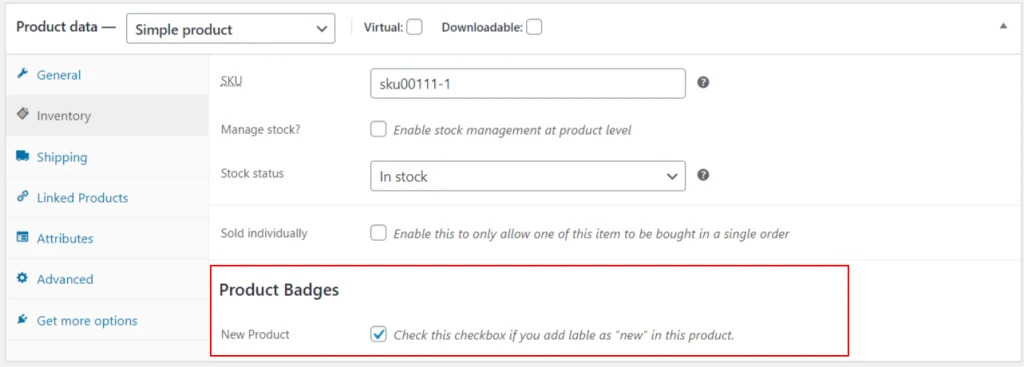
Admin can manage ‘new’ product label configuration by a product data tab.
Enable ‘new’ label for product.
Enable New liable Product
Setting page for Product Badges.
Setting Page for Product Badges
Setting page for Product Badges.
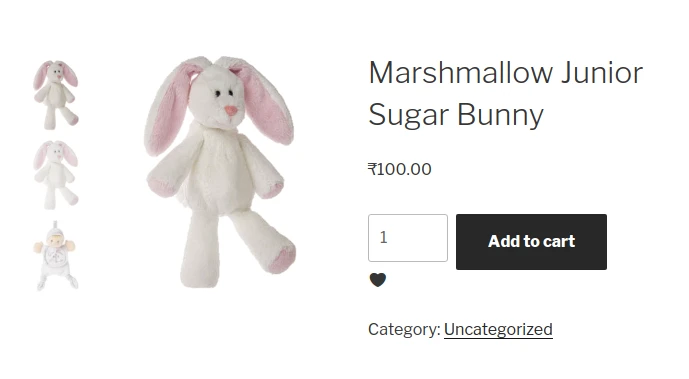
Front end Side Display Product Badges
Share this:
Click to share on Facebook (Opens in new window)
Click to share on LinkedIn (Opens in new window)
Click to share on Twitter (Opens in new window)
Click to share on Reddit (Opens in new window)
Click to share on Tumblr (Opens in new window)
Click to share on Pocket (Opens in new window)
Click to share on Pinterest (Opens in new window)
More
Click to print (Opens in new window)
Click to email this to a friend (Opens in new window)
Product quote request submission for logged-in users only.
Provides a customizable form for users to submit a Product Quote.
Display product add-to-quote button in product page.
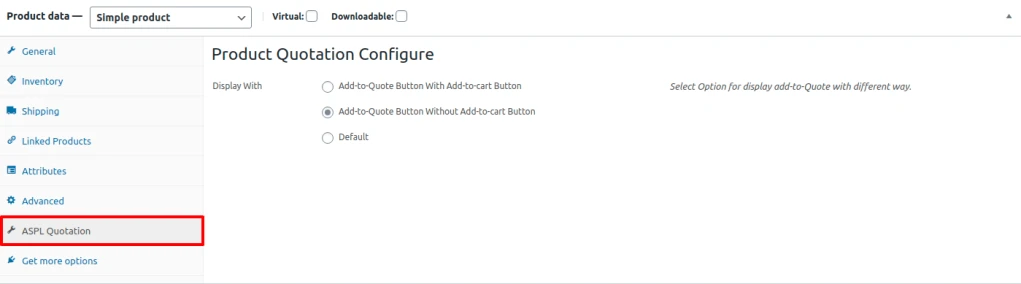
There are three option to set product quote button (1) add-to-quote with add-to-cart button (2)
add-to-quote button without add-to-cart button and (3) default.
Display user all request quote detail in my-account area which is submitted with status.
Admin acn delete request of product quote and change status of Quote.
User get gmail whene Request status is update by admin.
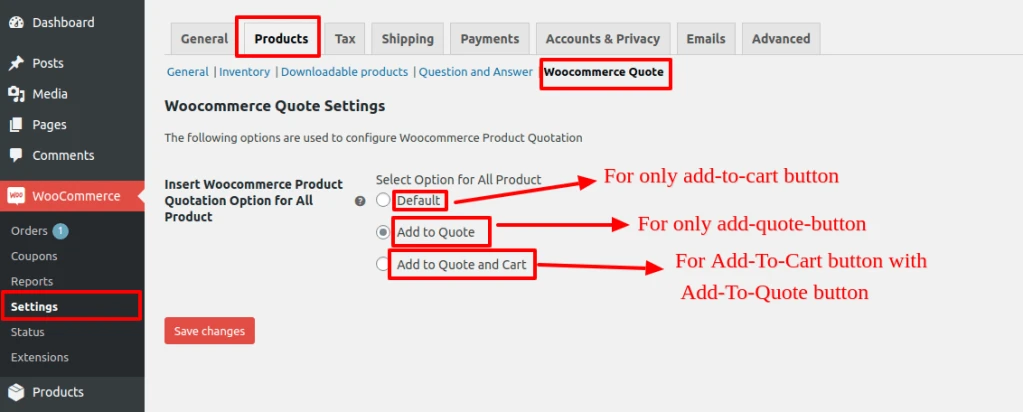
Admin can Add To Quote Button for all page from
WooCommerce – Setting – Products – Woocommerce Quote.
Admin can configure add to quote button for particular product in product tab ‘ASPL Quotation’.
Product Configuration for Quotation
Admin can easily set product quote option with multiple way to display quote for all products form WooCommerce – Setting – Products – WooCommerce Quote.
Set Option for all Product
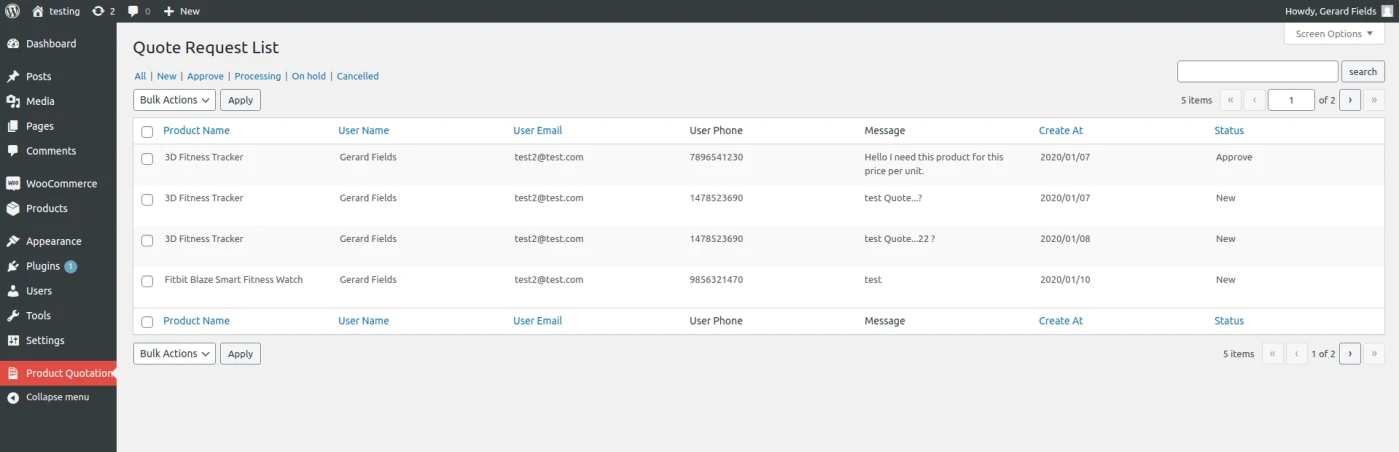
Admin can see the list of product request and edit or delete and update request status.
Product Request List
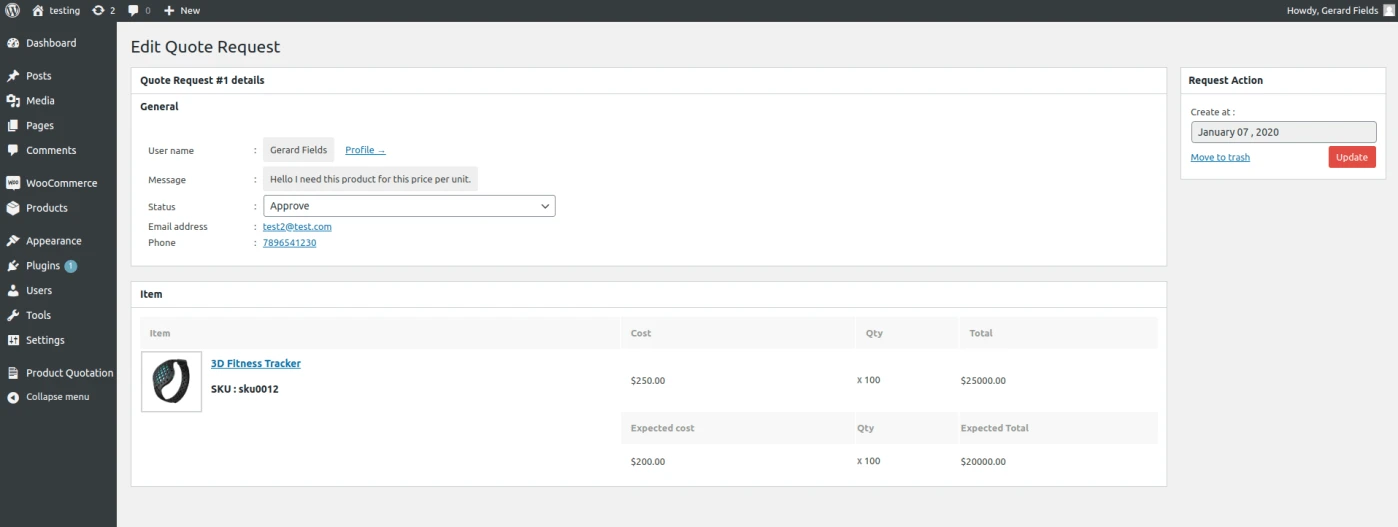
Admin can see all detail in edit page of request quote like customer profile, customer contact number, customer email id, customer request message and comparison between original and expected product price.
User get gmail when admin can change product quote status.
Product Quote Request Edit
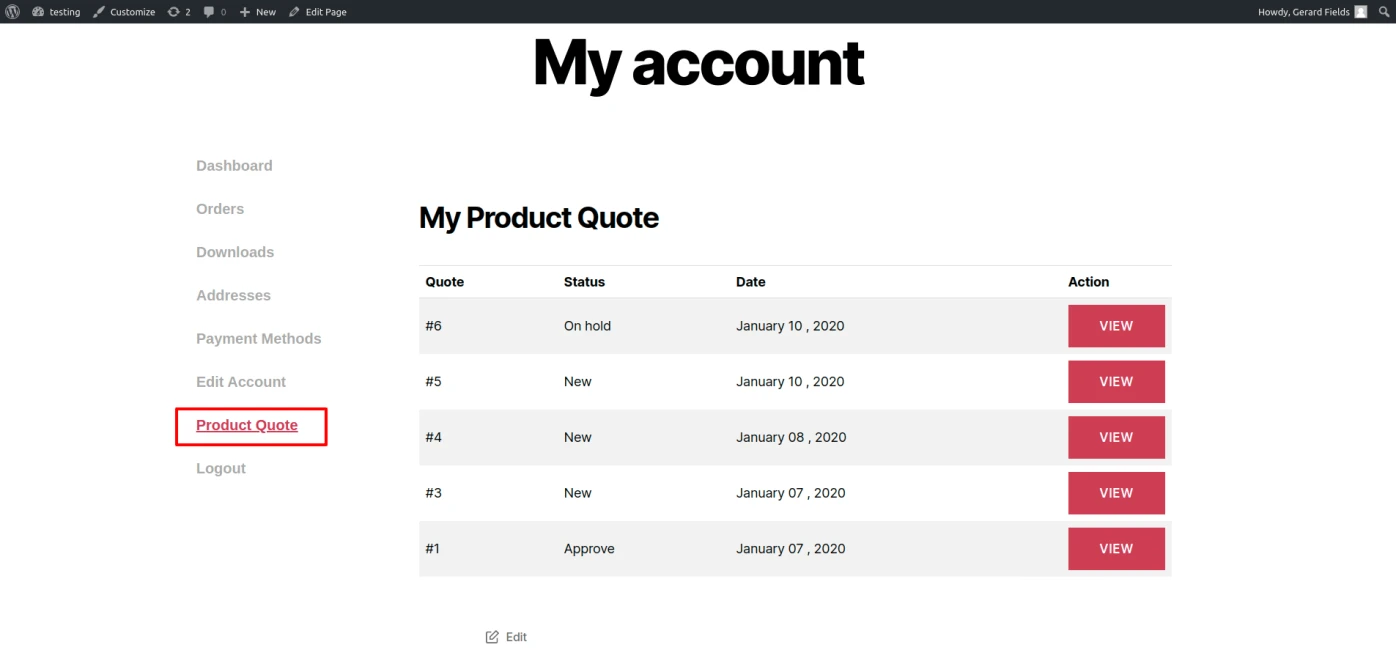
User can see his request quote list in my account area .
Product Quote Data User Side
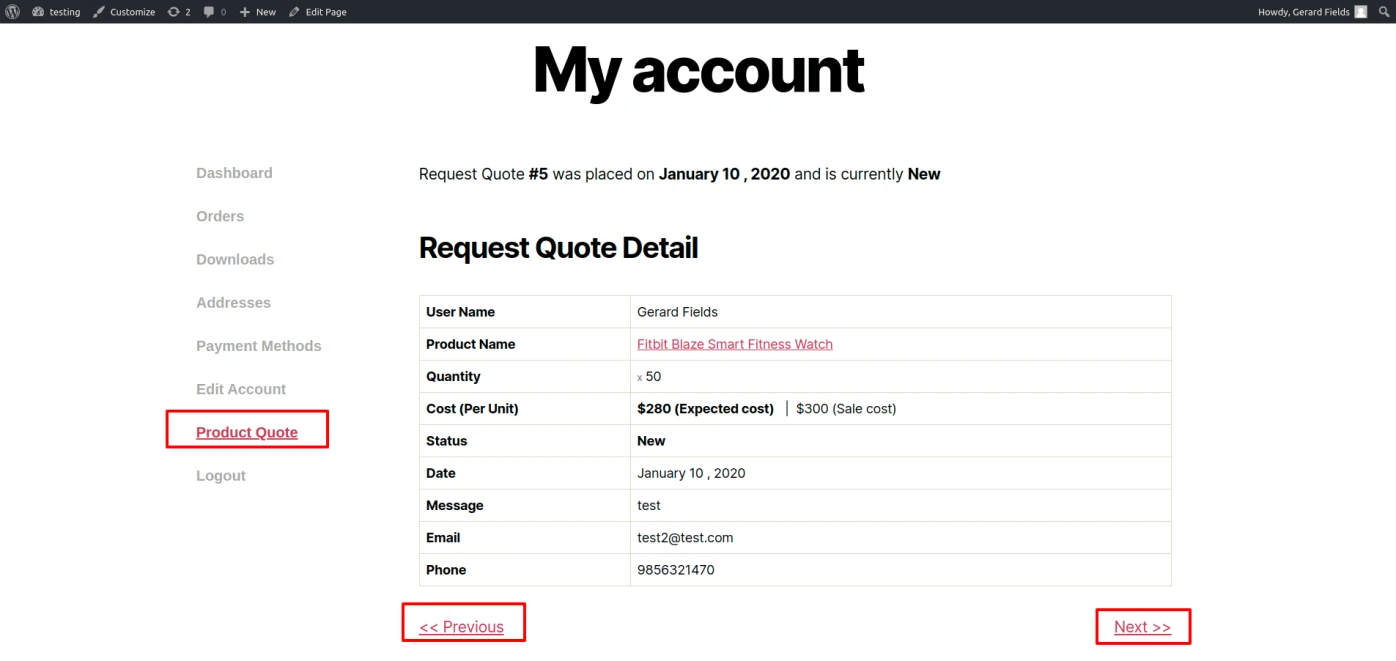
User get all the detail of request quote one by one in product quote view page in my account area.
Product Quote Request Detail User Side
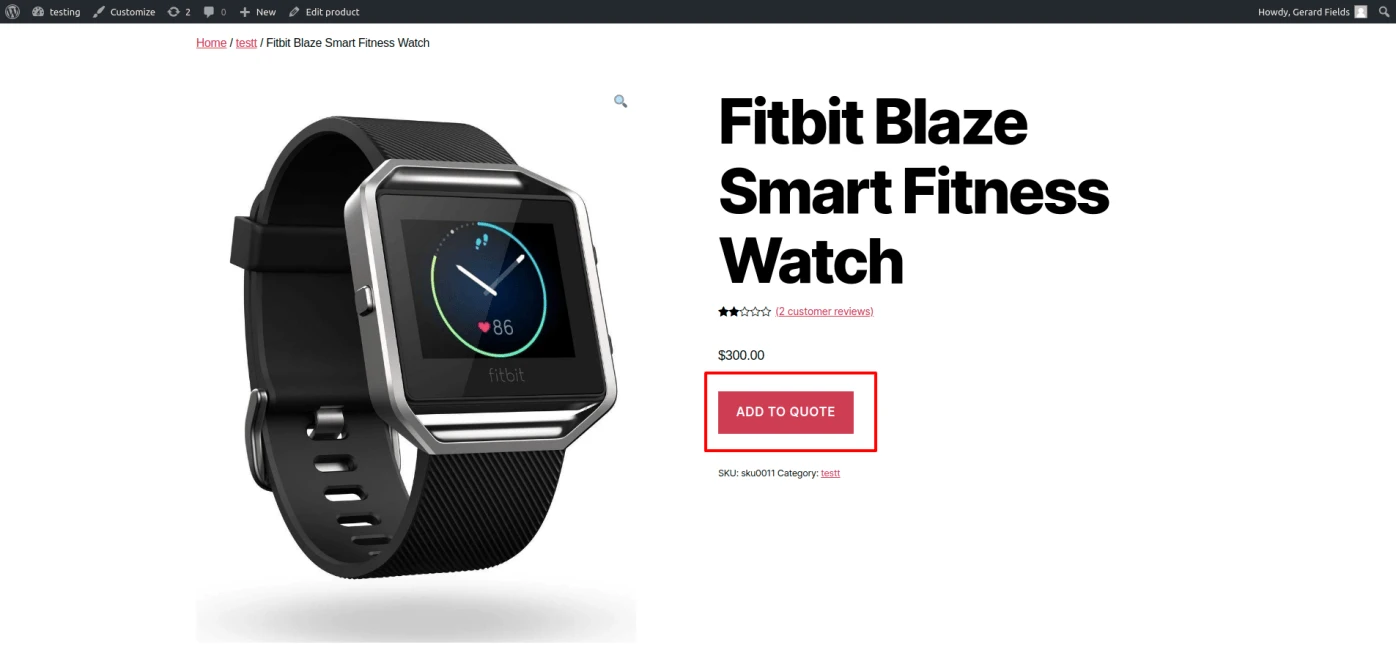
Button of add to quote is display in product page by admin configuration in product tabs.
Product Quote Button in Shop Page
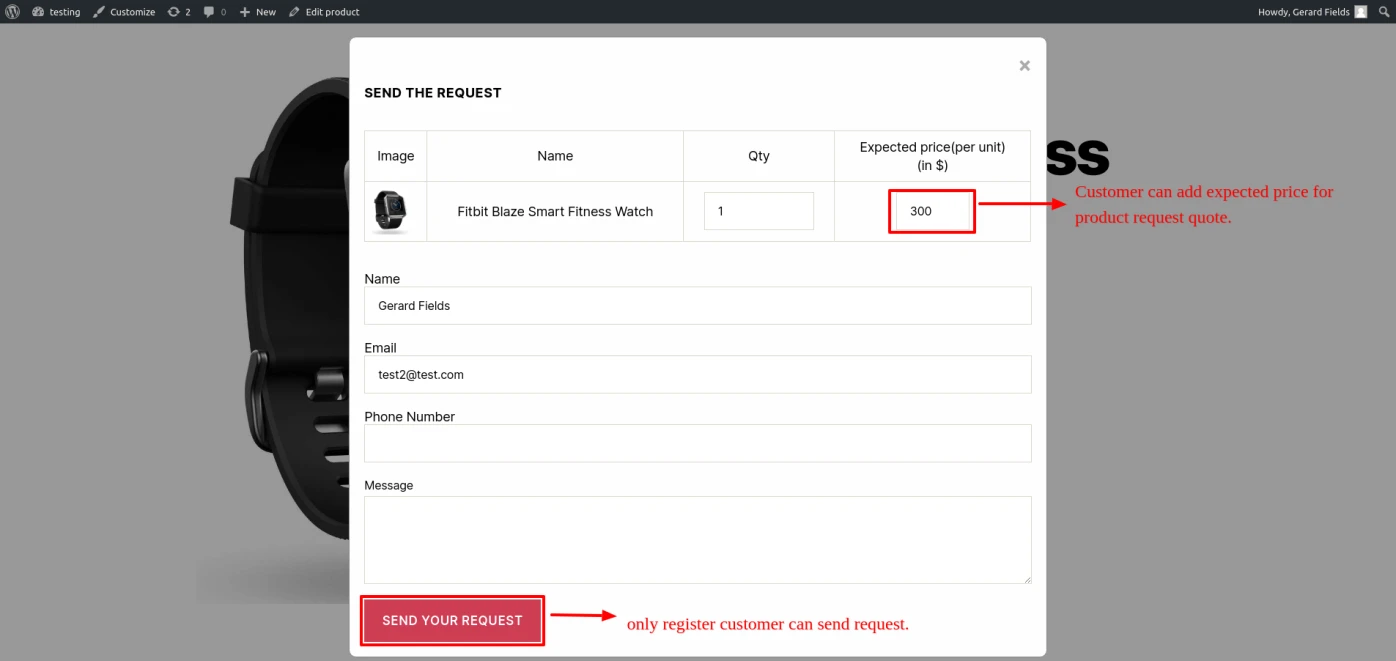
User can click on add to quote button then open this quotation form to user can easily request for product quotation. (Only register user can send the product quote request)
Easily Add products to My Favourites folders using click on popupbar.
You can Edit your favourite folders name and also Easily delete folders.
You can Transfer products One to Another folder Easily.
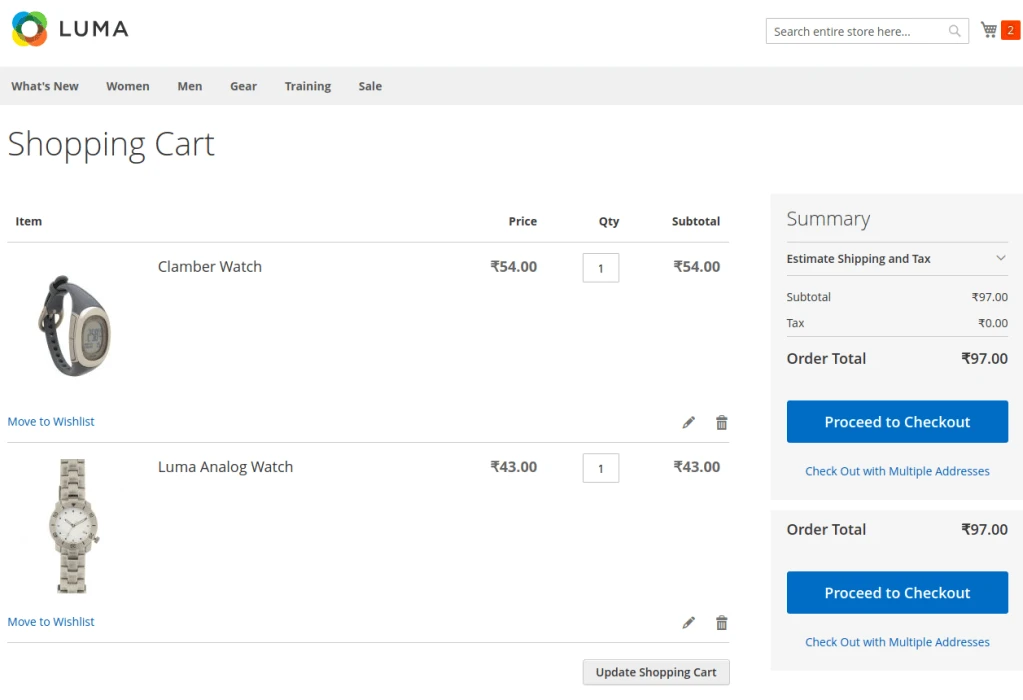
Using multiple select you can add to cart multiple products together and also add to cart perticular product.
Easily enable/disable module from admin panel.
How to Use:-
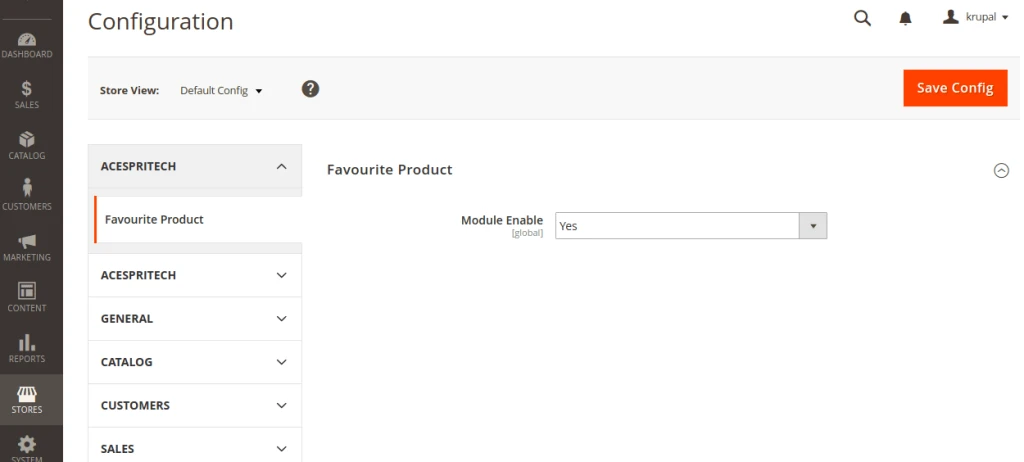
First go to the admin panel STORES – Configuration – Acespritech – Favourite Product tab.and Enable module first and Save Config.
Enable Disable
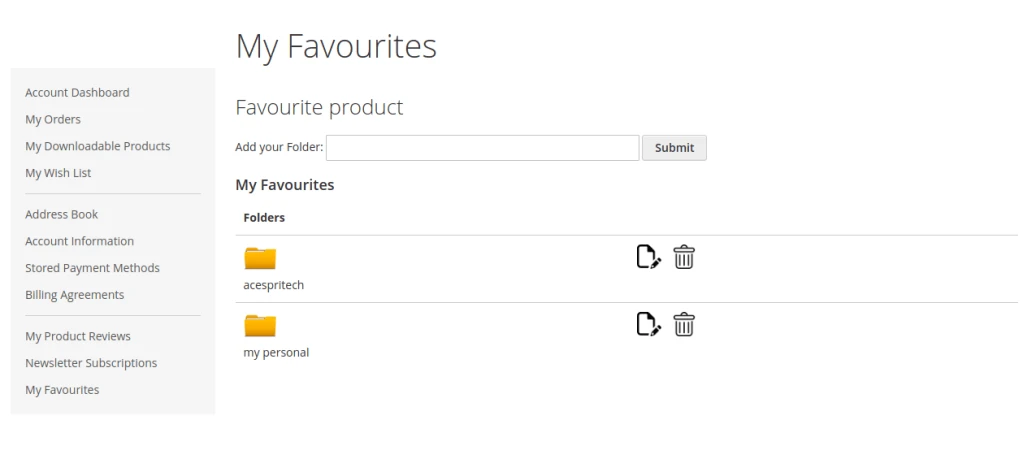
Than go to frontend and Sign in to your account first then go to My Favourites and add your folder .
My Favourites
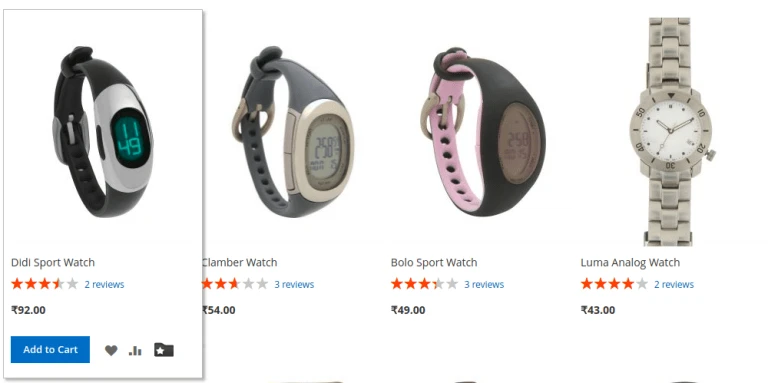
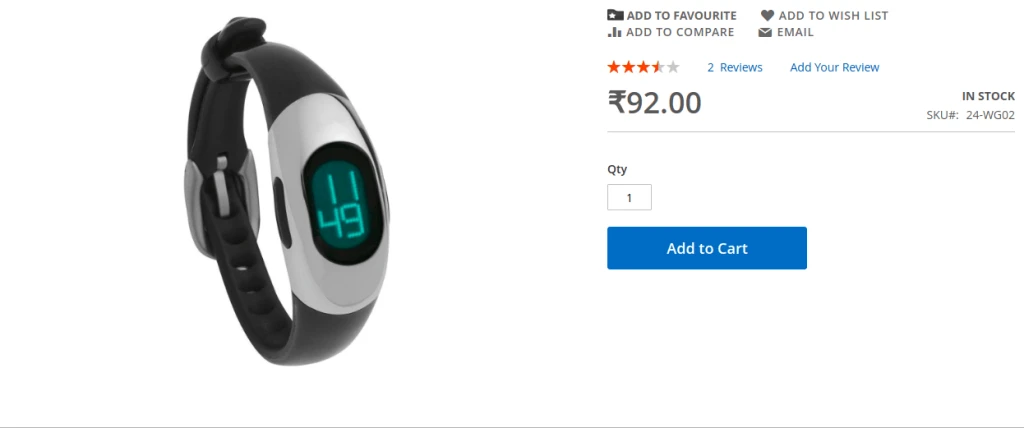
Go to product list page or product details page and add your Favourite product using click on icon or ADD TO FAVOURITE.
Category IconListpage Icon
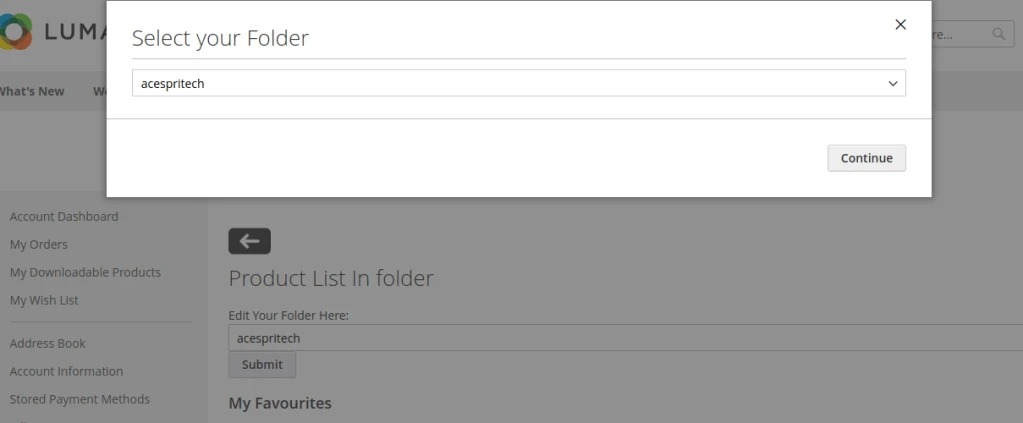
Whenever you click on ADD TO FAVOURITE the popup will be coming on screen And you can choose your favourite folder and add product to your favourite folder.
Move to Popup
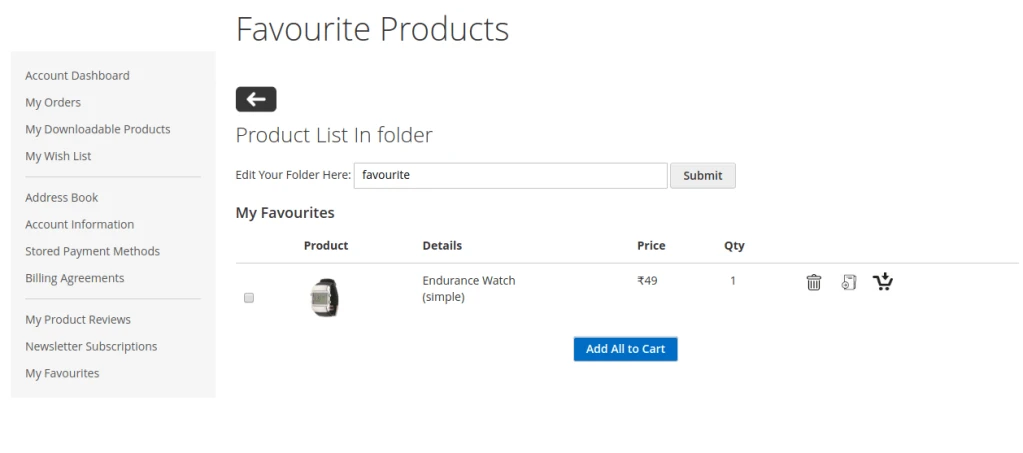
And In last you can go to your favourite folder edit page and you should delete your folder and product,edit your folder name,transfer your product one folder to another folder, add to cart perticular product,add to cart multiple product using multiple checkbox selection .
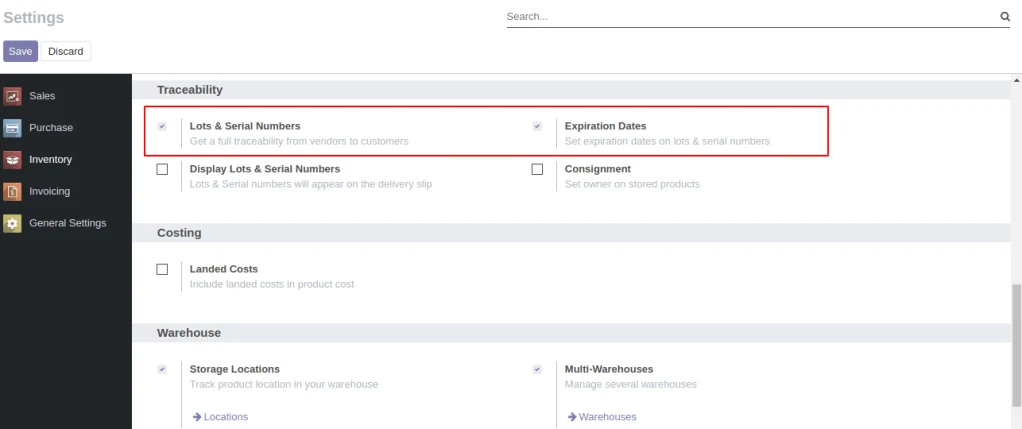
User need to enable Lots & Serial Numbers and Expiration Dates from Inventory/Settings/Traceability.
Configuration
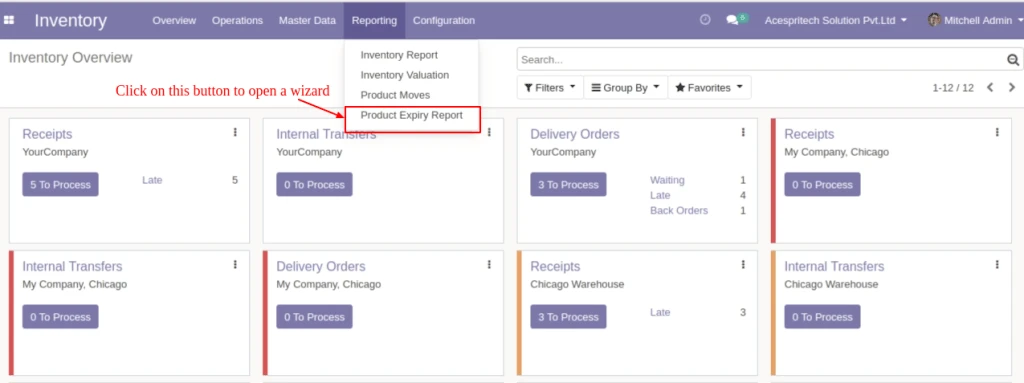
After selecting select the “Reporting” tab and then select the “Product Expiry Report” menu to open a wizard.
Product Expiry Report Wizard
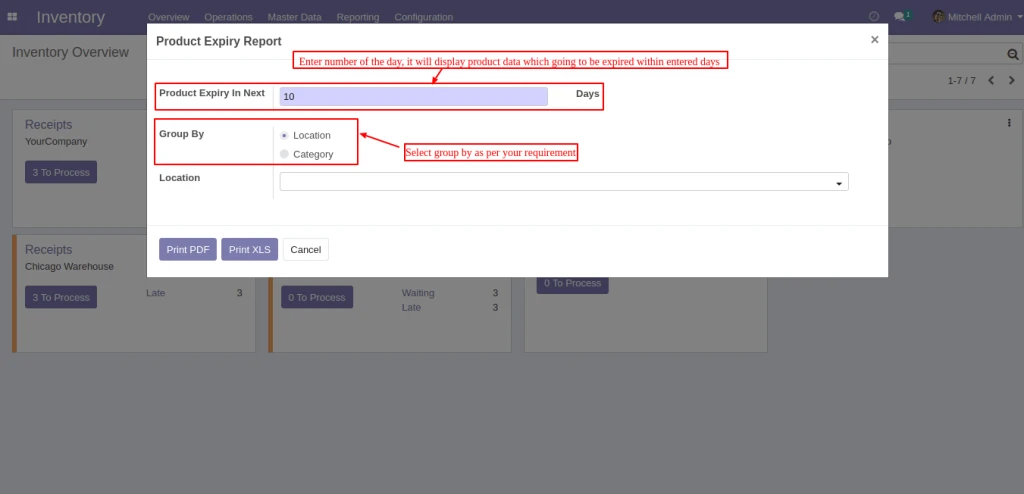
Enter “Generate Report For(Days)” for display products which are being expiring expiring during entered days.And select “Group By” option by which you want to do group by of data.You can group by(Location) or group by(Category)
Product Expiry Days
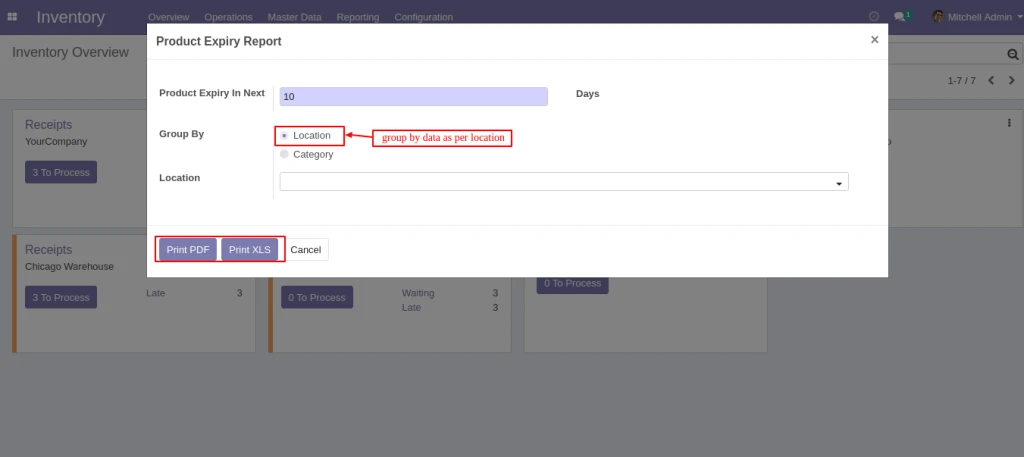
If you want to display data of specified location then select locations in “Location” field.If you want to display products of all locations which products are available then select nothing in “Category”. To print report click on “Print PDF” or “Print Excel” button.
Group by Location
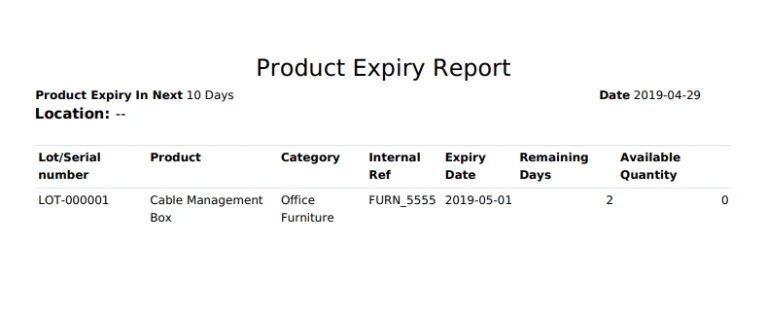
Display products which are group by “Location”.
Product Expiry Report
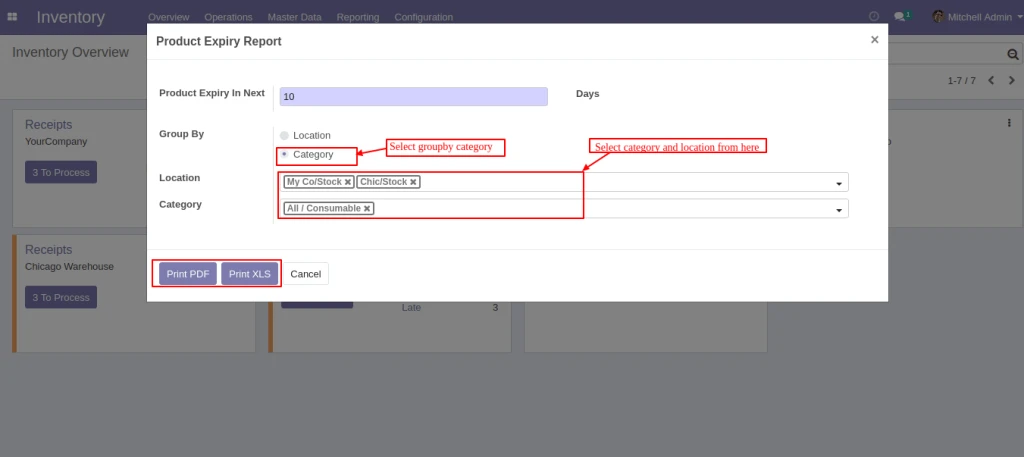
If you want to display data of specified category then select group by(Category) option and select categories in “Category” field.If you want to display products of all categories which products are available then select nothing in “Category”. To print report click on “Print PDF” or “Print Excel” button.
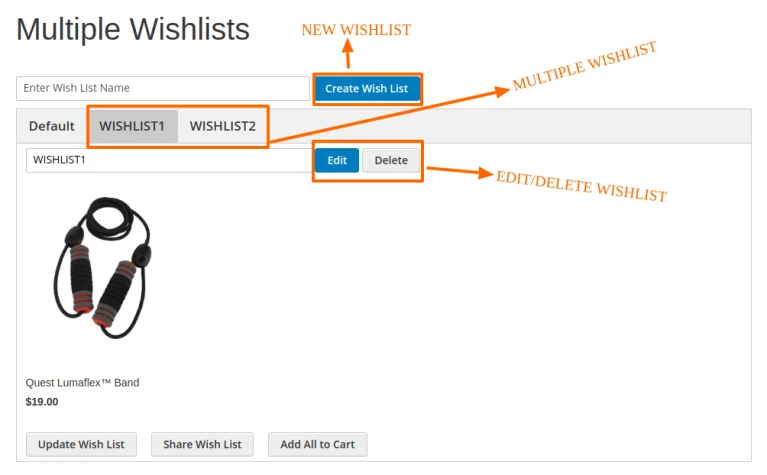
Create unlimited wishlist for easier control and tracking
Add product to wishlist via convenient popup
Flexibly manage wishlist with more functions(Create New Wishlist,
Copy, Move, Delete).
How to Use
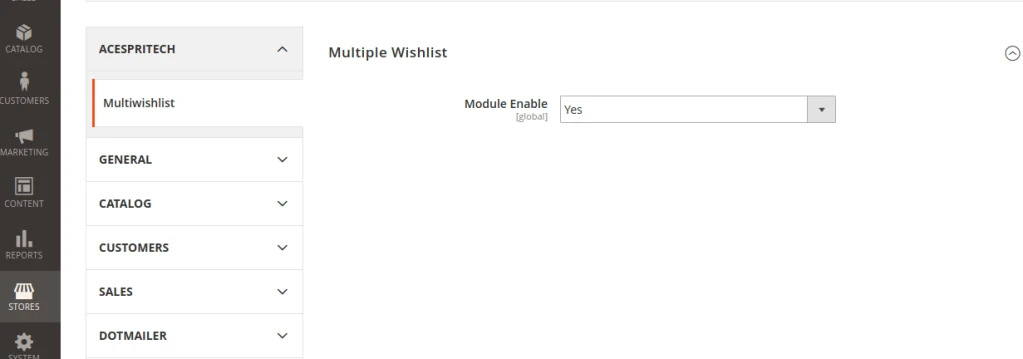
First go to the admin panel STORES –>Configuration –>ACESPRITECH–>Multiwishlist tab.and Enable module first and Save Config.
Configuration
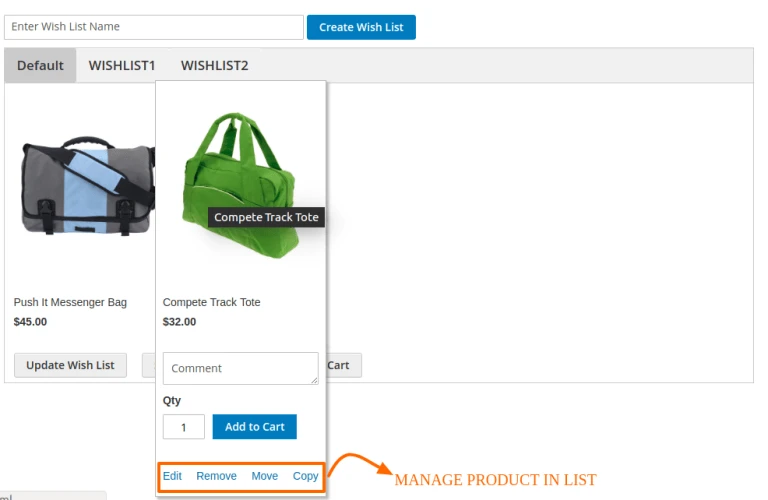
Go to Frontend and login first then click on “Multi Wishlist” Link , its display Default(My Wishlist)folder.
– Click on create wishlist button and adding multiple wishlist folder as u like.
– Also you Manage product in list like Remove,Move,Copy,Edit.
Multiple Wishlist Product Display
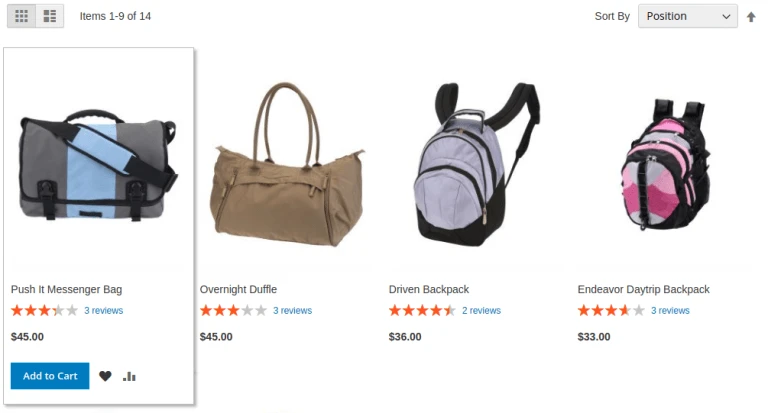
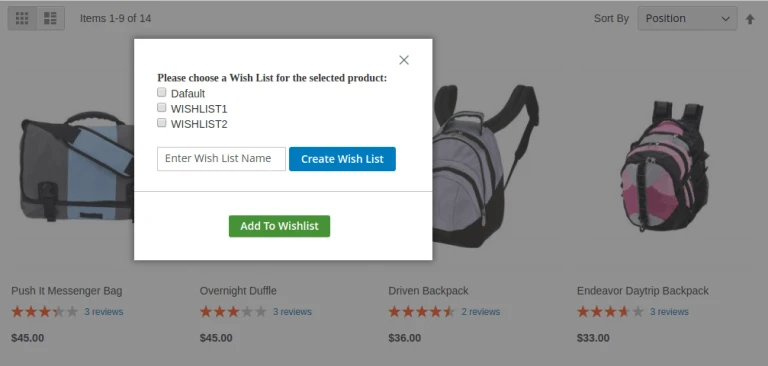
In product list page you can add product to your specific wishlist folder using click of add to wishlist icon.
Wishlist Button Wishlist Popupbar
Also you can Edit / Delete Your wishlist folder easily.and also use can use our functiality of Add All To Cart and Update Wish List For adding Comment on Specific product.
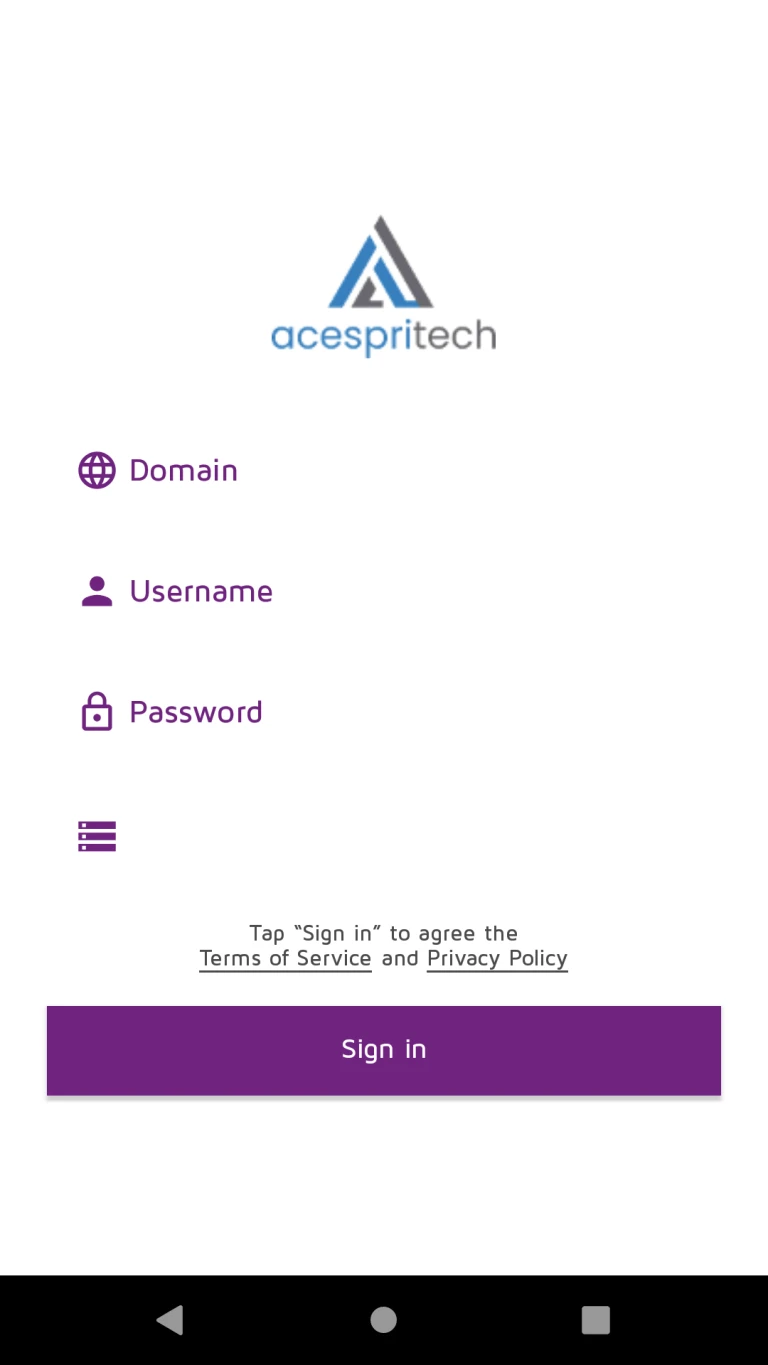
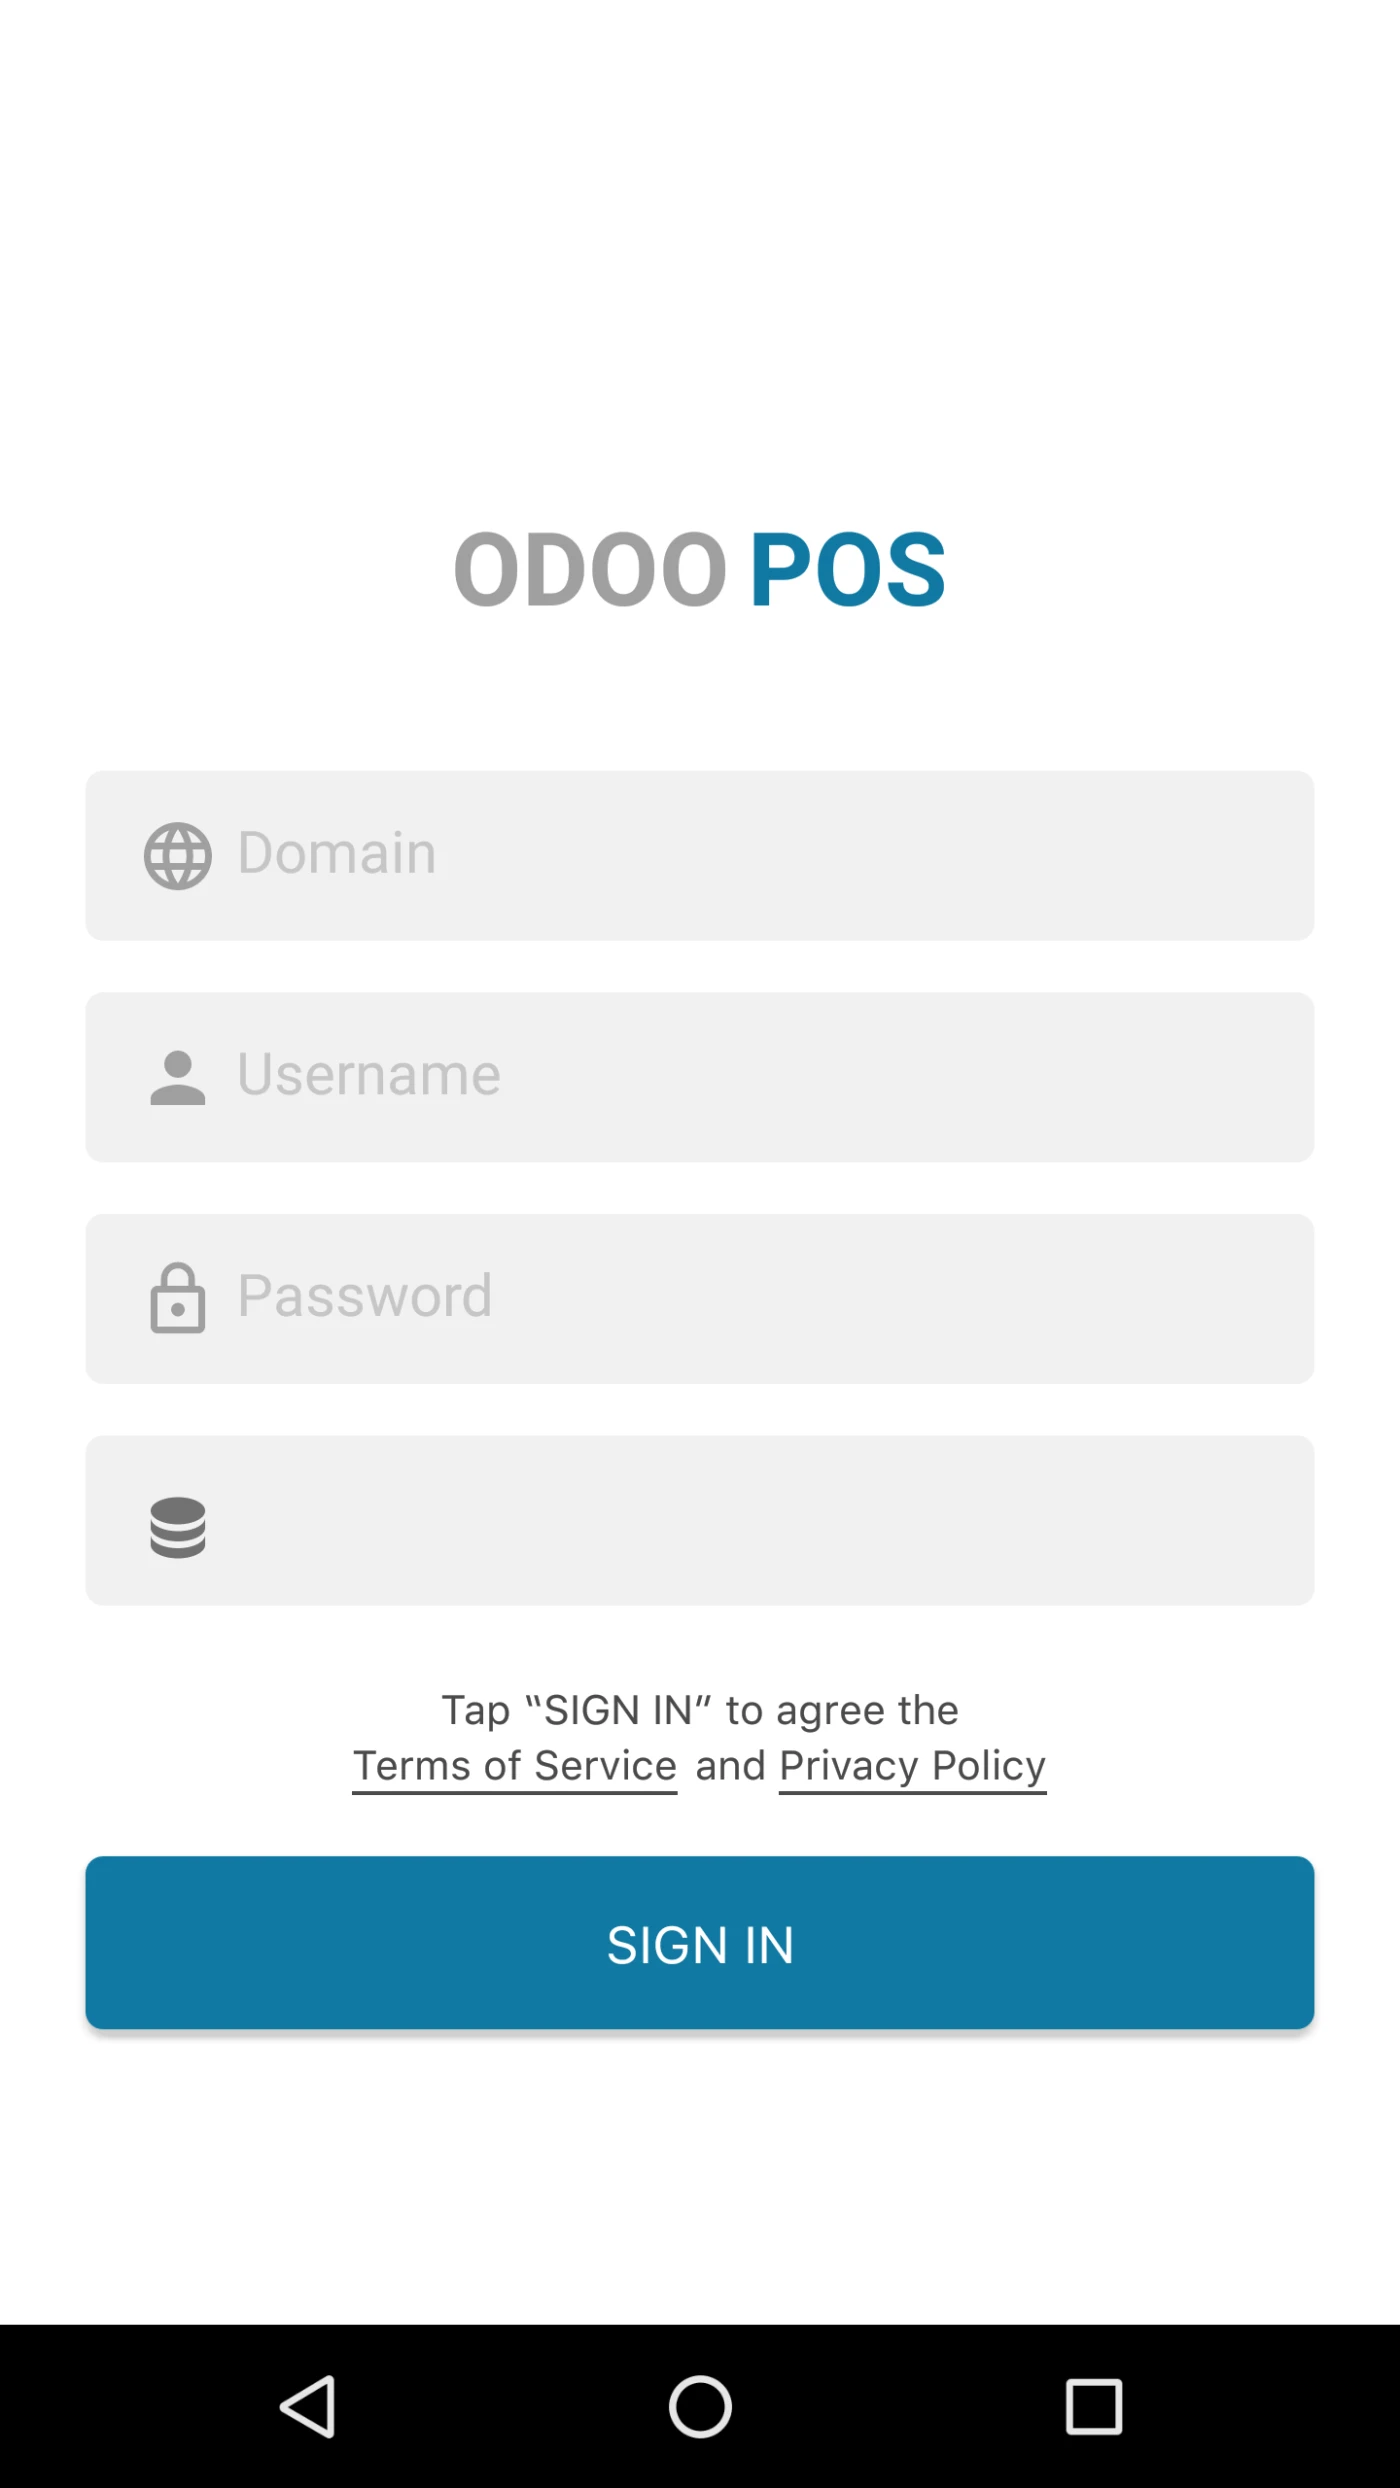
To Login in APP, Odoo v12 instance should be running.
User can Login in APP with his Odoo URL, Username, Password and Database.
Login Page
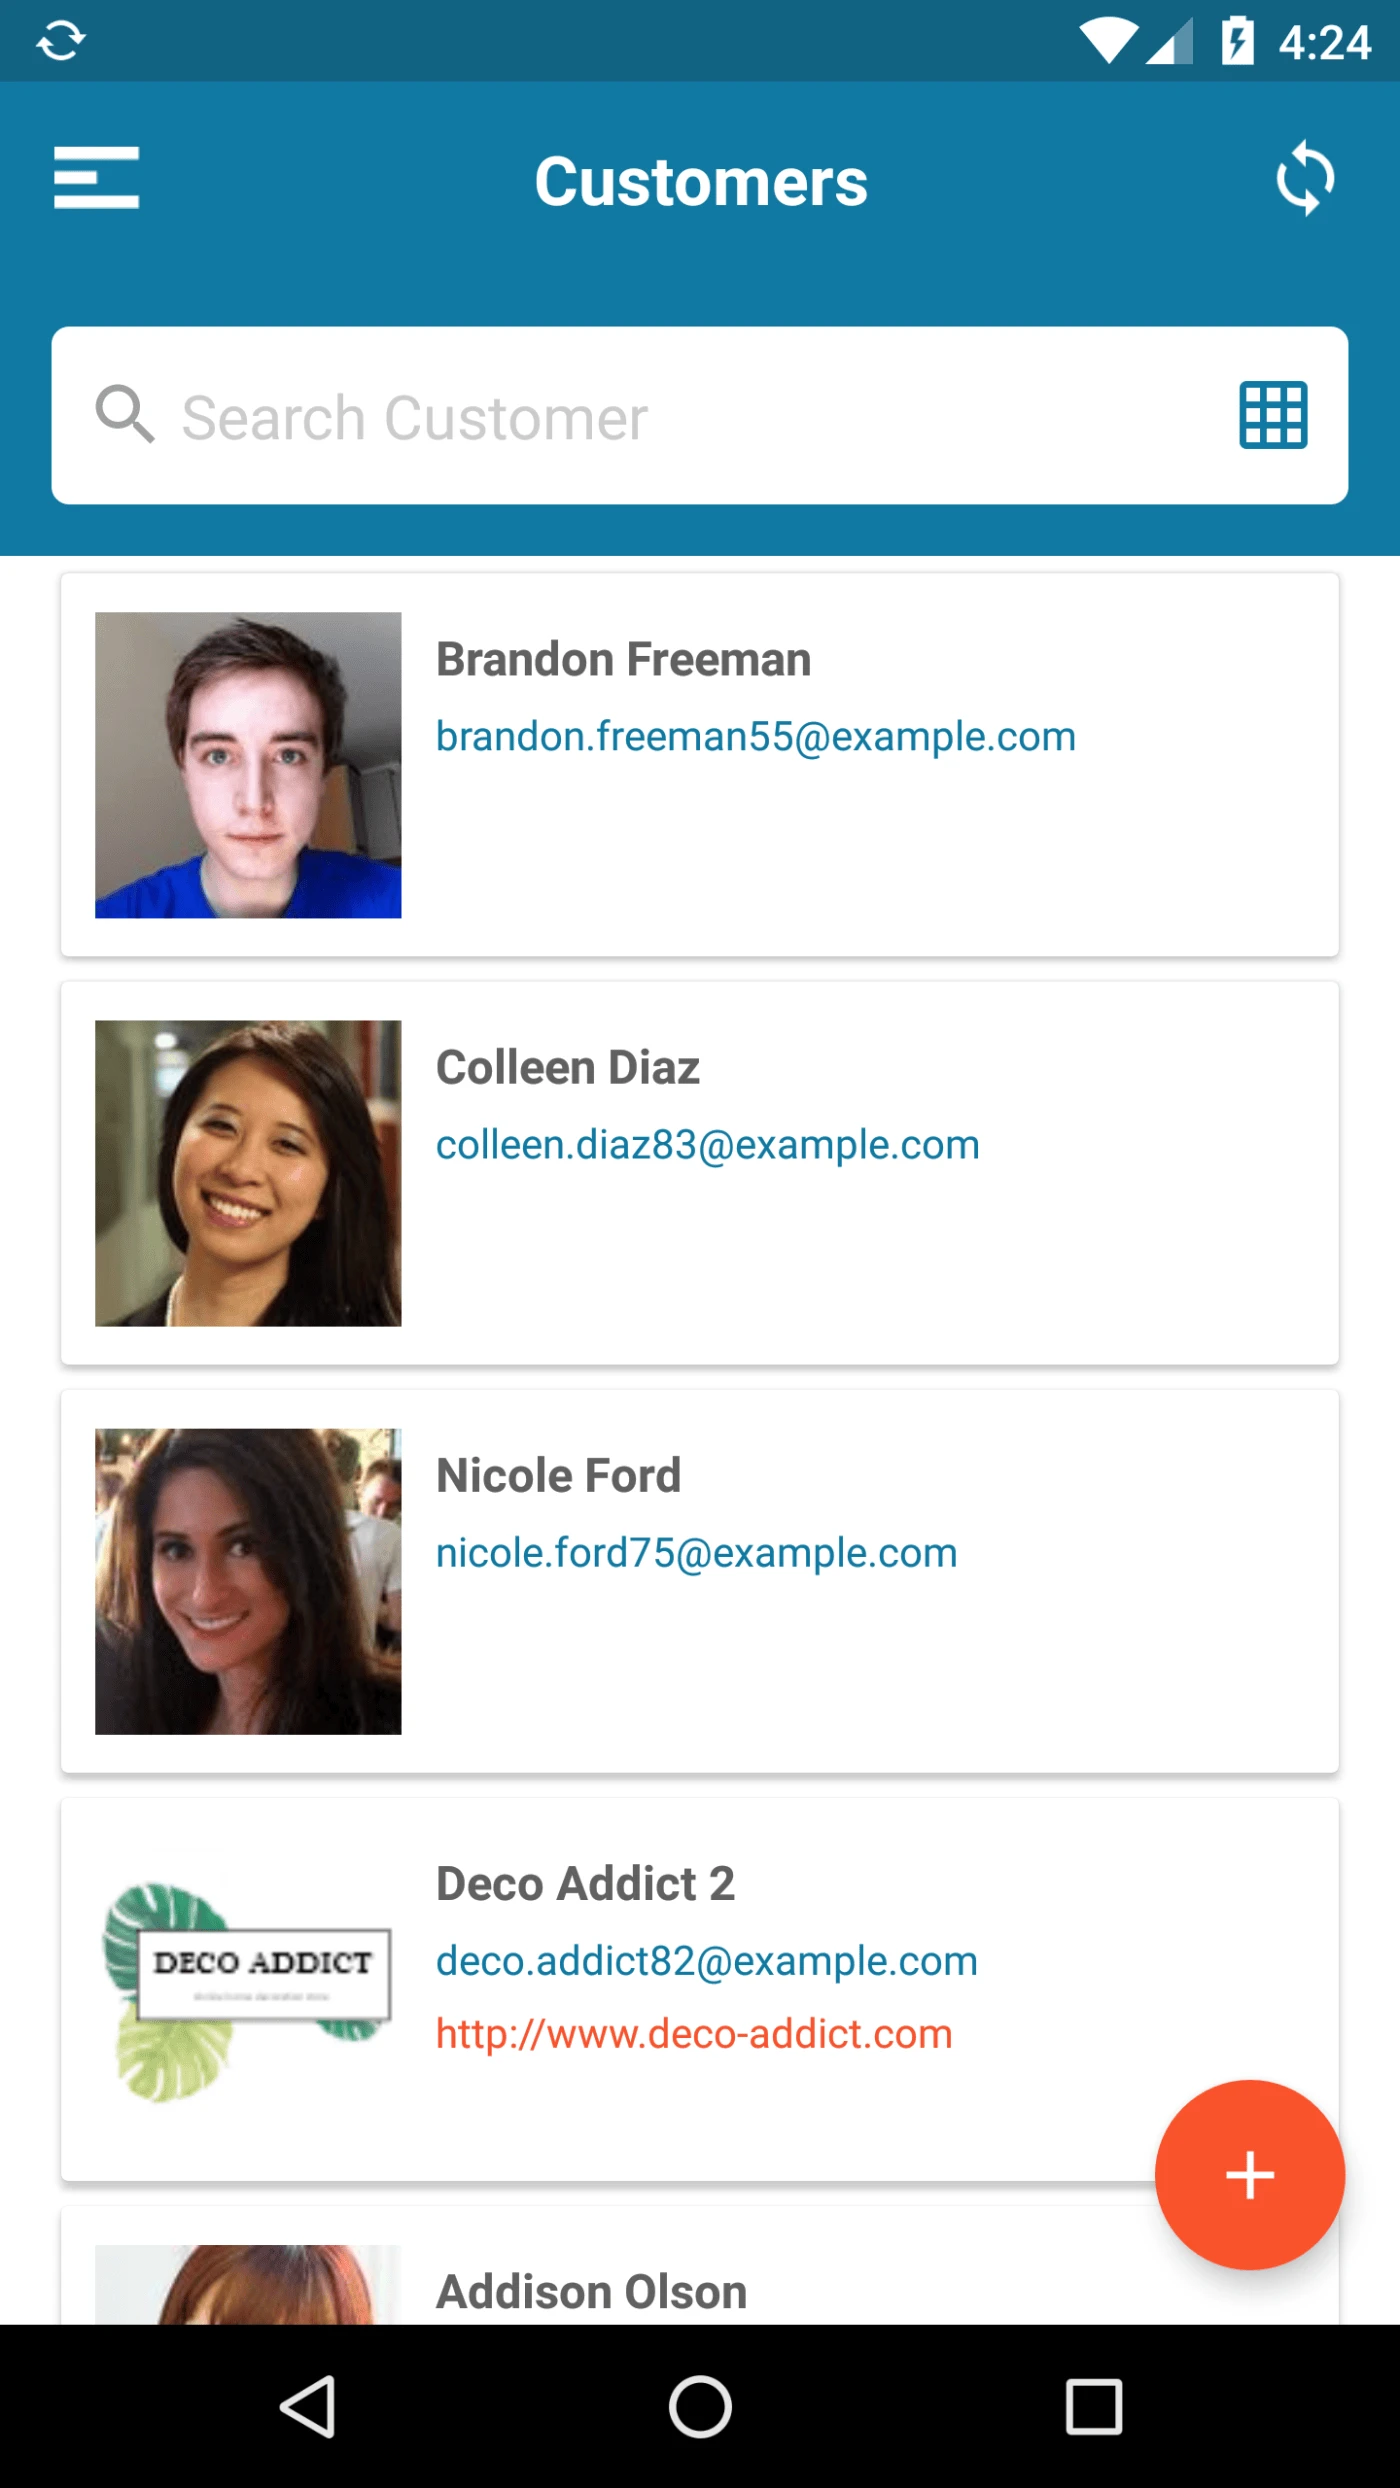
User can view List of Customers here.
User can switch Between Kanban and List view.
User can Create new Customer from Here.
Customers Page
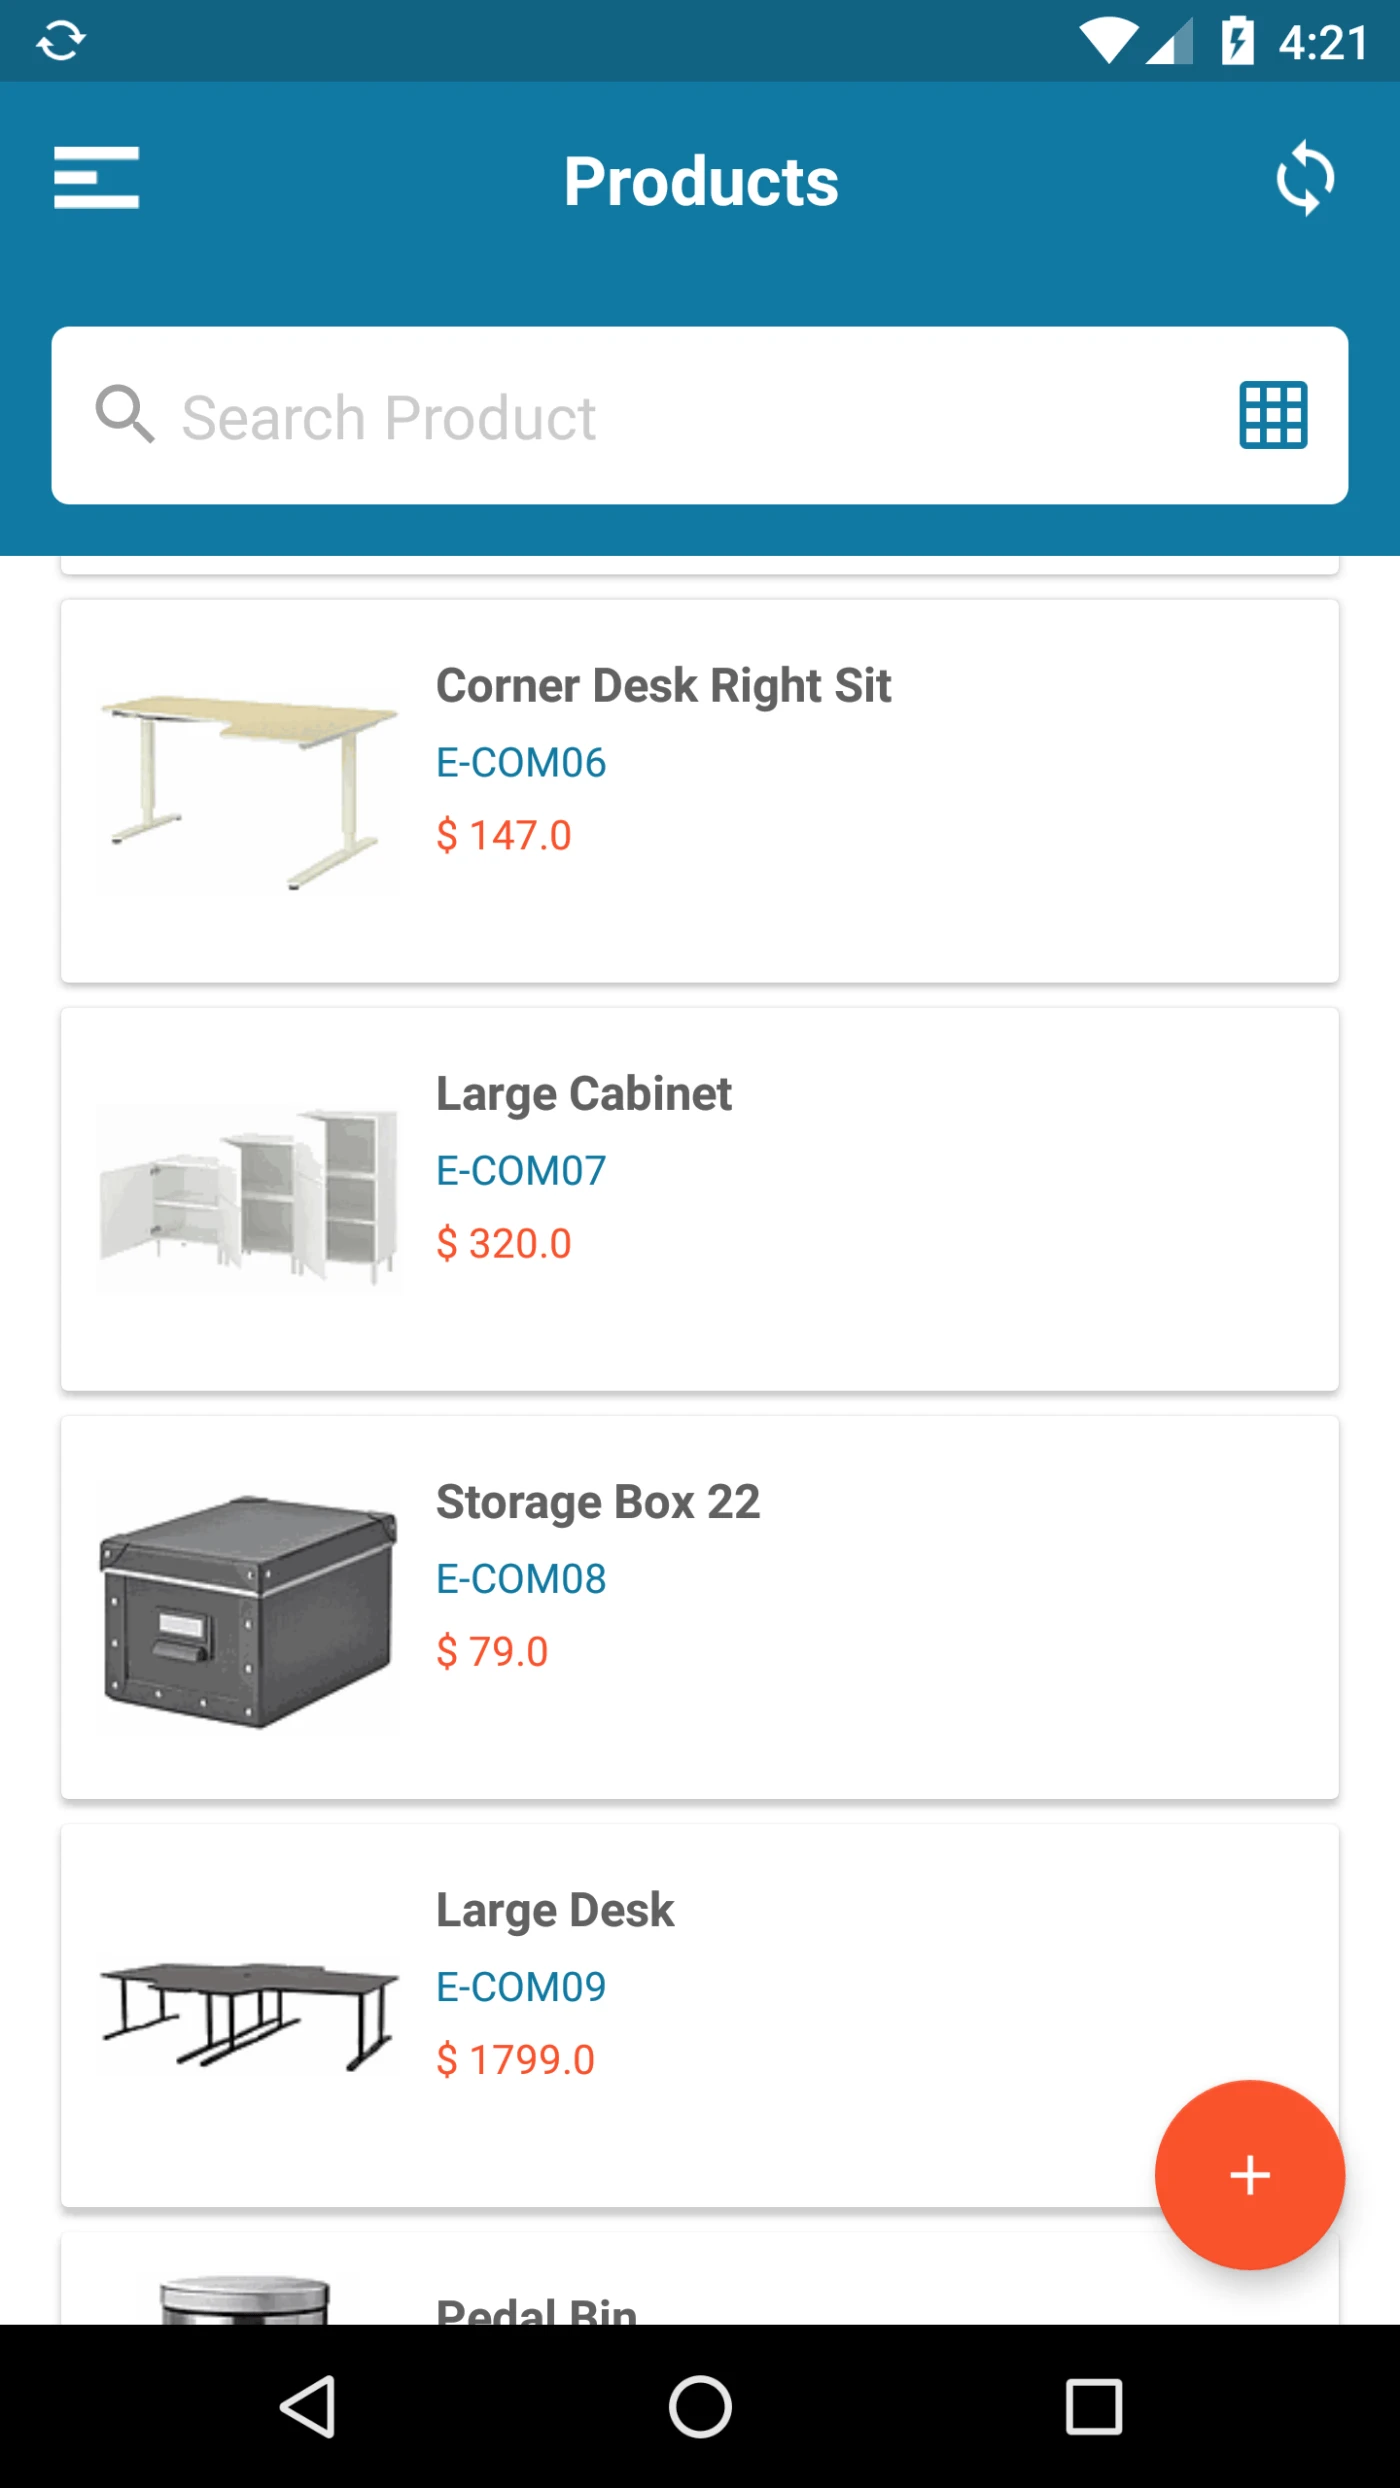
User can view List of Products here.
User can switch Between Kanban and List view.
User can Create new Products from Here.
Products
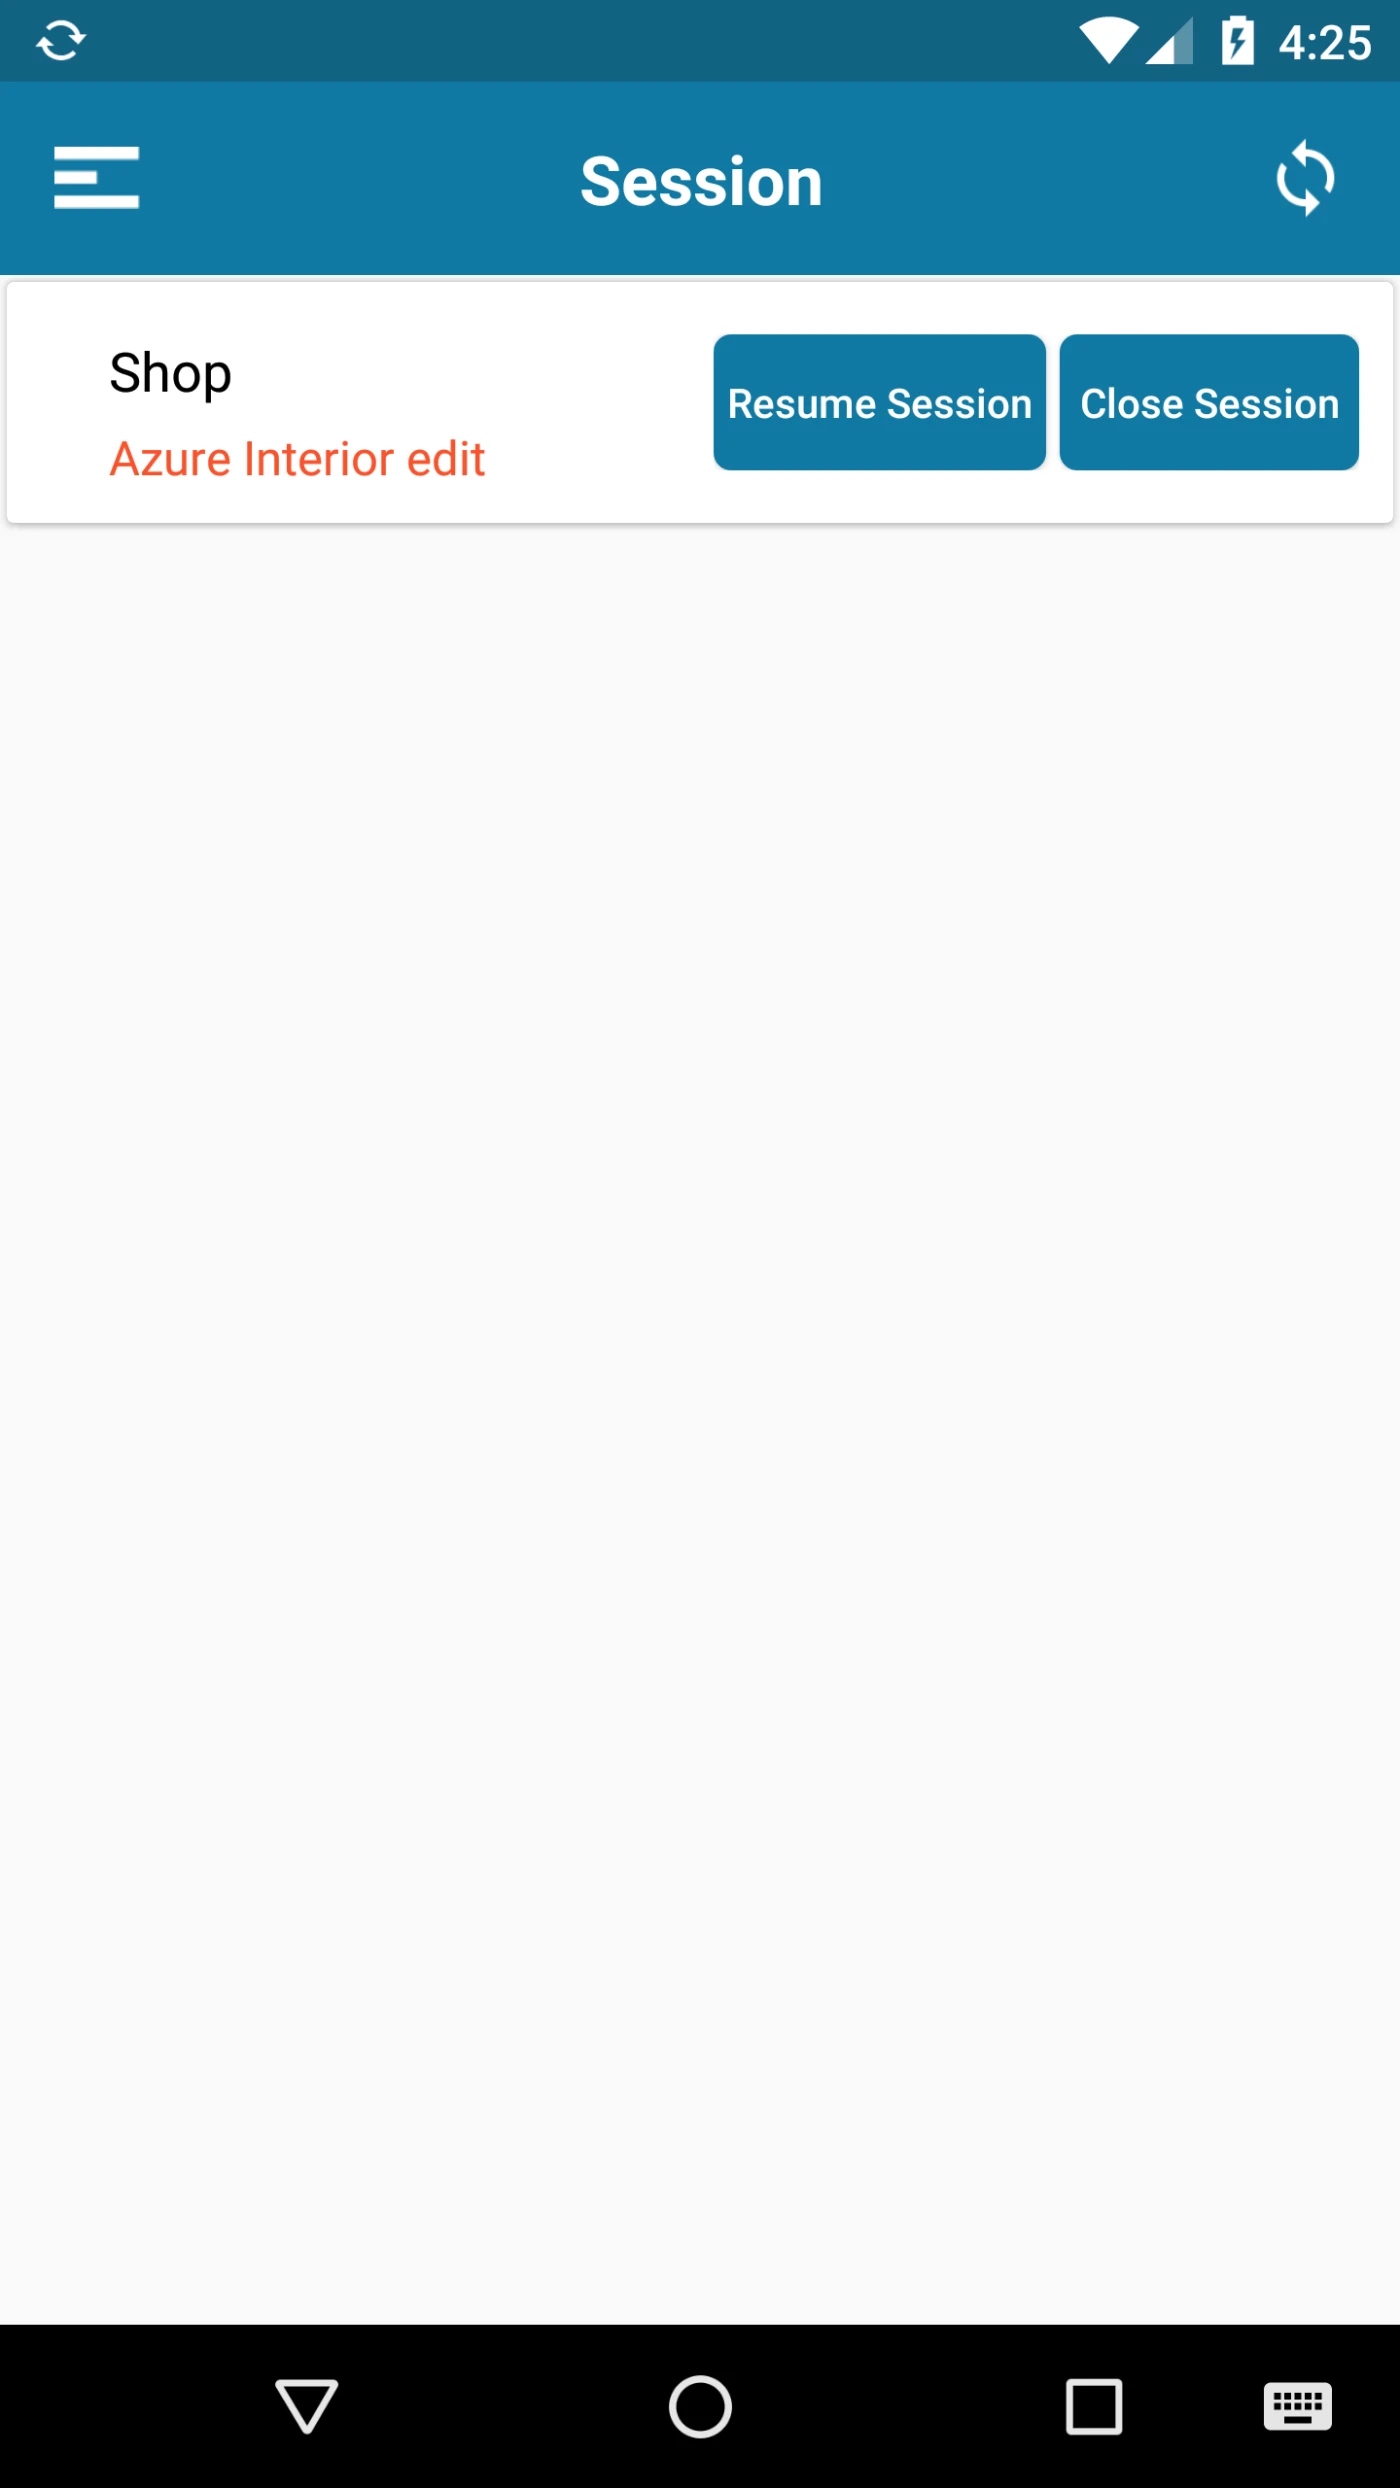
All POS Session will be Loaded Here. User can create, Open, Resume and Close the Session.
While Opening Session User can Enter Opening Balance.
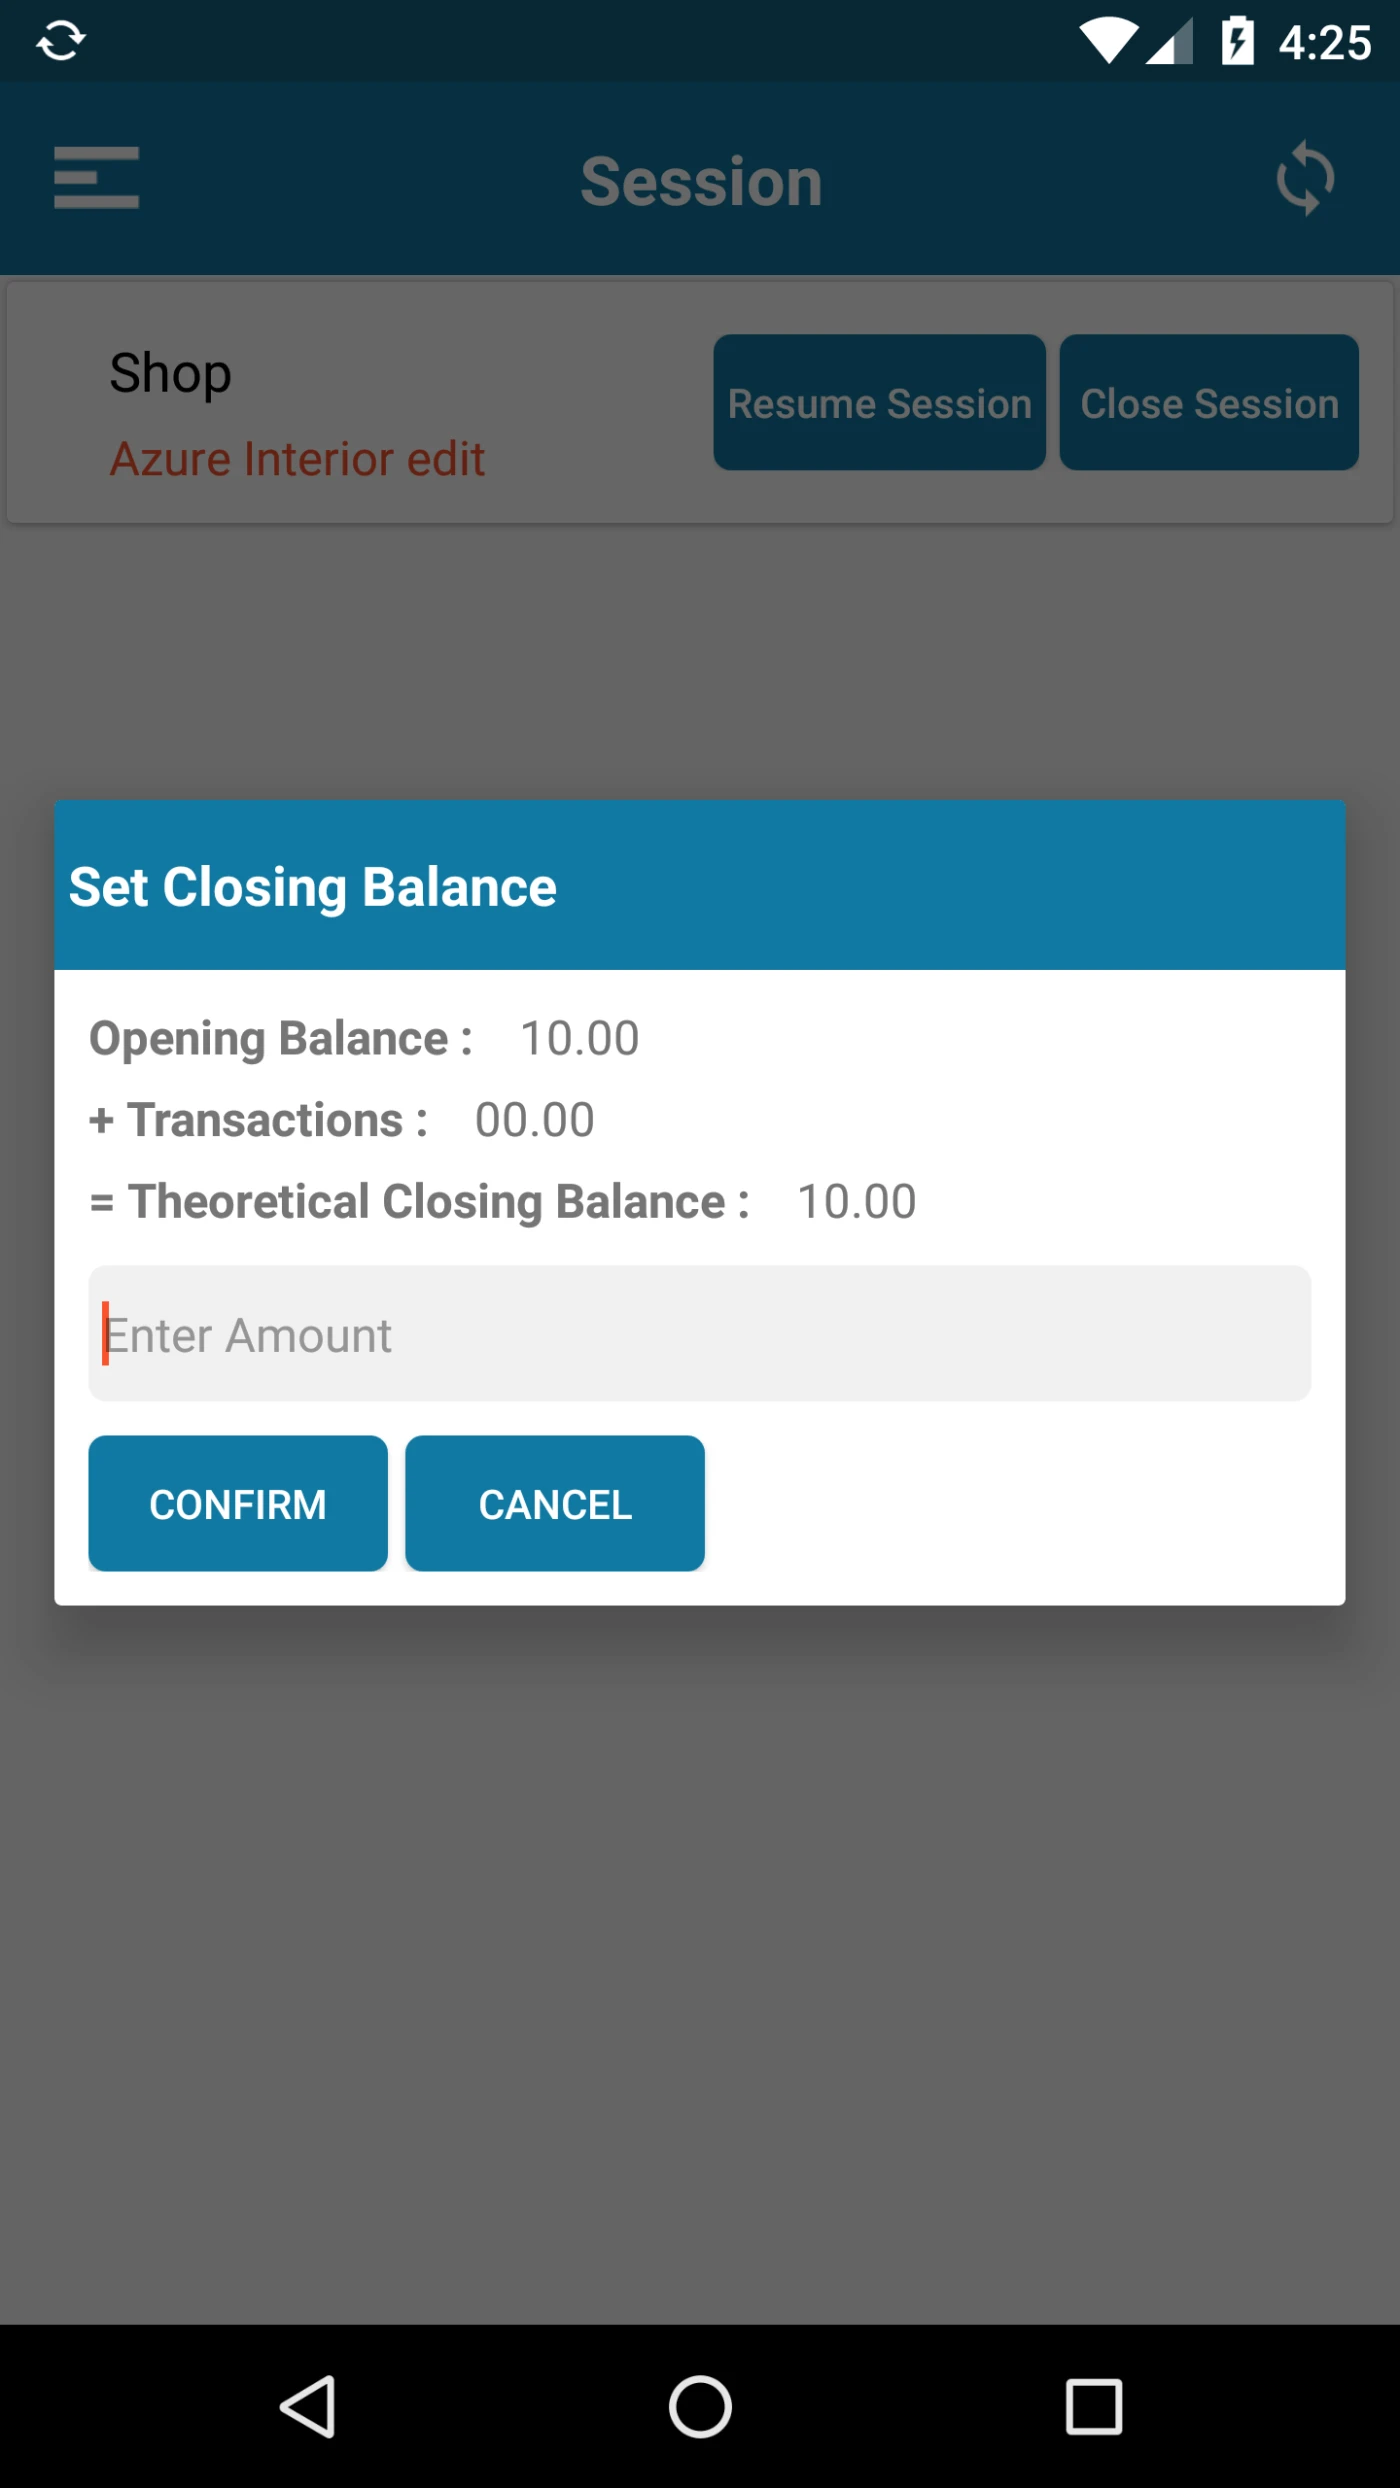
While Closing Session User can Enter Session Balance.
User can view Balance details as well while Closing the Session.
Closing Balance
Session
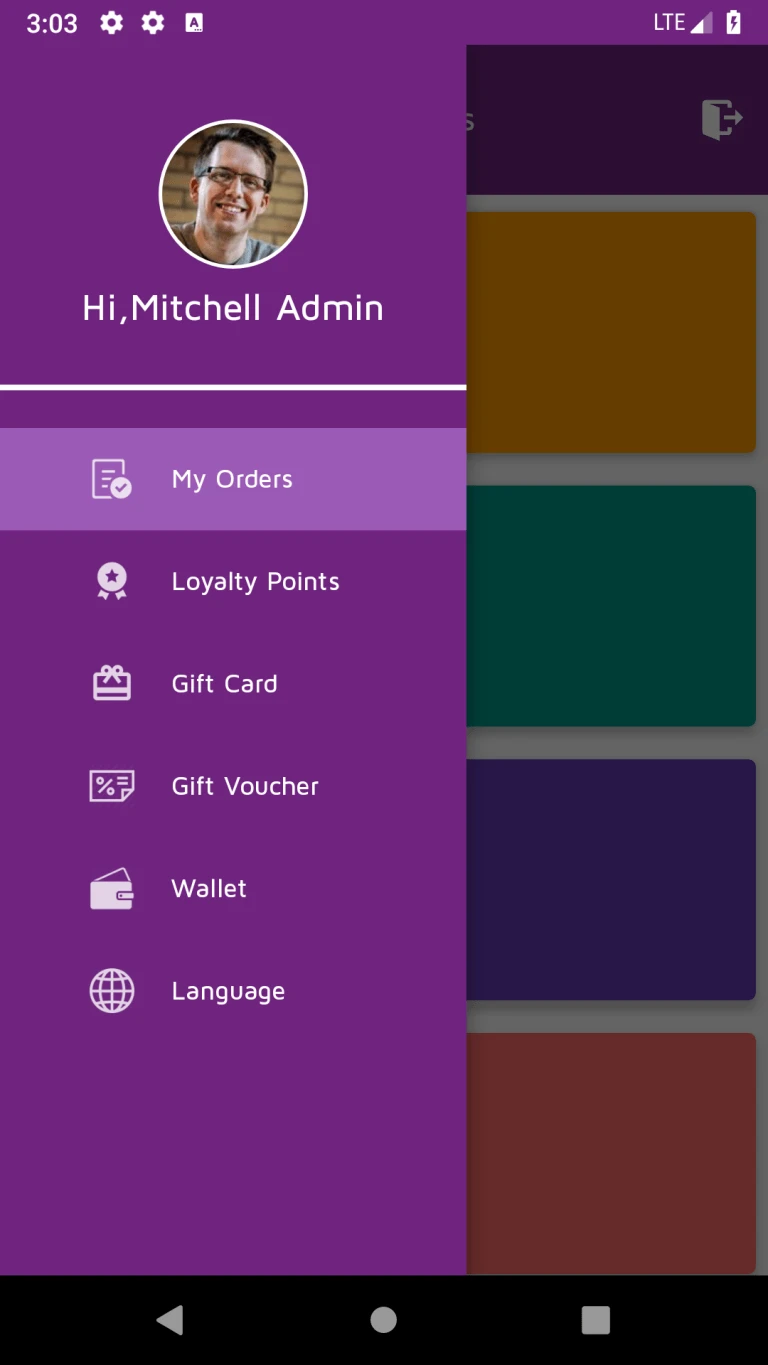
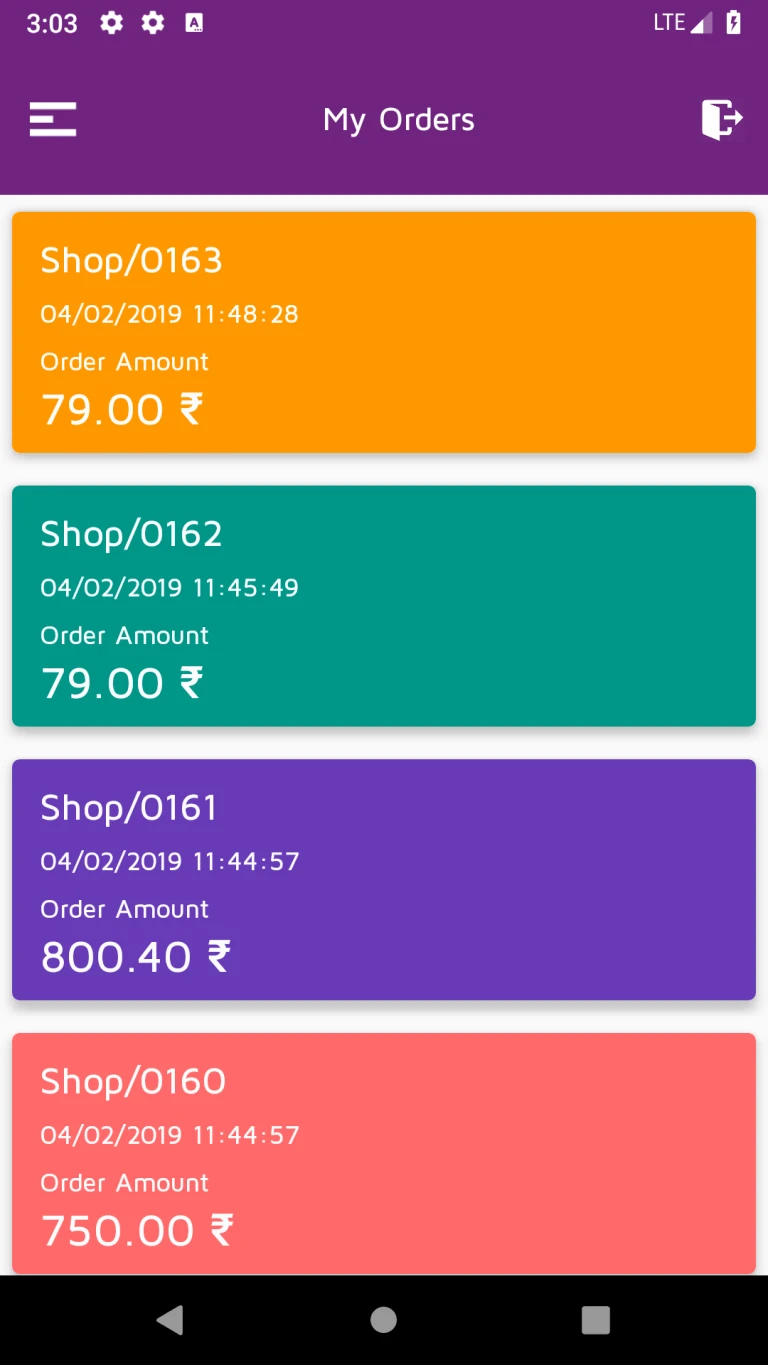
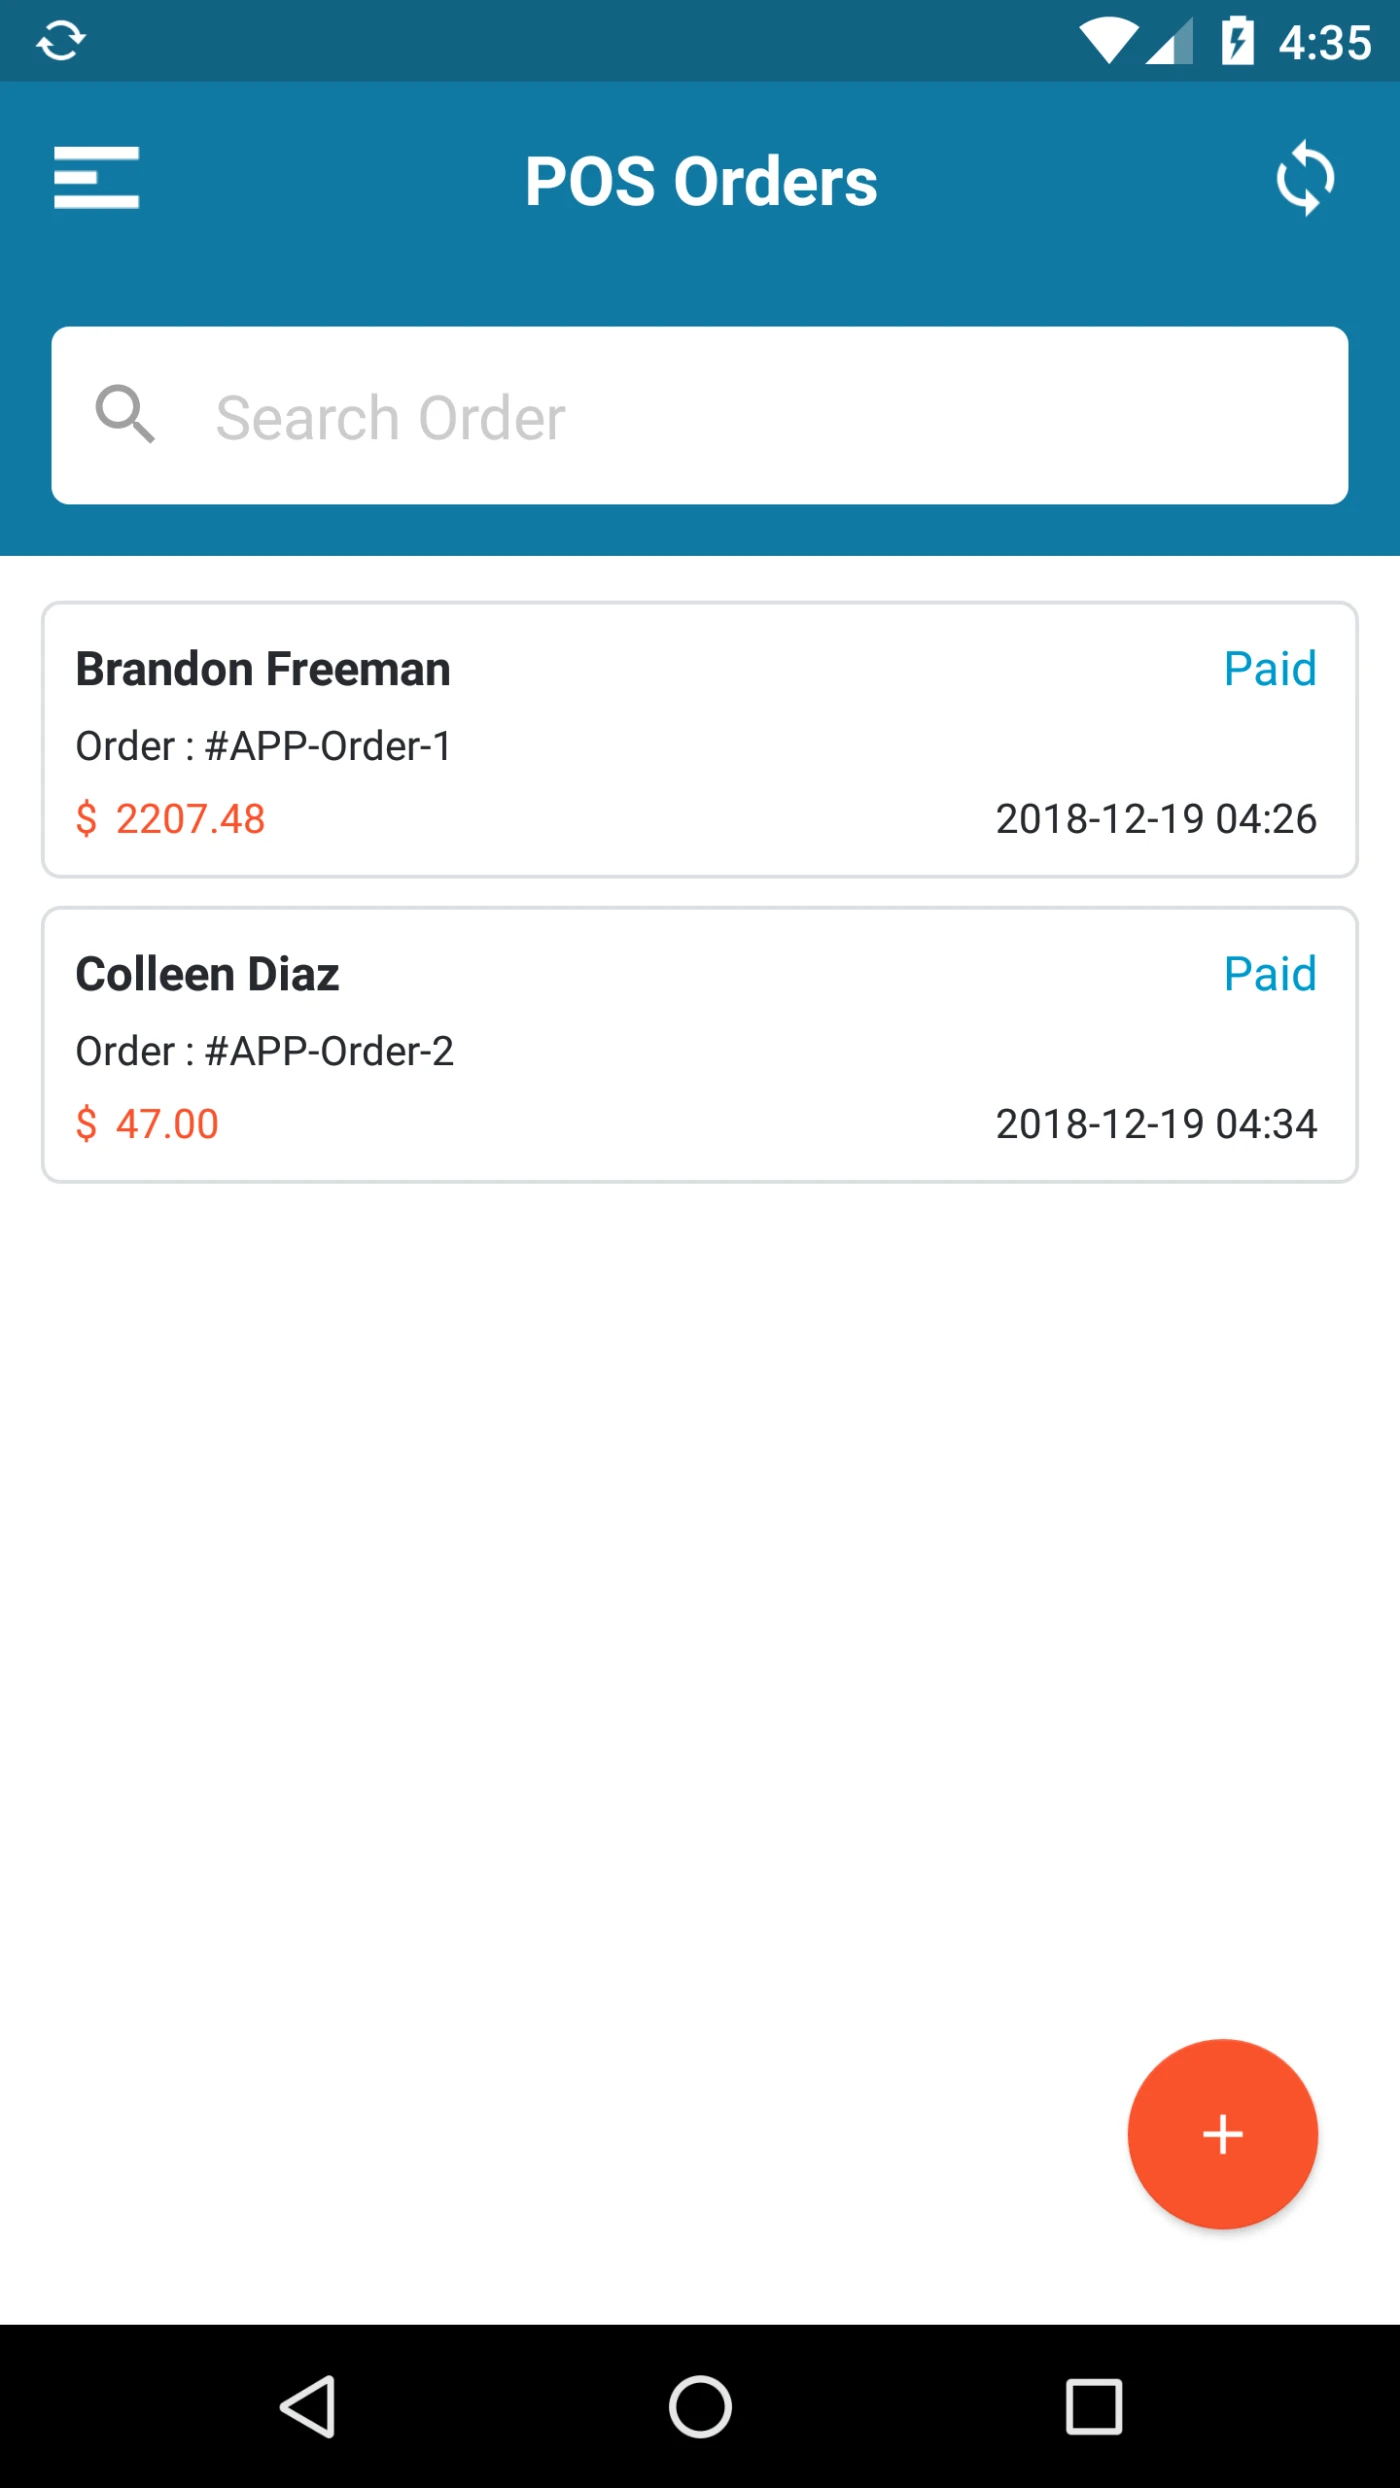
Here User can view orders created by him.
POS Orders
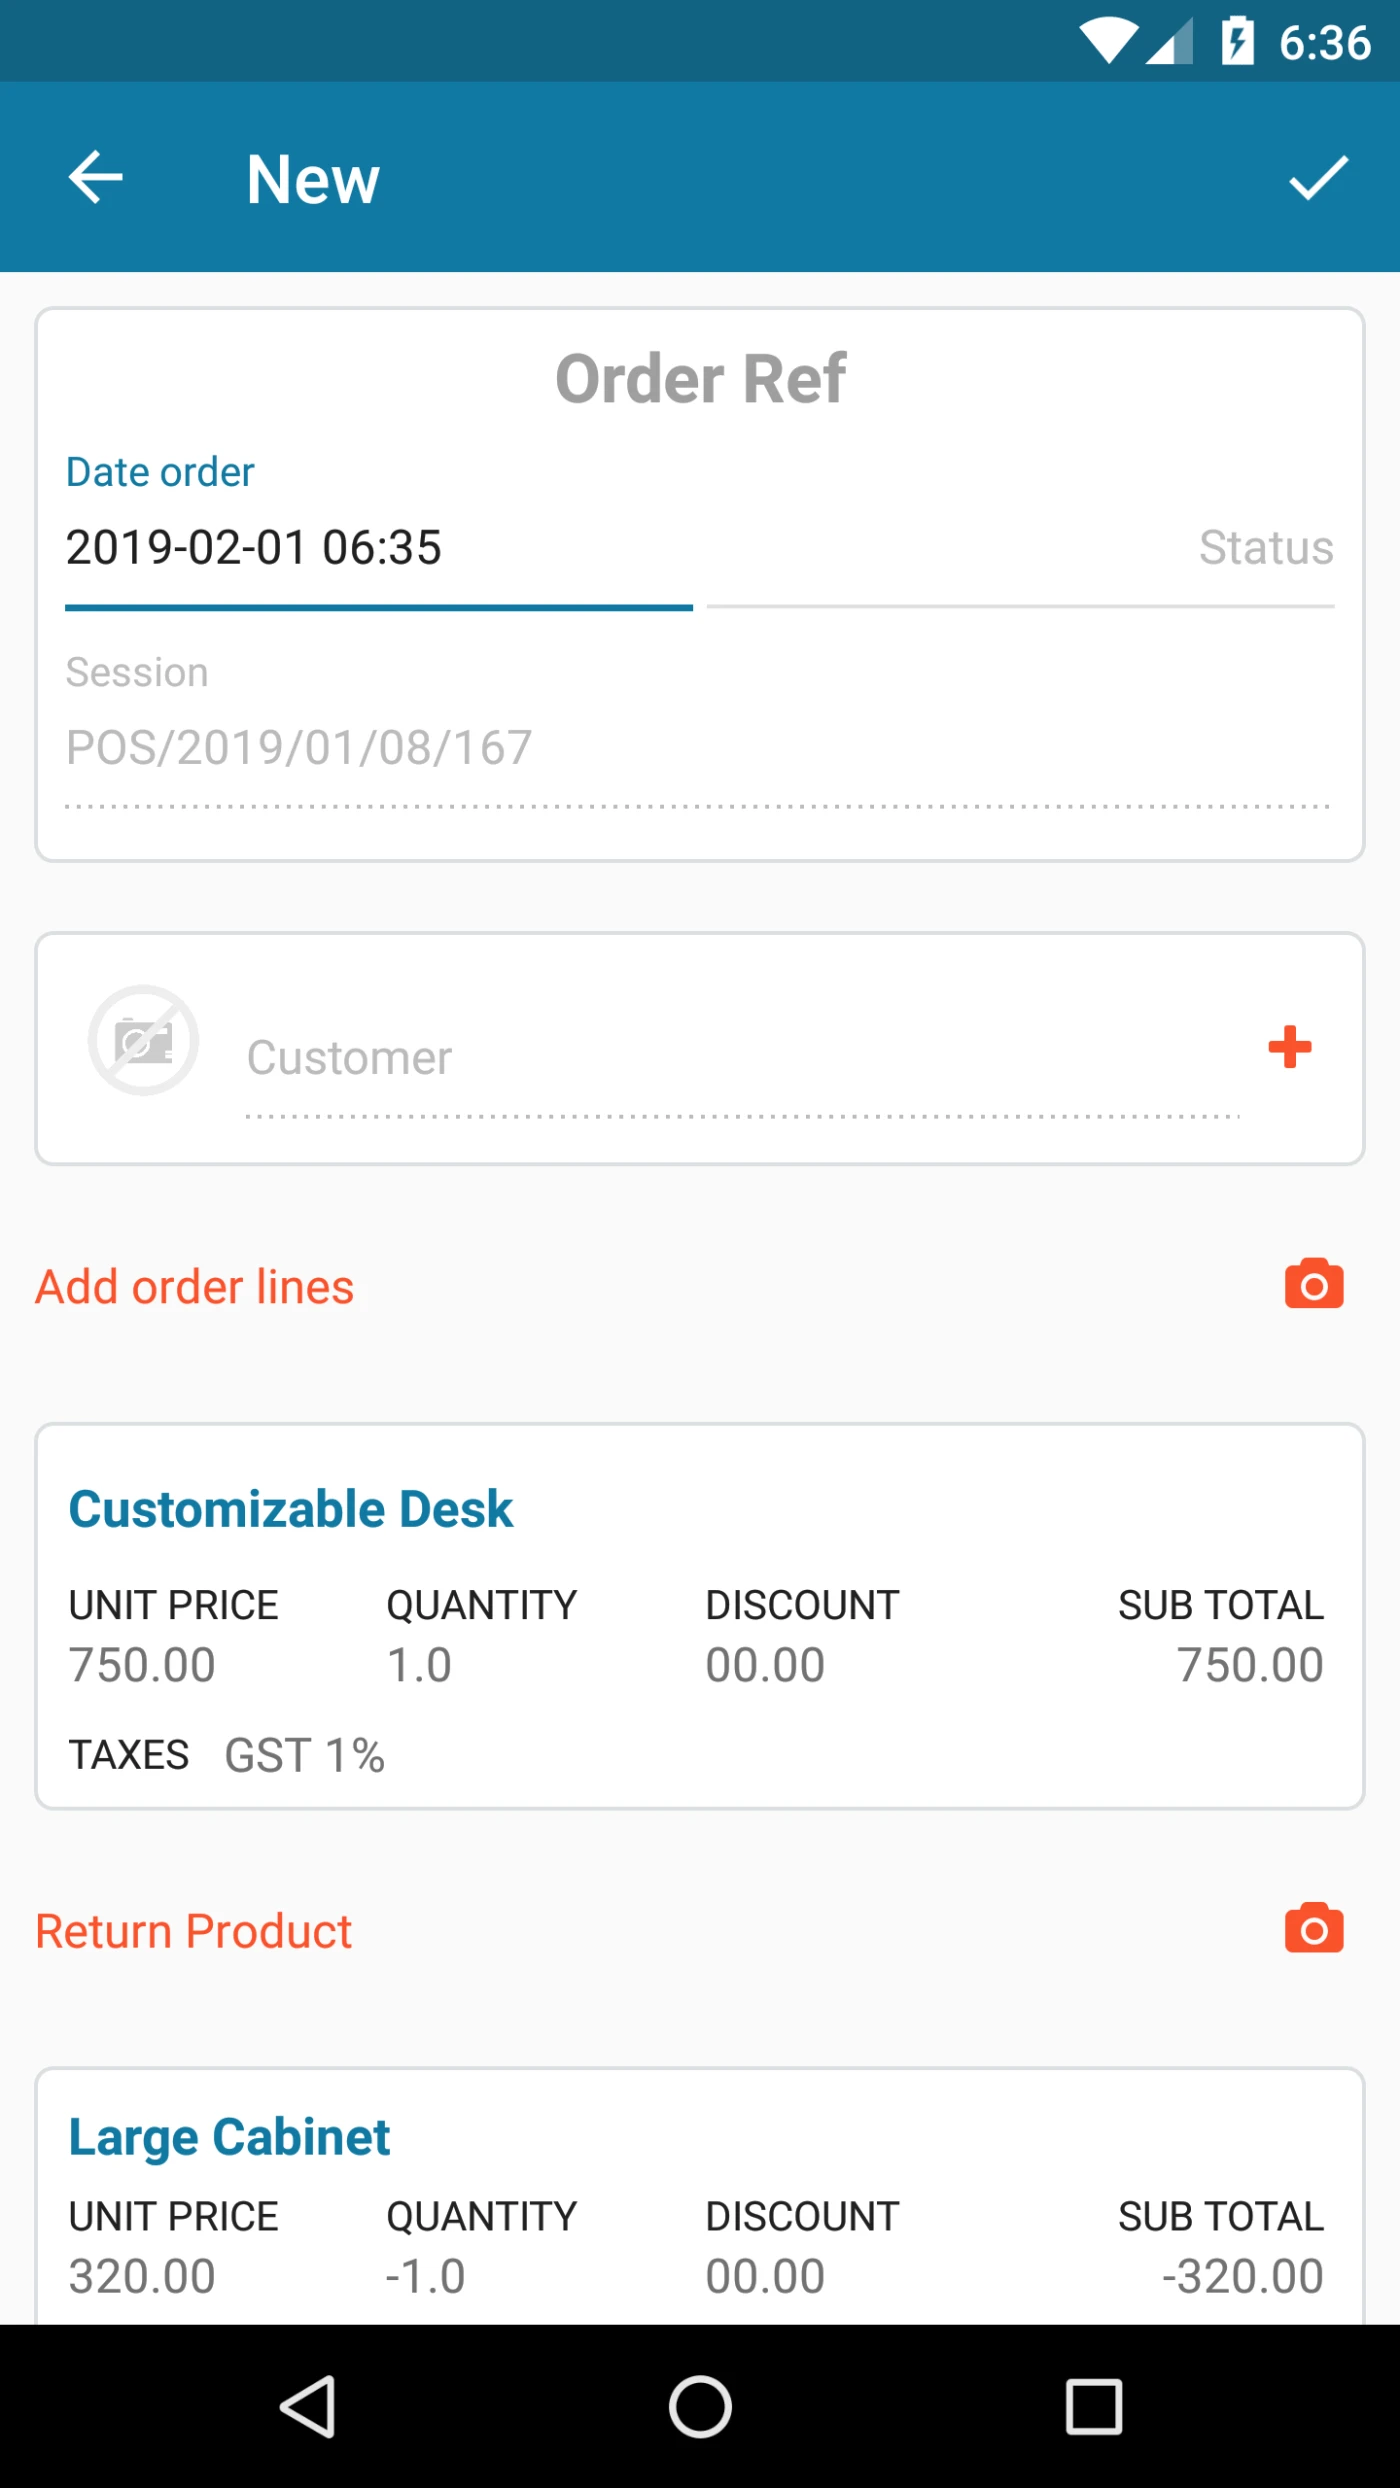
Here user can create order by selecting Customer, Products.
User can return products within same order. user can use Mobile camera to Scan Products.
User can give discount and taxes on Products as well.
Create New Order
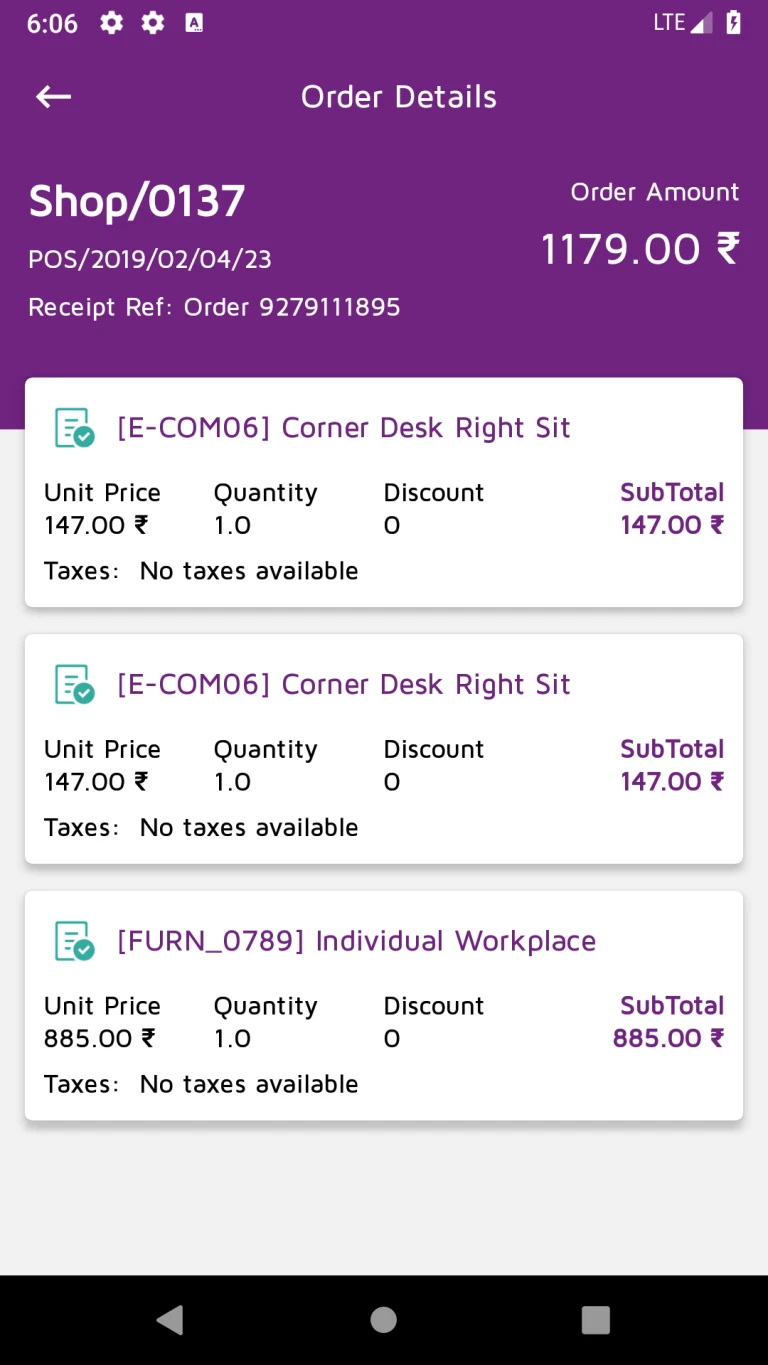
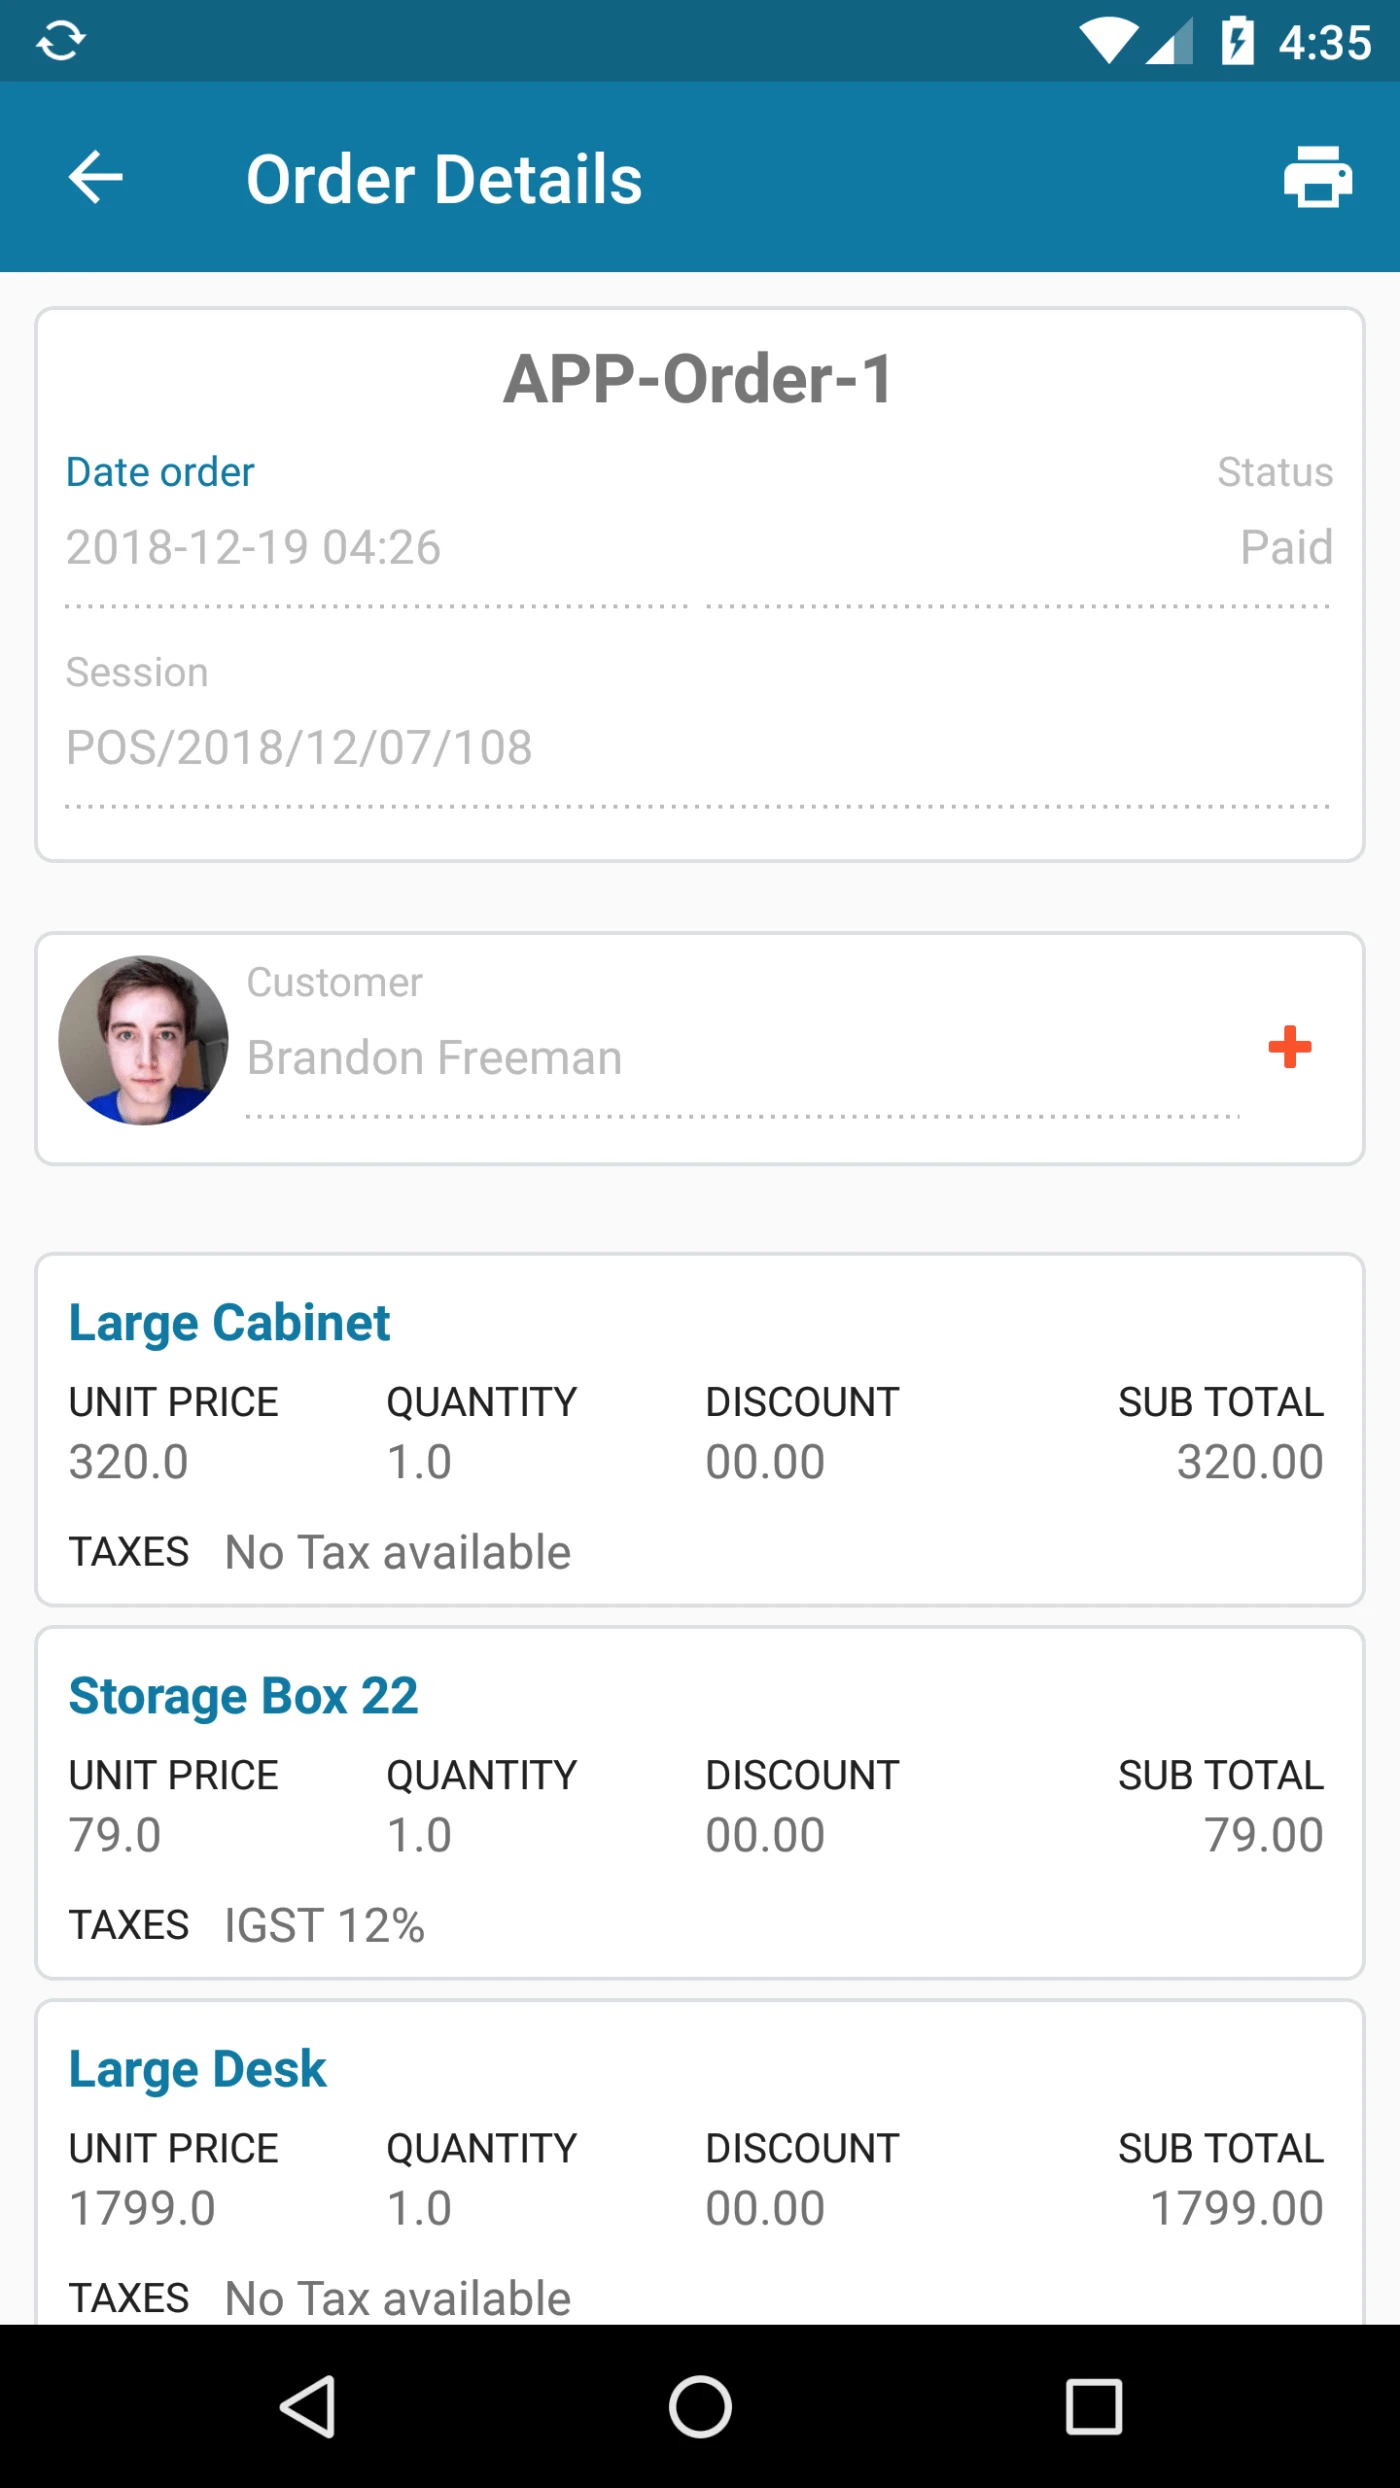
User can view order Details on this page
This page is displaying many order related information Like Order ref, Order Date, Status, Session Customer and Product Details.
from this page User can Add Discount as well.
User can Print order details from this page as well. Order Details
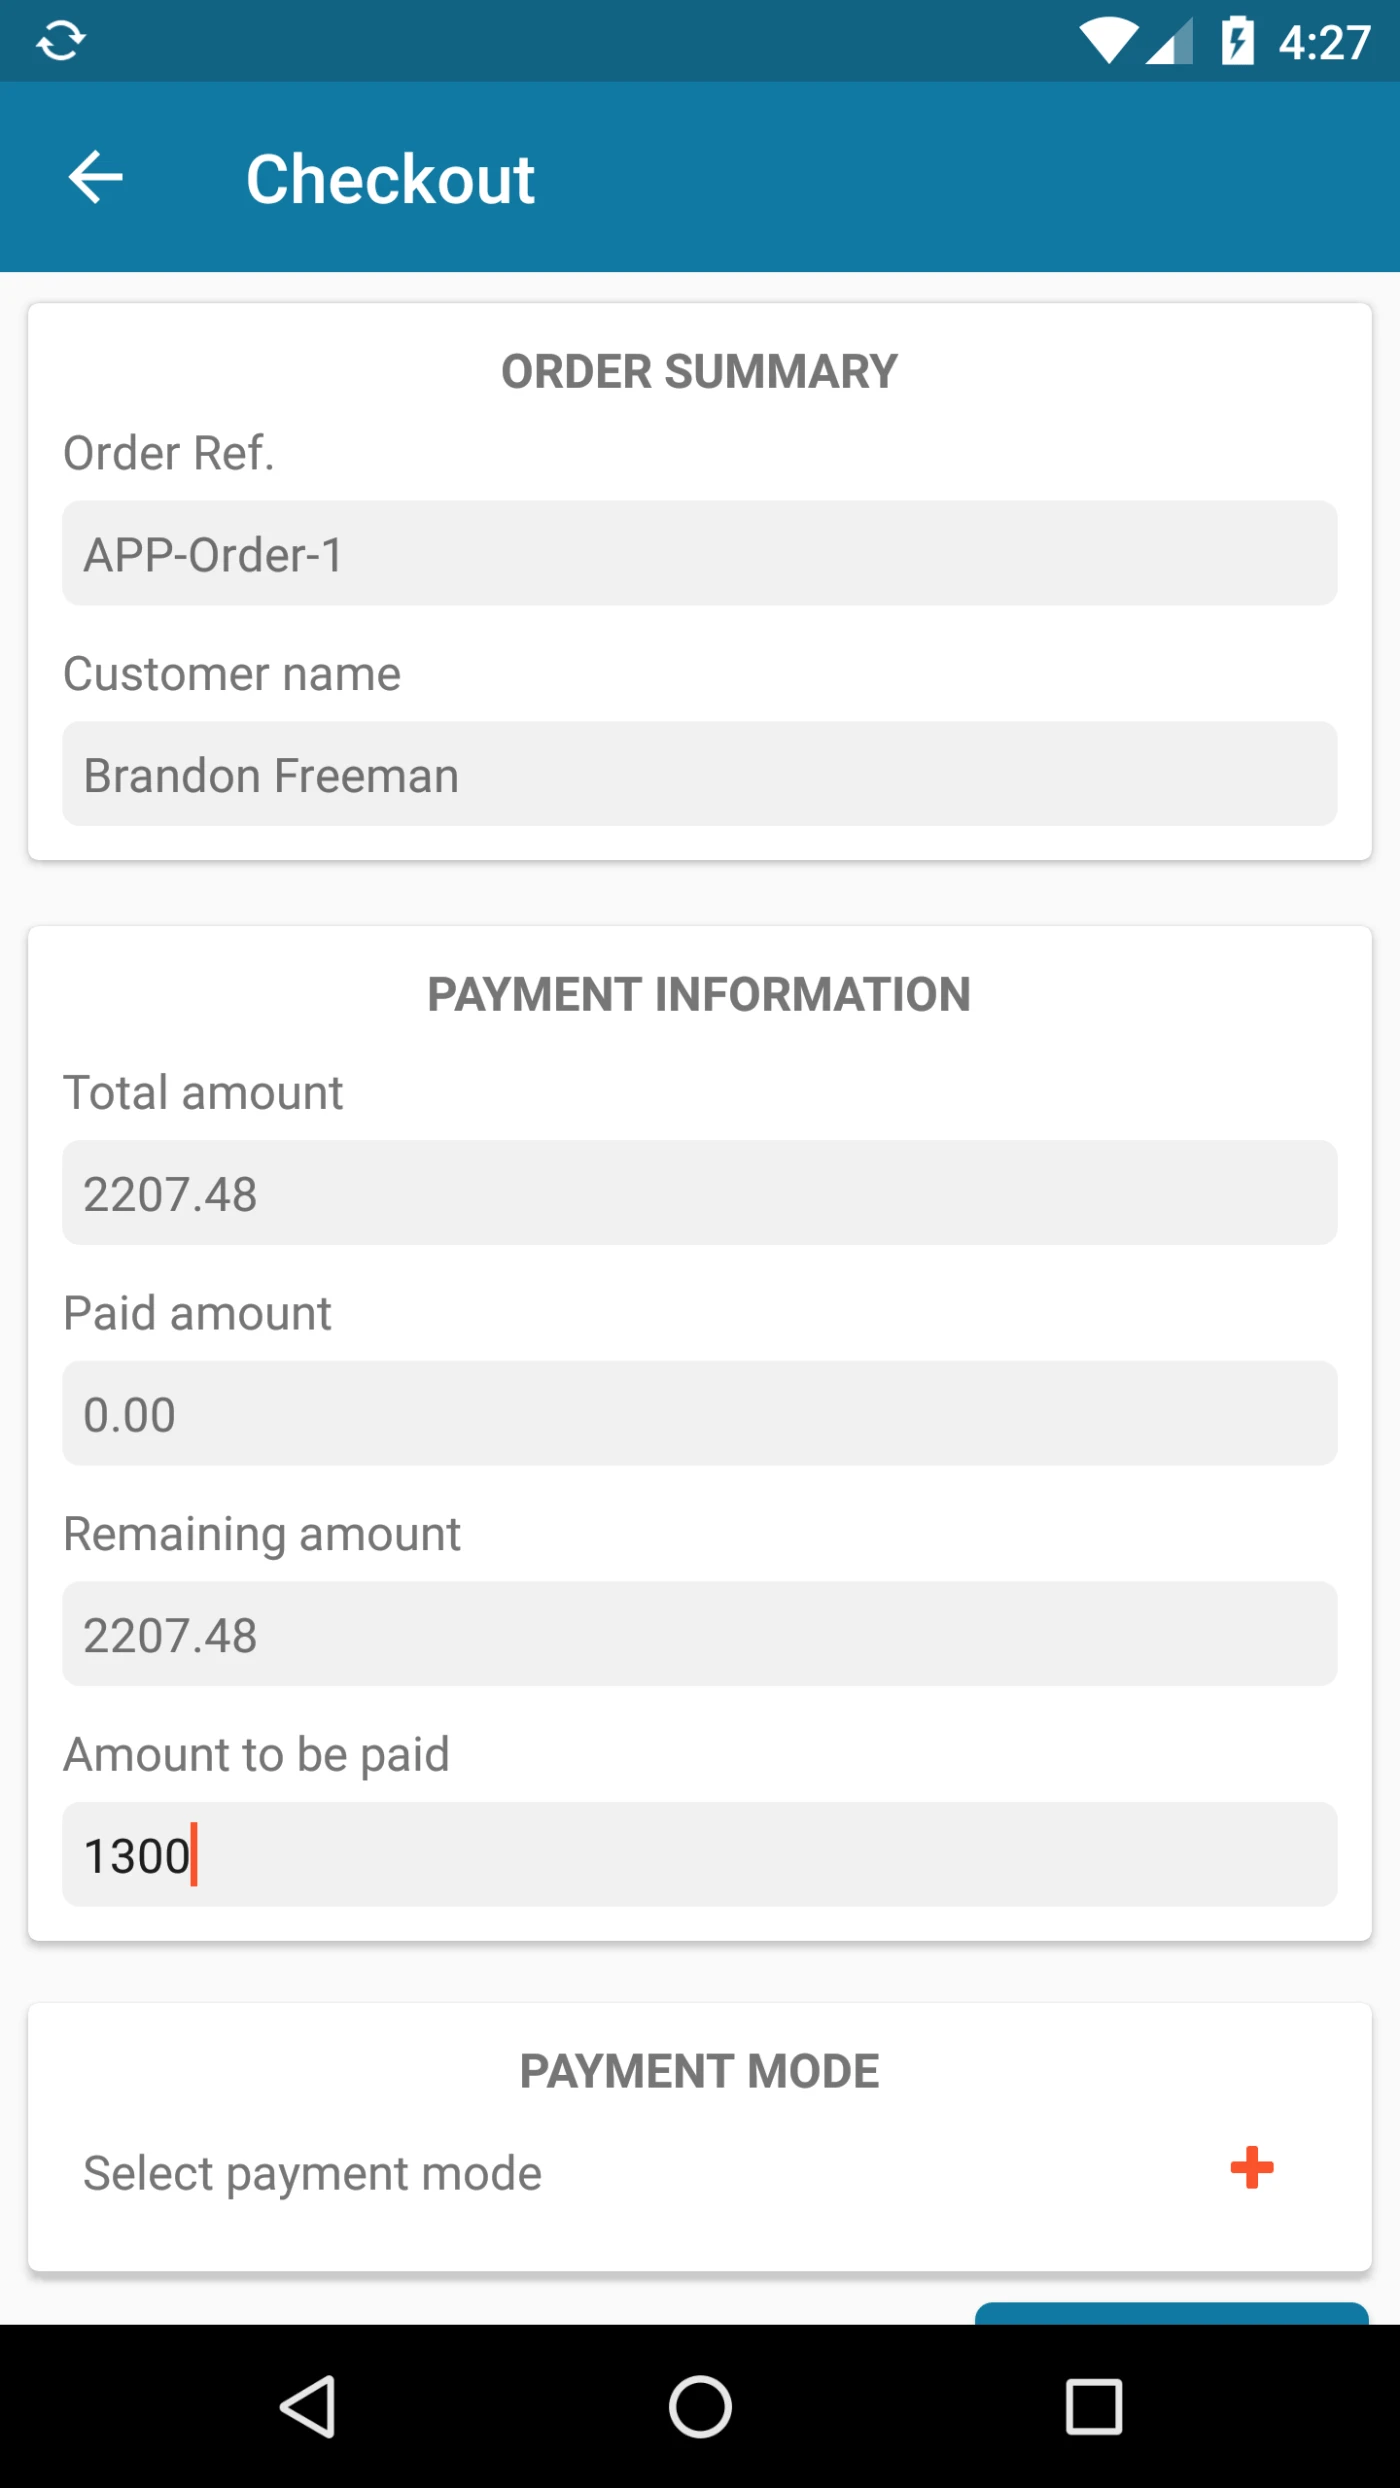
From this page User can Make Payment for the orders.
This page Displaying payment related information Like, Paid Amount, Total Amount , Remaining Amount.
User can Select Payment Method to make payment. Payment Methods are available based on Server configuration.
after successfull payment user can print Receipt using Bluetooth Printer.
Payment of Order
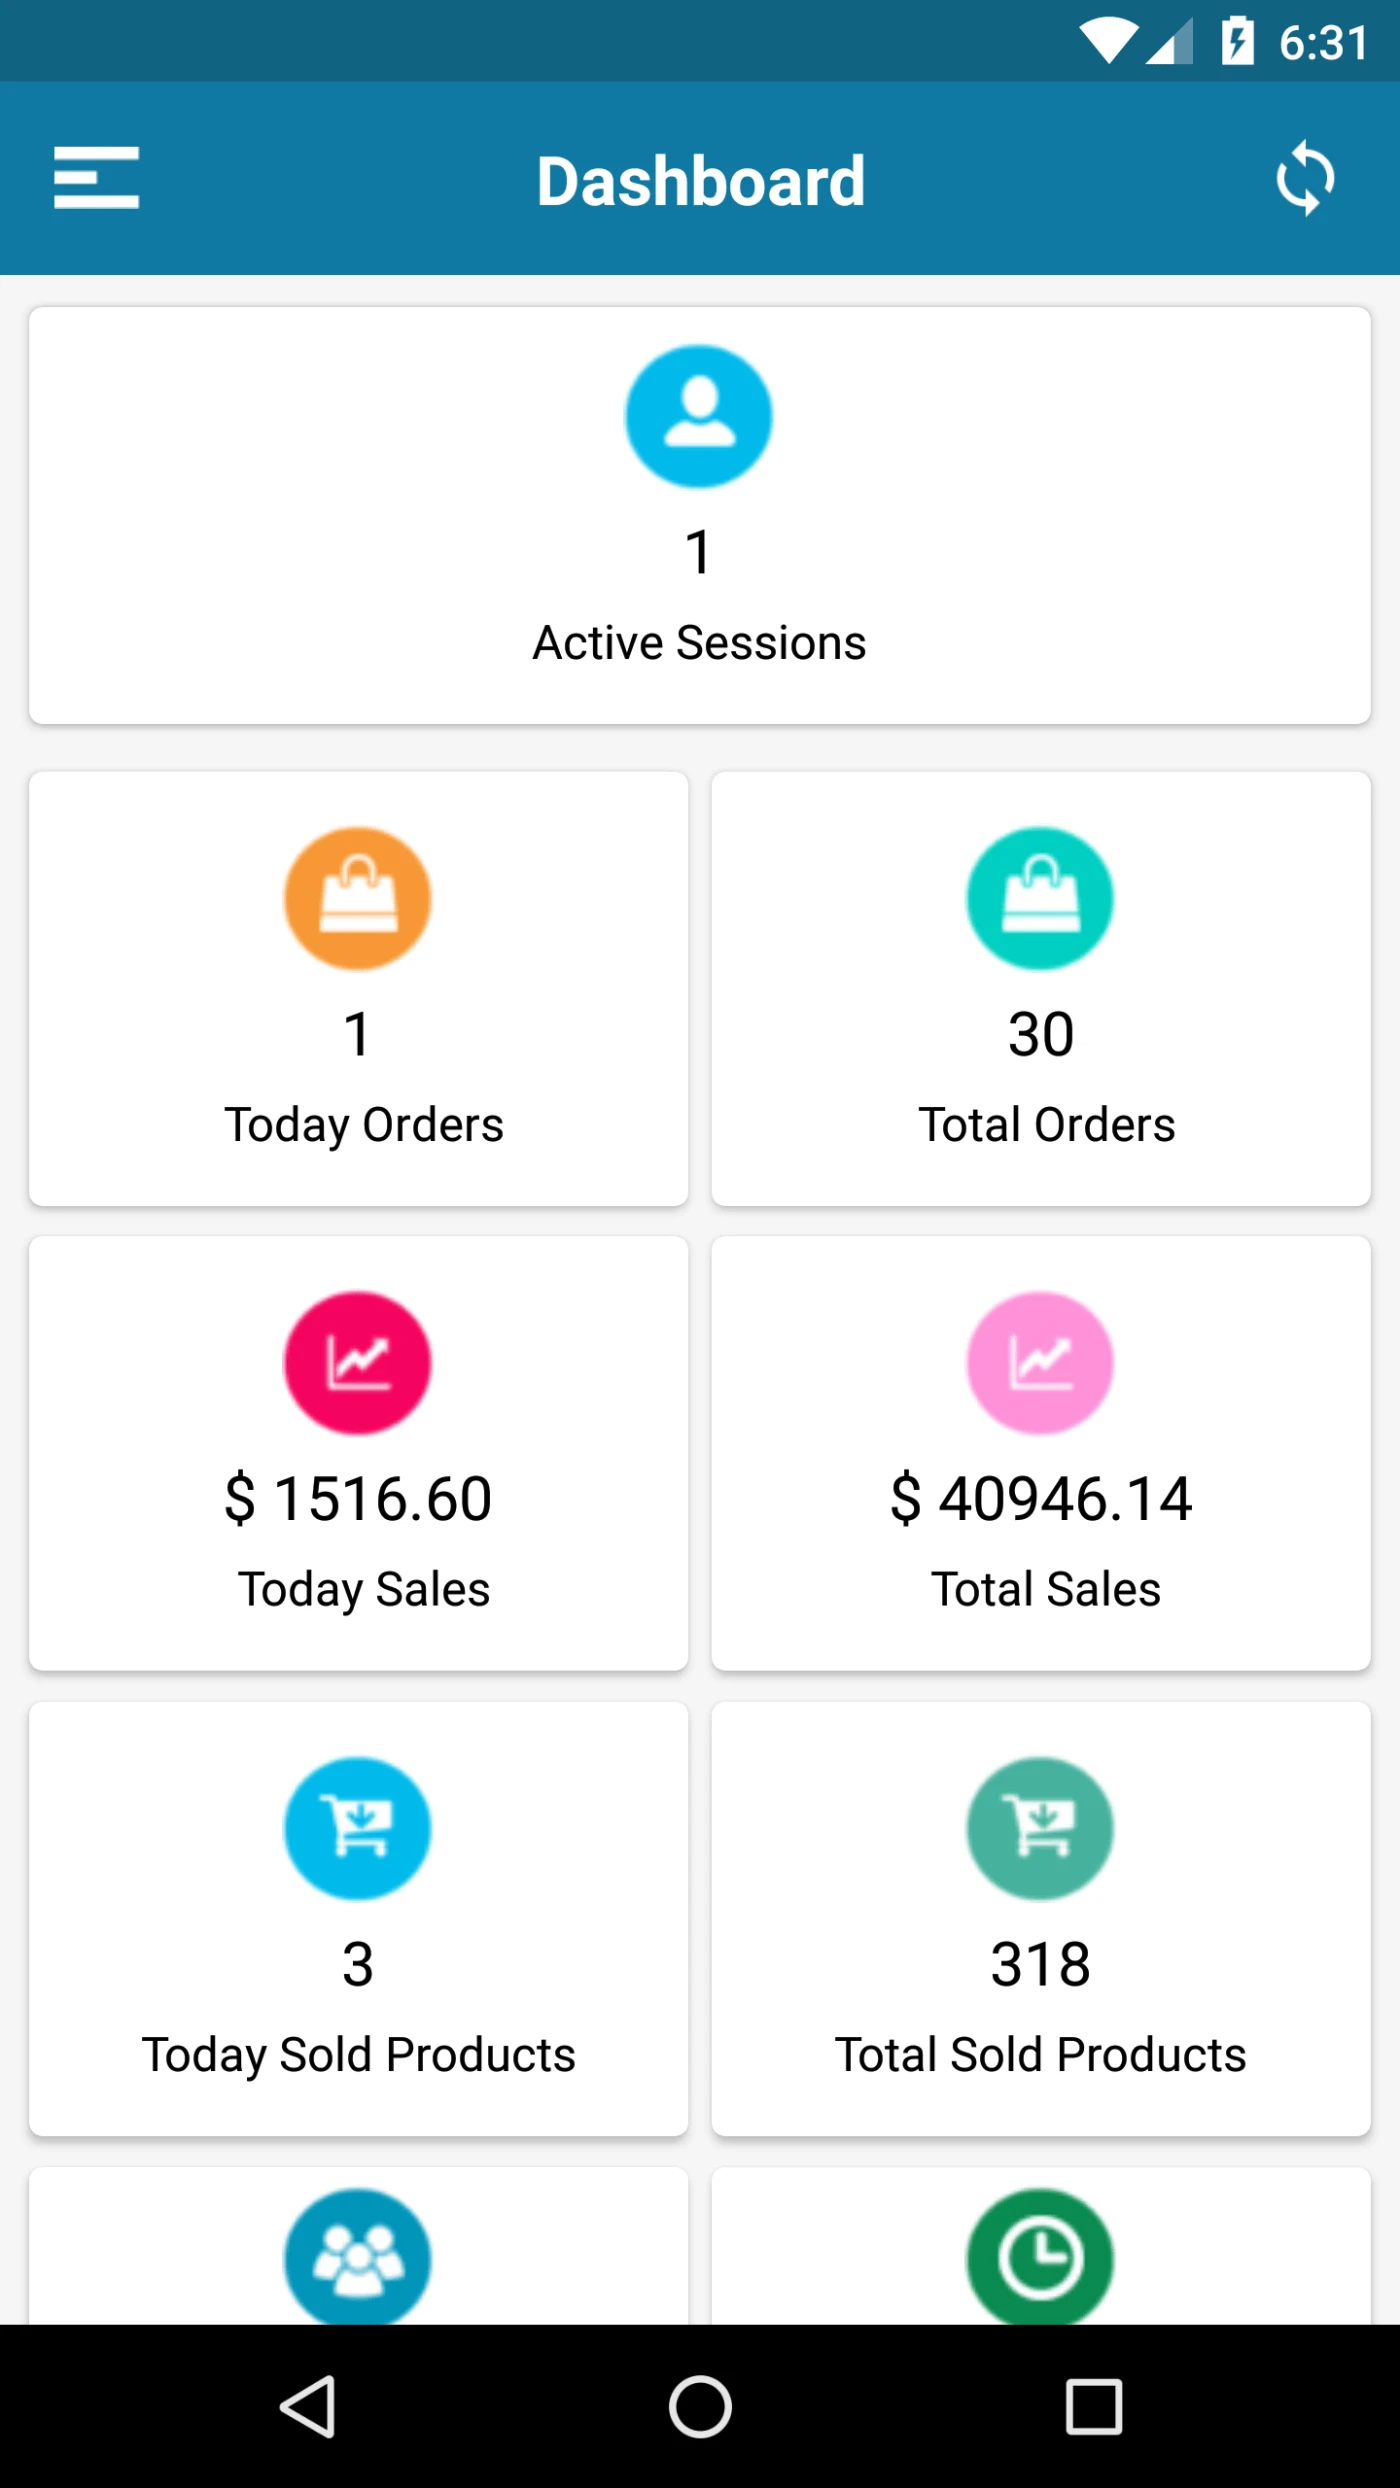
Active Session -Today’s Orders, Total Orders, Total Sales, Today’s Sales, Total Sold Products, Today’s Top staff, Top Hours Today, Average Customer spending, Average Customer visit
Pos Dashboard
Share this:
Click to share on Facebook (Opens in new window)
Click to share on LinkedIn (Opens in new window)
Click to share on Twitter (Opens in new window)
Click to share on Reddit (Opens in new window)
Click to share on Tumblr (Opens in new window)
Click to share on Pocket (Opens in new window)
Click to share on Pinterest (Opens in new window)
More
Click to print (Opens in new window)
Click to email this to a friend (Opens in new window)