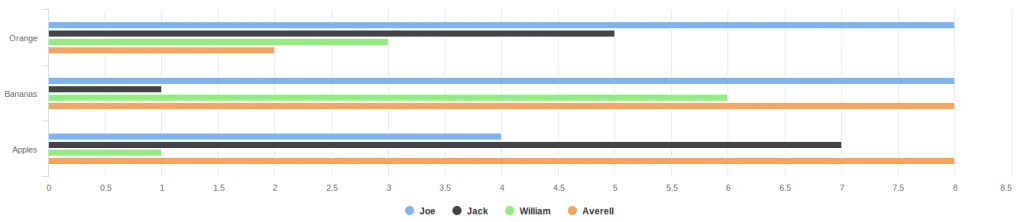
Highcharts is, in my opinion, one of the best JavaScript libraries to work with data visualization and charts out there. See my example,
Highchart Bar Chart
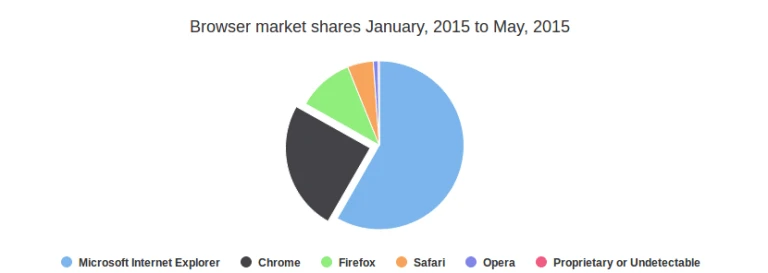
Highchart Pie Chart
Highcharts is, in my opinion, one of the best JavaScript libraries to work with data visualization and charts out there. See my example,
Highchart Bar Chart
Highchart Pie Chart
This tutorial is aimed at the Django user who wants to set up a production web server. It takes you through the steps required to set up Django so that it works nicely with uWSGI and Gunicorn.
We will be setting up a PostgreSQL database instead of using the default SQLite database. We will configure the Gunicorn application server to interface with our applications.
To begin the process, we’ll download and install all of the items we need from the Ubuntu repositories. We will use the Python package manager pip to install additional components a bit later.
We need to update the local apt package index and then download and install the packages.

Create the PostgreSQL Database and User By Typing :
$sudo -u postgres psql
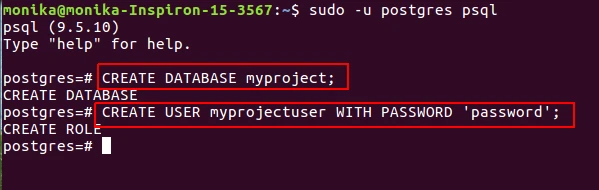
Afterwards, we’ll modify a few of the connection parameters for the user we just created
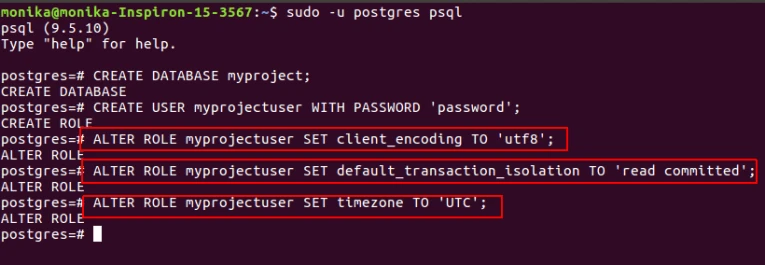
Now, we can give our new user access to administer our new database:
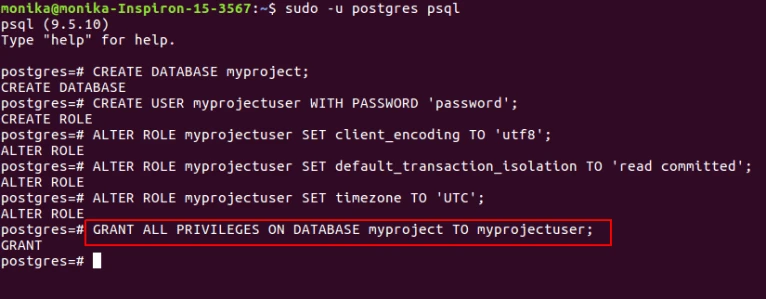
When you are finished, exit out of the PostgreSQL prompt by typing:
postgres=#\q

Within the project directory, create a Python virtual environment by typing:

Before we install our project’s Python requirements, we need to activate the virtual environment. You can do that by typing:

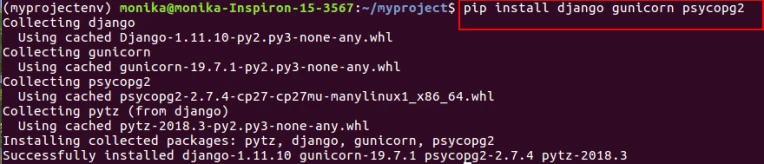
With your virtual environment active, install Django, Gunicorn, and the psycopg2 PostgreSQL adaptor with the local instance of pip:
Create and Configure a New Django Project

The first thing we should do with our newly created project files is adjust the settings. Open the settings file in your text editor:
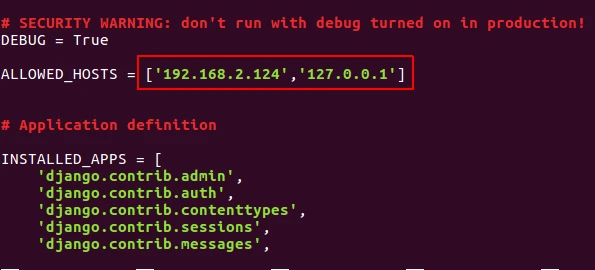
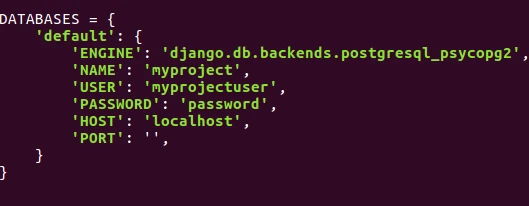
Change the settings with your PostgreSQL database information.
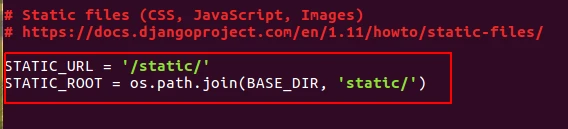
Next, move down to the bottom of the file and add a setting indicating where the static files should be placed.
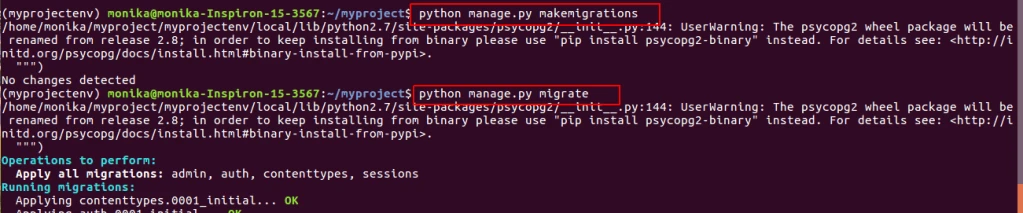
Now, we can migrate the initial database schema to our PostgreSQL database using the management script
Create an administrative user for the project by typing:

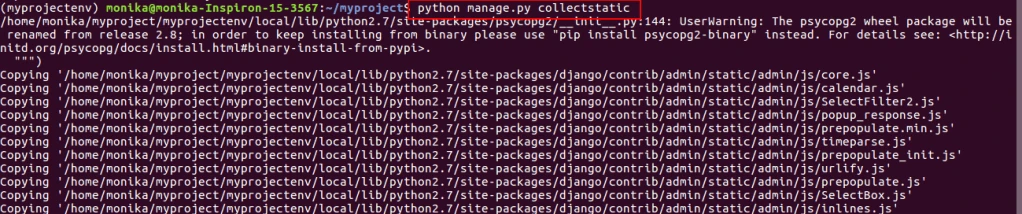
We can collect all of the static content into the directory location we configured by typing:
If you followed the initial server setup guide, you should have a UFW firewall protecting your server. In order to test the development server, we’ll have to allow access to the port we’ll be using.
Create an exception for port 8000 by typing:
$sudo ufw allow 8000
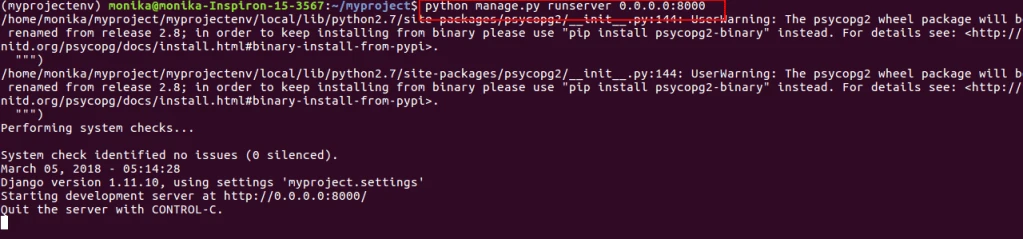
In your web browser, visit your server’s domain name or IP address followed by :8000:
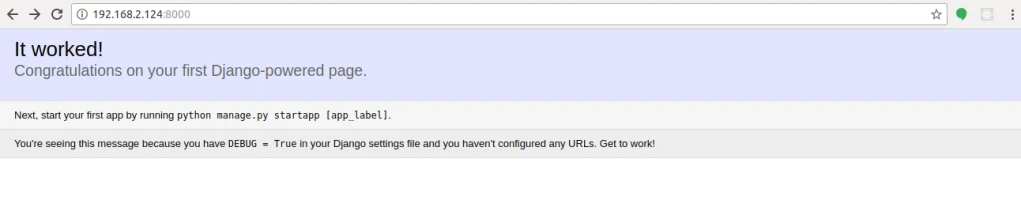
The last thing we want to do before leaving our virtual environment is test Gunicorn to make sure that it can serve the application.

Create and open a systemd service file for Gunicorn with sudo privileges in your text editor :
$sudo nano /etc/systemd/system/gunicorn.service

With that, our systemd service file is complete. Save and close it now.
We can now start the Gunicorn service we created and enable it so that it starts at boot:

Check the status of the process to find out whether it was able to start:
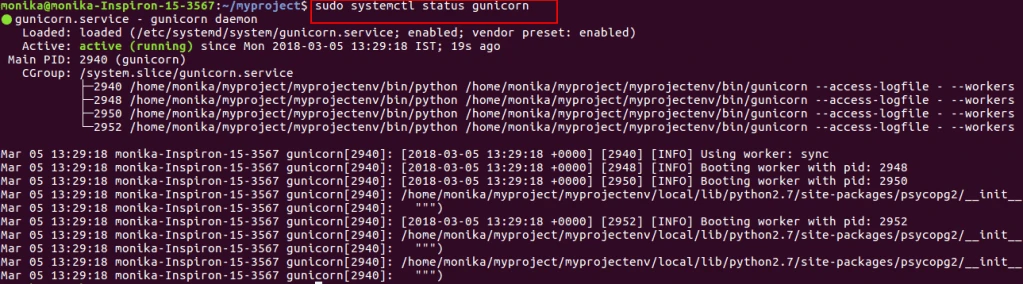
If you make changes to the /etc/systemd/system/gunicorn.service file, reload the daemon to reread the service definition and restart the Gunicorn process by typing:

Now that Gunicorn is set up, we need to configure Nginx to pass traffic to the process.
Start by creating and opening a new server block in Nginx’s sites-available directory:
$sudo nano /etc/nginx/sites-available/myproject
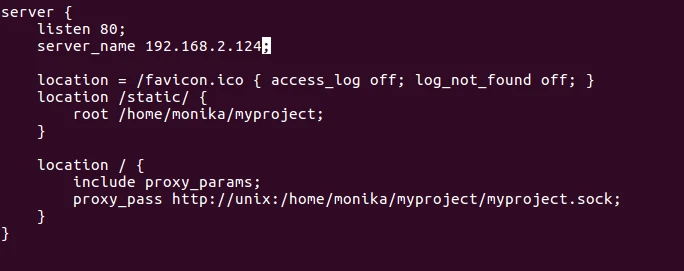
Save and close the file when you are finished. Now, we can enable the file by linking it to the sites-enabled directory:

Test your Nginx configuration for syntax errors by typing:

If no errors are reported, go ahead and restart Nginx by typing:
$sudo systemctl restart nginx
Now we can remove the rule to open port 8000 as well:

Now Its Run on: http://192.168.2.124 (Our local)

Use Paypal Payment Integration in Jobseeker Website
We have implemented solution for allowing payment process via Paypal from Django. We are still improving this module by adding new functionalities. Currently we have implemented feature with Client monthly and yearly plan activation to post a Job.
We have created account on Paypal (https://sandbox.paypal.com/) We can get more information from here : http://developer.Paypal.com/
In Django-Jobseeker, first we have to sign in as a company for selecting plan, for signing in you must have created account on Django-Jobseeker.
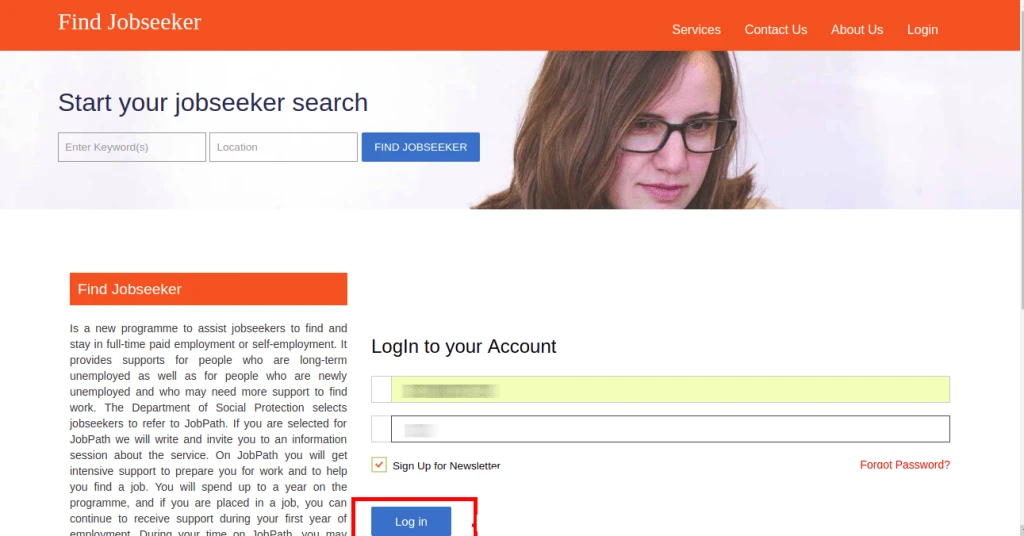
Company have the option to post the Job Before post the job company have to pay some amount according to the plans, that are available on the plan list
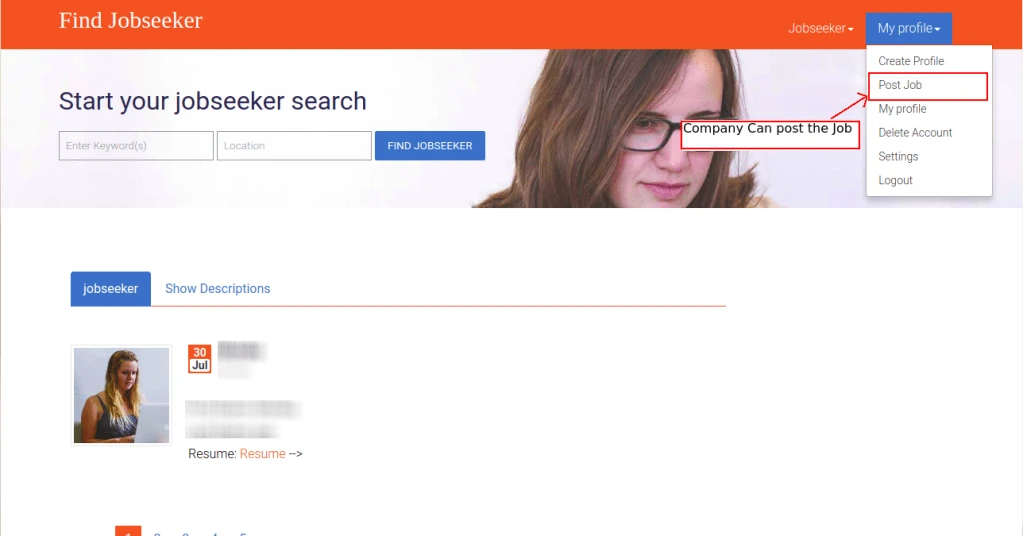
When Company select the option of post job, plans are visible on the screen where company can select the one of them, Company can select plan of yearly basis or monthly basis
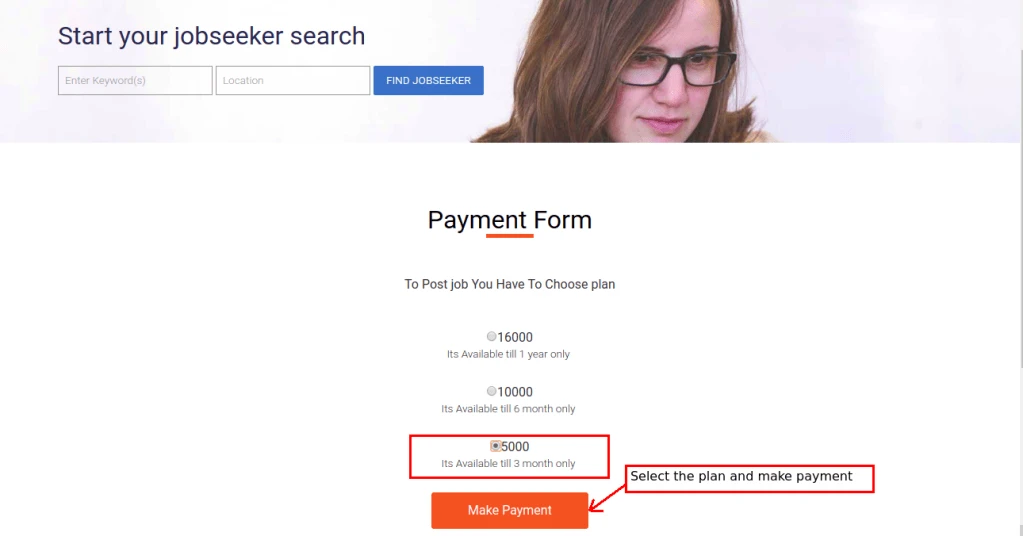
After selecting the plans from plan list company have to choose payment method to pay, If company select the Paypal gateway to pay, It redirect to the Paypal account form
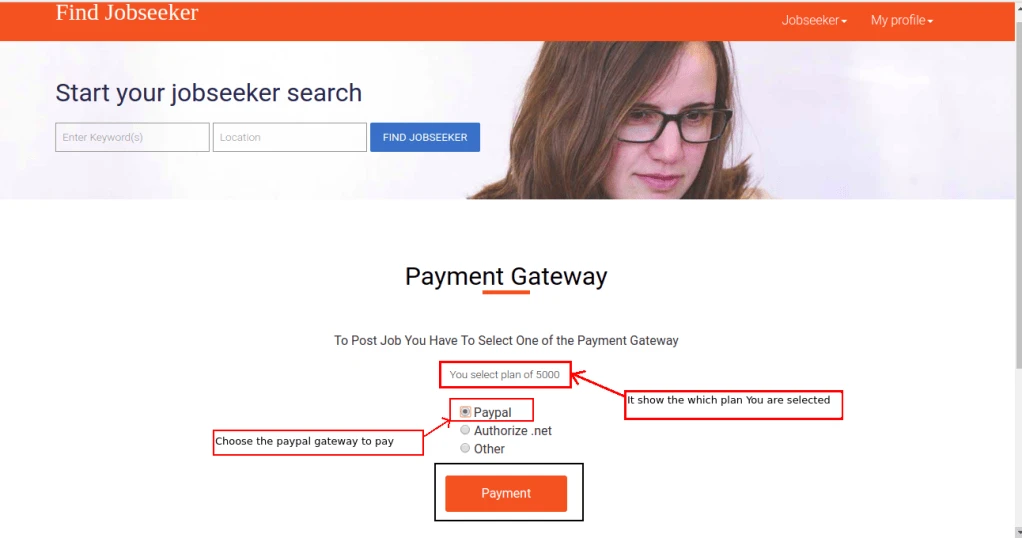
Company selected the Paypal Gateway So It redirect to the Paypal button

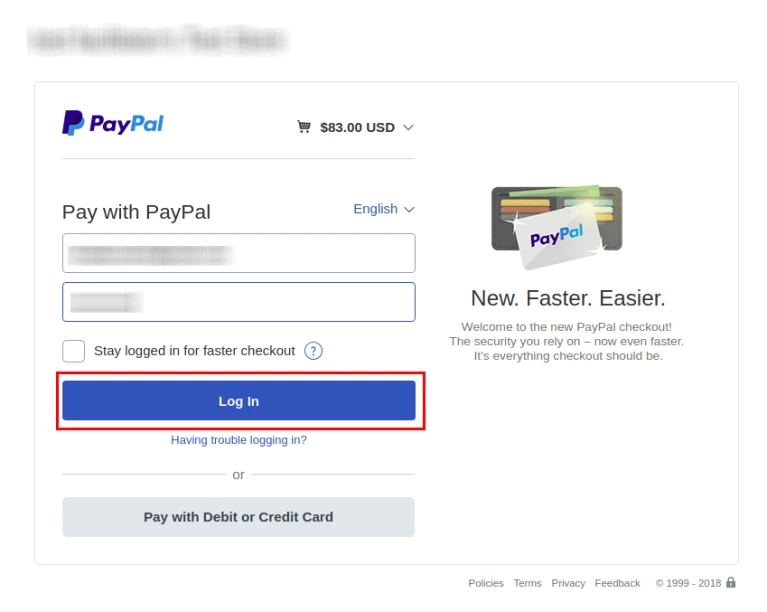
After clicking on paypal Button It redirect to the Paypal login screen where company have to login with their Paypal account
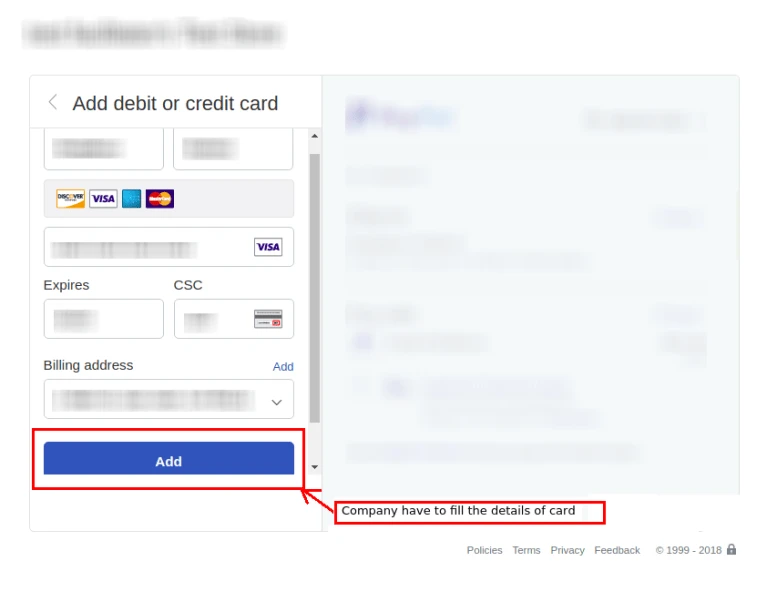
Company Have to Add the payment detail
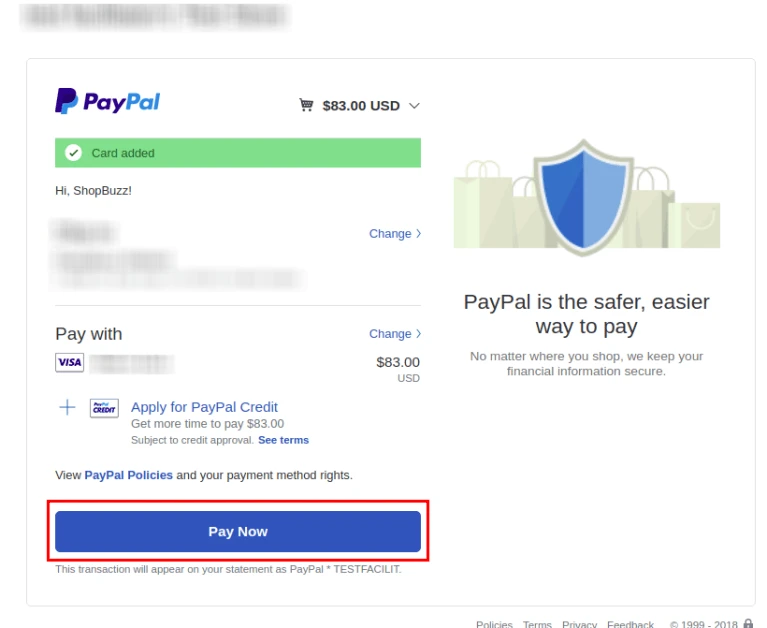
After Adding the detail of payment it show the Pay Now Button
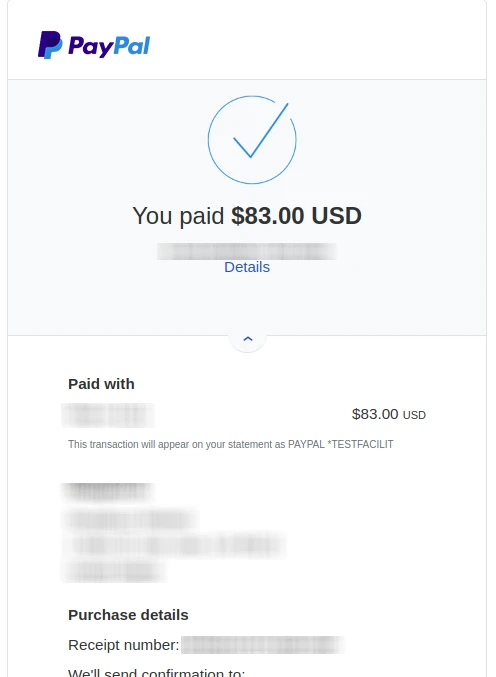
Clicking on Pay Now Button, Payment will be successfully done and It will show the Receipt
When clicking on return to merchant it redirect to the message of payment successfully done
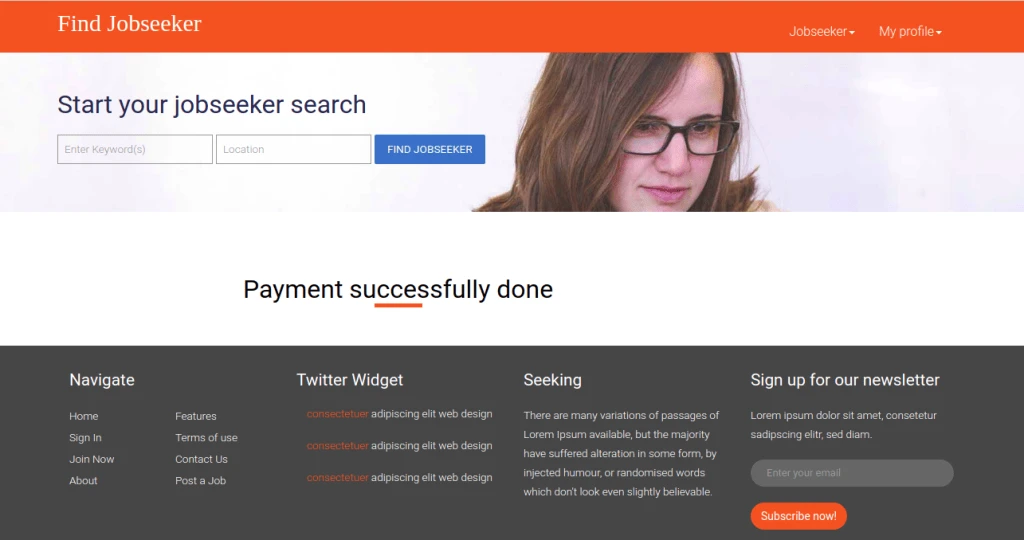
We have implemented solution for allowing payment process via Authorize.Net from Django. In this post we will show the payment is processed using Authorize.net. We are still improving this module by adding new functionalities. We have a feature where client must buy a plan before the post can be made on the site about the project.
First, we have created an account on Authorize.Net (https://sandbox.authorize.net/) and turn ON TEST mode. For more detail refer: http://developer.authorize.net/
To use the application login is required. Client will login using his credentials.
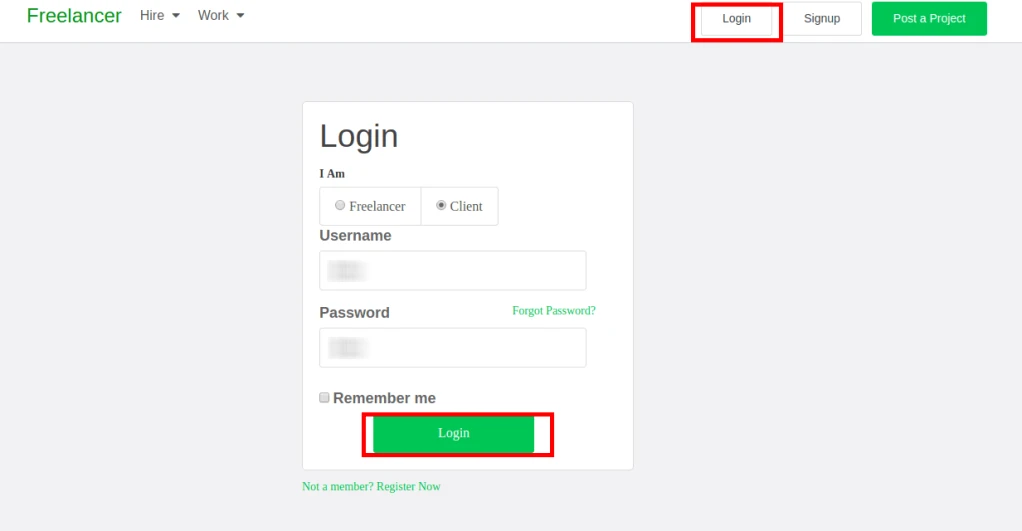
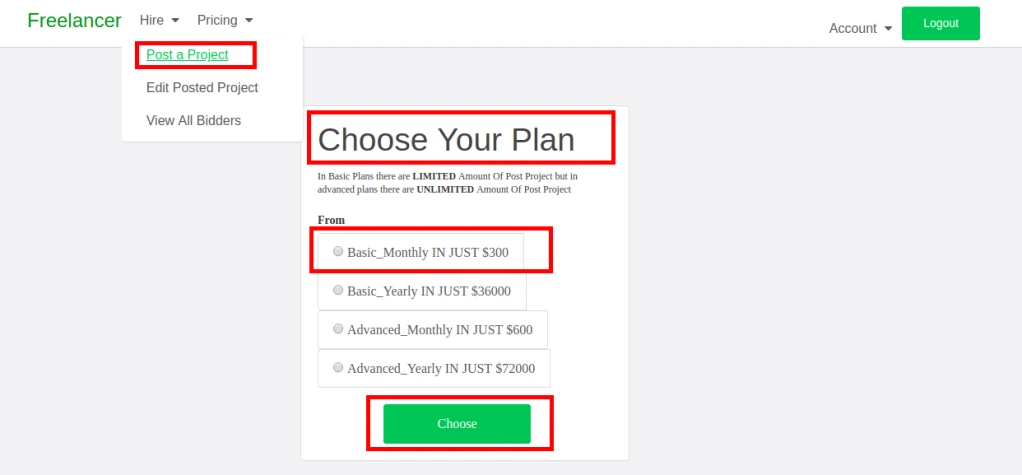
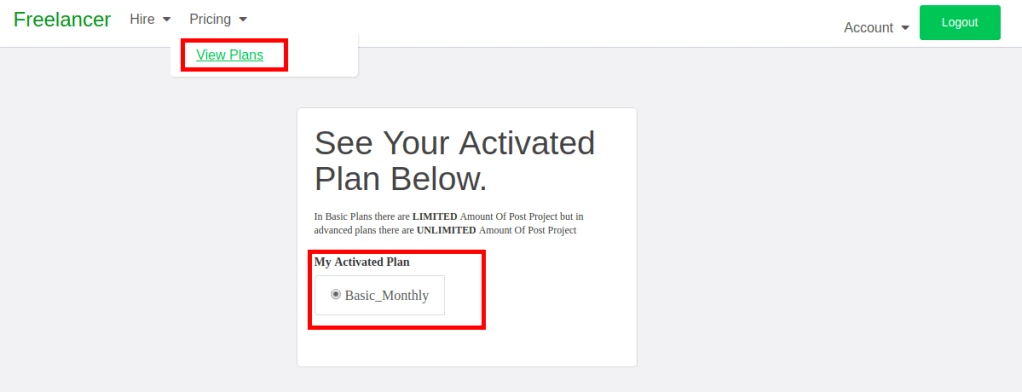
When client first sign in to the web application, plans page is displayed. To post the project client must have an active plan. It can also be accessed via View Plans option in Pricing menu.
If client already have an active plan in that case View Plans will display the Current plan.
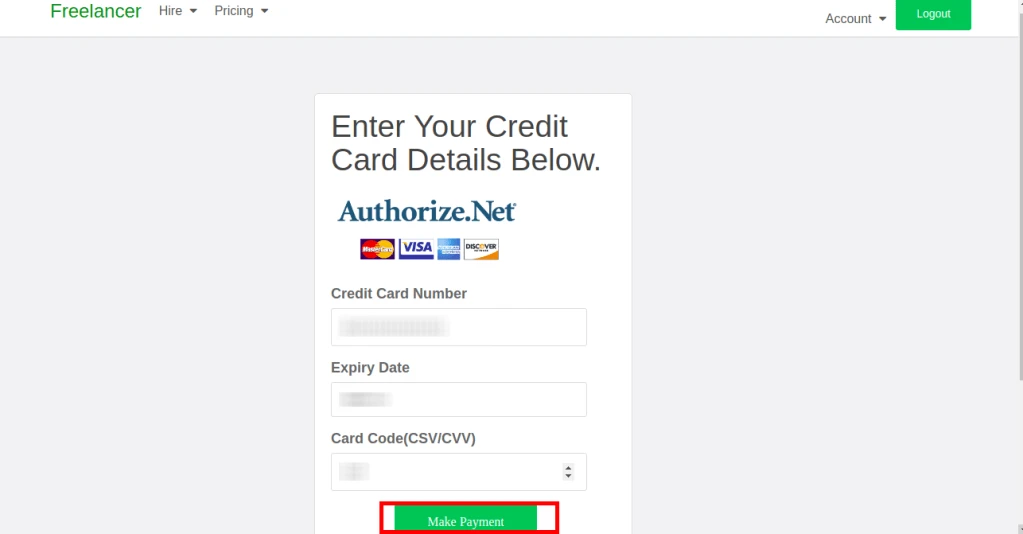
After selecting plan, client is redirected to authorize.net credit card information/checkout page for further processing. Next screen will ask for basic detail about credit card number, expiry data, CVV code. After filling the required details , Make Payment button is pressed which will do all the work of Django.
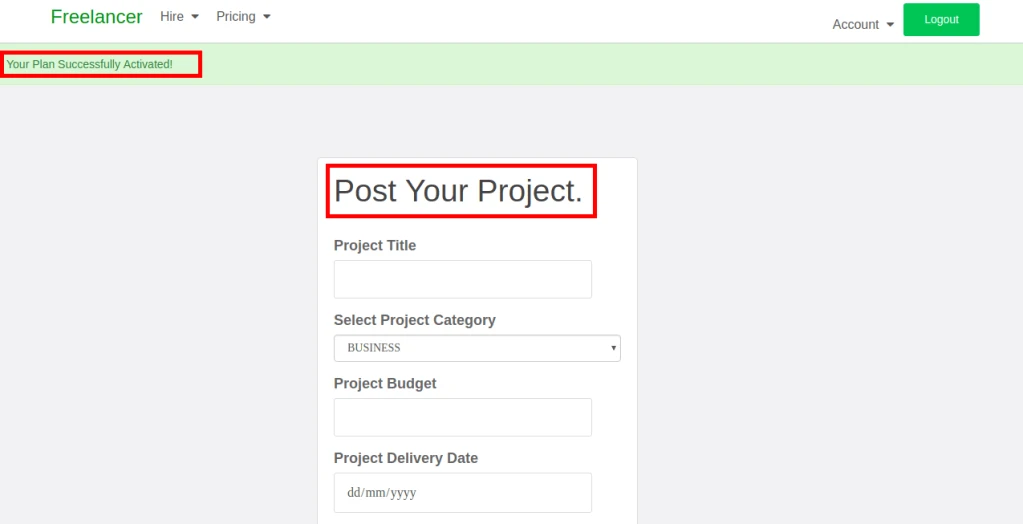
Once the payment is successful, the message will be displayed saying Your Plan Successfully Activated. Now client can post the project details.
‘View Plans’ option can be used to see the activated plan.
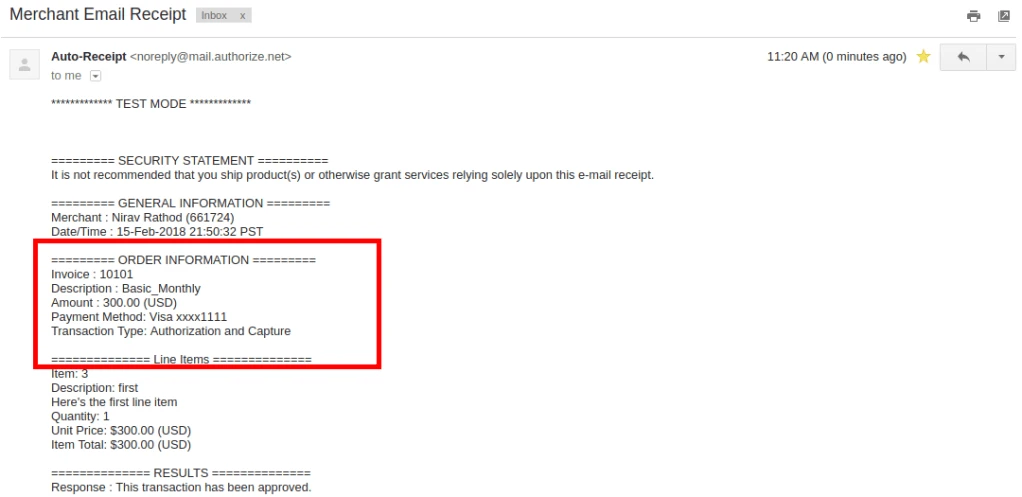
Merchant will receive email notification from authorize.net contains transaction information.