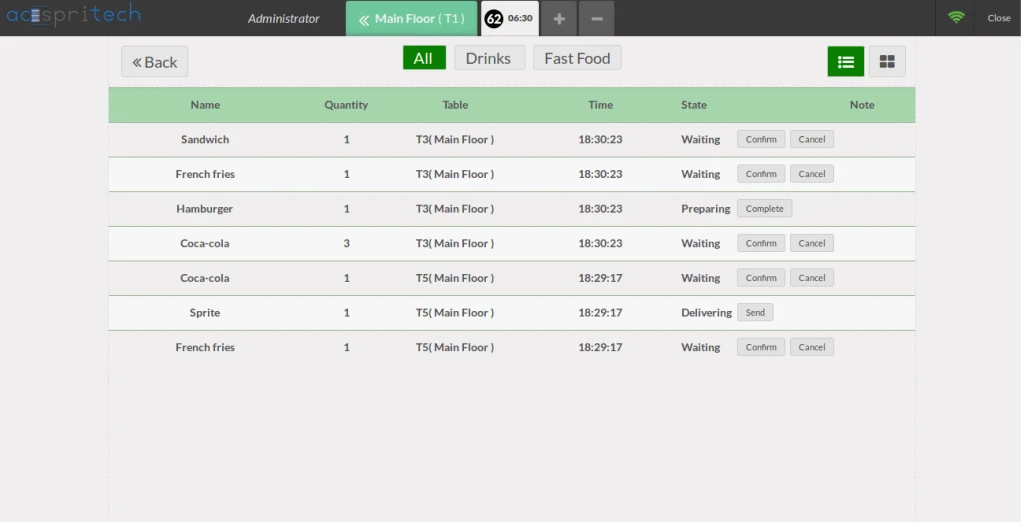
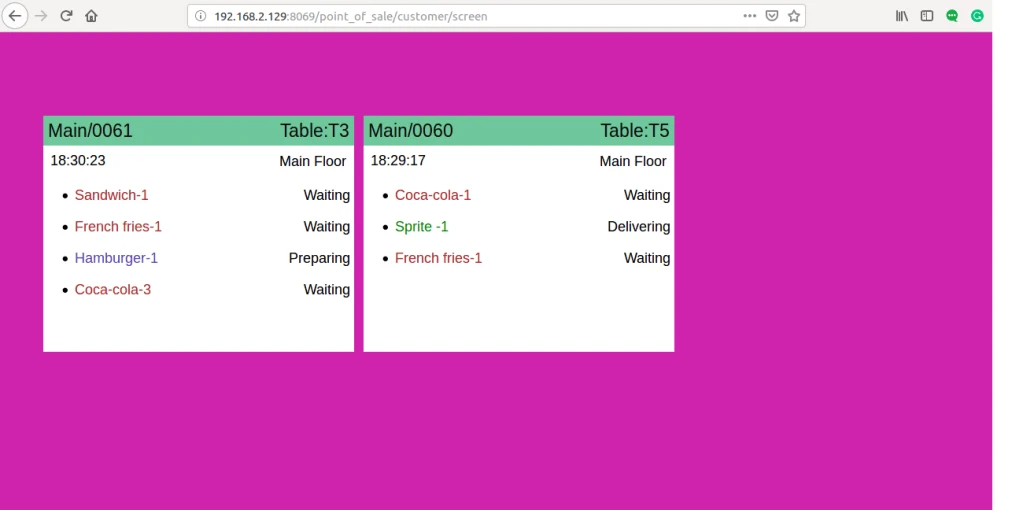
Customers can see their order on the screen with it’s status.
Important
In module, “hw_customer_order_screen.zip”. Extract it and put it in order to
receive data, you have to install on your proxy device. Proxy Device = POSBox
Device
How to use
Configuration of customer screen.
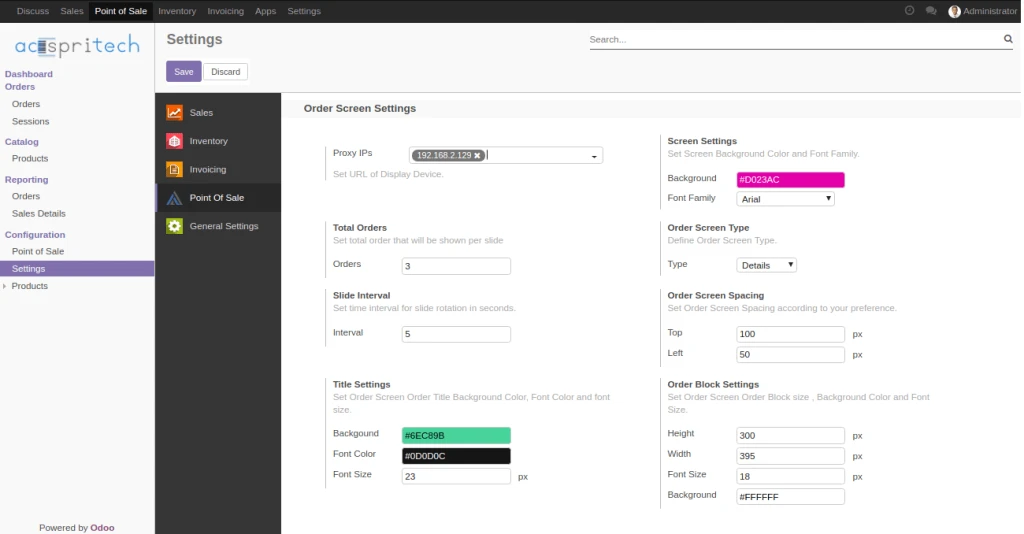
Set proxy ip of devices.
You can set screen background,font family, spacing, slide interval, total order
and screen type.
You can set height, width, color, font size and background color of order block
and it’s title.
Select Whether you want to show order summary or details.
POS_Settings
After setting configuration set url /point_of_sale/customer/screen.
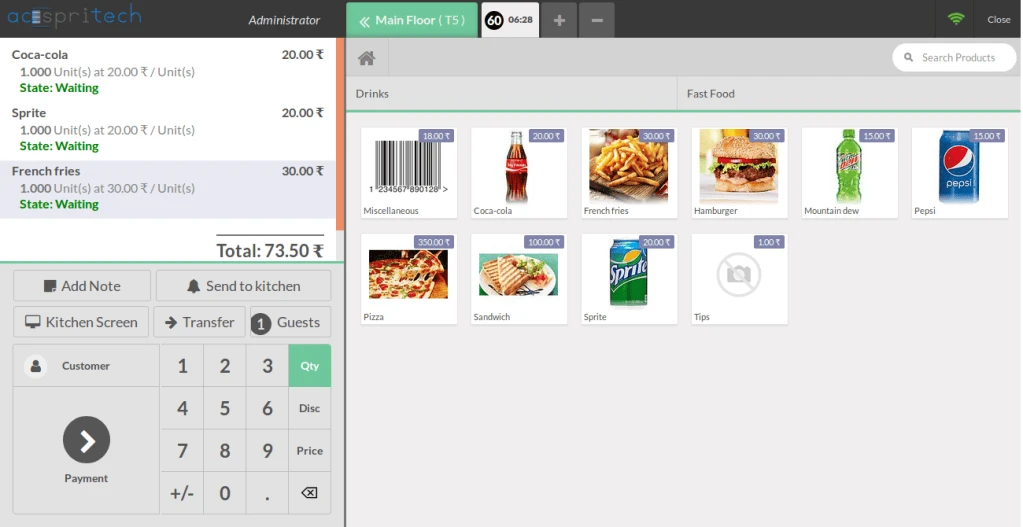
POS First Order
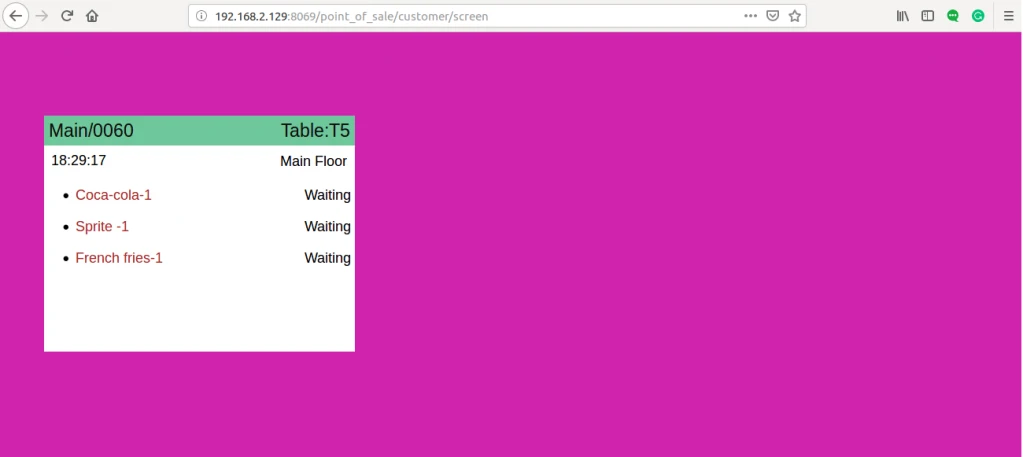
Now set url /point_of_sale/customer/screen on browser.
This module will send order data to this url.
In order to receive data, you have to install hw_customer_order_screen module
on your proxy device.
Below image shows orders when screen type is details.
POS Order Screen
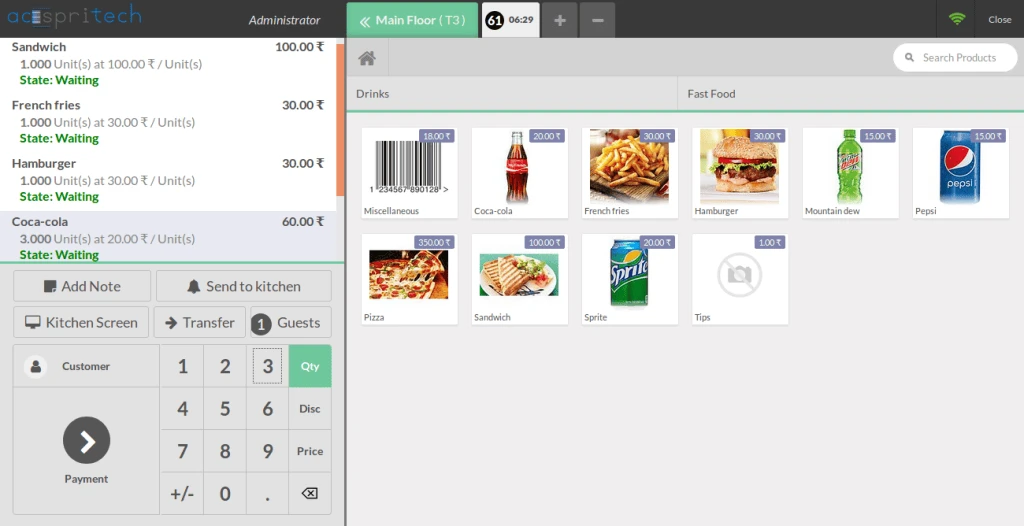
Place second order and change state which effect will be shown in customer order screen.
POS Order 2 POS Change State
Here, order line color will be shown according to it’s state and order will blink when state is delivering.
POS Customer Screen
Below image shows orders when screen type is summary.
Features
Easy To Manage Sales Commission.
Give commission to Sales Person.
Commission calculation based on Product, Product category, Sales team, Customer
Manage the commission calculate on Order confirmation, Invoice Validation, Invoice payment.
Manage the commission payment via Salary or Invoice.
How to use
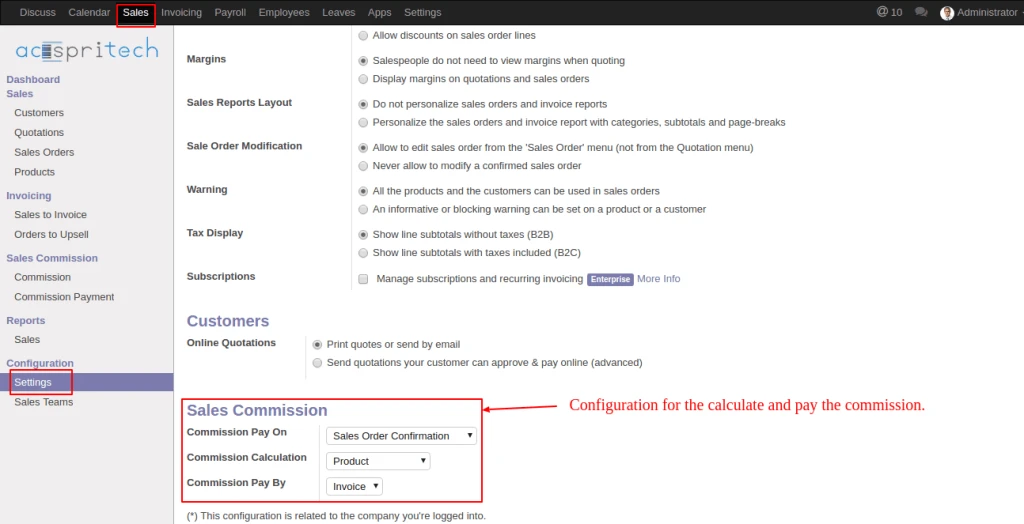
In Sales configuration, under the Sales commission, set the option for Commission Pay on, Commission Calculation, Commission Pay on. Based on this configuration the commission is calculate and paid.
Odoo Sale Configuration
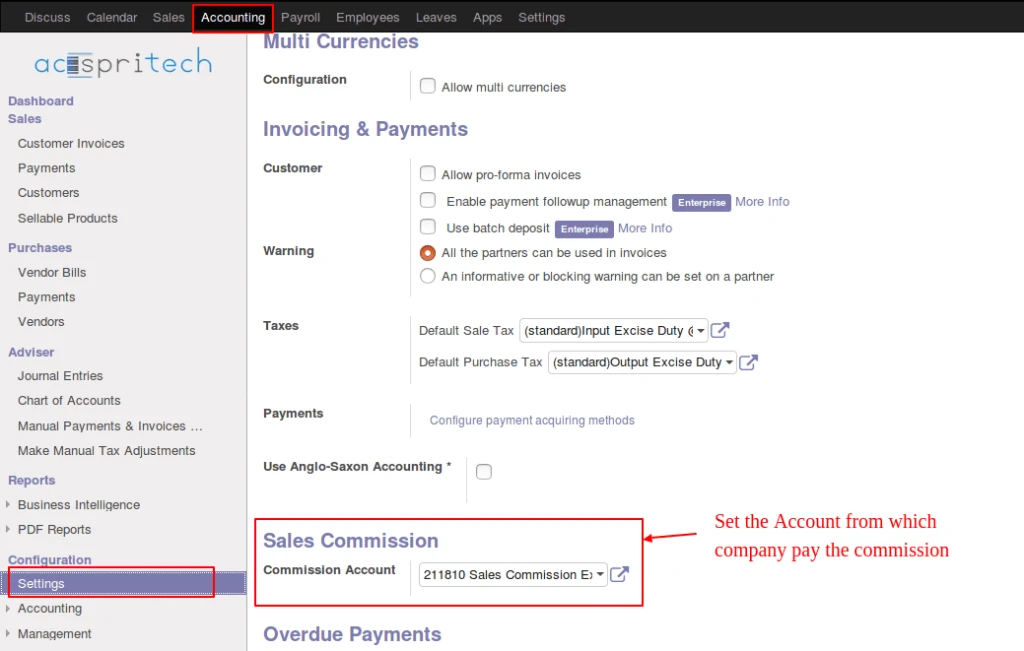
In Account configuration, under the Sales commission, set Account so when company pay the commission at that time commission pay from selected account.
Odoo Commission Account
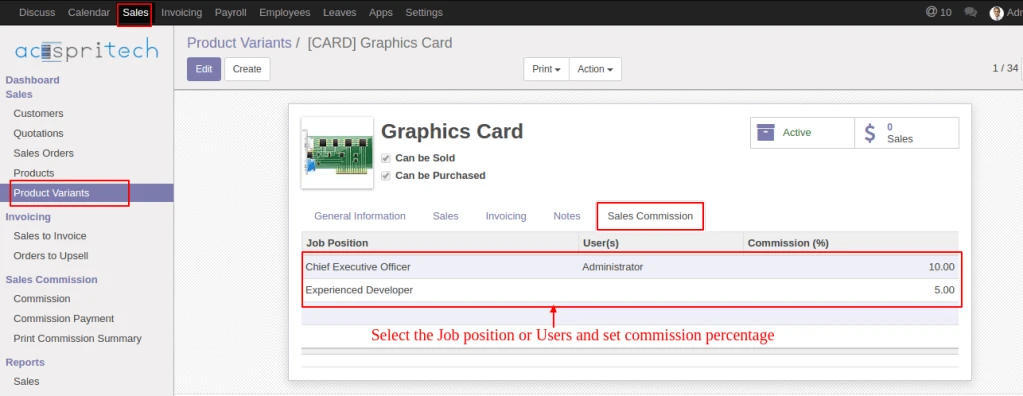
In Products, below the Sales commission tab, select the Job Position or Users and Commission percentage. This same configuration also available into the Customer, Product Category and Sales Team view.
Odoo Commission Configuration
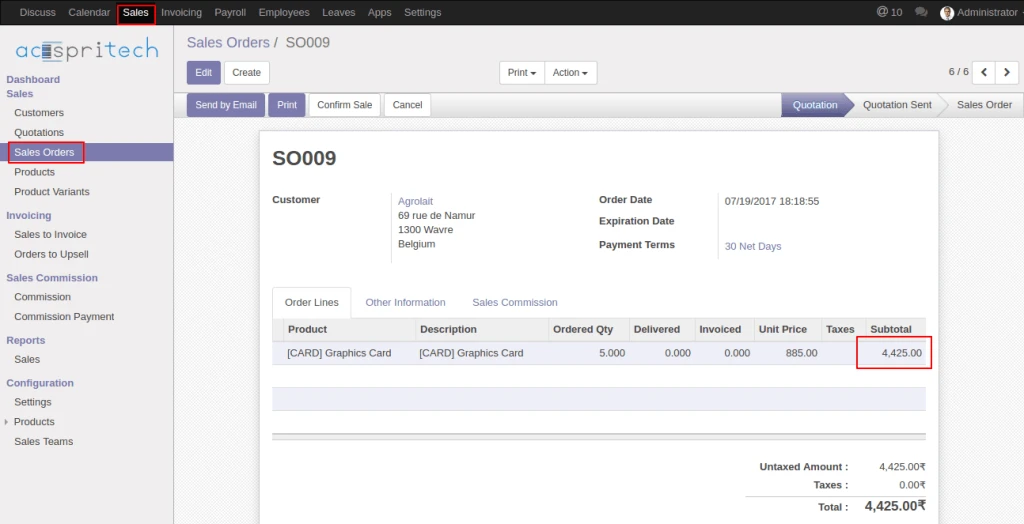
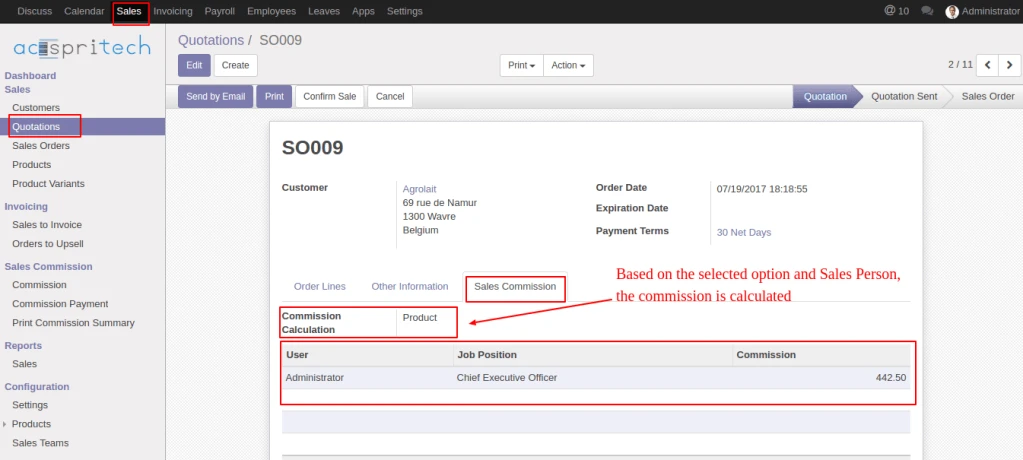
In Sale order, below the Sales commission tab, based on the Sales person and commission calculation option, commission data is calculated.
Odoo Sales OrderOdoo Commission Calculator
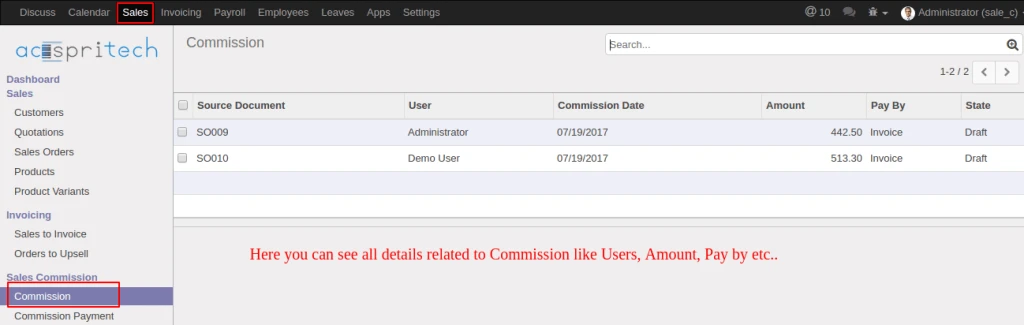
Into Commission menu, you can see the commission’s detail like user, amount, pay by etc…
Odoo Commission Data
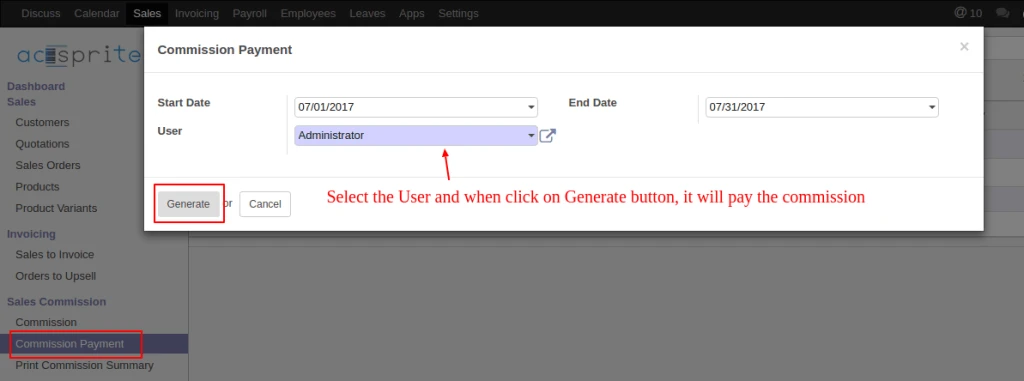
Click on the commission payment, into opened pop-up, select the user, when click the generate button it will paid the commission which is pay by ‘Invoice’ and make the account Journal entries.
Odoo Wizard Pay Commission
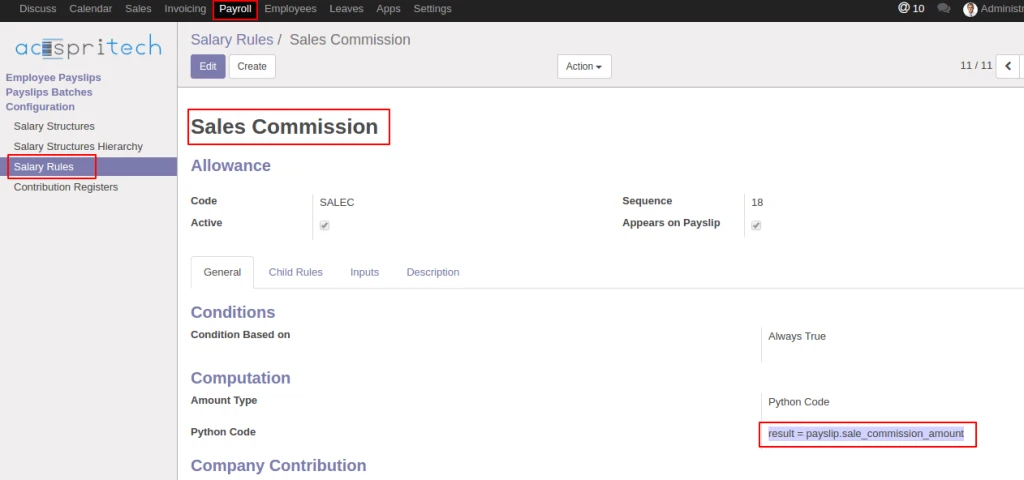
When module is install, into salary rule, you get new salary rule for pay the commission by Salary.
Odoo Commission Salary Rule
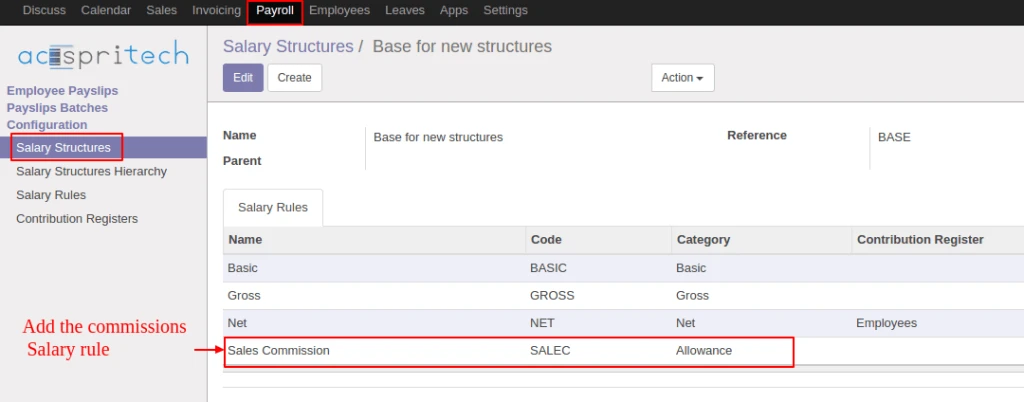
Add this new salary rule to Salary structure, so when employee payslip is create at that time employee related user’s commission amount is added into employee’s salary amount.
Odoo Salary Structure
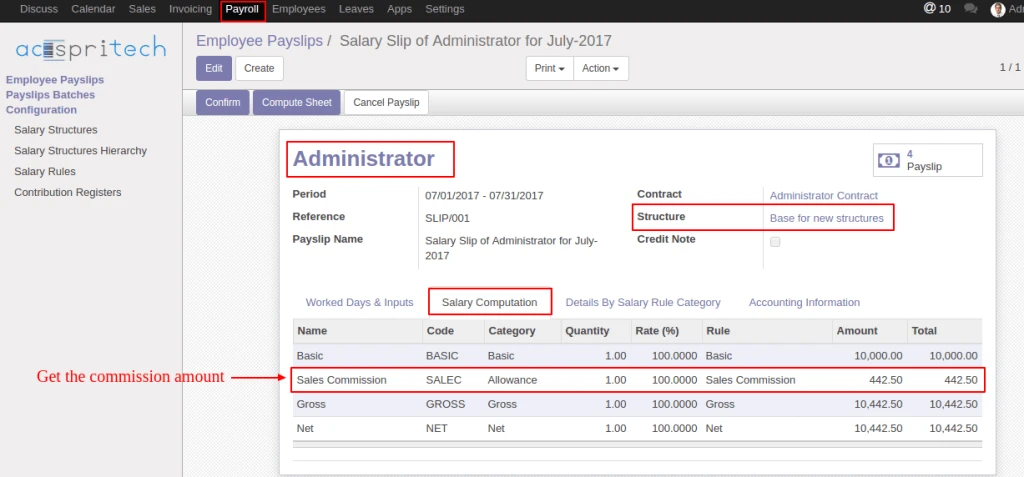
When the employee salary slip is generate, it will automatically added the commission amount and when confirm payslip, employee related user’s commission set to ‘Paid’.
Odoo Commission Payslip
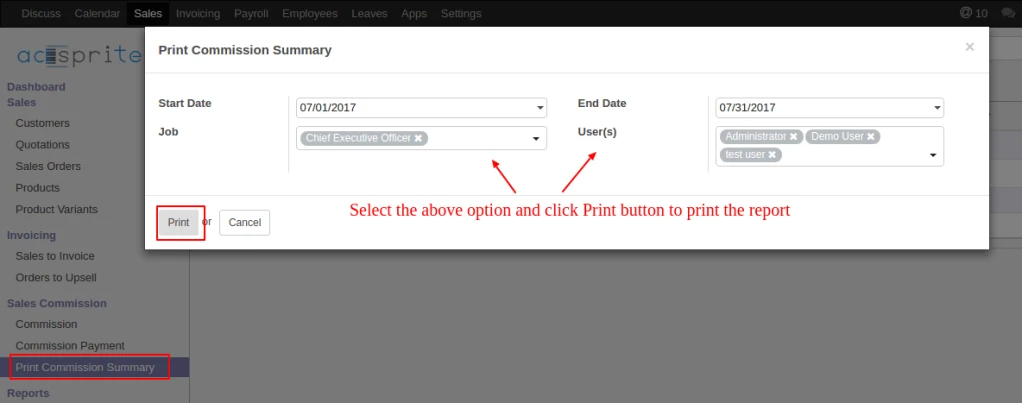
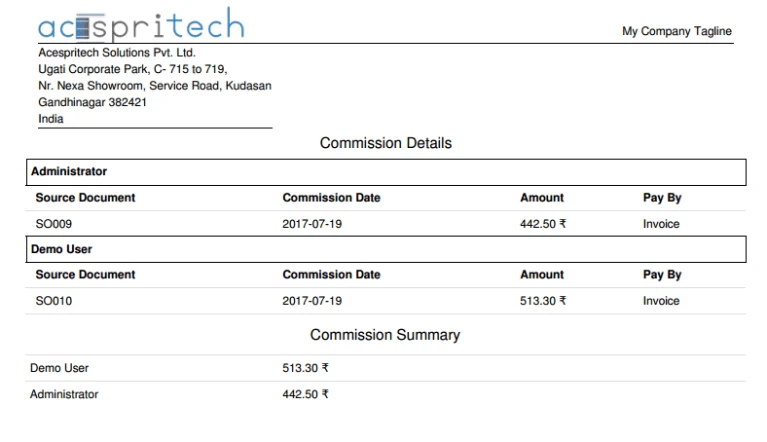
Click Print Commission summary menu, into opened pop-up, select the available options and click print button for printing the commission report.
Sometimes it is required to print draft receipt before validating POS Order and that is what we have improved in our new development in OpenERP V7.
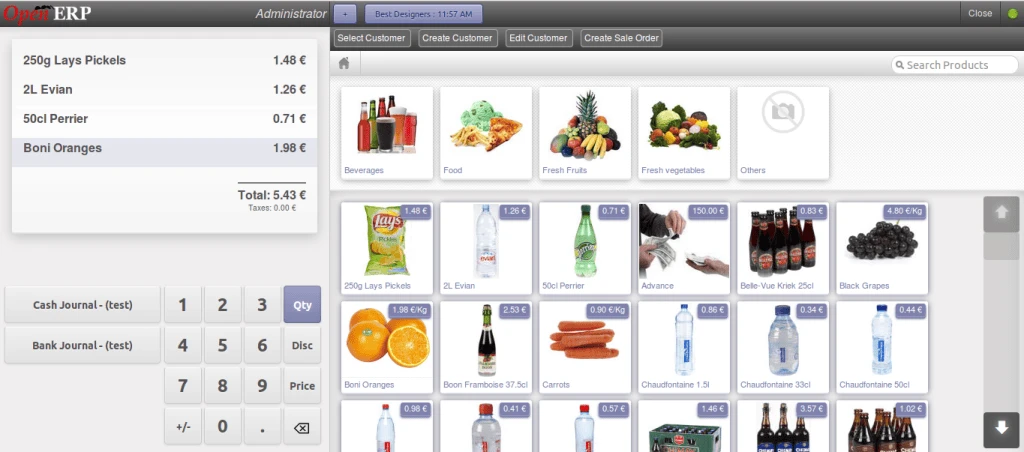
Here in below screen, we can see that we have selected customer, and few products.
OpenERP POS Normal Order
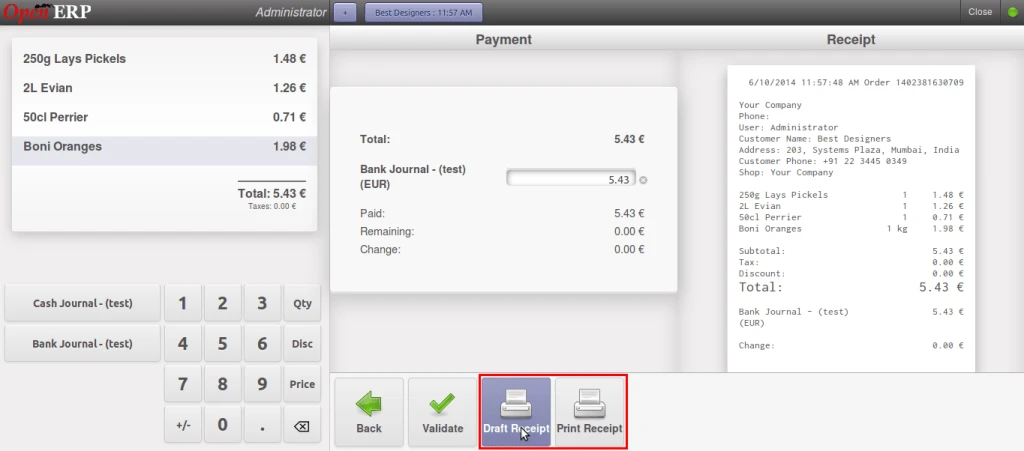
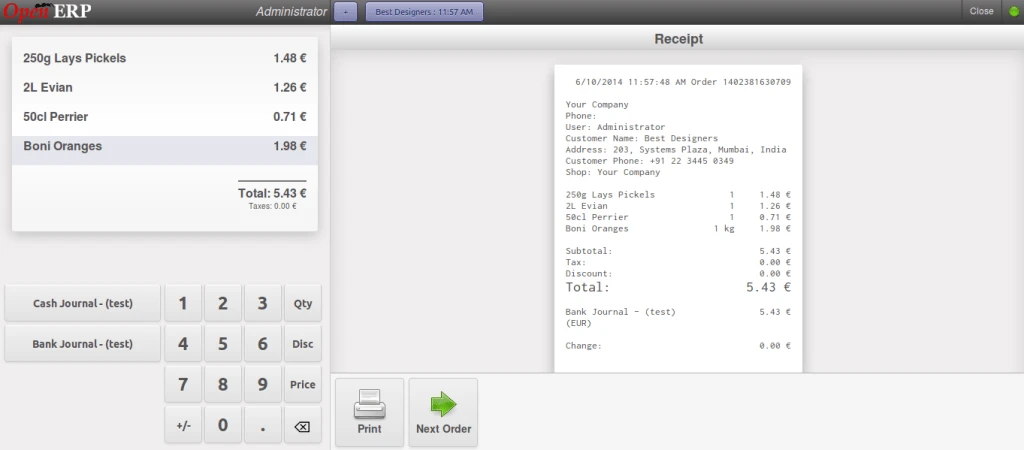
Now once we click on payment option, we will have two more options for Draft Receipt. We can see the Draft Receipt directly on screen like this, or we can print draft receipt also.
OpenERP POS Draft Receipt
And here is the normal receipt which we can see after validation which is same as draft receipt.