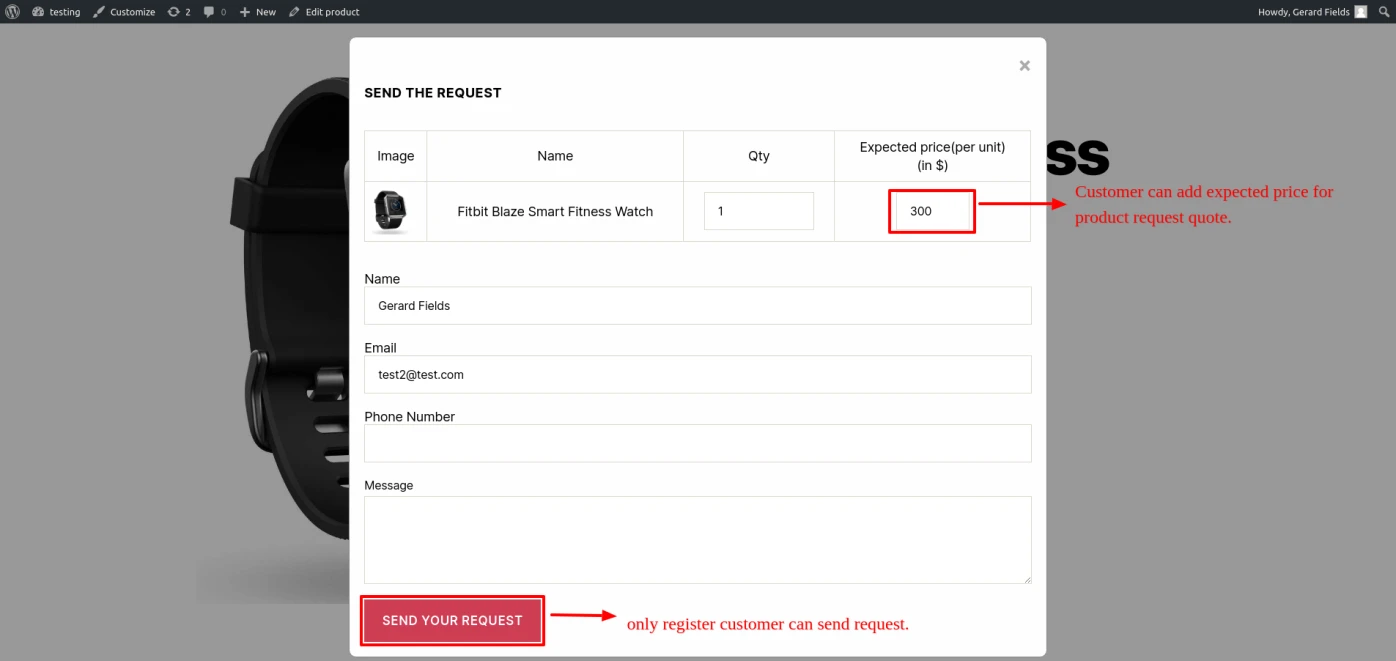
Product quote request submission for logged-in users only.
Provides a customizable form for users to submit a Product Quote.
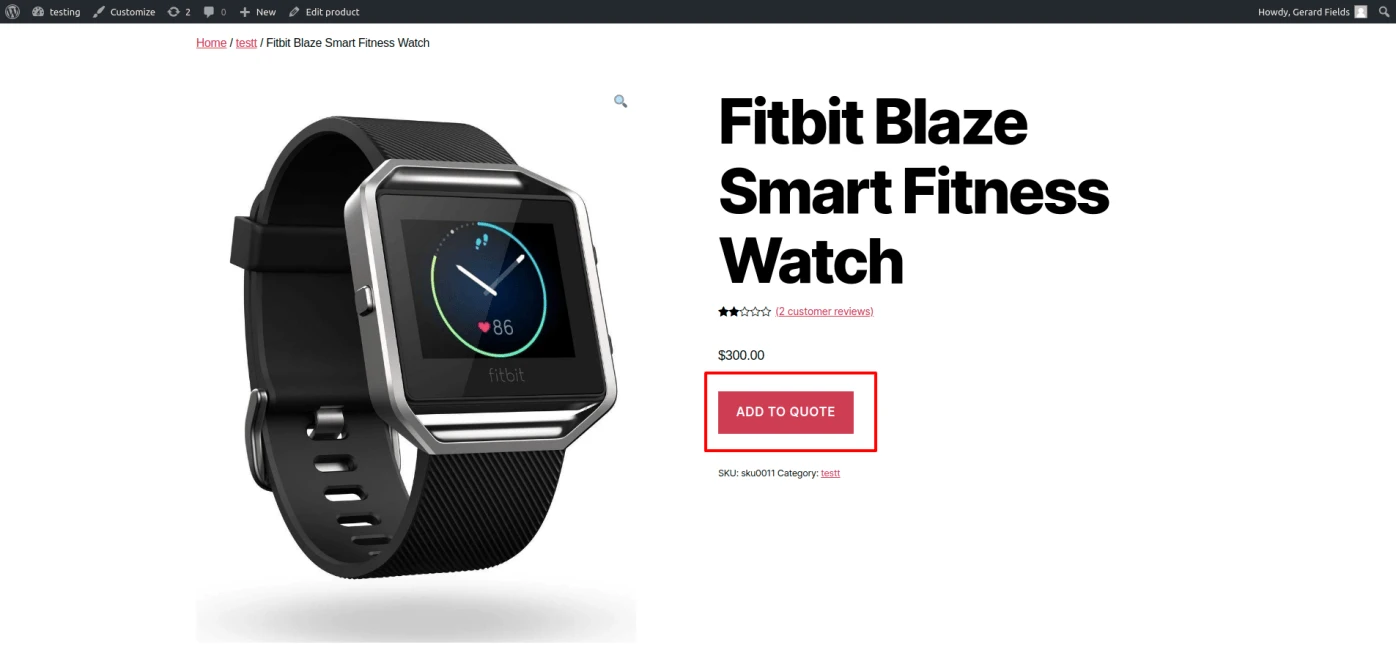
Display product add-to-quote button in product page.
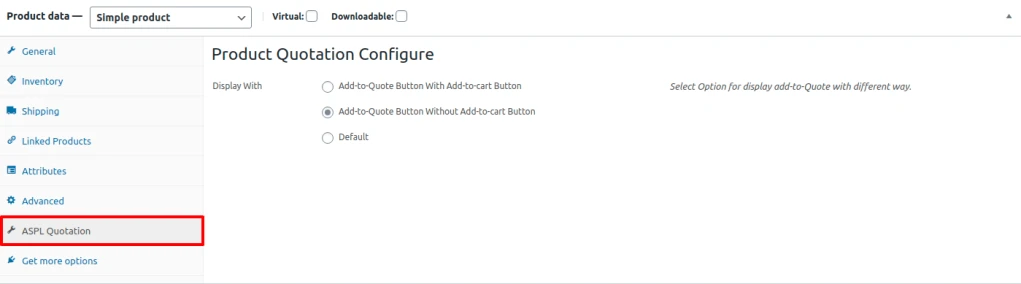
There are three option to set product quote button (1) add-to-quote with add-to-cart button (2)
add-to-quote button without add-to-cart button and (3) default.
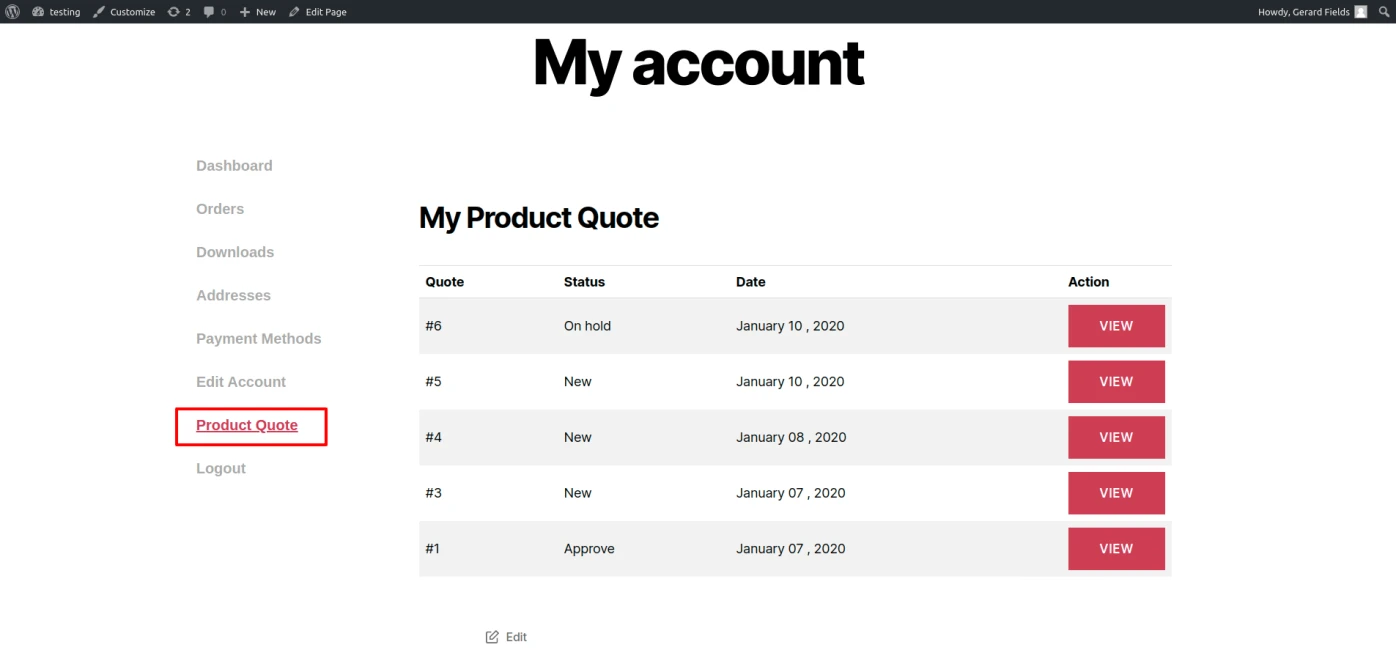
Display user all request quote detail in my-account area which is submitted with status.
Admin acn delete request of product quote and change status of Quote.
User get gmail whene Request status is update by admin.
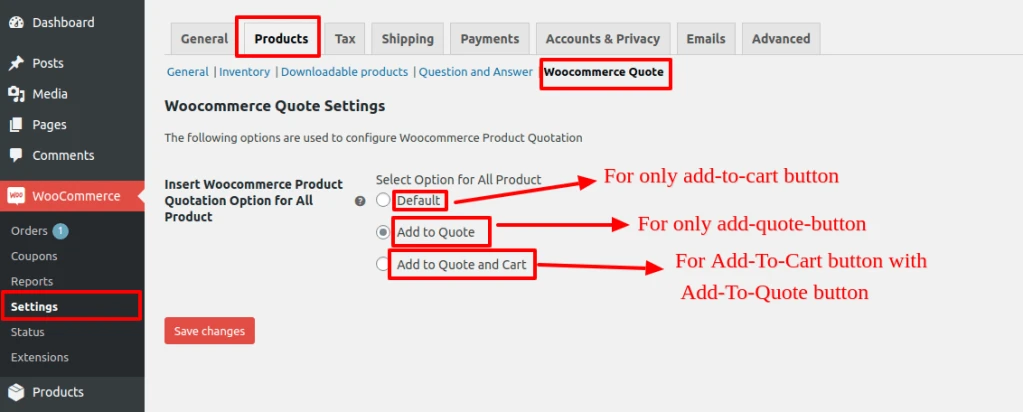
Admin can Add To Quote Button for all page from
WooCommerce – Setting – Products – Woocommerce Quote.
Admin can configure add to quote button for particular product in product tab ‘ASPL Quotation’.
Product Configuration for Quotation
Admin can easily set product quote option with multiple way to display quote for all products form WooCommerce – Setting – Products – WooCommerce Quote.
Set Option for all Product
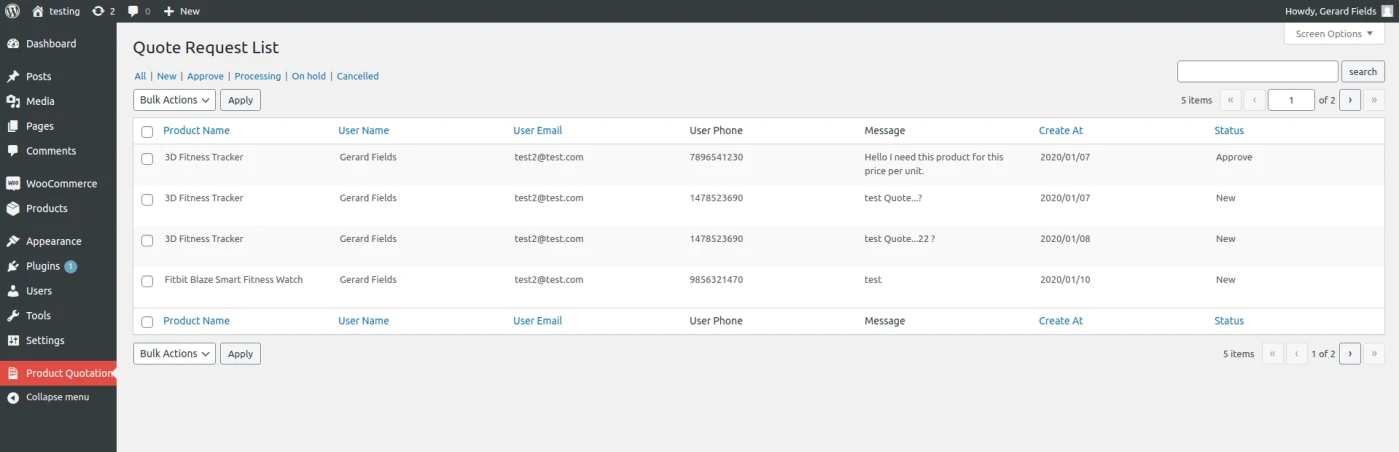
Admin can see the list of product request and edit or delete and update request status.
Product Request List
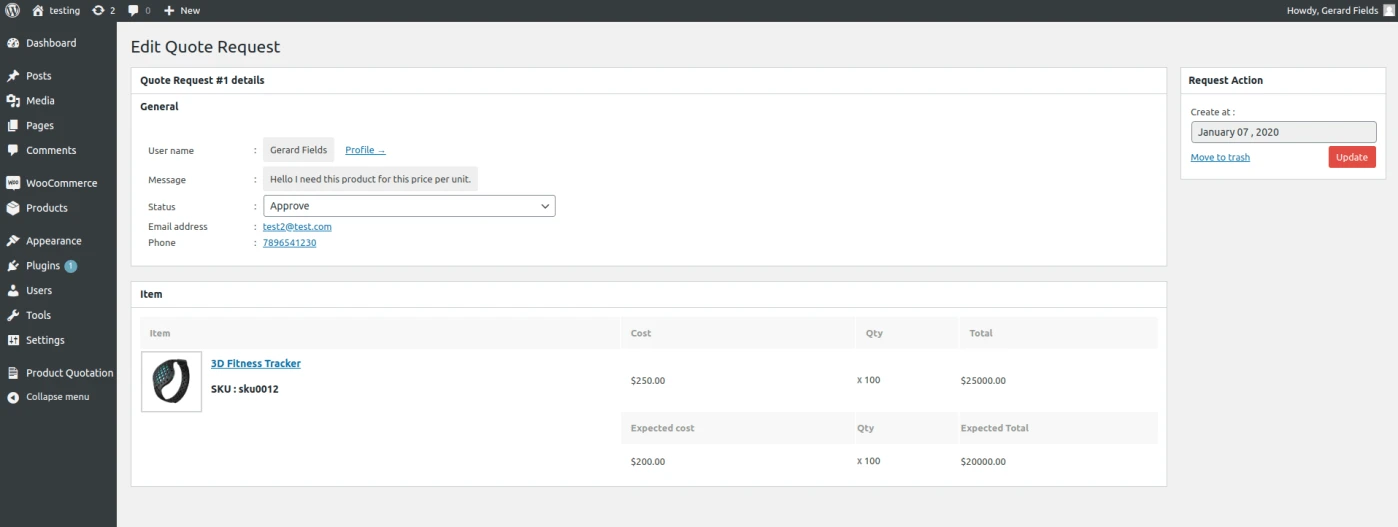
Admin can see all detail in edit page of request quote like customer profile, customer contact number, customer email id, customer request message and comparison between original and expected product price.
User get gmail when admin can change product quote status.
Product Quote Request Edit
User can see his request quote list in my account area .
Product Quote Data User Side
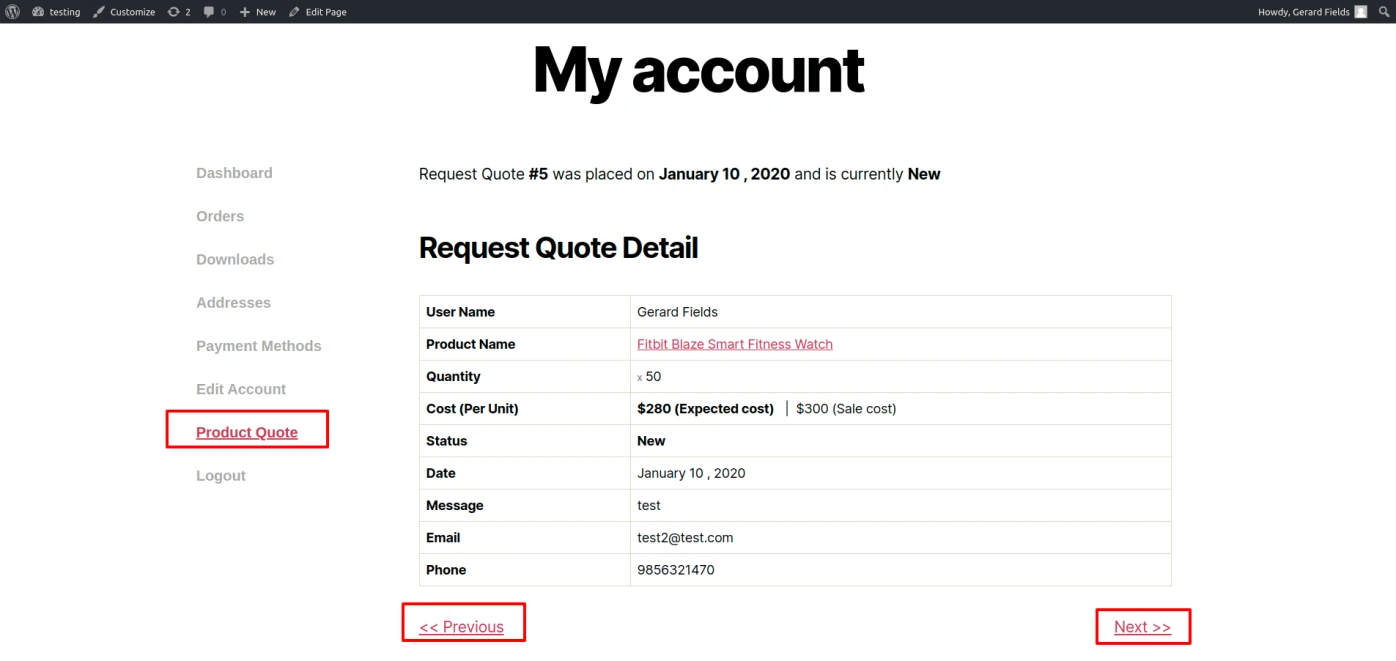
User get all the detail of request quote one by one in product quote view page in my account area.
Product Quote Request Detail User Side
Button of add to quote is display in product page by admin configuration in product tabs.
Product Quote Button in Shop Page
User can click on add to quote button then open this quotation form to user can easily request for product quotation. (Only register user can send the product quote request)
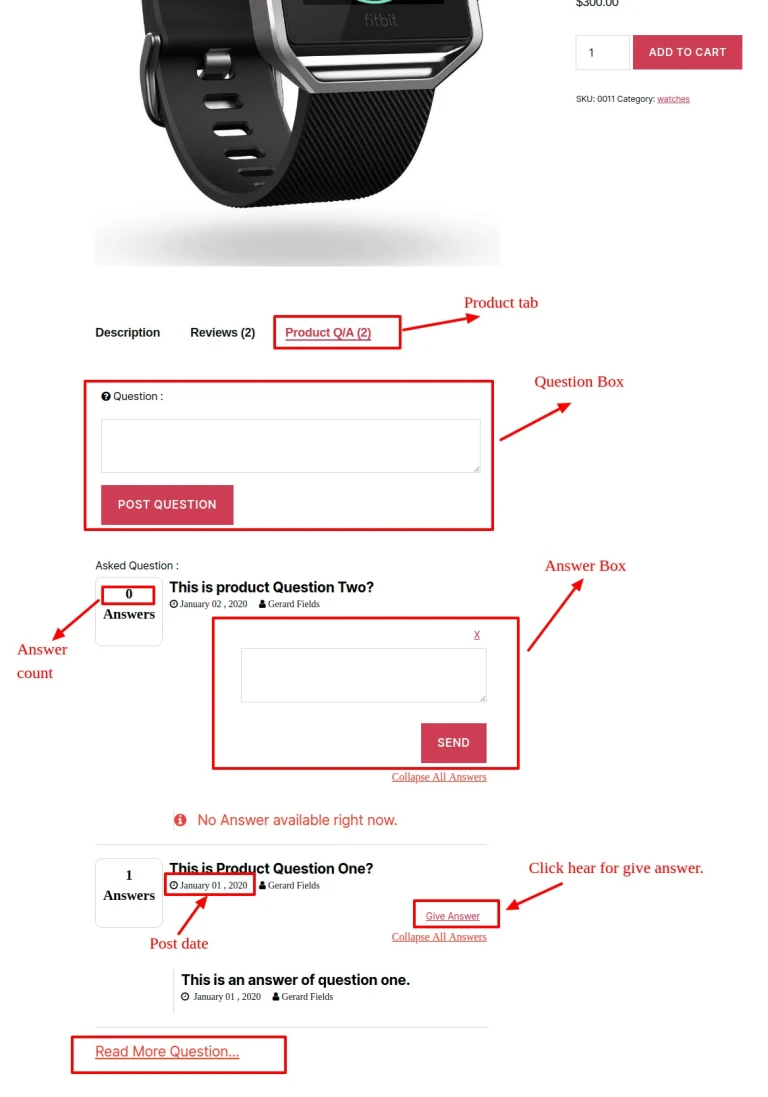
Let your users ask a question on specific WooCommerce products.
Let your users answer a question on the product page.
Manage easily questions and answers.
This plugin allows register customer of your shop to ask questions about products. Both admin
and other register customer can answers to them and guest customer can see all question and answer
of all product of your shop.
Work with simple product and variable products.
Avails logged-in customers to ask question and give answer about each product.
User can give multiple answers for one question for same login account.
It is working on simple product and variable product in WooCommerce.
No configuration needed! just install and it will start working from there, you can change the settings at any time though.
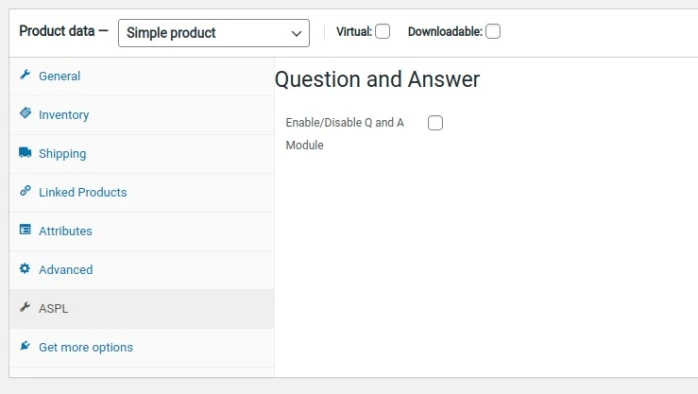
Product Edit Page
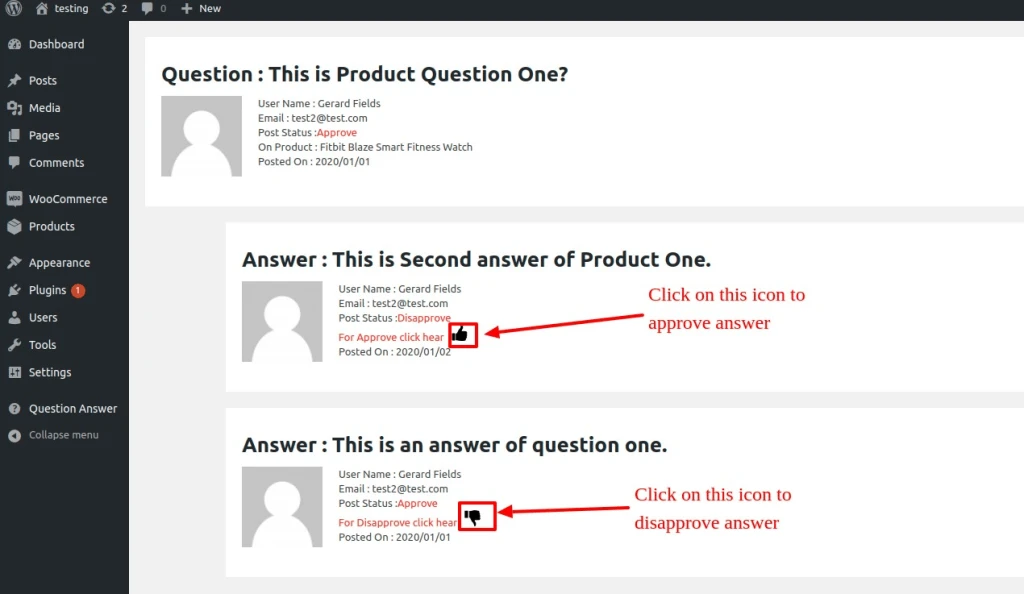
This plugin allows the customers to ask questions about each product in your store and any one can answers for those Questions and admin can delete/approve/disapprove answers and question both
Question and Answer Product Tab
Admin can enable Product Q/A tab in particular product page and disable for particular product page.
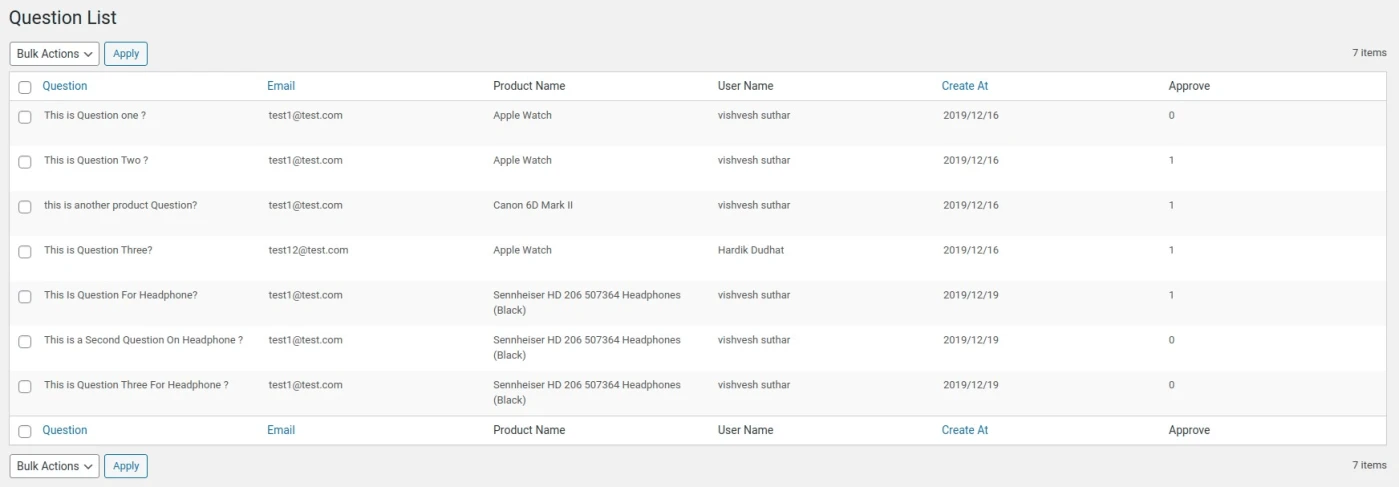
Admin can show list of question order by post date ,user name ,user email id and approve status.
Question List : Question List
Answer List
Answer List
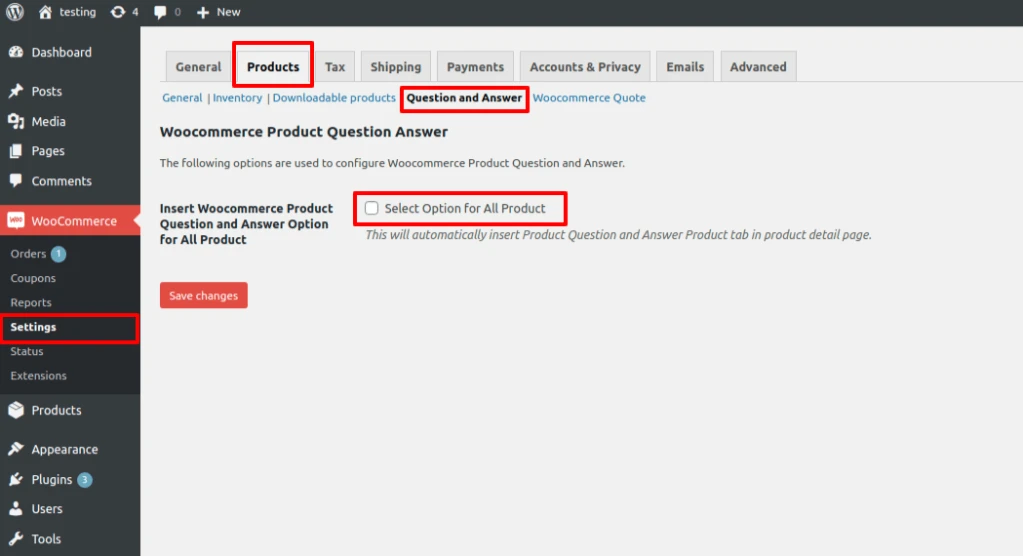
Admin can enable question and answer product tab for all product using WooCommerce – Setting – Products – Question and answer.
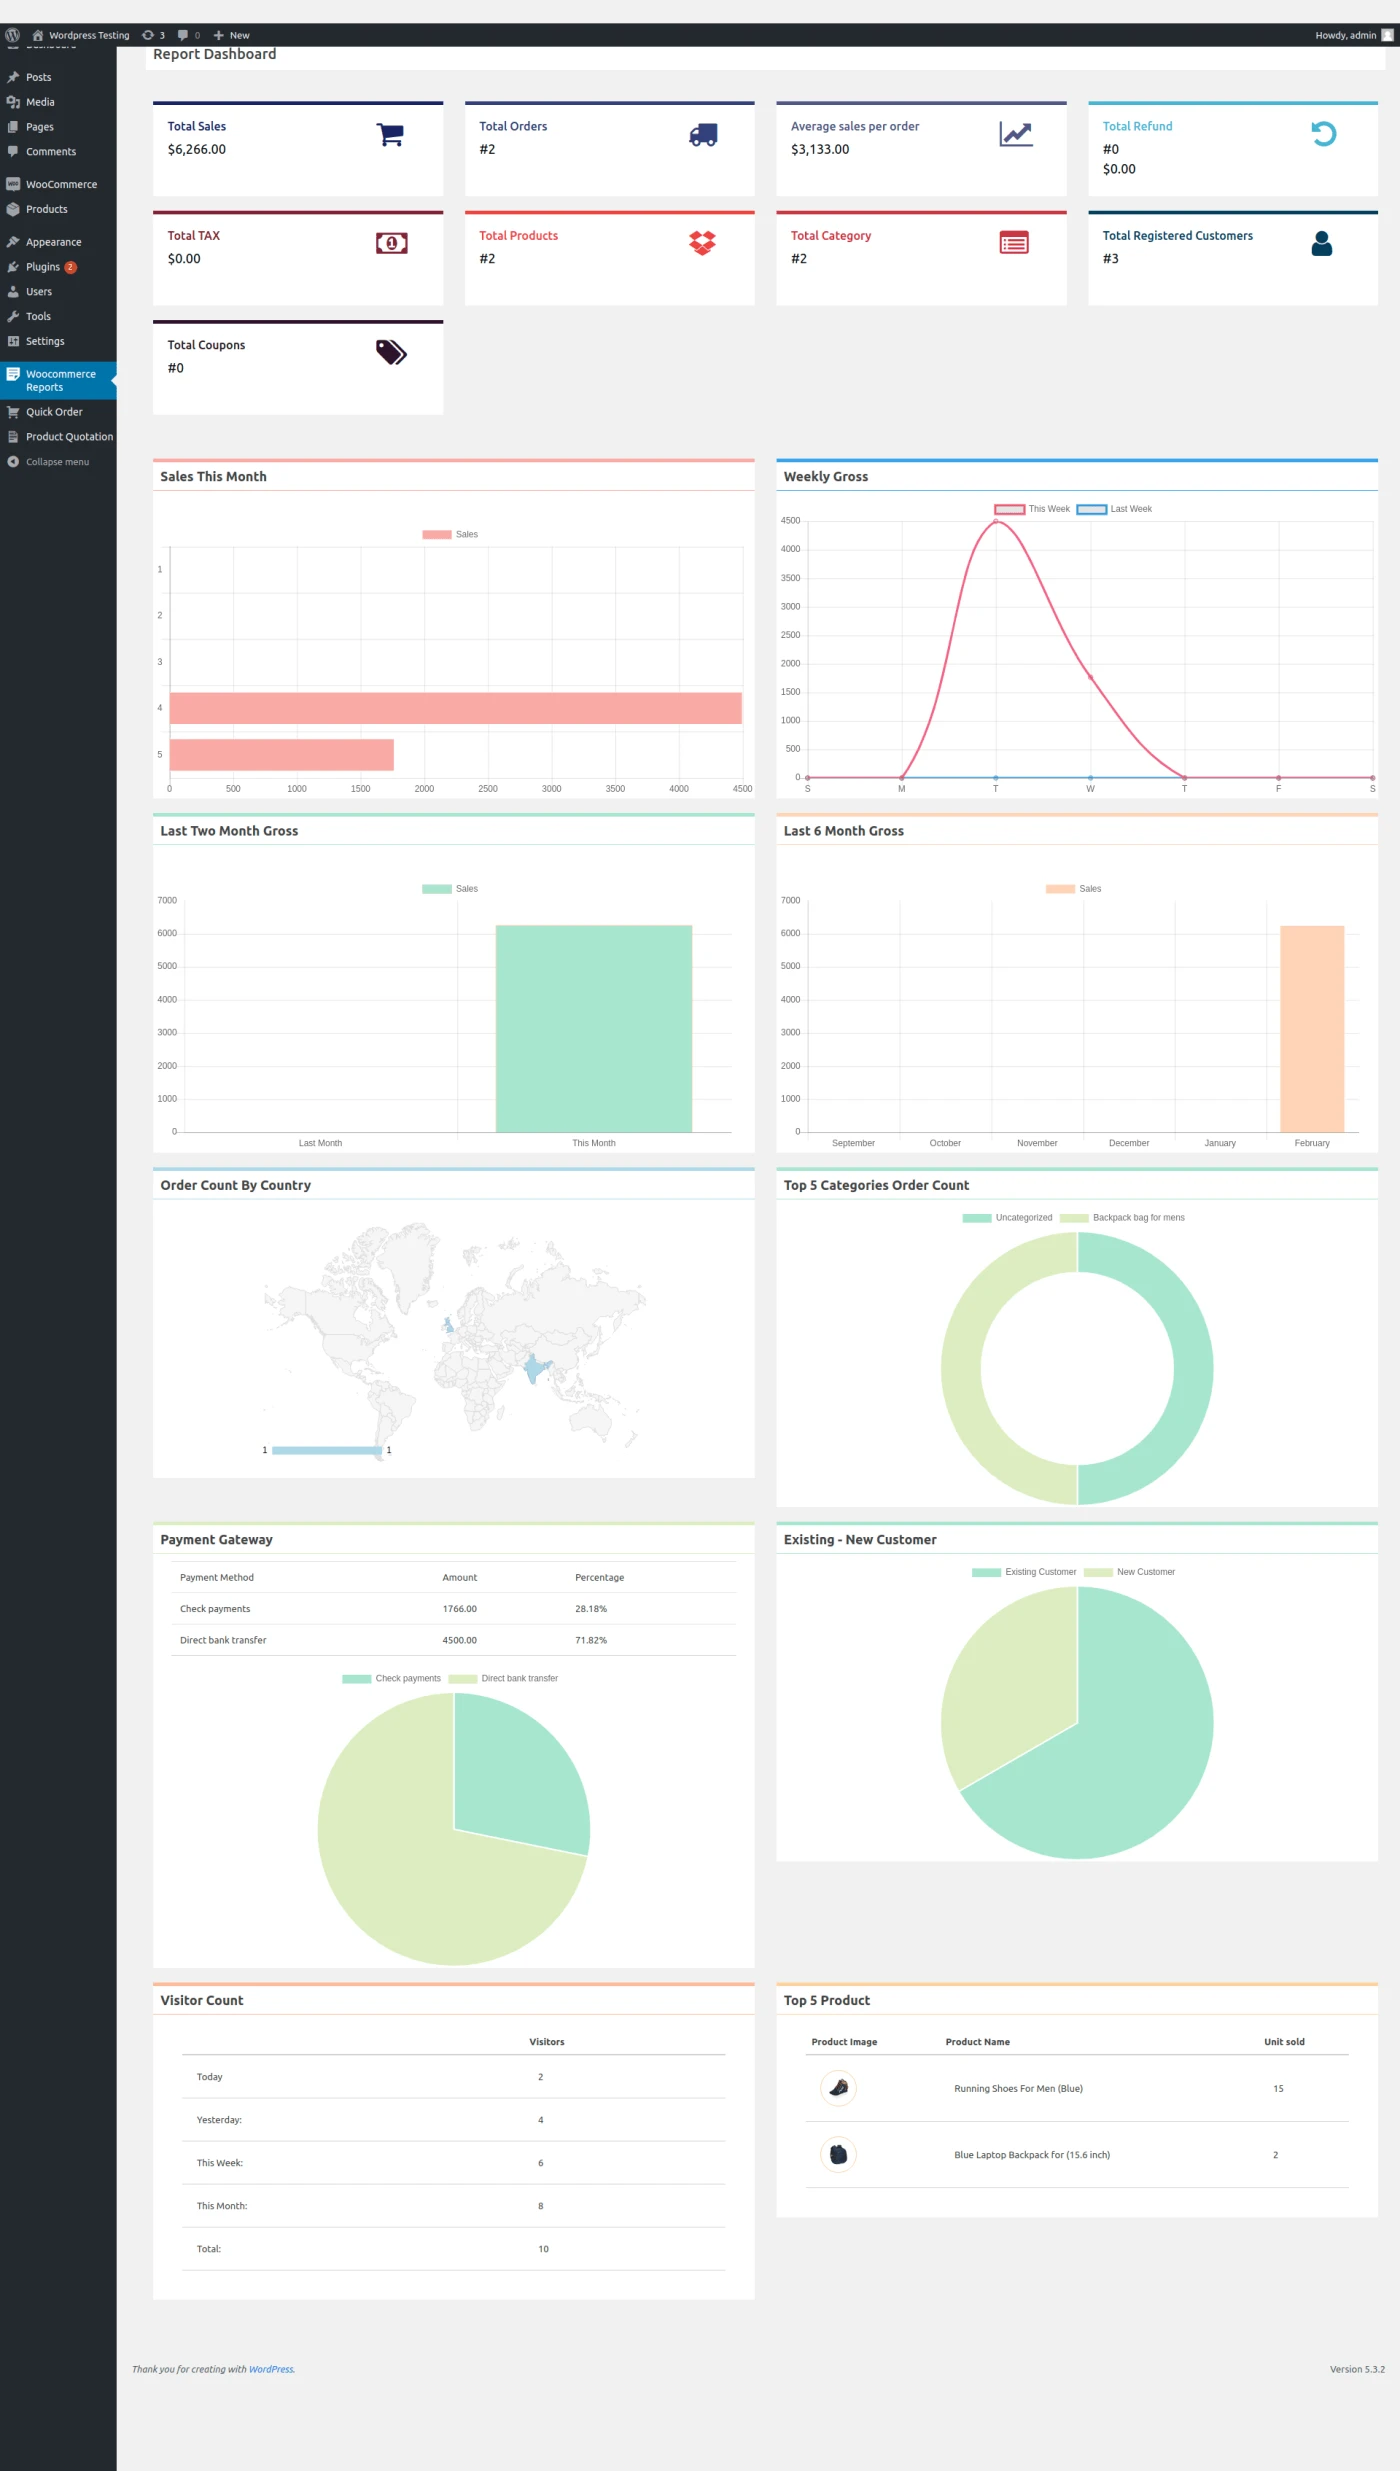
Woocommerce Advance Report plugin shows you all sales and order
information in one report dashboard in very easy to understand graph
view format.
Click here to download
Features:-
Display today’s total earnings by date.
Displays Top Products and Top Five Category.
Shows the visitor count.
Shows the number of Coupons and Payment Gateway.
Display total amount of refund and count number of it.
Shows total amount of sales, taxt and average sales per order.
It display count of total product ,order and total register customers.
It graphically present:
This month sales by date
Weekly gross
last two month gross
Last six month gross
Order count by country
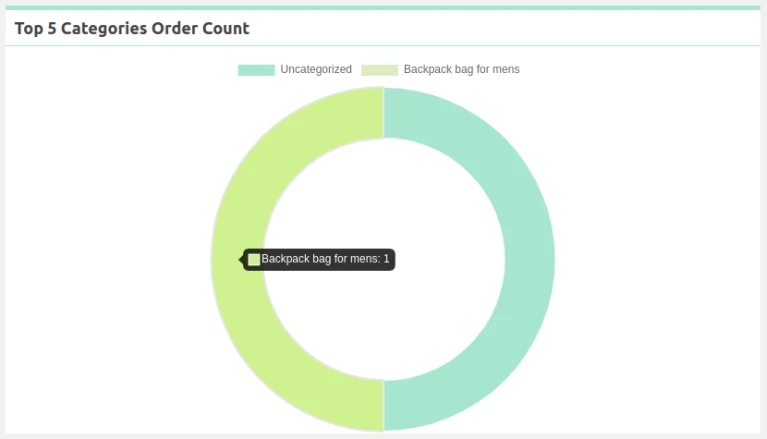
Top five ctegories order count
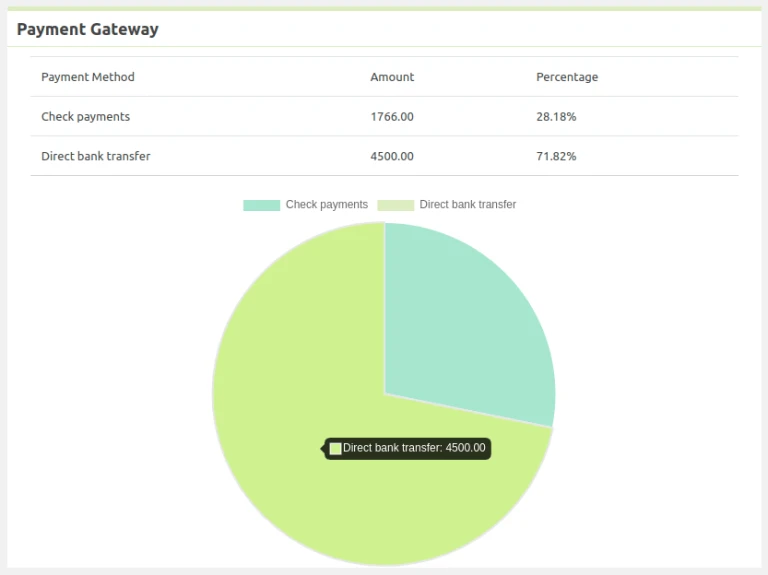
Payment gateway.
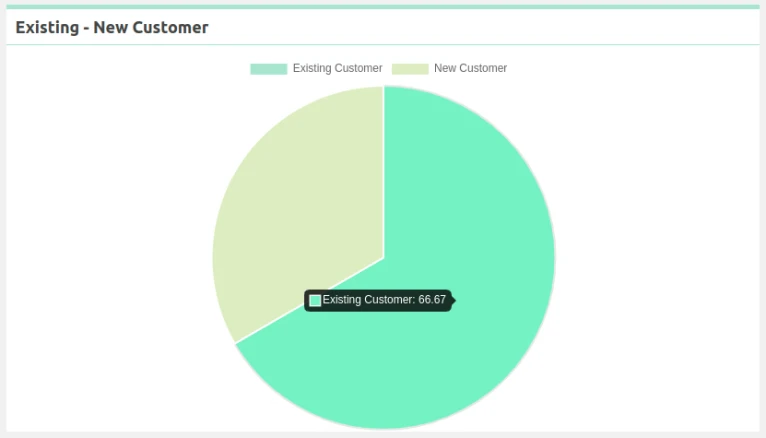
Existing-New customer
Report Dashboard –
WooCommerce Report Dashboard
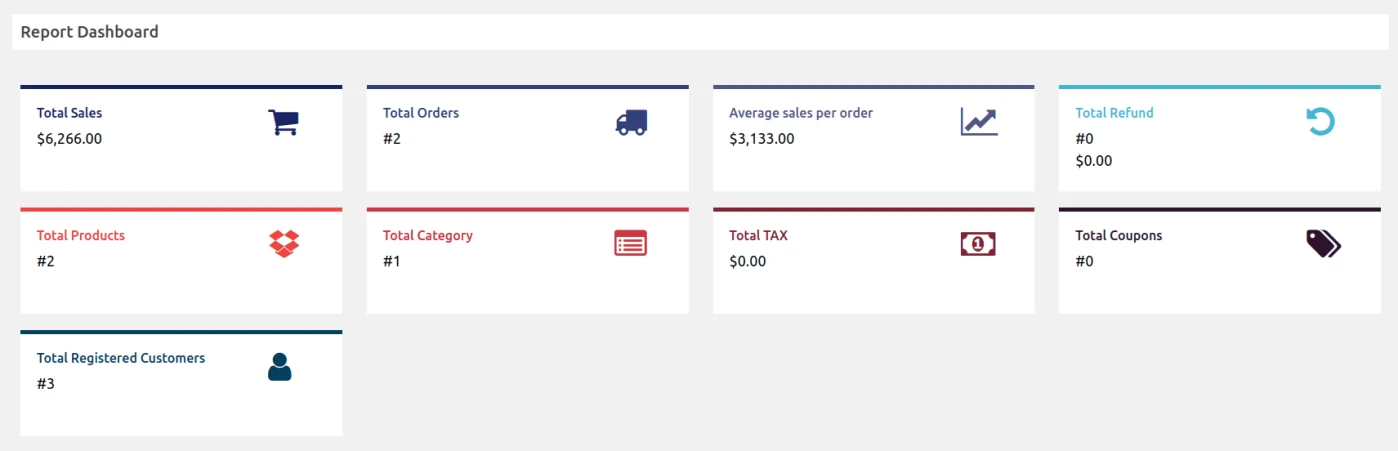
Total summaries like – Total sales, total order count, average
sales per order, total refund amount and count, total product
count, total ctegories count, total tax amount, total coupons
count and total numbers of registered customer.
Report Summary
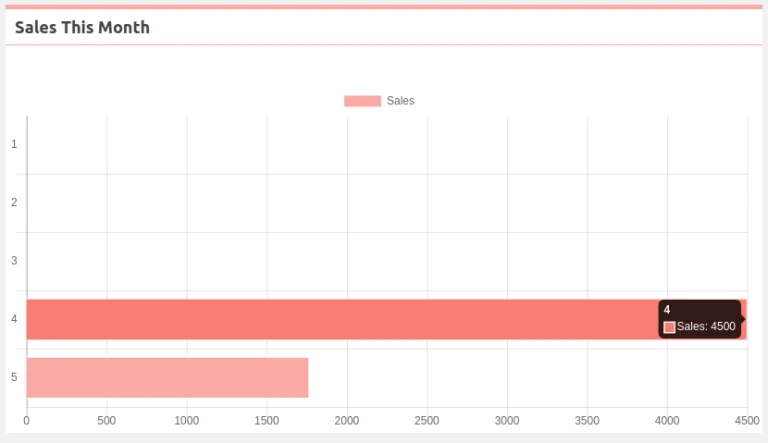
Sales this month : It is comparison graph of day by day
in this month.
Sales this Month
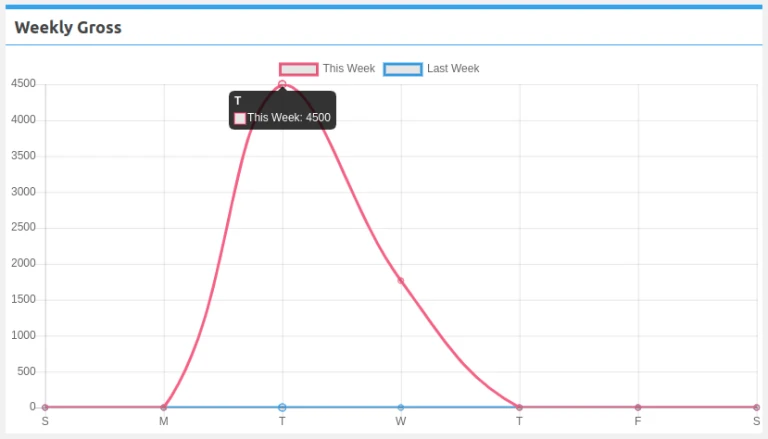
Weekly gross : It is comparison graph of two week one
is this week and other is last week in this month.
Weekly Gross
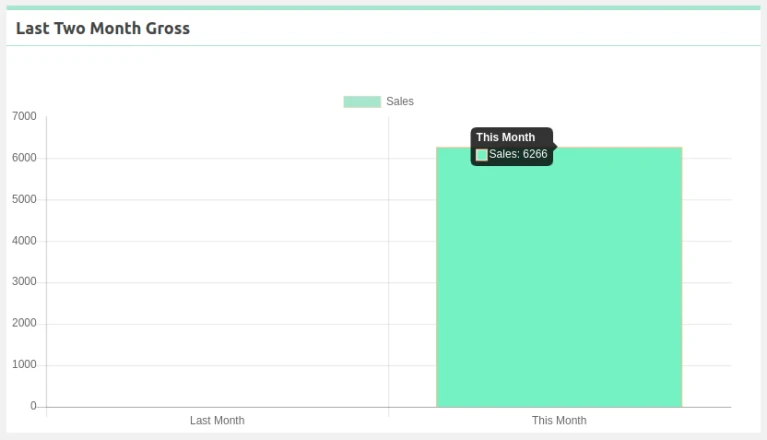
Last two months gross : It is comparison graph of two
months one is this month and other is last month.
Last Two Month Gross
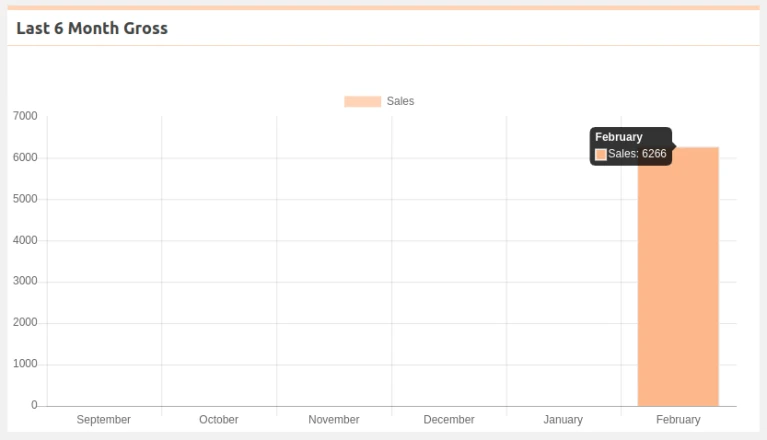
Last six months gross : It is comparison graph of six
months of this year.
Last 6Month Gross
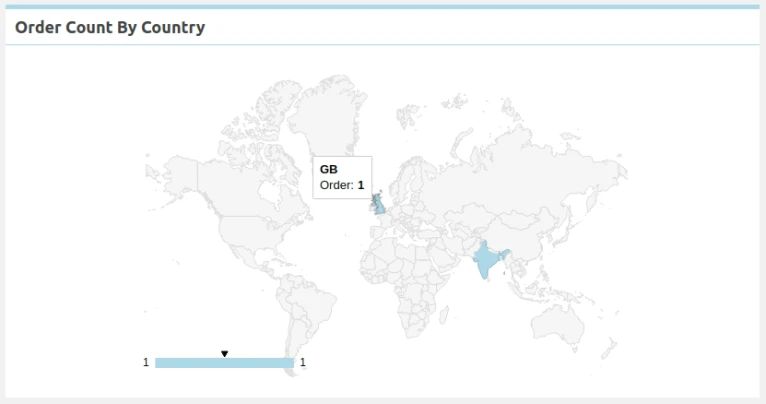
Order count by country : It’s shows all order count by
country in map.
Order Count by Country
Top five categories order count – It’s display all order
count by top five categories in graph.
Top5 Categories Order Count
Existing-New customer : It’s shows comparison of
Existing customer and New customer count.
Existing and New Customer Count
Payment Gateway : It’s display list of payment methods
with total amount and graphical comparison of them.
Payment Gateway
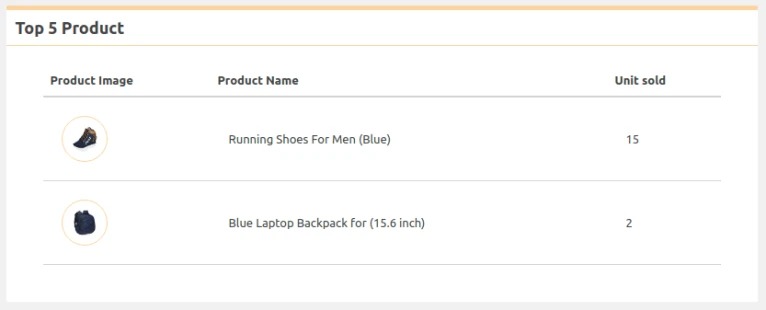
List of top five product : It’s display list of top five
product with count of unit sold.
Top Five Products with Unit Sold
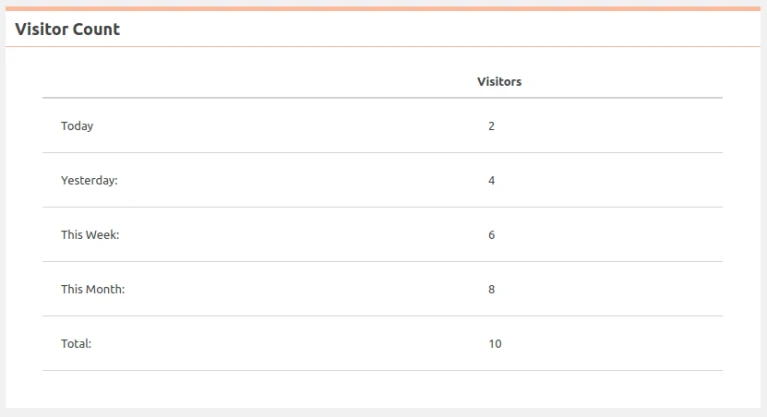
Visitor count : It’s shows list of Today ,Yesterday ,This
week ,This month ,Total visitors count.
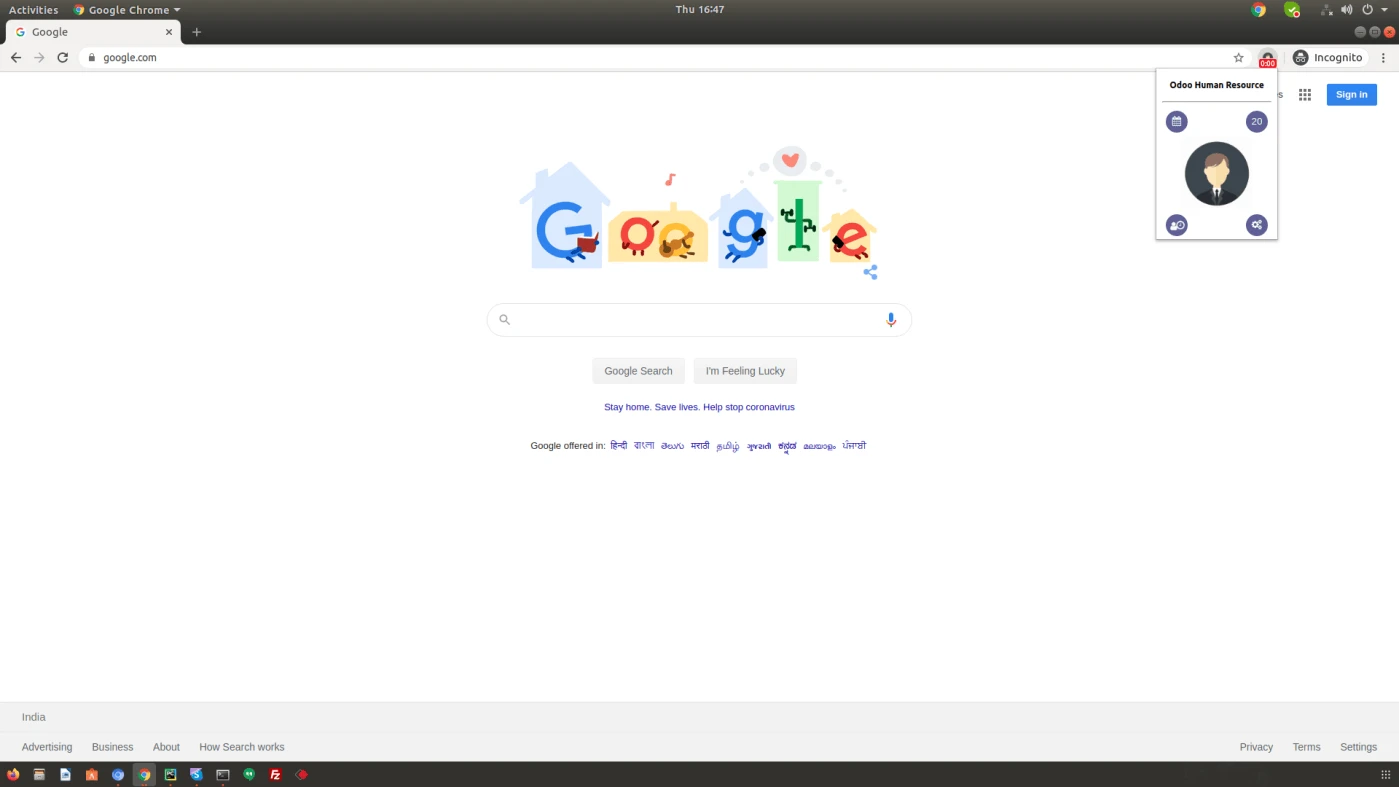
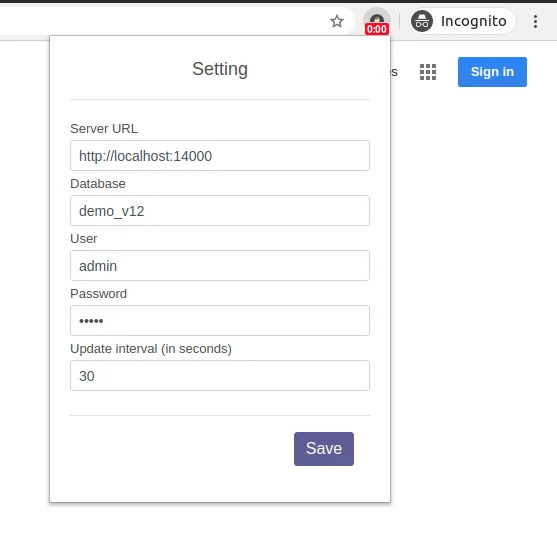
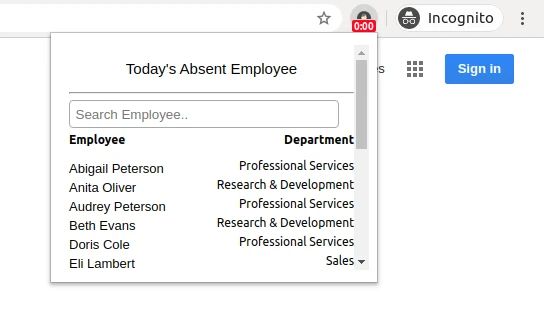
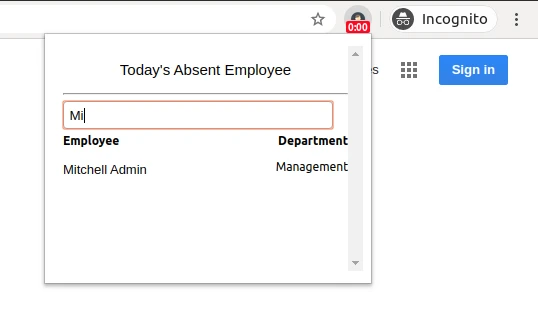
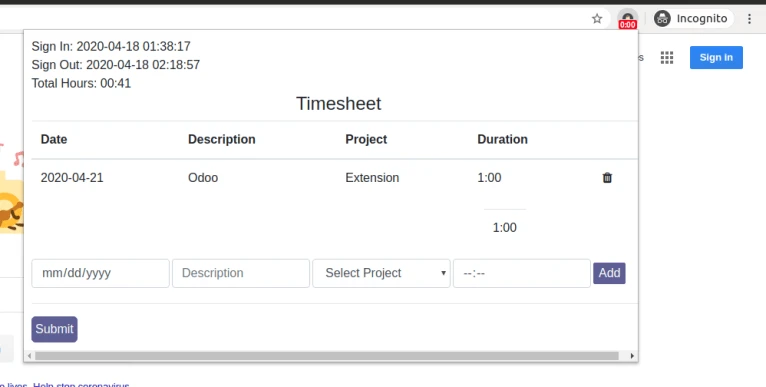
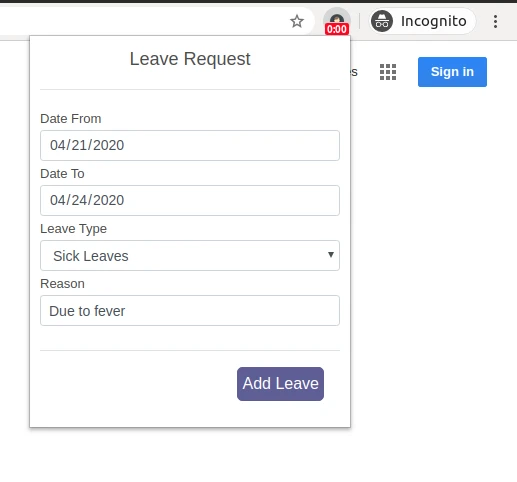
A chrome extension (browser extension), also called a plug-in, it enhanace browsing experience. This extension connects with Odoo ERP and simplify daily process with easy steps and simple user interface.
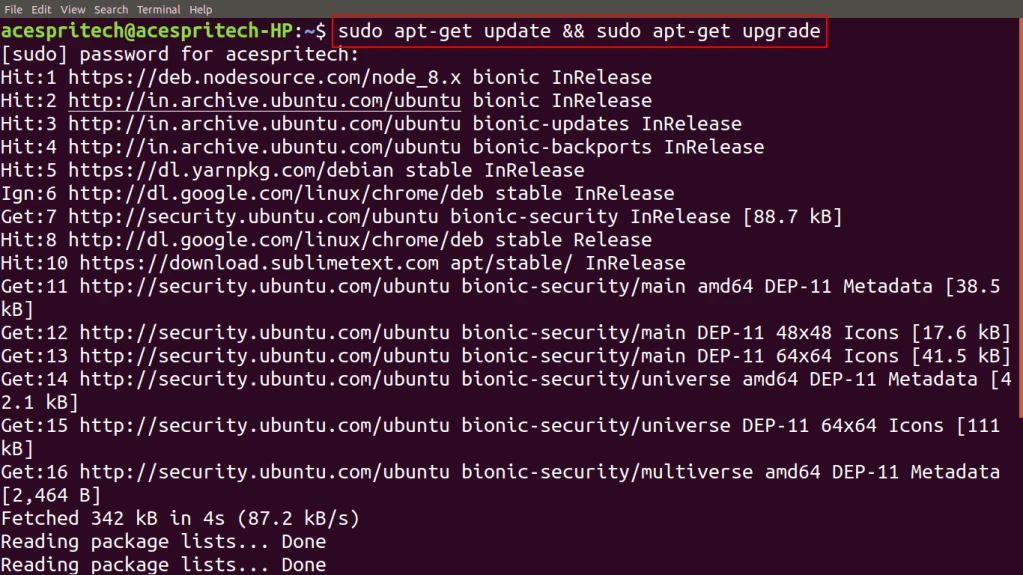
Step1: Use upgrade command to actually installs newer versions of the packages. sudo apt-get update && sudo apt-get upgrade
Update and Upgrade
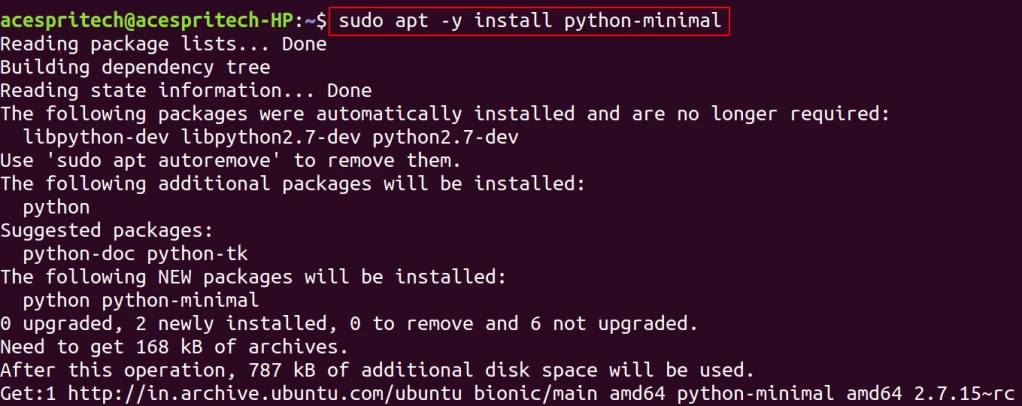
Step2: You have to install the following package. sudo apt -y install python-minimal
Python Minimal
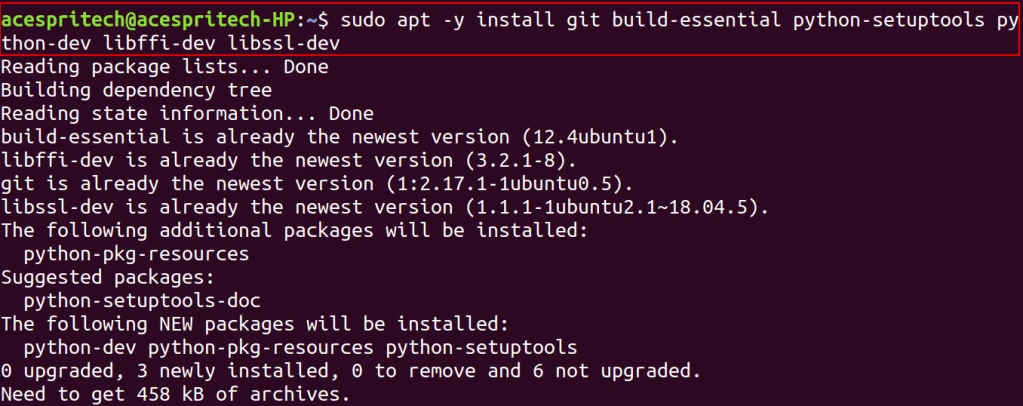
Step3 : You have to install the following dependancy. sudo apt -y install git build-essential python-setuptools python-dev libffi-dev libssl-dev
Python Setup Tools
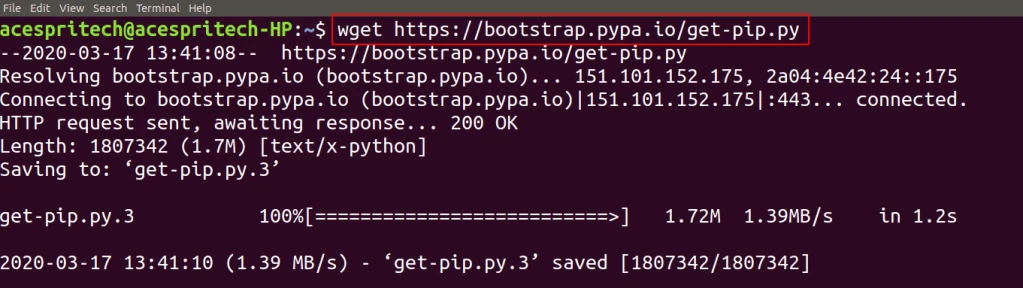
Step4: Now The next step is install pip3 package for python wget https://bootstrap.pypa.io/get-pip.py
Get Pip
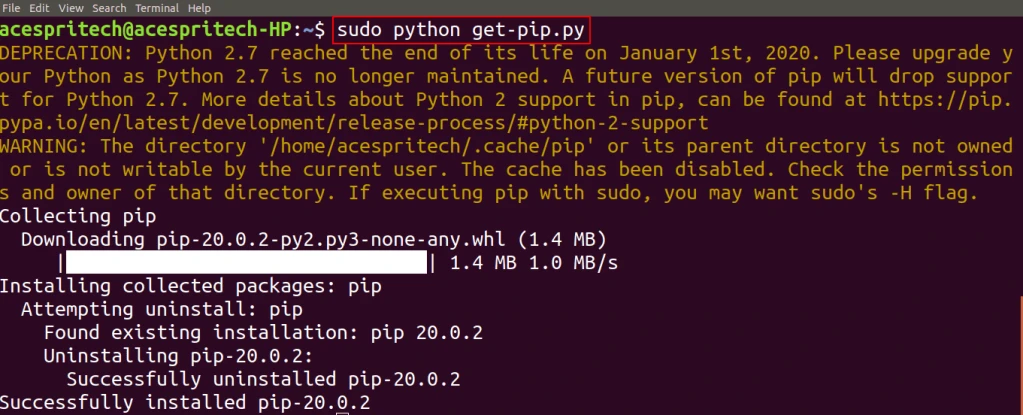
sudo python get-pip.py
Get Pip Install
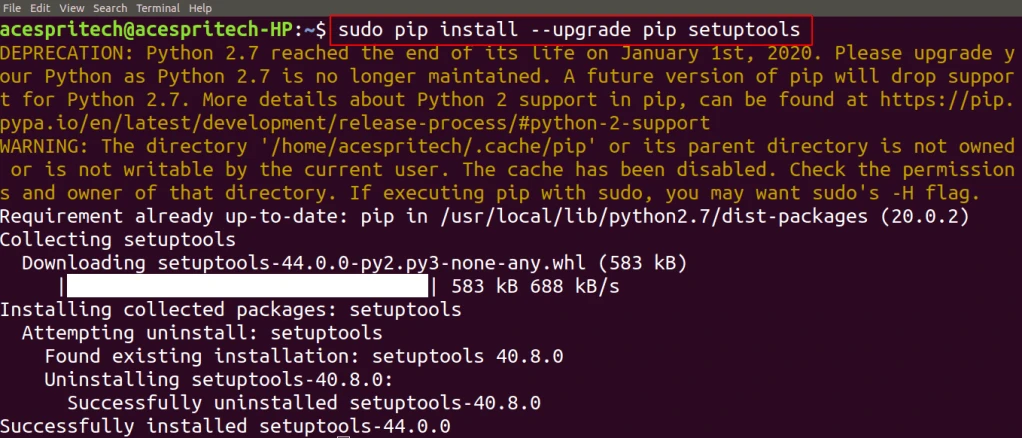
sudo pip install –upgrade pip setuptools
Setup Tools Update
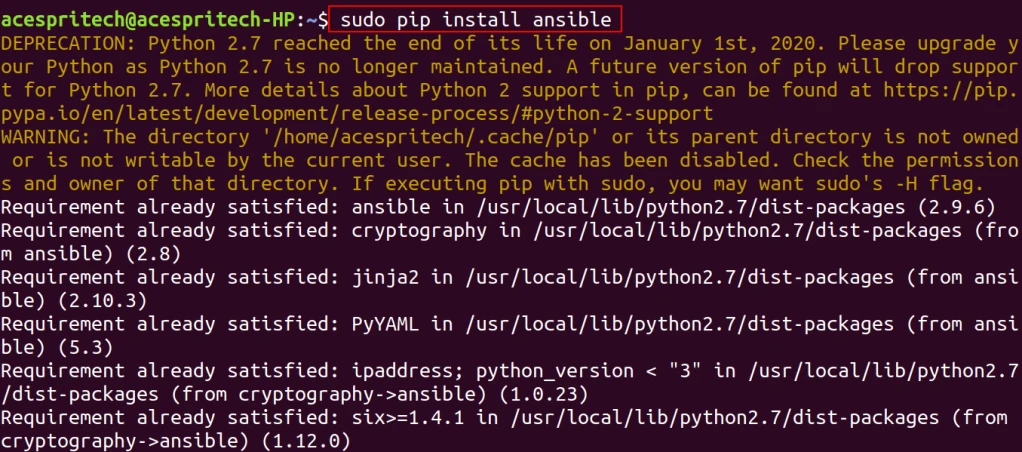
sudo pip install ansible
Ansible Install
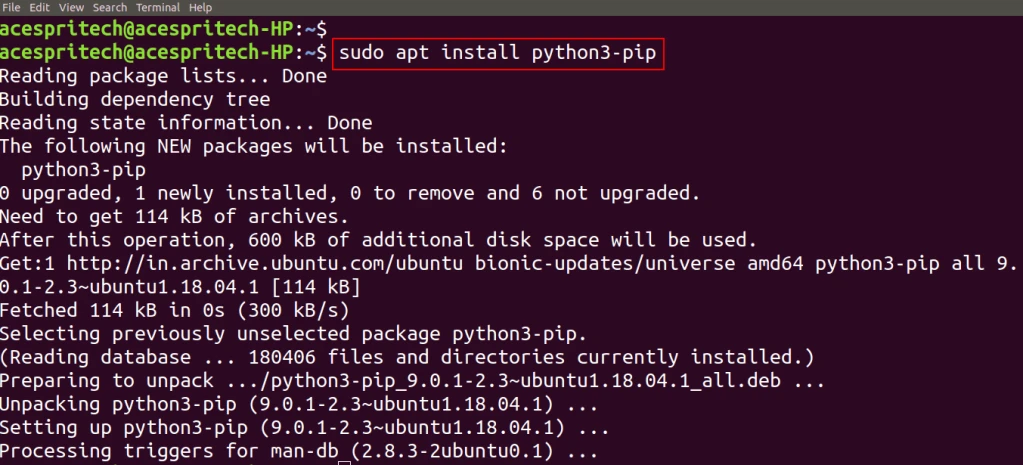
Step 5: Next to install python3 sudo apt install python3-pip
Python3 Pip
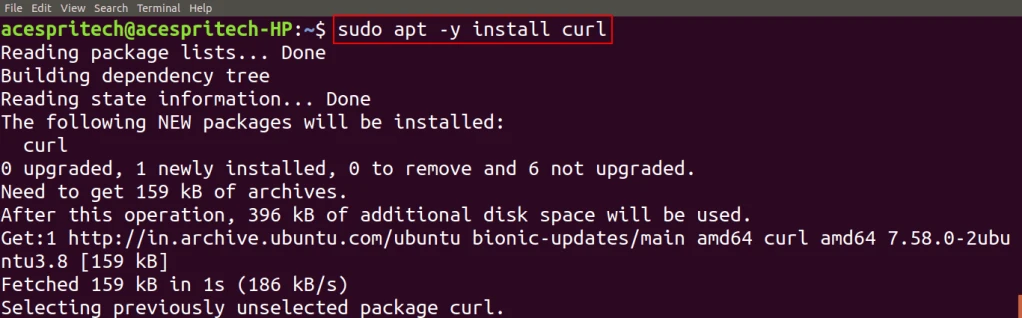
Step 6: Next step is to install curl sudo apt -y install curl
Curl Install
Step 7: Next you have to configure the yarn package repository. curl -sS https://dl.yarnpkg.com/debian/pubkey.gpg | sudo apt-key add –
Apt Key Add
echo “deb https://dl.yarnpkg.com/debian/ stable main” | sudo tee /etc/apt/sources.list.d/yarn.list
Yarn List
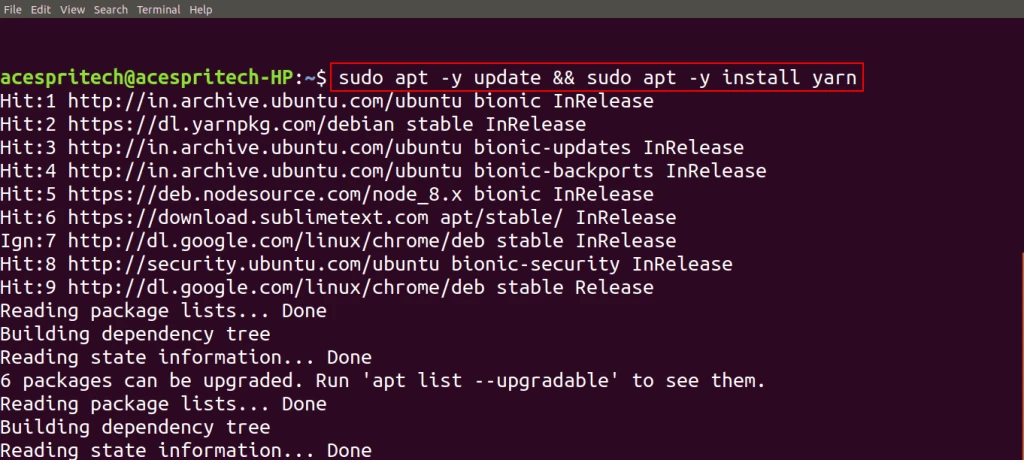
Step 8: Next following command to install yarn. sudo apt -y update && sudo apt -y install yarn
Update and Install Yarn
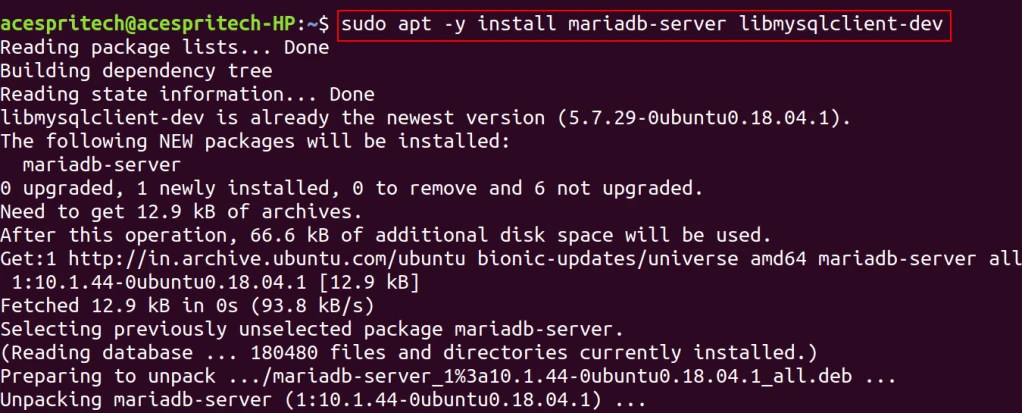
Step 9: Now next For install mariaDB you have to run following command sudo apt -y install mariadb-server libmysqlclient-dev
Install Mariadb
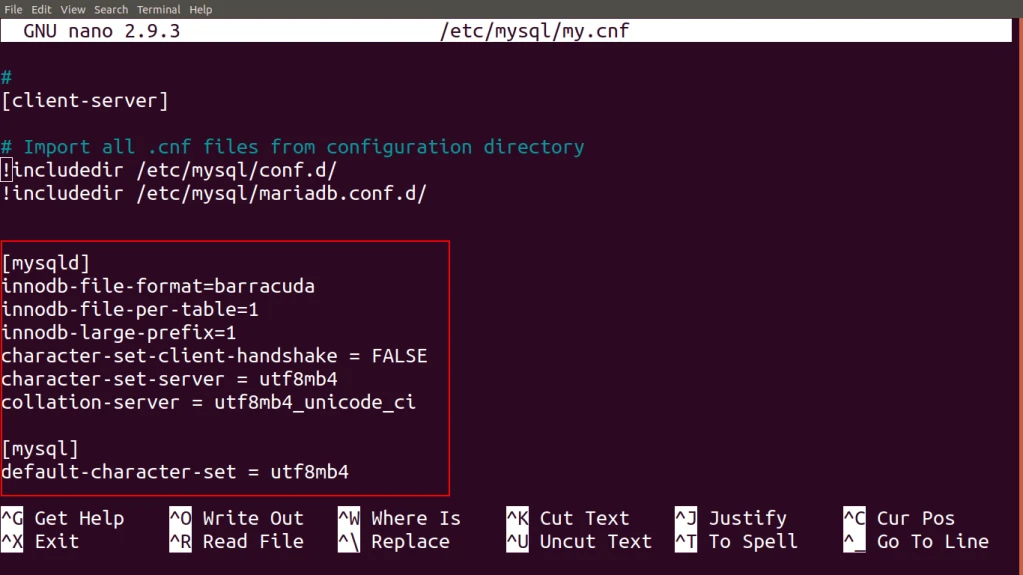
Step 10: Now next step is to update “my.conf” file for database.
For that to open file in command prompt in edit mode enter below command. sudo nano /etc/mysql/my.cnf
Step 11: Next, you have to restart MariaDB and enable it to auto start MariaDB at boot time. sudo systemctl restart mariaDB
Restart Mariadb
sudo systemctl enable mariaDB
Enable Mariadb
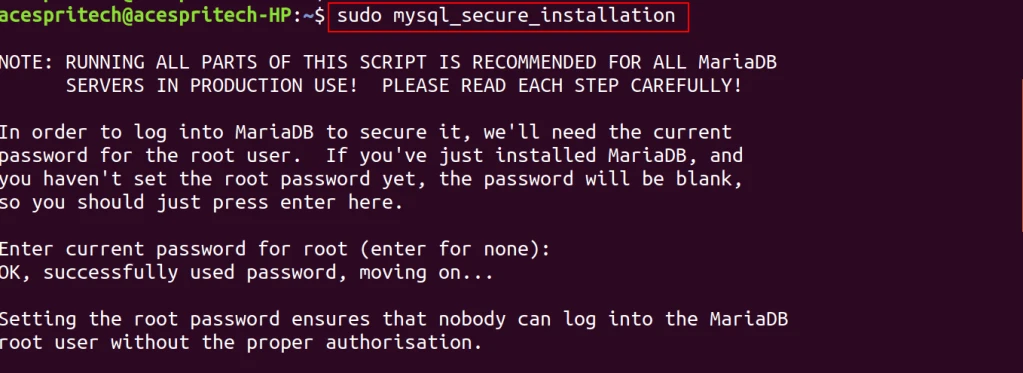
Step 12: Next, the mysql_secure_installation tool to configure additional security options. sudo mysql_secure_installation
Enter current password for root (enter for none): xxxxxx
Change the root password? [Y/n] n
Remove anonymous users? [Y/n] y
Disallow root login remotely? [Y/n] y
Remove test database and access to it? [Y/n] y
Reload privilege tables now? [Y/n] y
My Sql Secure Installation
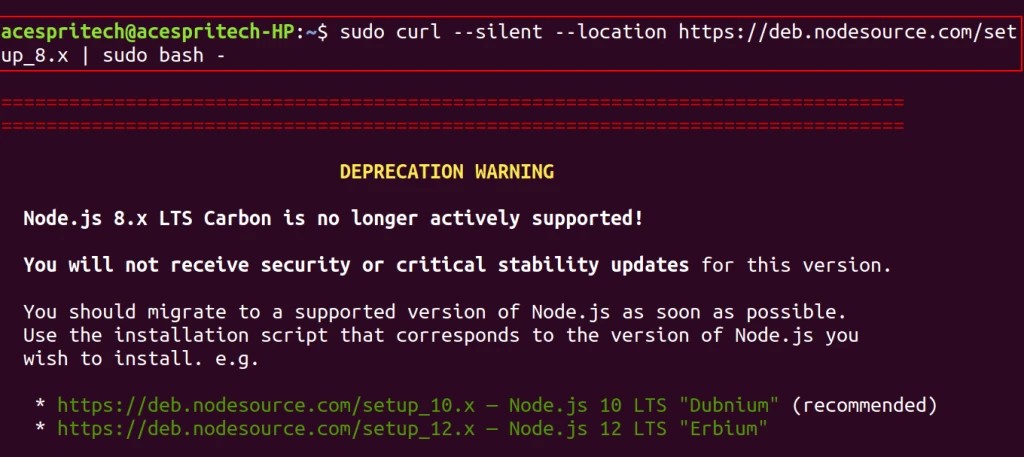
Step 13:you have to add the Node source Node.js 8.x respository. sudo curl –silent –location https://deb.nodesource.com/setup_8.x | sudo bash –
Curl Location
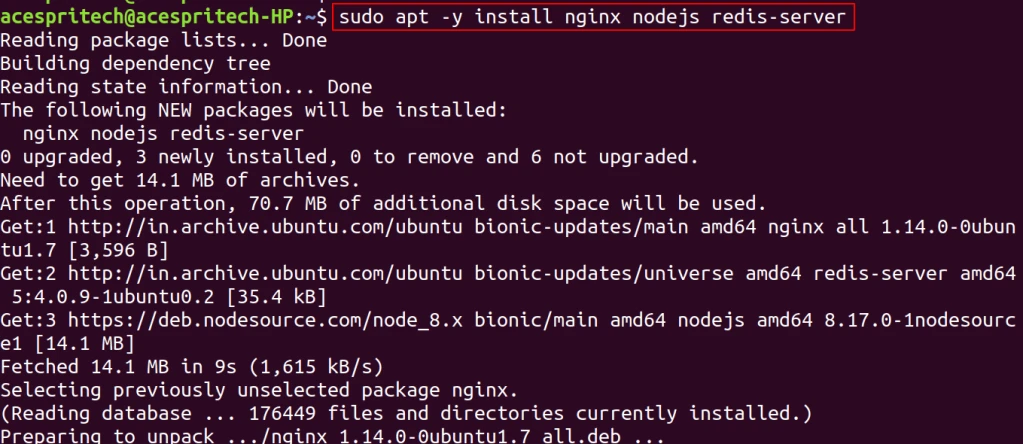
Step 14: To install Nginx, Node.js and Redis on Ubuntu, run the commands below. sudo apt -y install nginx nodejs redis-server
Install Nginx
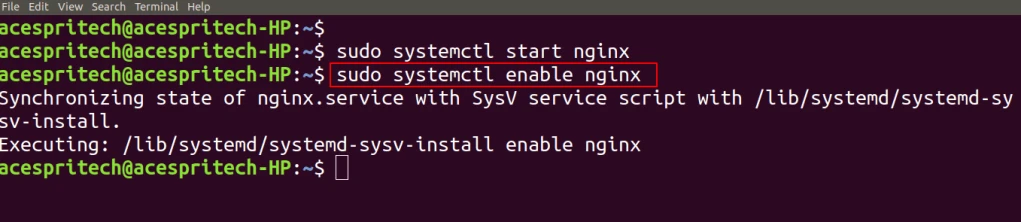
Step 15: Next step is to start and enable Nginx service to always start up with the boots. sudo systemctl start nginx Start Nginx sudo systemctl enable nginx Enable Nginx
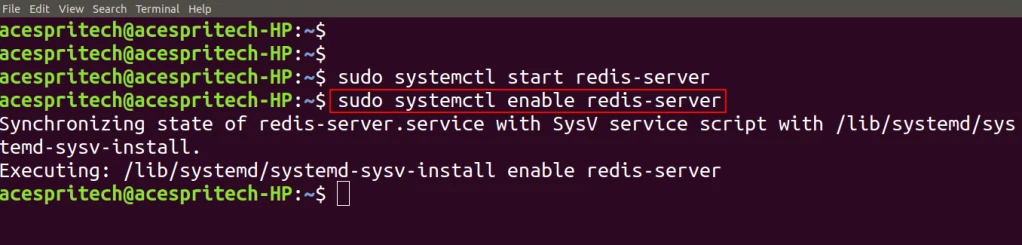
Step 16: Start and enable Redis service to always start up with the boots. sudo systemctl start redis-server
Start Redis Server
sudo systemctl enable redis-server
Enable Redis Server
Step 17: For installation and activation of virtual environment. sudo systemctl enable redis-server
Mkdir ERPNext
cd erpnext
CD ERPNext
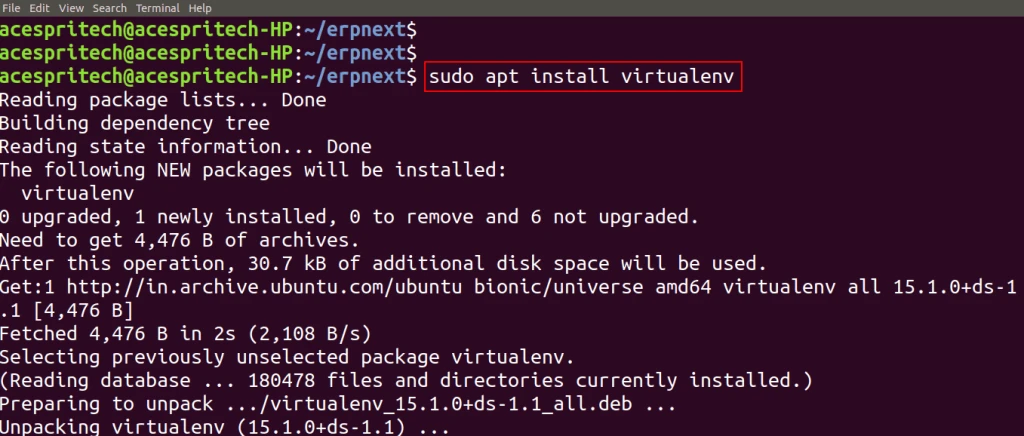
Run below command to install virtual environment sudo apt install virtualenv
Install Virtualenv
you need to create virtual environment on “erpnext” directory using the following command virtualenv .
Virtualenv
For activation of virtual environment. source ./bin/activate
Active Virtualenv
Step 18: Now Next step is to install bench and there dependencies. git clone https://github.com/frappe/bench bench-repo
Install Bench
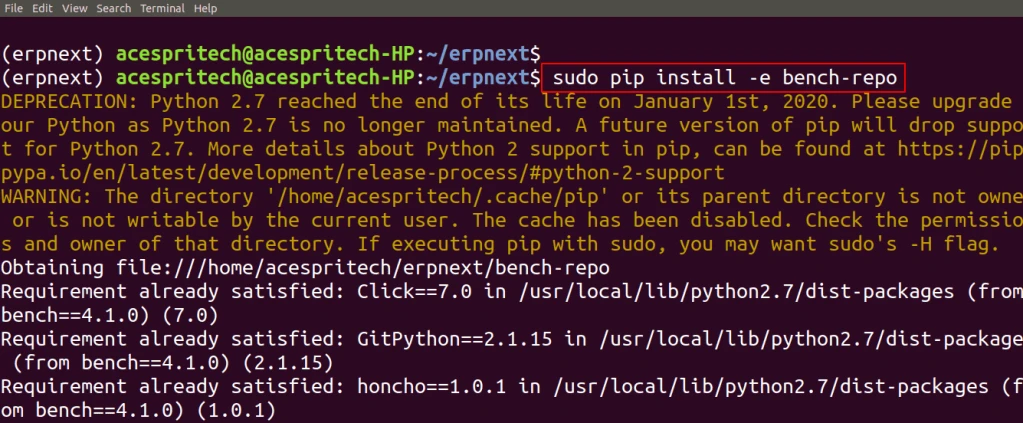
sudo pip install -e bench-repo Install Bench Repo
Step 19: The next step is to init command will create a bench directory with frappe framework installed. bench init –frappe-branch master –frappe-path https://github.com/frappe/frappe.git frappe-bench Continue reading →
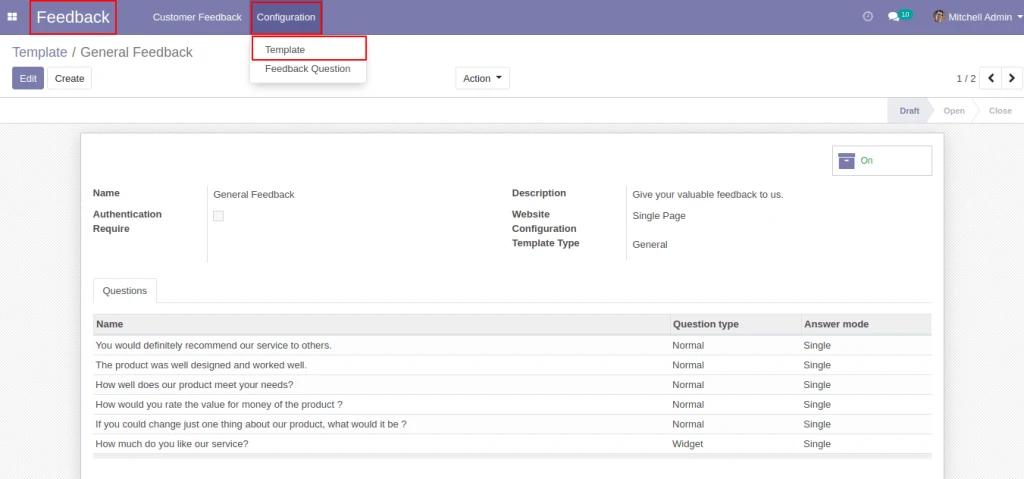
In Feedback > Configuration > Template, configure the template..
Feedback Template Configuration
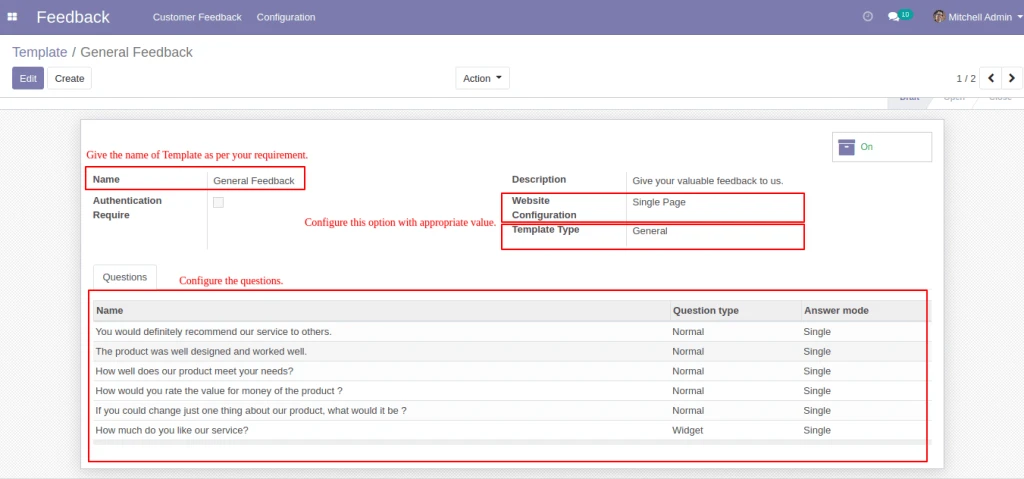
Into Template configure all the option with appropriate value like Name, Website configuration, Template type and Questions. When you Select the Single Page in Website Configuration then all the Question will come in one page.
Template Question Configuration
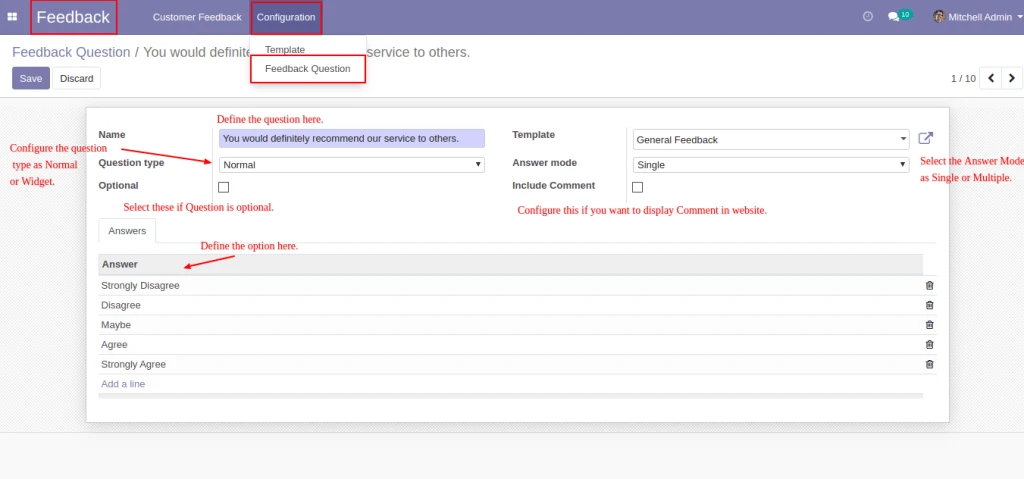
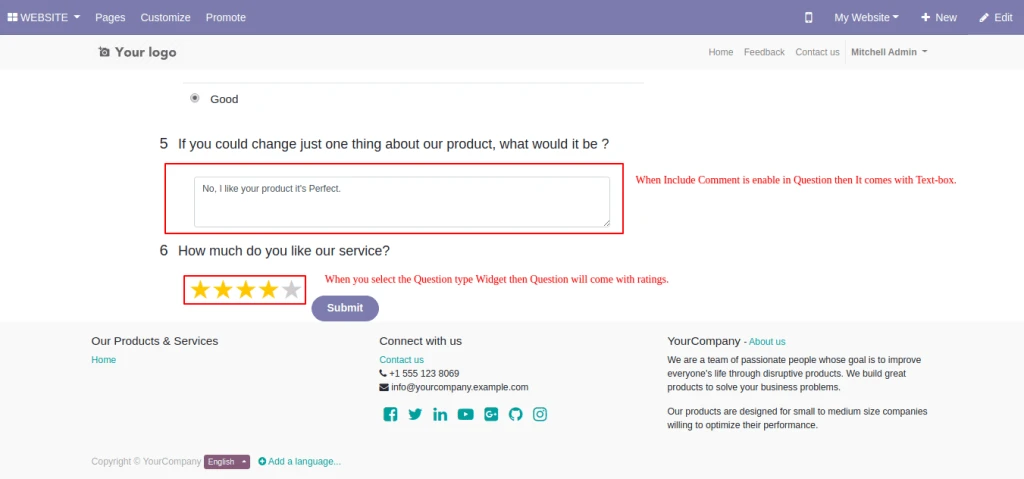
In Feedback > Configuration > Feedback Question, Configure the Question with appropriate value like Question, Template, Question type Normal or Widget, Answer Mode Single or Multiple, Question will Optional or Required and If you want to include the comment then enable the Include Comment option.
Feedback Question Configuration
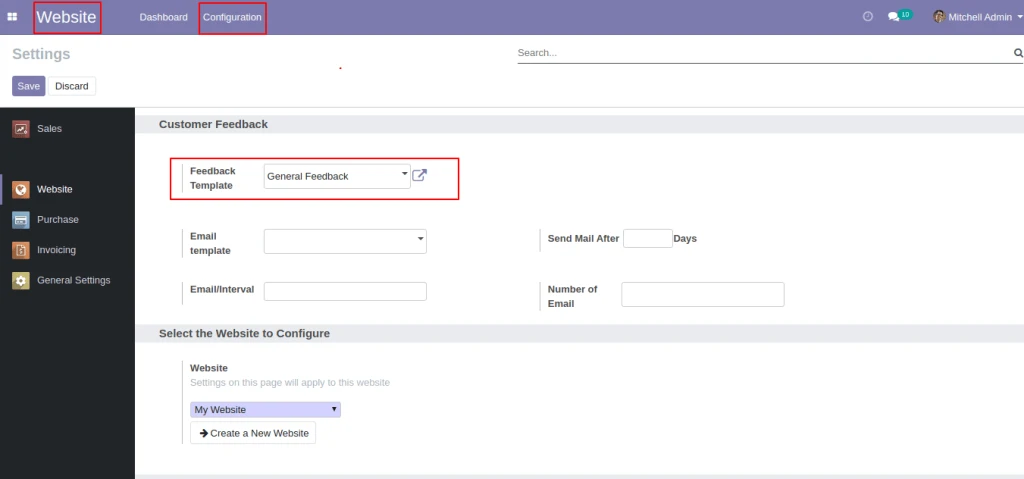
In Website > Configuration, under the Customer Feedback, set the option for Feedback Template. Based on this configuration the Feedback Questions are display.
Website Configuration
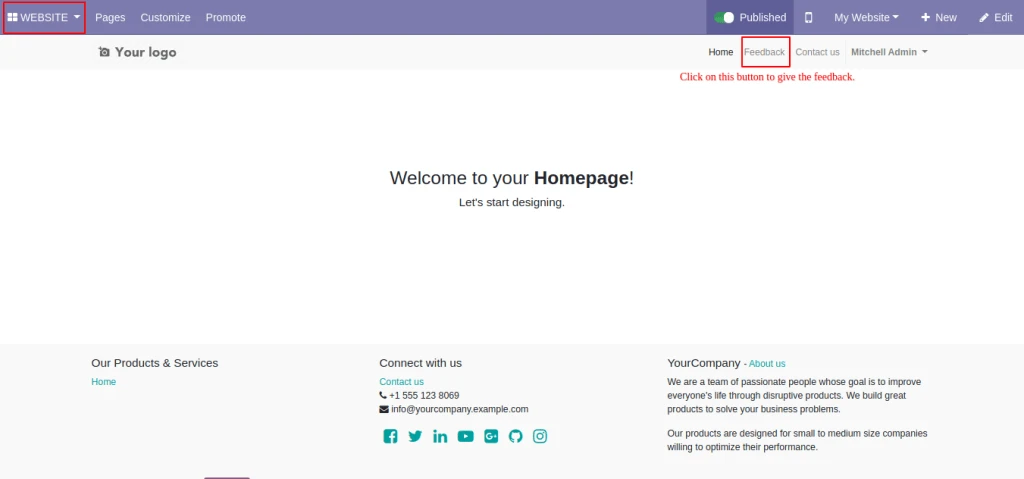
Now Go into the website and Click on “Feedback” Menu to Give the Feedback.
General Feedback Website
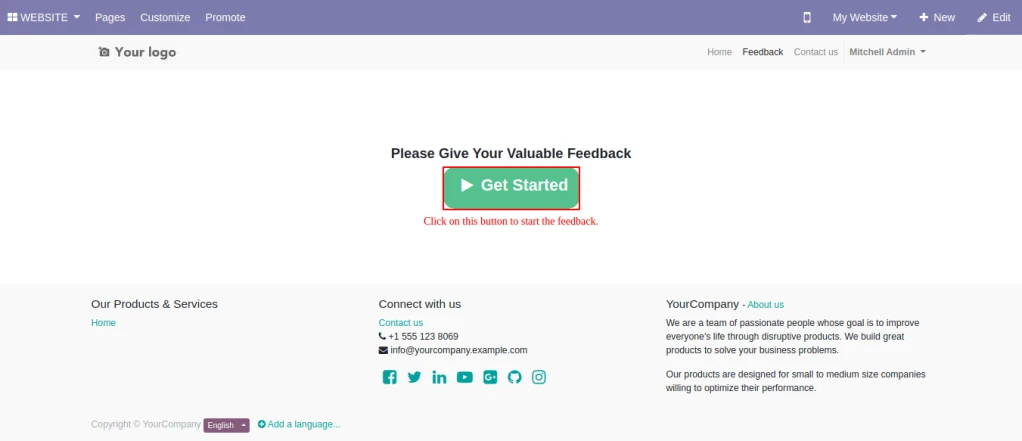
Now Click on “Get Started” Button to start feedback.
Feedback Get started
When you click on Get Started Button Question will come which you configure into the Template.
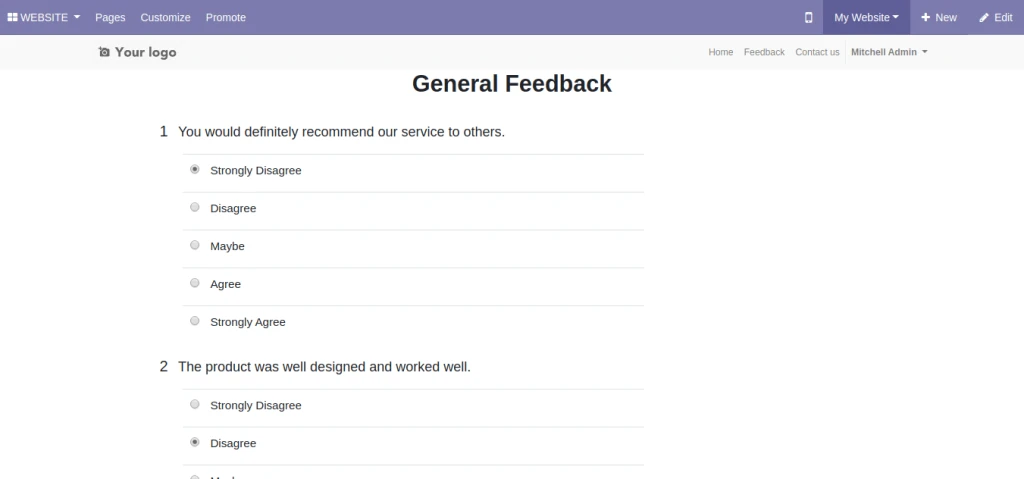
When you select the Question type Normal and Answer Mode Single Question Will come with radio button and you will submit only one answer.
Question Website
When you select the Question type Widget Question Will come with Ratings.
Question Website 2
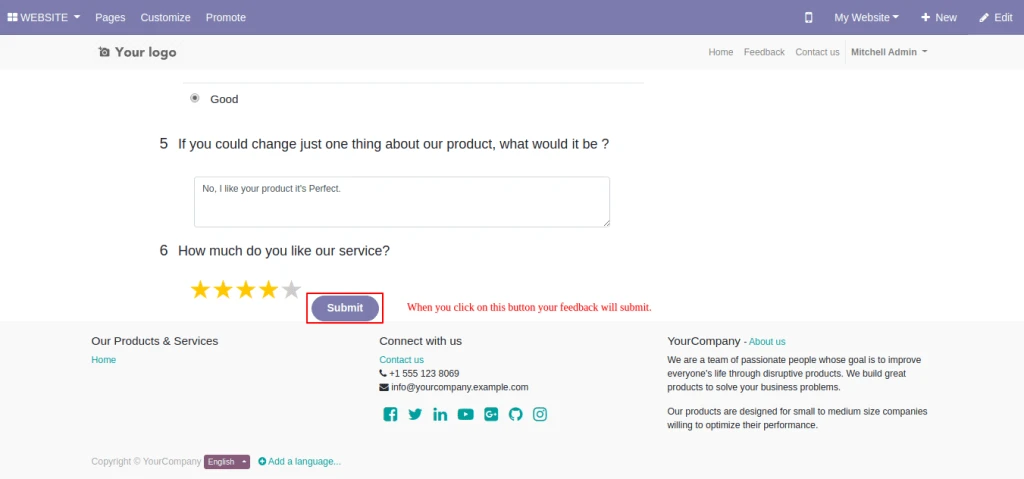
When you click on “Submit” button your feedback will submit.
Submit Feedback
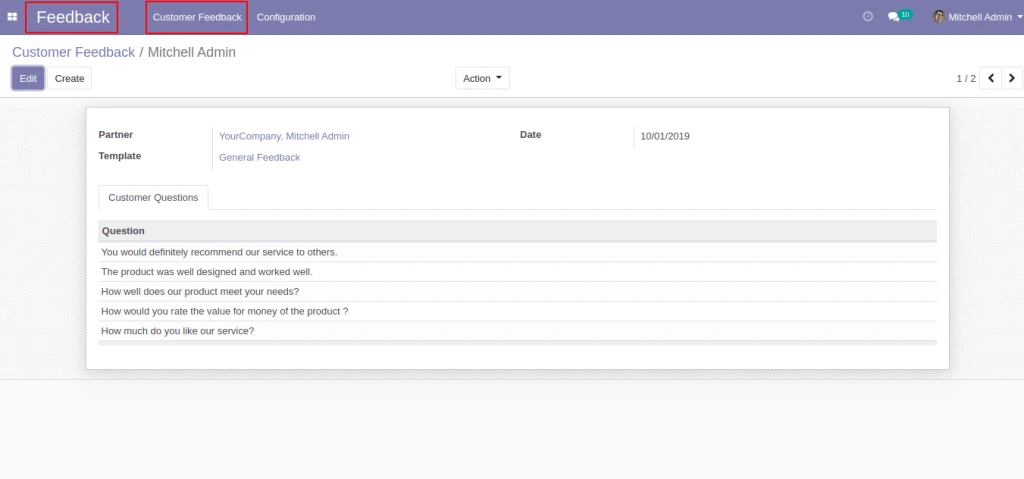
After Submitting the feedback it will Store into the Feedback > Customer Feedback.
Store Submit Feedback
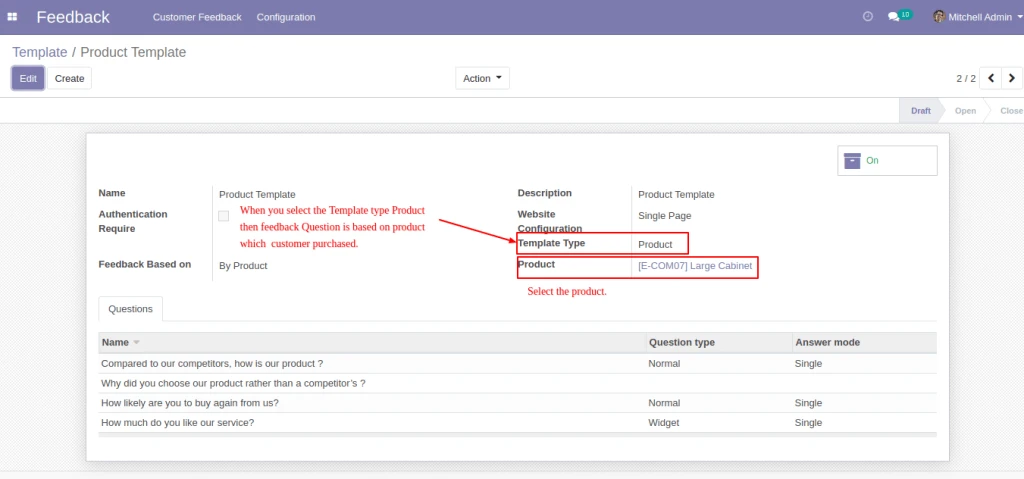
When you select the Template type as Product then feedback question will come based on Product.
Product Feedback Template
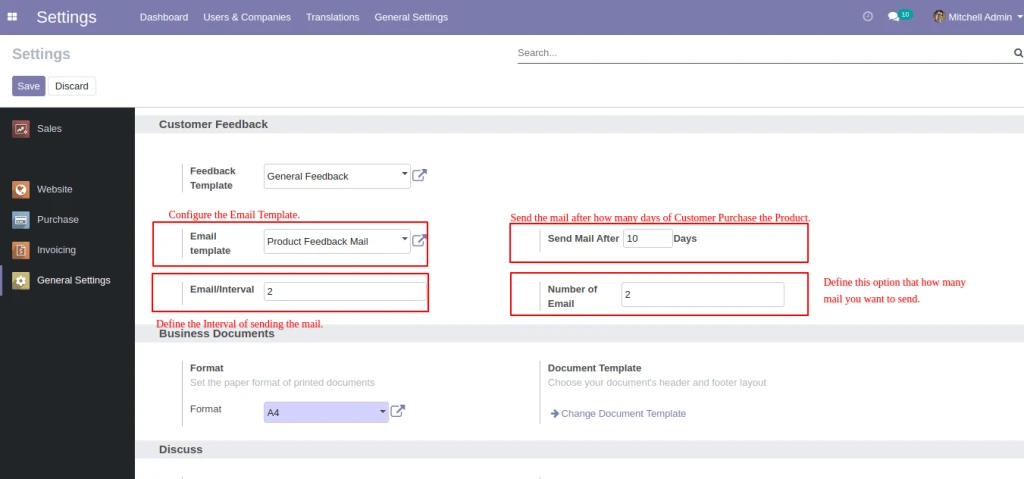
Configure the Mail template, Send mail after How many days of Customer Purchase the Product, Number of Mail that you want to Send and Interval and Cron will run everyday and send the mail to the customer based on your configuration and customer can give the feedback from mail.
Product Feedback Configuration
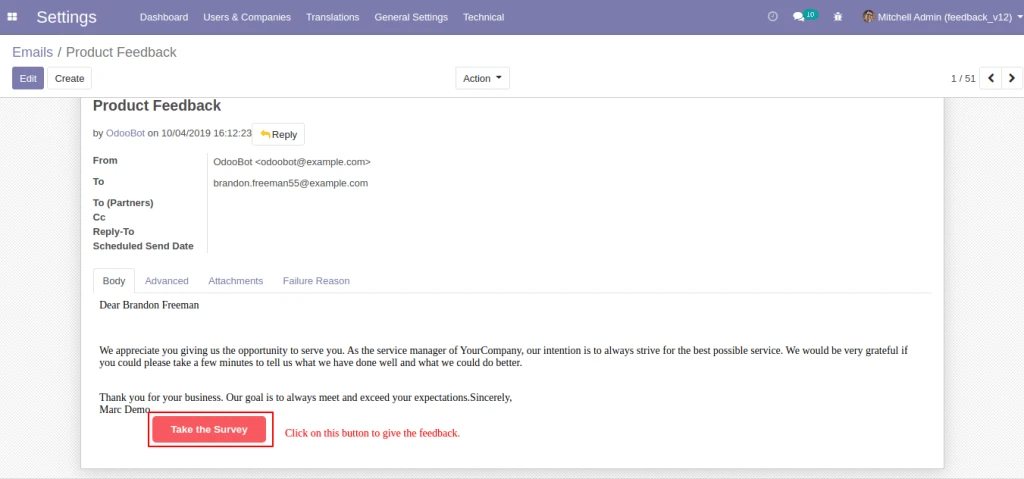
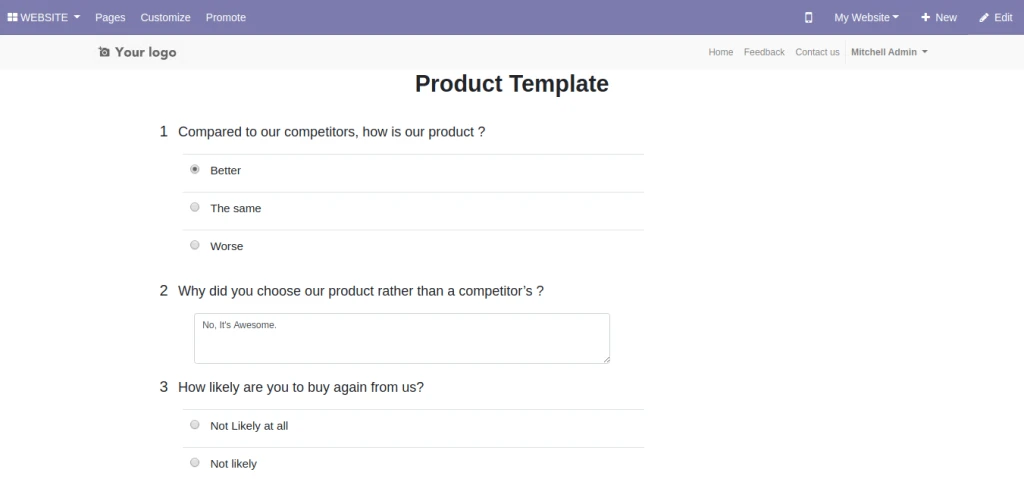
By clicking in Take the Survey button, Feedback will Started and after that same procedure will follow as General Feedback.
Customer Feedback Mail Feedback Get started Customer Product Feedback Answer
Easily Add products to My Favourites folders using click on popupbar.
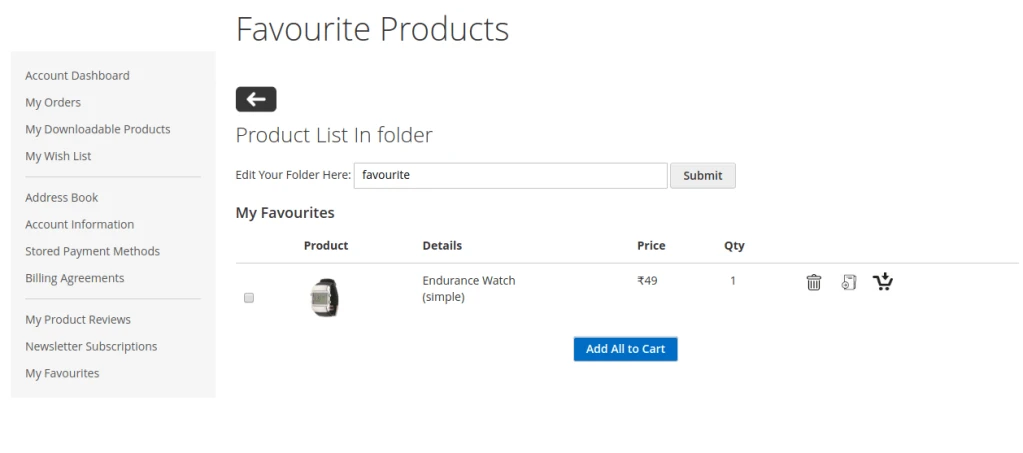
You can Edit your favourite folders name and also Easily delete folders.
You can Transfer products One to Another folder Easily.
Using multiple select you can add to cart multiple products together and also add to cart perticular product.
Easily enable/disable module from admin panel.
How to Use:-
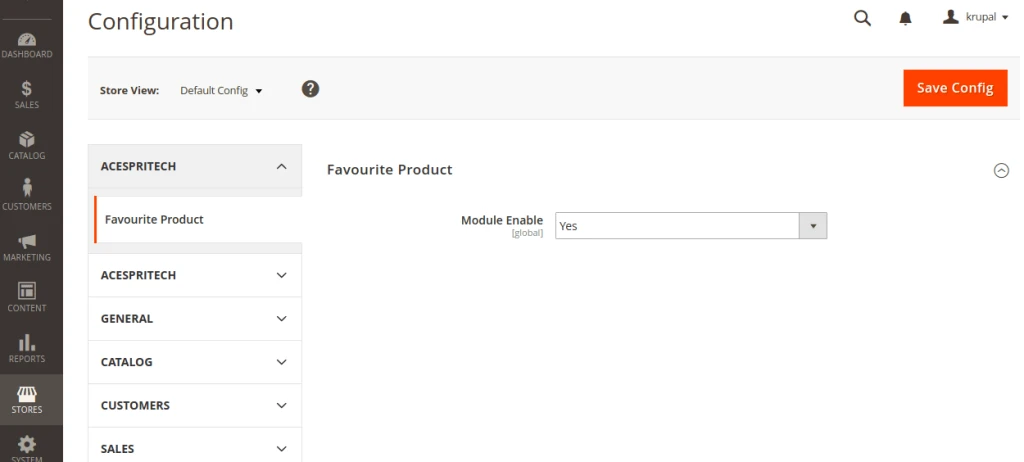
First go to the admin panel STORES – Configuration – Acespritech – Favourite Product tab.and Enable module first and Save Config.
Enable Disable
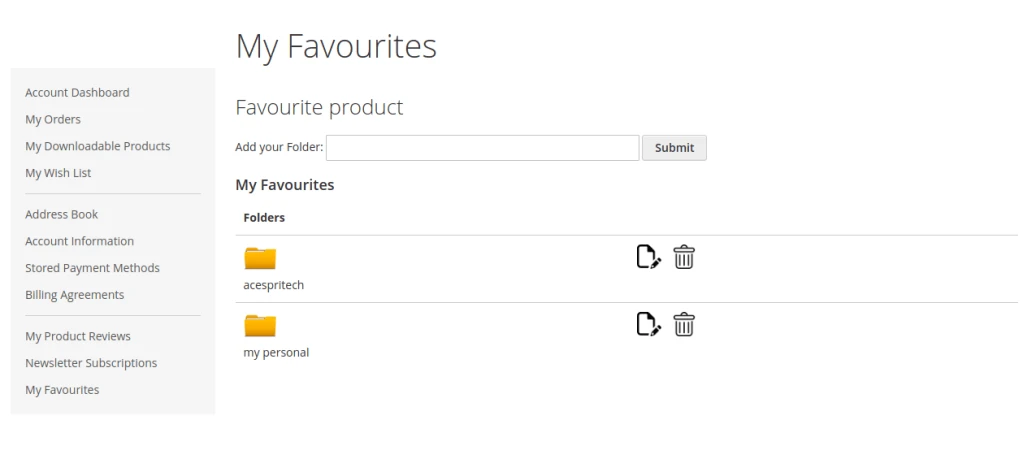
Than go to frontend and Sign in to your account first then go to My Favourites and add your folder .
My Favourites
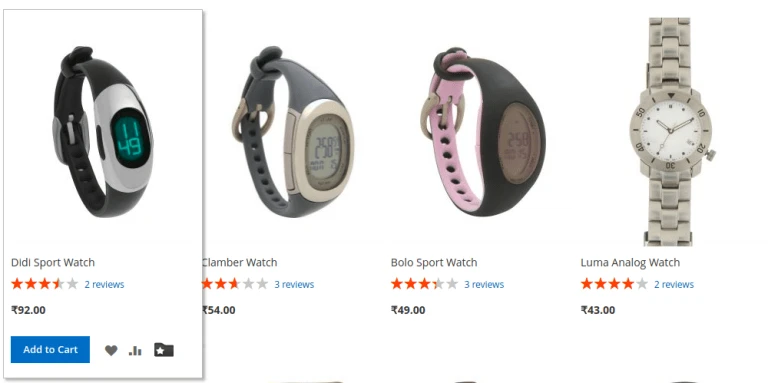
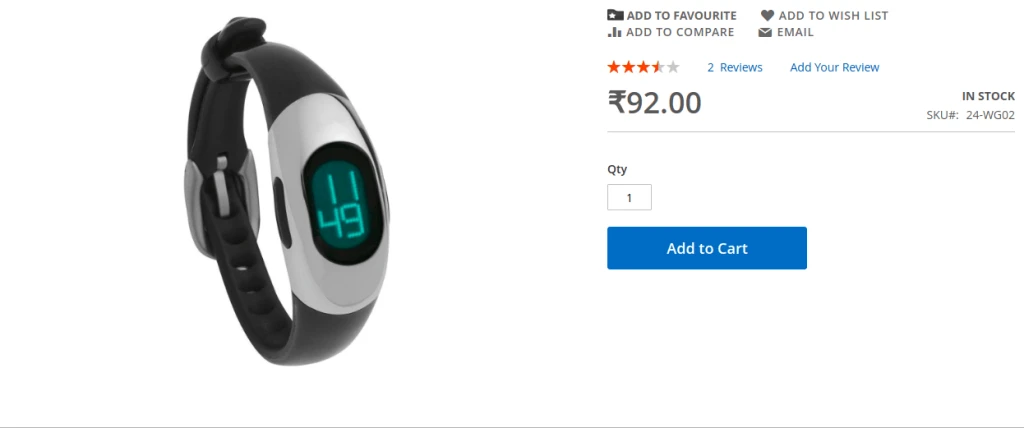
Go to product list page or product details page and add your Favourite product using click on icon or ADD TO FAVOURITE.
Category IconListpage Icon
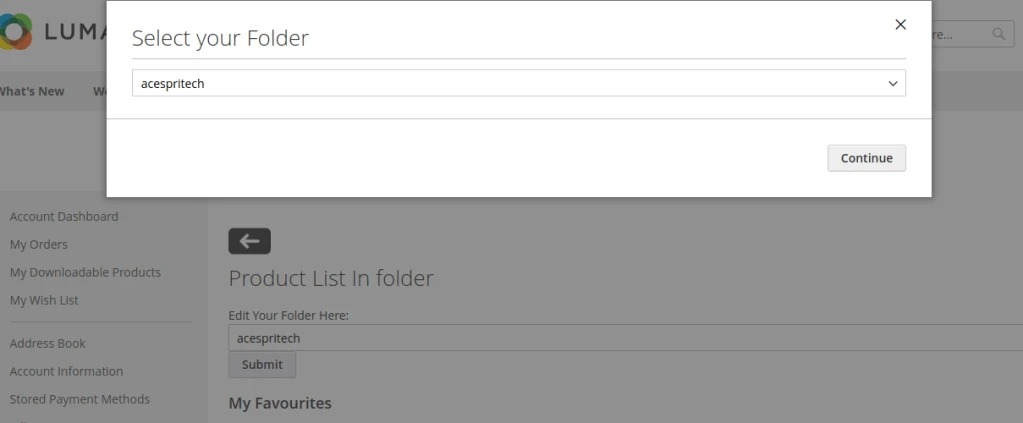
Whenever you click on ADD TO FAVOURITE the popup will be coming on screen And you can choose your favourite folder and add product to your favourite folder.
Move to Popup
And In last you can go to your favourite folder edit page and you should delete your folder and product,edit your folder name,transfer your product one folder to another folder, add to cart perticular product,add to cart multiple product using multiple checkbox selection .