Blog Archives
How to load different languages into OpenERP ?
As we all know that OpenERP is a multilingual ERP system.
We can add as many languages as we want. Each user may work with an interface in his own language.
This section explains how to load another language. Lets take an example of displaying into French language.
Just start your OpenERP, open your favourite browser and login into webclient.
Click on Setting Menu and as displayed in below image, you will find ‘Load an official translation’ from ‘Translations’ menu.
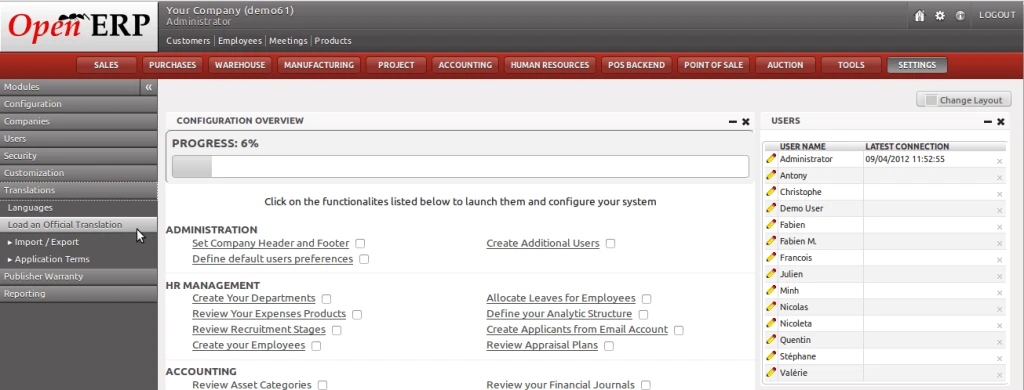
After clicking, a wizard will open which will allow us to select any language.
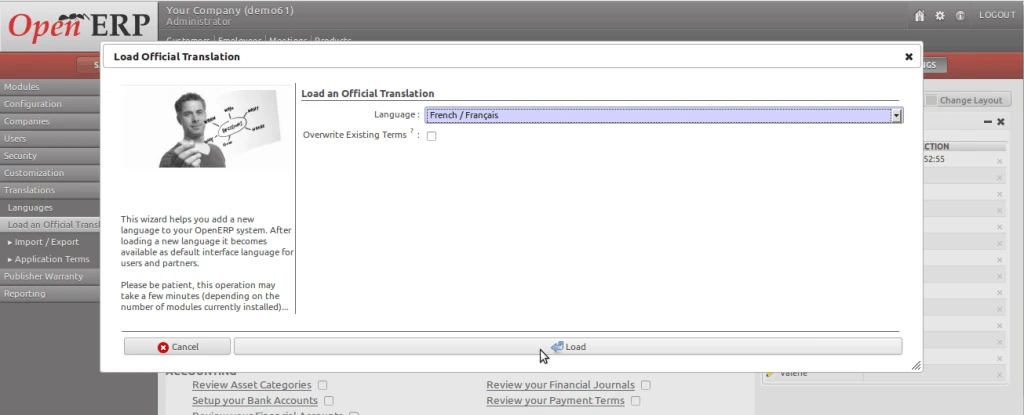
Press the “Load” button and a process will be there. After completion of process below screen be displayed on your screen.
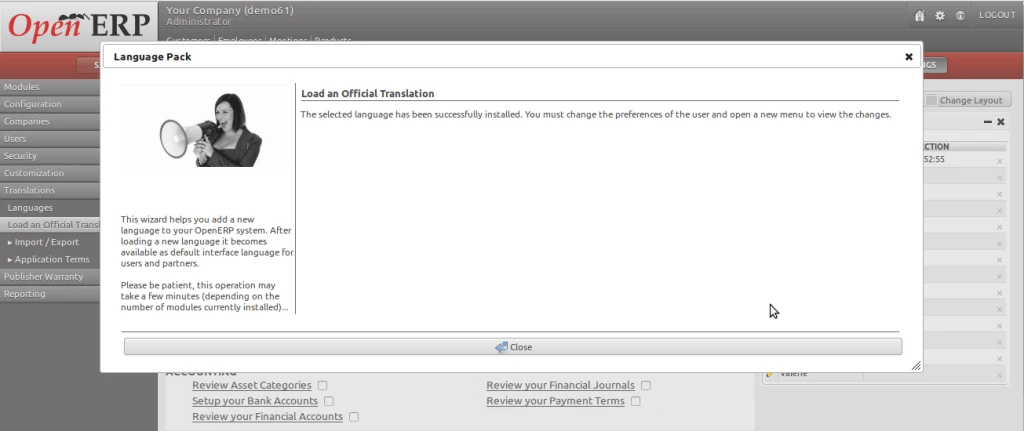
Here, your language has been loaded now. You have to select your language from “Preferences” from top.
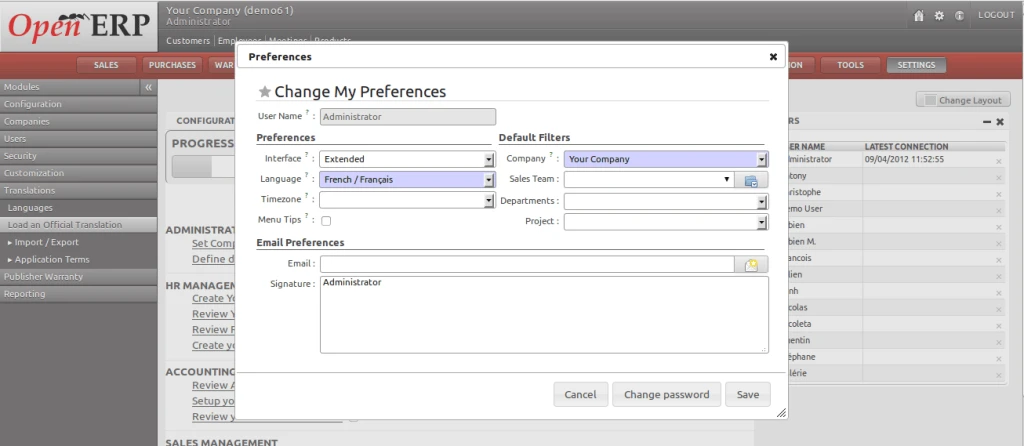
Once you select your loaded language from the list, just save this form and you will find OpenERP environment in your language.
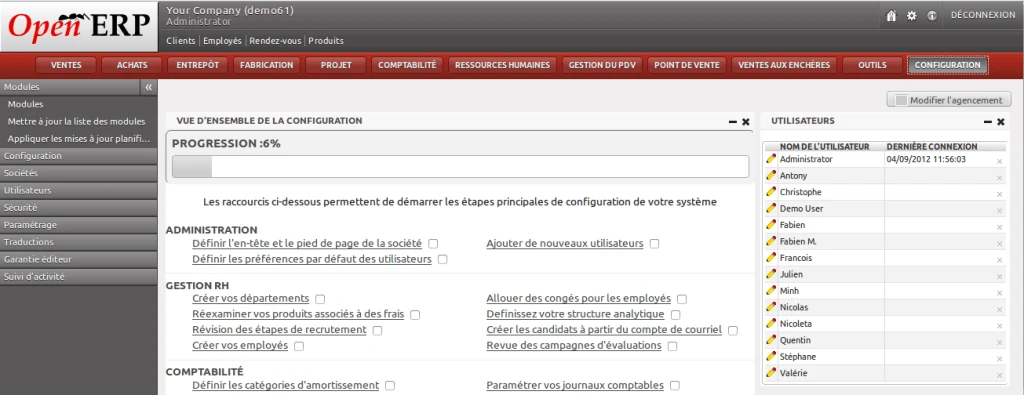
Its pretty simple…
How to create a module in OpenERP ?
It is very easy to create a module in OpenERP.
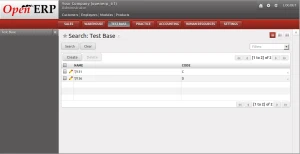
Find the below displayed screens. We will code to result this output.
Tree View
Form View
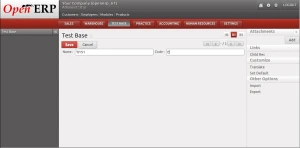
Few files needs to be created compulsory. We will take an example let say – “test_module”
First of all, we will see the architecture of a typical OpenERP module.
- __openerp__.py
- __init__.py
- Python files
- XMLFiles
- Actions
- Menu Entries
- Reports
- Wizards
All the modules are located in server/addons directory.
The following steps are necessary to create a new module “test_module”:
- create a subdirectory in the server/addons directory having module name test_module.
- create a module description file: __openerp__.py
- create the Python file containing the objects.
- create .xml files that download the data (views, menu entries, demo data, …).
- optionally create reports, wizards or workflows.
We will see each files introduction one by one.
The __init__.py file:
The __init__.py file is, like any Python module, executed at the start of the program. It needs to import the Python files that need to be loaded.
So, if you create a “test_module.py” file, containing the description of your objects, you have to write one line in __init__.py:
import test_module.py
The __openerp__.py file
In the created module directory, you must add a __openerp__.py file. This file, which must be in Python format, is responsible to
- determine the XML files that will be parsed during the initialization of the server, and also to
- determine the dependencies of the created module.
This file must contain a Python dictionary with the following values:
{


"name" : "Test Module",


"version" : "1.1",


"author" : "Open",


"category" : "Test Base/Test Base",


"depends" : ["base"],


"init_xml" : [],


"demo_xml" : [],


"update_xml" : ["test_view.xml"],


"installable": True,


"active": True


}
The test_module.py file
from osv import osv
from osv import fields
class test_base(osv.osv):
”’Test Base Class”’
_name=‘test.base’
_columns={
‘name’:fields.char(“Name”,size=128,),
‘code’:fields.char(“Code“,size=64)
}
test_base()
The text_view.xml file
<?xml version=“1.0” encoding=“utf-8″?>
<openerp>
<data>
<record model=“ir.ui.view” id=“test_base_form”>
<field name=“name”>test.base.form</field>
<field name=“model”>test.base</field>
<field name=“type”>form</field>
<field name=“arch” type=“xml”>
<form string=“Test Base”>
<field name=“name”/>
<field name=“code”/>
</form>
</field>
</record>
<record model=“ir.ui.view” id=“test_base_tree”>
<field name=“name”>test.base.tree</field>
<field name=“model”>test.base</field>
<field name=“type”>tree</field>
<field name=“arch” type=“xml”>
<tree string=“Test Base”>
<field name=“name”/>
<field name=“code”/>
</tree>
</field>
</record>
<record model=“ir.actions.act_window” id=“action_test_seq”>
<field name=“name”>Test Base</field>
<field name=“res_model”>test.base</field>
<field name=“view_type”>form</field>
<field name=“view_mode”>tree,form</field>
</record>
<menuitem id=“menu_test_base_main” name=“Test Base”/>
<menuitem id=“menu_test_base” parent=“menu_test_base_main”
name=“Test Base” action=“action_test_seq”/>
</data>
</openerp>
How to convert *.pyc to *.py files ?
Before few weeks I required to convert *.pyc to *.py files for one of my python project so thought to share with others.
Here is the steps to follow:
- Download plugin from below link,
– https://github.com/wibiti/uncompyle2/downloads
– extract the ZIP file.
– Goto command prompt,
$ sudo python setup.py install
$ uncompyle2 -h (will give you help to process further)
I want add here is, its working on for python 2.7 only.
How to make pgAdmin connection with PostgreSQL ?
I would like to discuss regarding pgAdmin connection with PostgreSQL.
We will go with screenshots one by one.
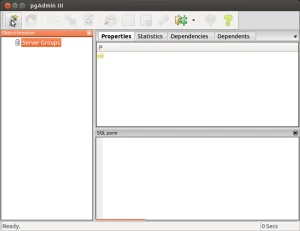
In first screen, I have opened pgAdmin, and clicked on “Connect” icon.
When we click on “Connect” button, following window will get appear in which we have to enter postgresql information.
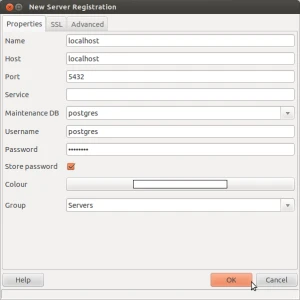
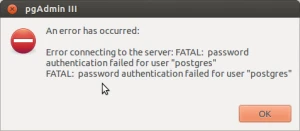
Press “OK” button when done with information. You will get below error message because of PostgreSQL user authentication.
Now, lets solve this error by using following commands.
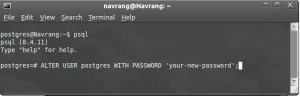
Once you completed this process from command line, do the same process for entering PostgreSQL information.
You will see the following screen with connection in pgadmin.