Following video provides demo for customer selection in OpenERP 7.0 POS.
Customer selection in OpenERP 6.1 Point of Sale
Advertisements
Following video provides demo for customer selection in OpenERP 7.0 POS.
Customer selection in OpenERP 6.1 Point of Sale
Following video provides demo for selecting customer in OpenERP POS.
Customer selection in OpenERP 7.0 Point of Sale
OpenERP Point of Sale is a great feature and module developed by OpenERP. Day by day more and more enhancements are going on.
Till now, there is no option to select customer from the POS screen and as we know, its very important feature that everyone would like to have who are using POS.
Today, we are going to show a very important feature which I am sure, you would like to visit once. We are providing an option to select customer for current POS order from POS front screen.
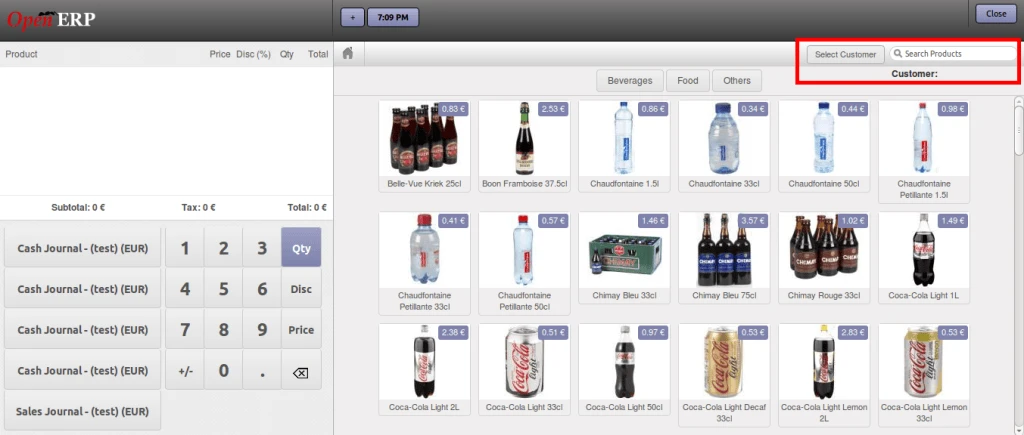
In above screen, you can see there is a button “Select Customer” which will open a customer list, from where you can select your customer.
You can see customer list in below screen. This screen is a same OpenERP search view screen from where you can select any customer or if you want, you can create new customer also.
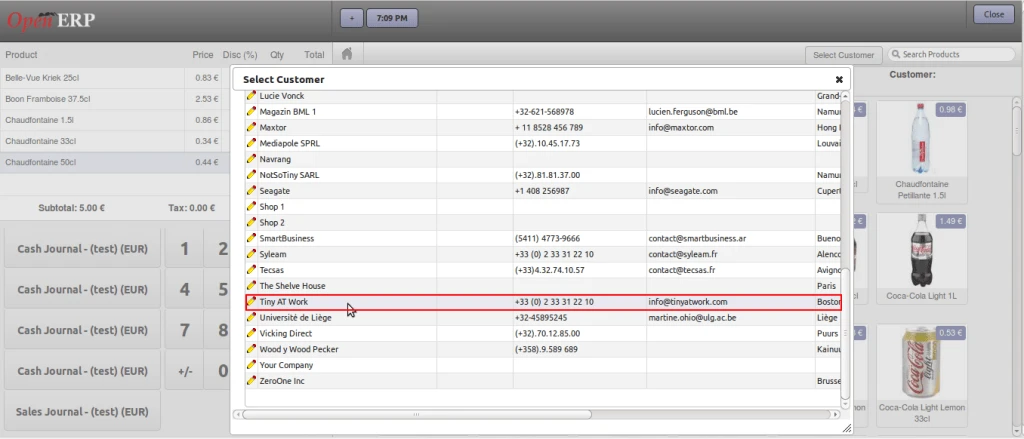
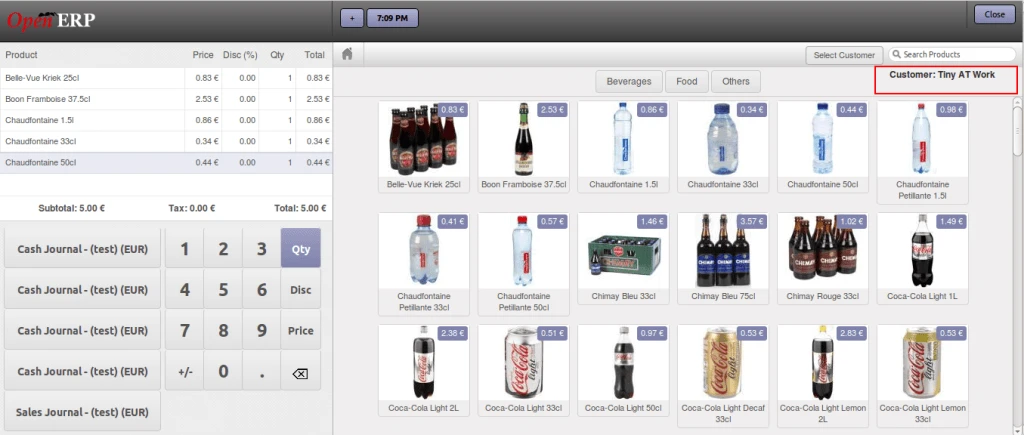
Here in above screen, you can see we are selecting a customer “Tiny At Work” for demo.
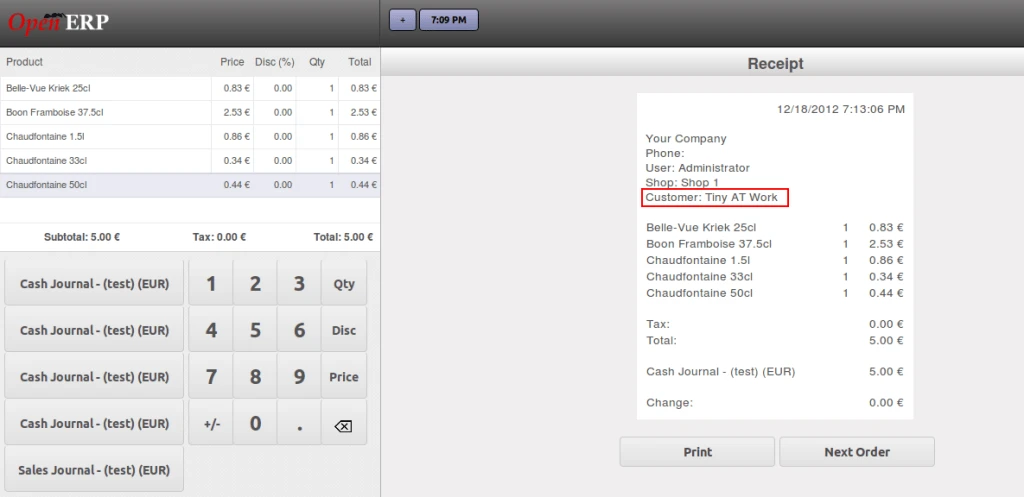
After validating the current order, you will get customer name on the receipt as displayed on below screen.
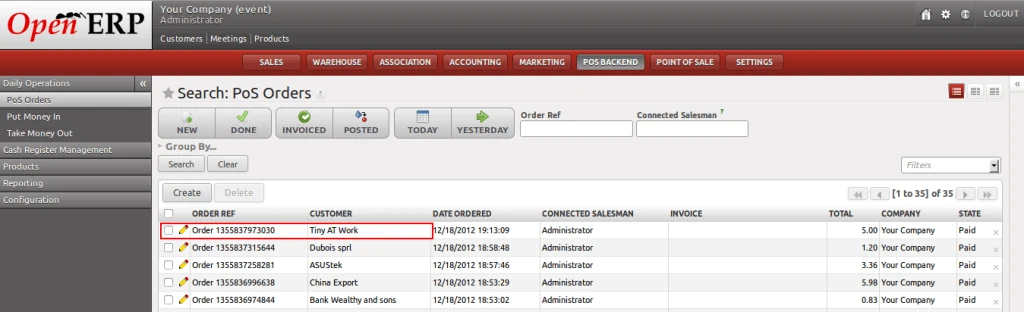
Now lets open POS Order which we have just created from POS front screen.
A Bank reconciliation is a process that explains the difference between the bank balance shown in the bank statement as supplied by the bank, and the corresponding amount shown in the organization’s own accounting records at a particular time.
Differences may occur just because of some unknown charges by bank or any transaction or anything made by company.
It may be necessary to go through and match every single transaction in both sets of records since the last reconciliation, and see what transactions remain unmatched. The necessary adjustments should then be made in the cash book, or any timing differences recorded to assist with future reconciliations.
For this reason, and to minimize the amount of work involved, it is good practice to carry out such reconciliations at reasonably frequent intervals.
We will check one of the way that will show how Bank Reconciliation works in OpenERP.
First of all, we will start by creating invoices.
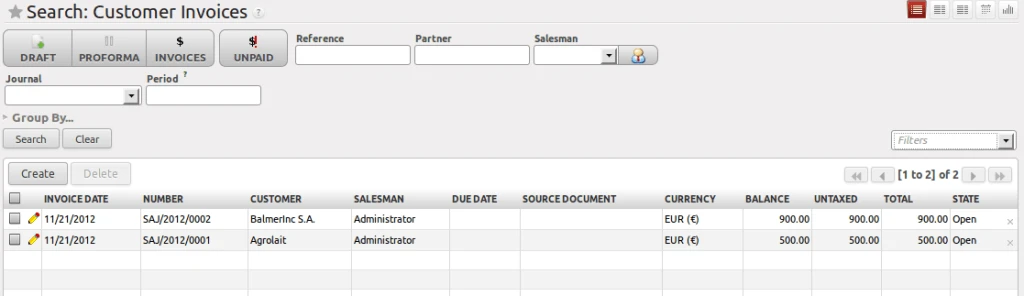
In below screen, we can see that there are two OPEN invoices.
Now open Bank Statement from the menu Accounting > Bank & Cash > Bank Statement. We will find the screen as shown here.
As per following screen in Transaction tab, Statement Lines contains one line having partner is the one of our OPEN invoice partner.
Here two options are there, that we can insert statement lines from csv file “if provided by bank” or we can do manual entry.
Please note that we have created Statement line amount is less amount (which is 450.00) than the Invoice amount (which is 900.00) to better understand the reconciliation process.
There is a field called Ending balance which contain the total amount which we got from bank statement. We can enter in advance if we have that amount.
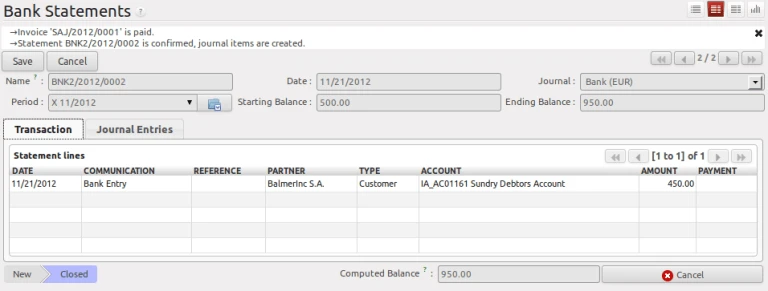
Once we confirm the Bank Statement, we will have Journal Entries of the entered amount.
Now to process the reconciliation, we will select Manual Reconciliation from the menu Accounting > Periodical Processing > Reconciliation.
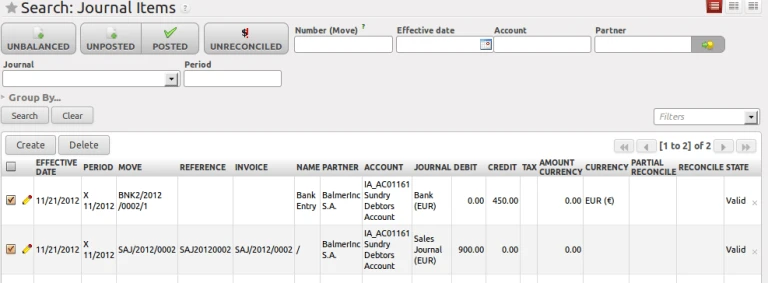
List of statements which should have reconciliation have to be done will be displayed here. Just select all related entries and execute a wizard called “Reconcile Entries” from the right side panel in the “Action”.
Following screen will be displayed with the amount to be credit, debit and write-off.
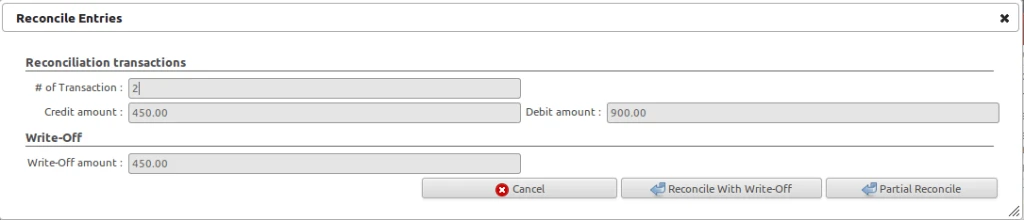
We have two options here are: Reconcile with Write-Off and Partial Reconcile.
If we go for partial reconcile option then we have to wait for the remaining bank statements to be reconciled later.
Another option is Reconcile with Write-Off as shown in below screen.

We have to select Proper Journal and Account here.
Just press Reconcile button and we will get our entries reconciled and will be removed from Manual Reconciliation list.
Now we can check the unposted entry in our Journal Entries and can process accordingly.
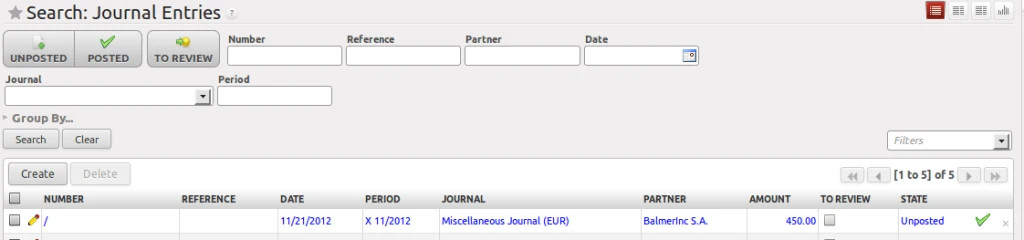
Here we have done with the Bank Reconciliation.
As we all know that OpenERP 7.0 is near to release soon and all are waiting to use in their live business. We are trying to make people aware that how to install new module in this new version. We found some extra steps which are require to install new module which is different than OpenERP 6.1 version so just sharing with you all guys. We have created a Demo module and put that into addons directory.
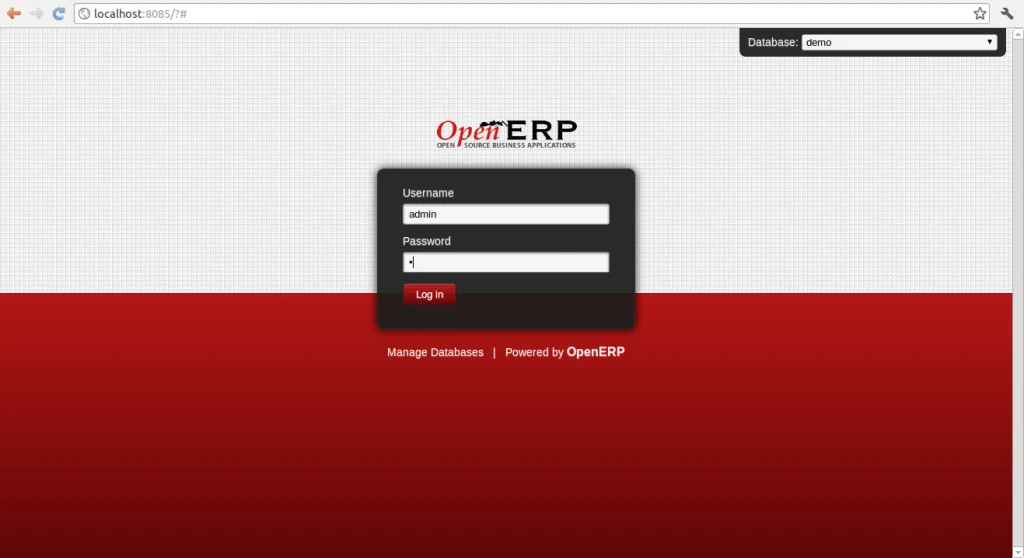
Now as we can see, by default there are very less menus available at left sidebar and you won’t find ‘Update Module List’ which is there in OpenERP 6.1 by default.
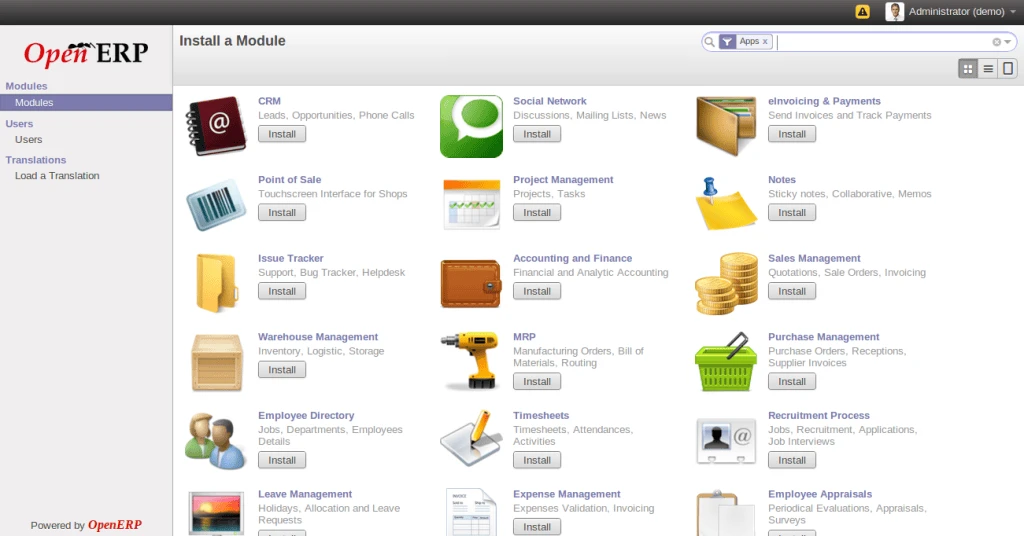
Now lets do some small changes to see all other configuration options in left side menu list. First go to ‘Users’ menu and select ‘Administrator’ and click on ‘Edit’ button. Now change the value of ‘Administration’ field to Acess Rights and make Technical Features checkbox True. Now save record and reload again. It should display all other menus in the list. If you are not able to see all menus, you may have to re-login into the webclient.
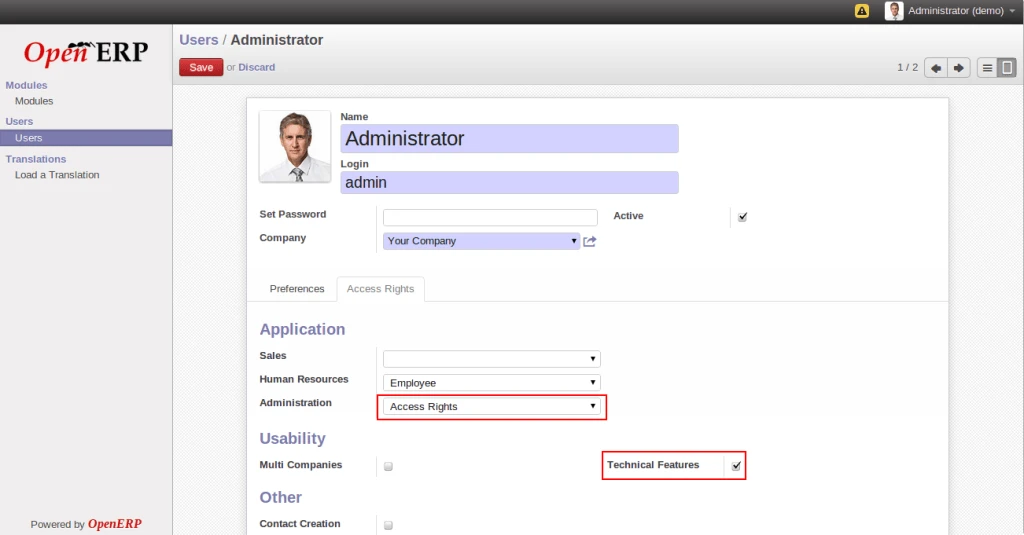
After performing above steps, you can see all menus at left sidebar as shown in following screen.
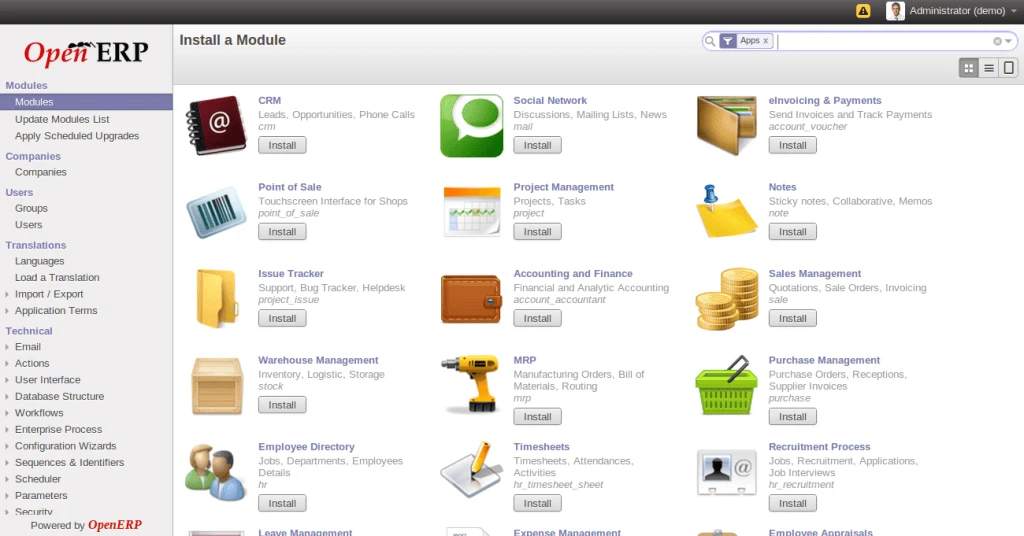
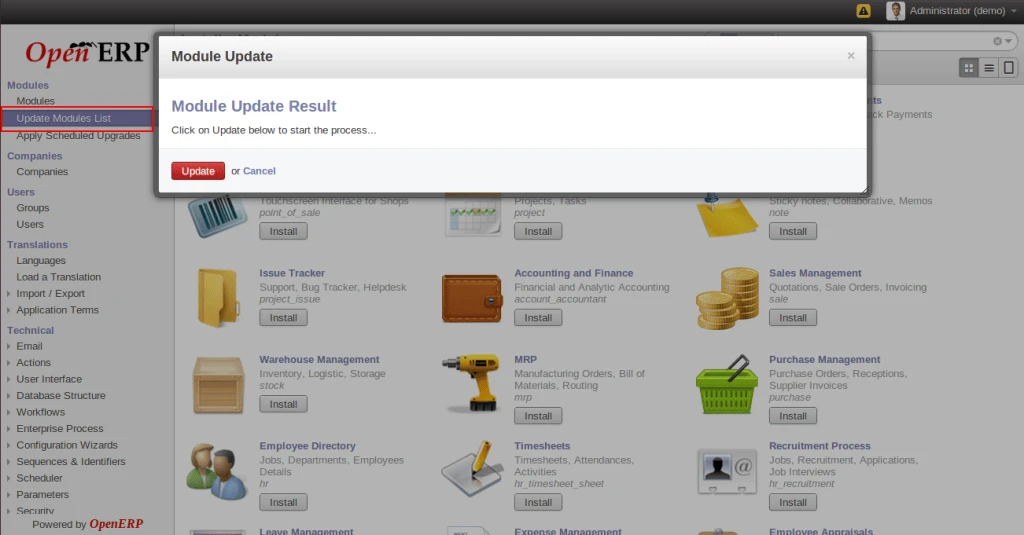
Now according to older version, click on ‘Update Module List’ and follow the instructions.
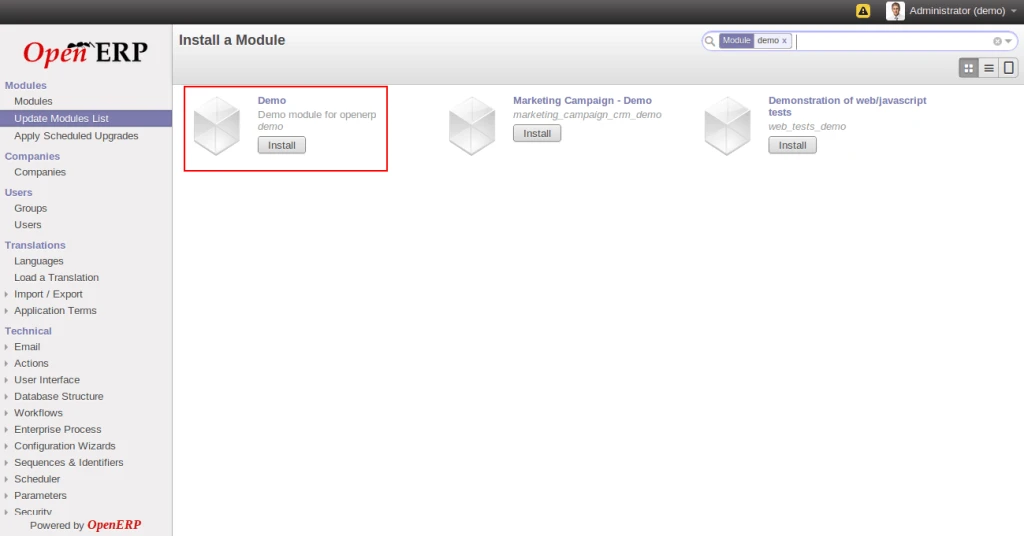
Finally, you will get your new module in the list.
In OpenERP, stock management is completely integrated with the accounts, to give strong coherence between the two systems. The double-entry structure of locations enables a very precise correspondence between stocks and accounts.
Each stock movement also generates a corresponding accounting entry in an accounting journal to ensure that the two systems can stay in permanent synchronization.
How to Configure Accounting Valuation?
We are taking an example of one product as shown in below screen with different sale price and cost price.
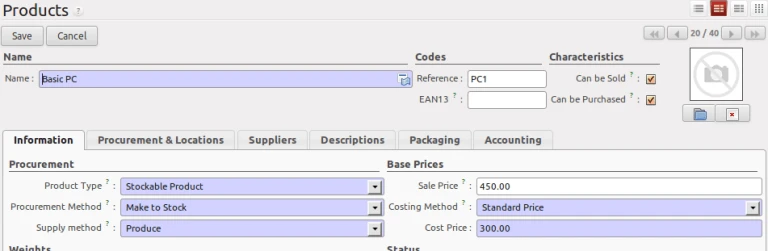
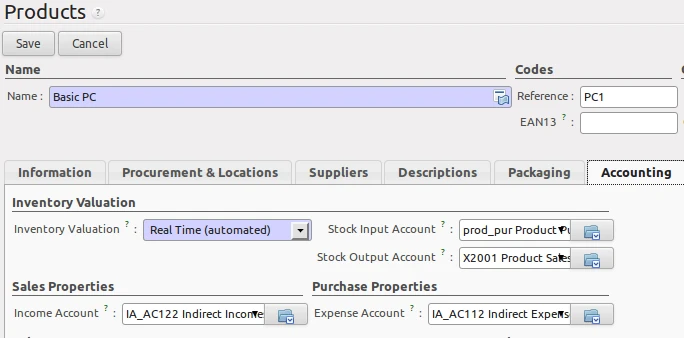
Now go to the Accounting tab and select the Real Time (automated) option for Inventory Valuation,
You have to define Stock Input Account, Stock Output Accounts here as shown in below screen.
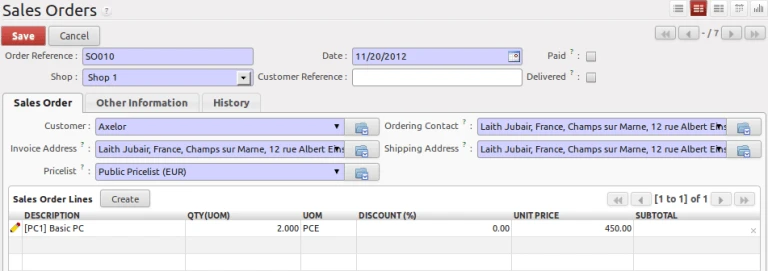
Now we are creating a sales order having 2 products to sale.
After confirming the sales order, we have to do rest of the process for delivery from warehouse.
Once we complete product delivery process, we will check Journal Entry.
Go to the Journal Entries from Accounting menu and we can see the unposted entry created here in which we can see partner is the same we have selected in our Sales Order.
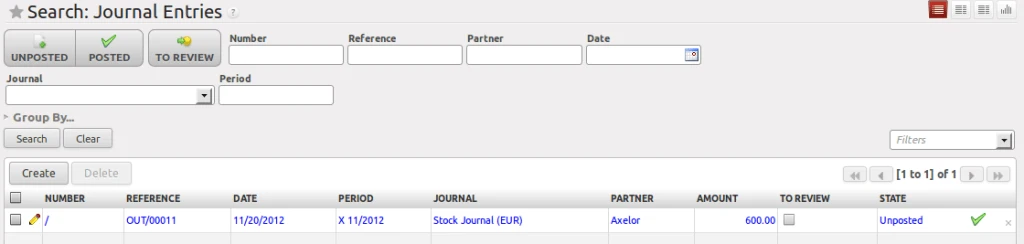
Here we can see that, the amount considered is the cost price of product Basic PC. As we have selected 2 products in our sales order so journal entries are accordingly in screen.
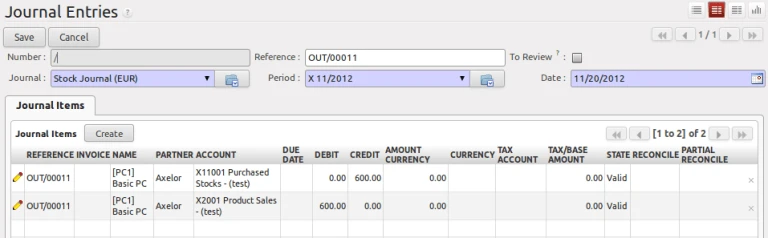
Now from here, we can post the entries and can perform rest of the stuff which are required for accounting.
At the end of a financial year, you will have to transfer the closing balance of current year as an opening balance to the new financial year.
You have to do following steps to achieve this.
First create new financial year (In our example, we are using 2012 as our running fiscal year).
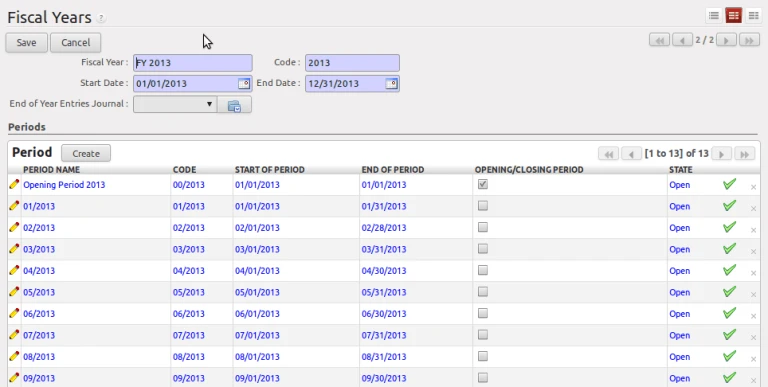
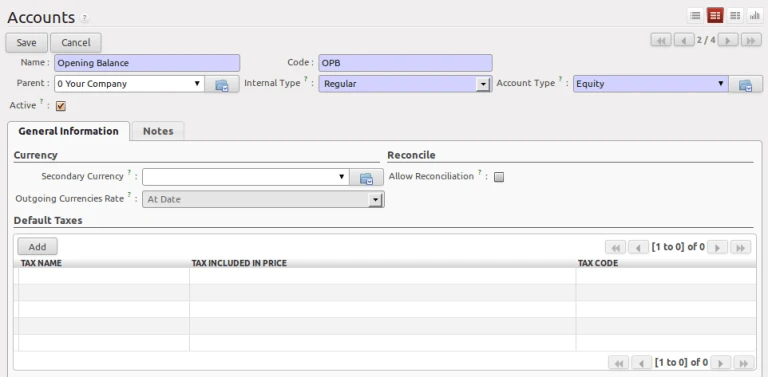
Now create an account for opening balance.
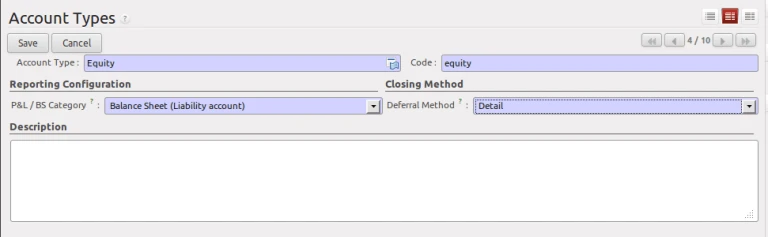
You have to take care before selecting account type more specifically the Deferral Method. It determines whether and how account entries will be transferred to the new financial year. There are following types of deferral methods:
Deferral Method    Action

None               Nothing will be transferred (typically P&L accounts)

Balance            Account balance will be transferred

                   (typically Balance Sheet accounts)

Detail             All entries are transferred, also reconciled entries

Unreconciled       Only entries that are not reconciled on the first day

                   of the new financial year will be transferred

                   (typically receivable and payable)
Define journal for opening balance.
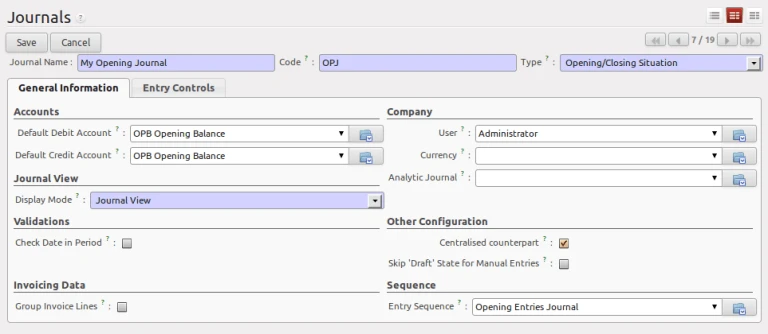
Make entries for opening balance in that journal.
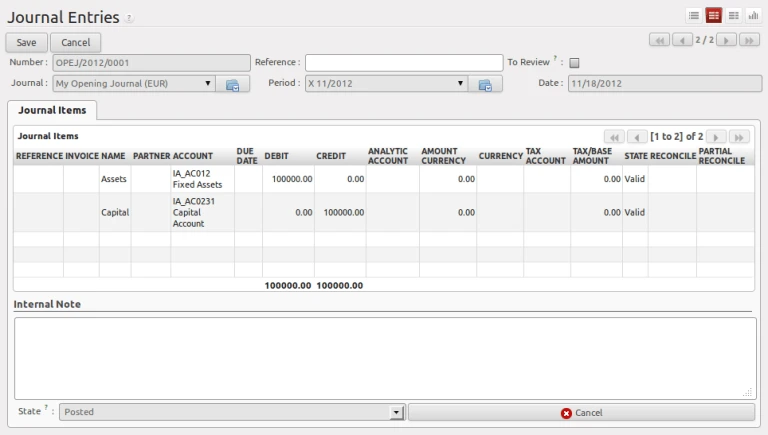
It will automatically generate the opening entries based on information provided in following wizard.
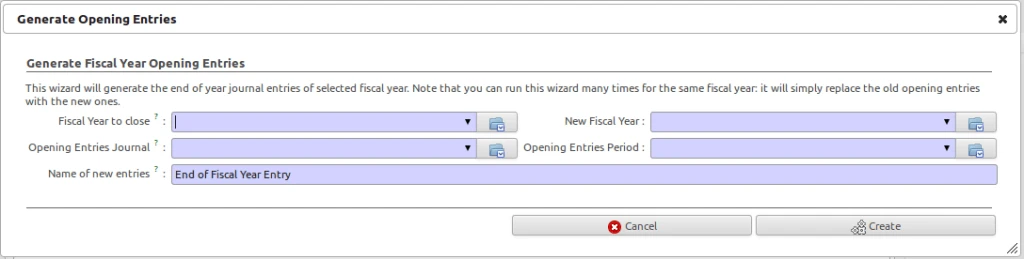
In the wizard, enter the financial year for which you want to transfer the balances (Fiscal Year to close). Select the New Fiscal Year (the year in which you want to generate the opening entry). You have to select the journal and the period to post the opening entries. Enter description for the opening entry such as Opening Entry for year YYYY. After that click on the Create button to generate the opening entry according to the settings defined.
Just look at the draft opening entry that has been generated. Open record which has state ‘Unposted’. Click on Post button to confirm the entry.
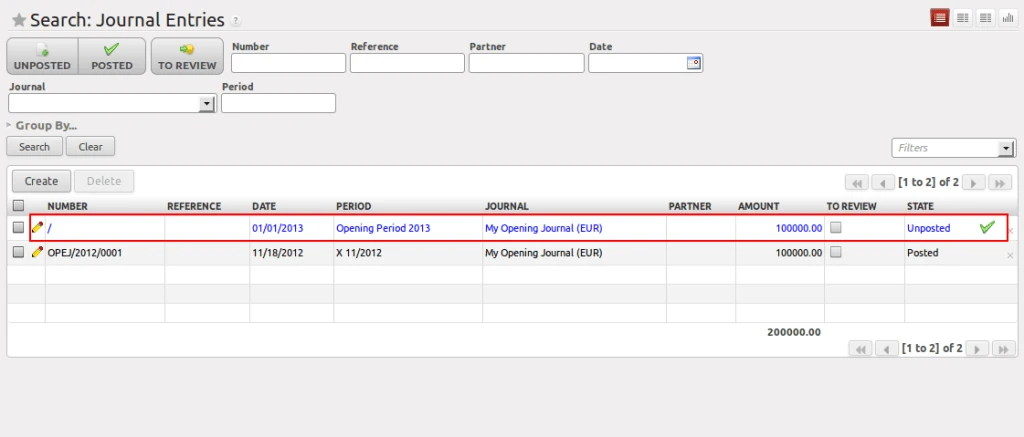
Now we have to close previous fiscal year as we do normally.

Further more, we can check in Chart of Account for all entries which we have created to varify.