A single provider for all your payment needs. Your customer can pay anywhere, anytime, and through multiple channels
International Processing:
Unlock new markets and benefit from the rapid growth of international sales
Fraud & Risk Management:
Reduce the costs of fraud to your business whilst ensuring that genuine customers are not rejected or left frustrated
How to use
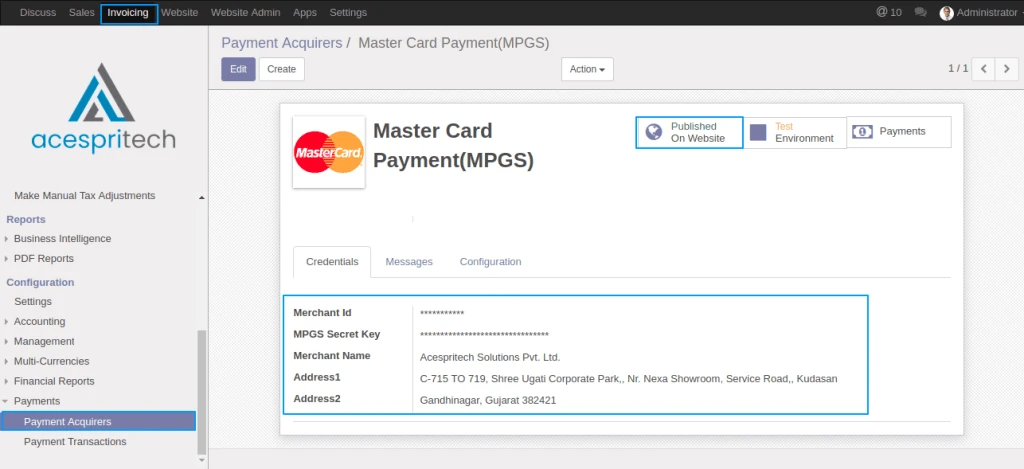
MPGS Credentials: Take Merchant ID, MPGS Secret Key and Merchant Name and Address from your MPGS account and put into MPGS Payment Acquire in Odoo.
Payment acquirers configuration
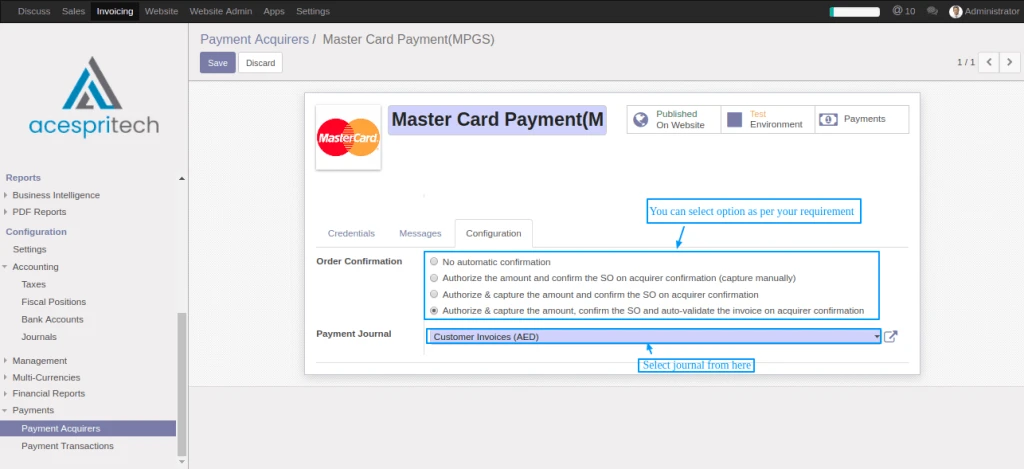
User can manage the order flow from here.
MPGS Configration
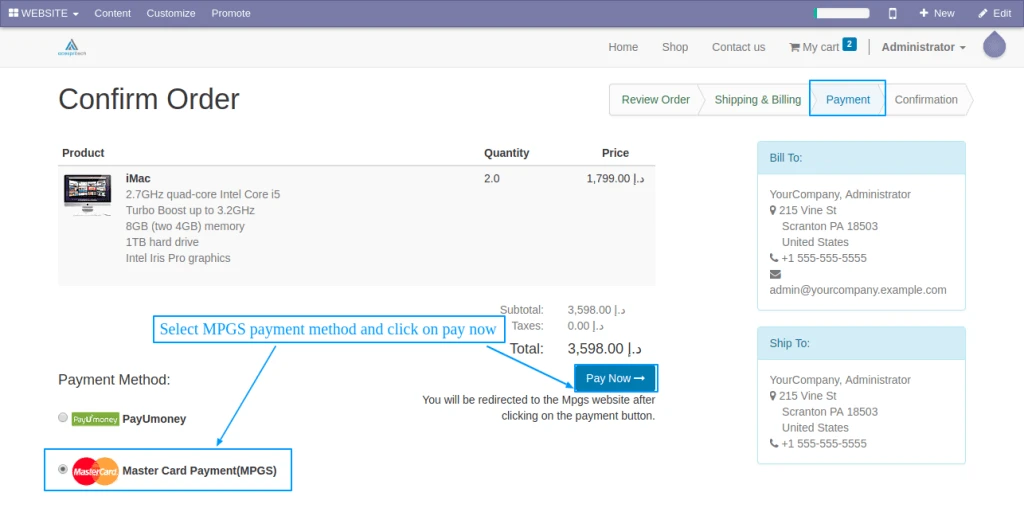
Select MPGS from payment methods.
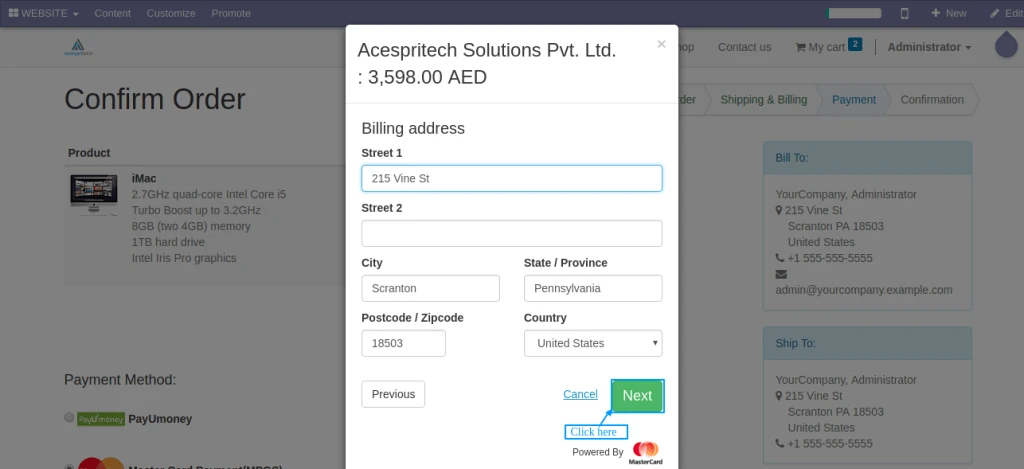
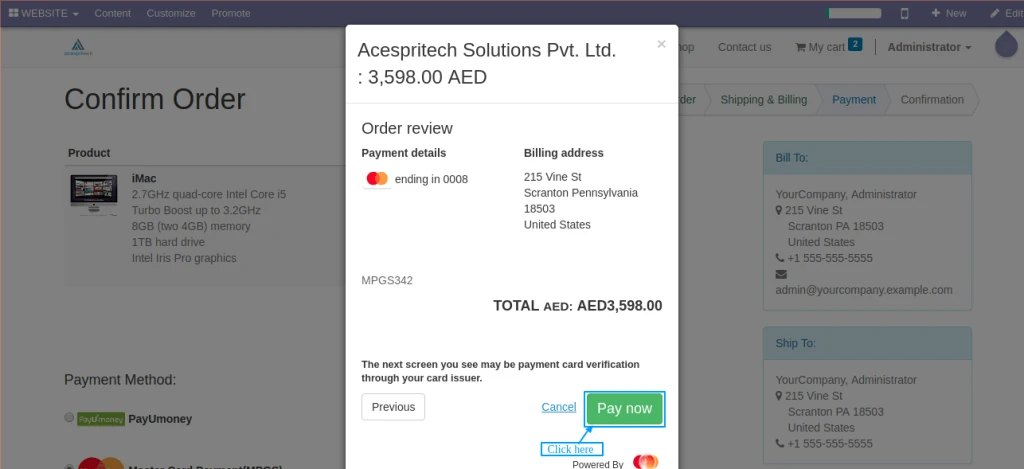
Pay with MPGS
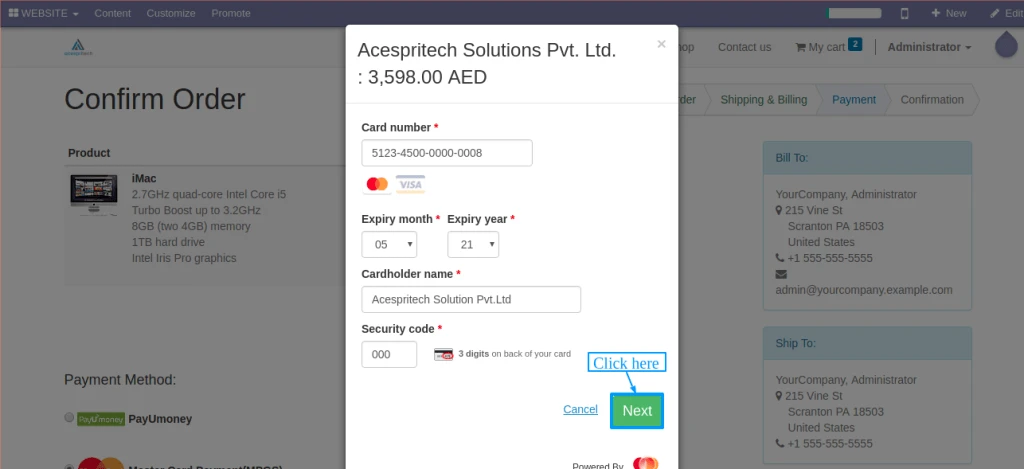
You need to follow this payment step
PaymentPaymentPayment
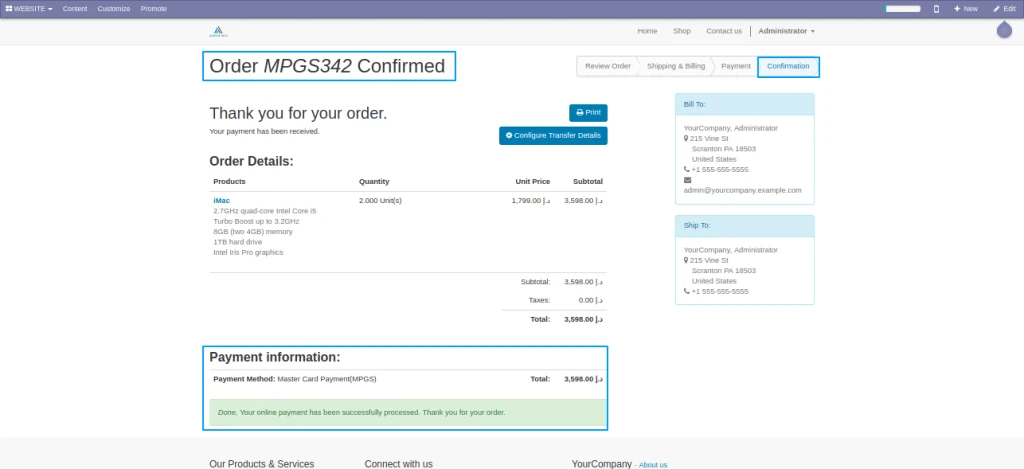
User can see confirm order detail here
Confirm Order
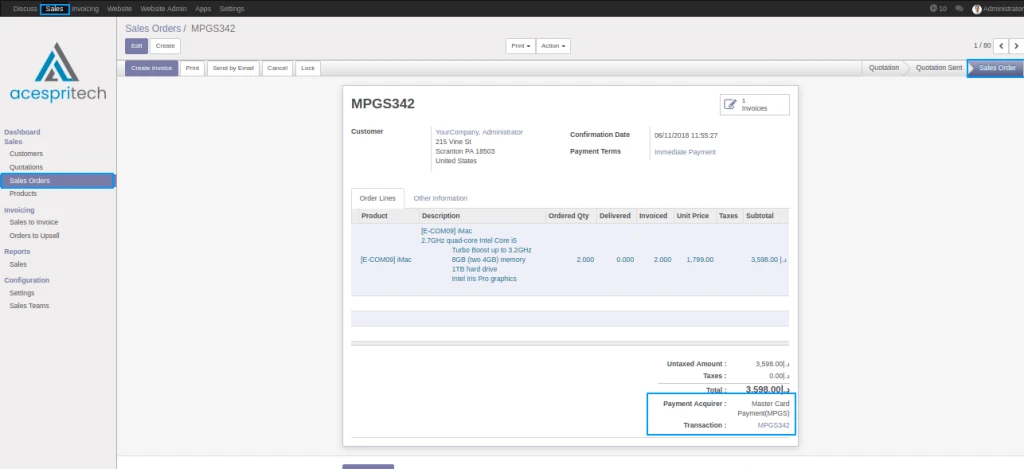
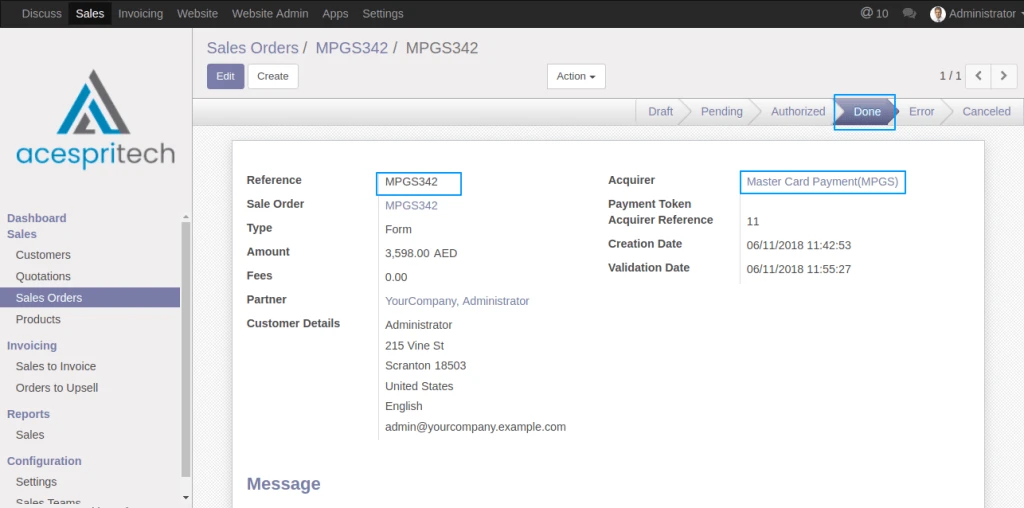
Transaction Record has been created in Sales order
Sale Order View
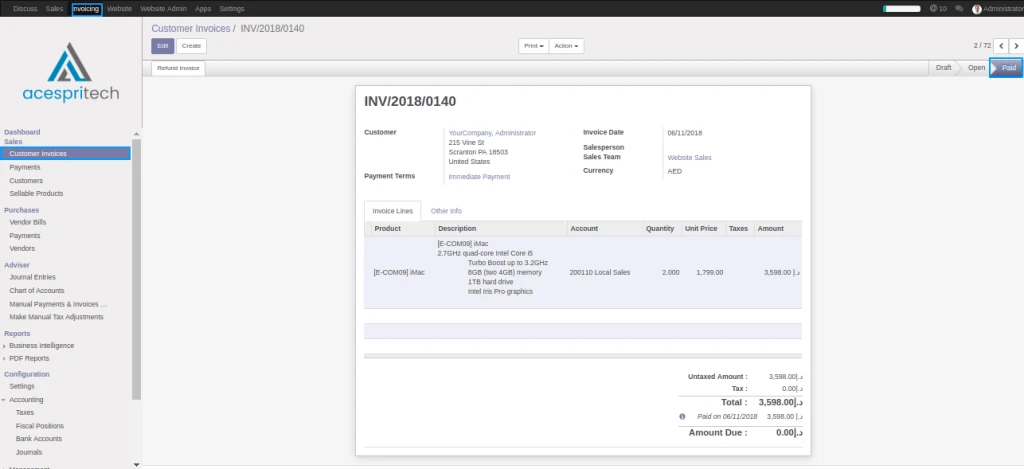
Transaction Record has been created in Invoice
Transaction View
Transaction Record has been created in Payment Transaction
Invoice View
Advertisements
Share this:
Click to share on Facebook (Opens in new window)
Click to share on LinkedIn (Opens in new window)
Click to share on Twitter (Opens in new window)
Click to share on Reddit (Opens in new window)
Click to share on Tumblr (Opens in new window)
Click to share on Pocket (Opens in new window)
Click to share on Pinterest (Opens in new window)
More
Click to print (Opens in new window)
Click to email this to a friend (Opens in new window)
Use Paypal Payment Integration in Jobseeker Website
We have implemented solution for allowing payment process via Paypal from Django. We are still improving this module by adding new functionalities. Currently we have implemented feature with Client monthly and yearly plan activation to post a Job.
We have created account on Paypal (https://sandbox.paypal.com/) We can get more information from here : http://developer.Paypal.com/
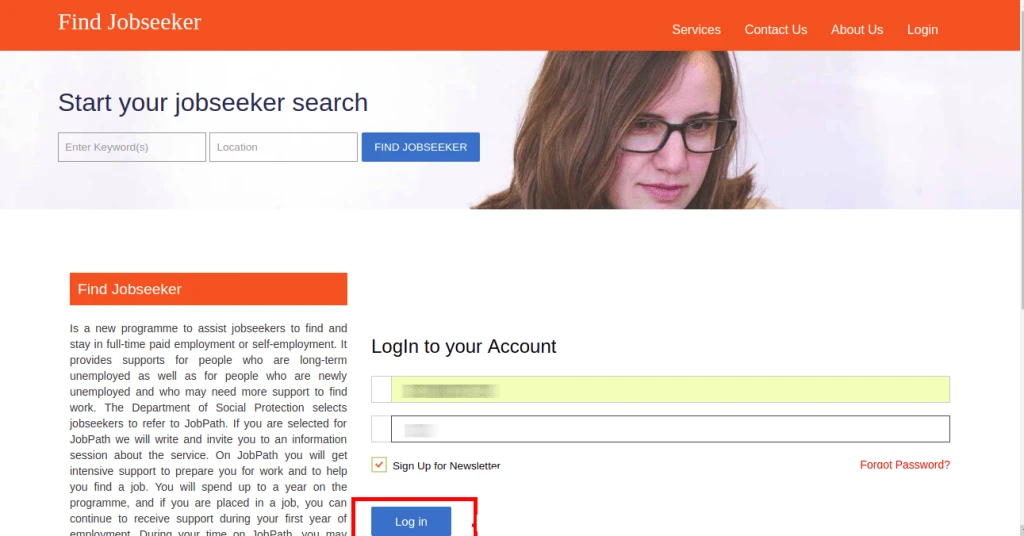
In Django-Jobseeker, first we have to sign in as a company for selecting plan, for signing in you must have created account on Django-Jobseeker.
Django Jobseeker Login Page
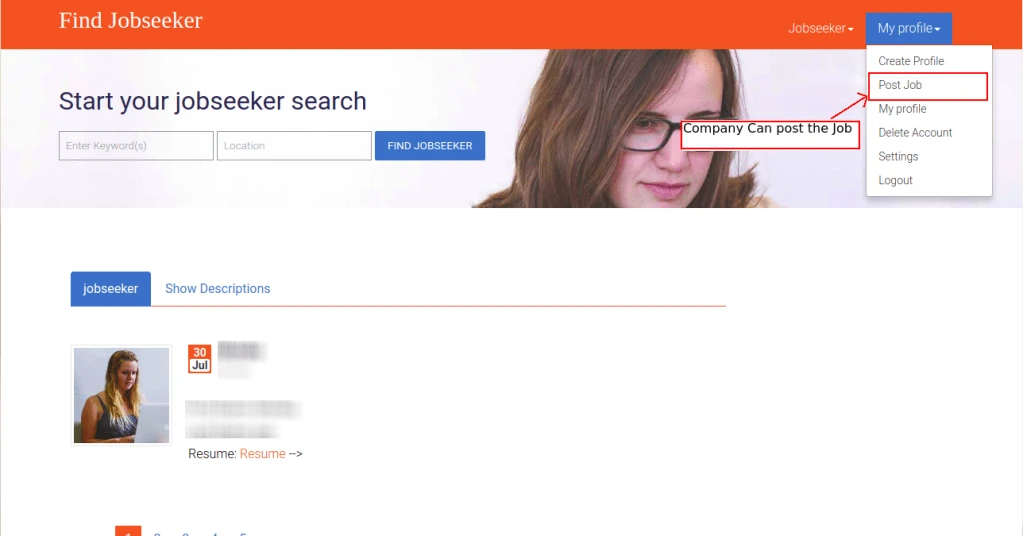
Company have the option to post the Job Before post the job company have to pay some amount according to the plans, that are available on the plan list
Django Jobseeker Post Job
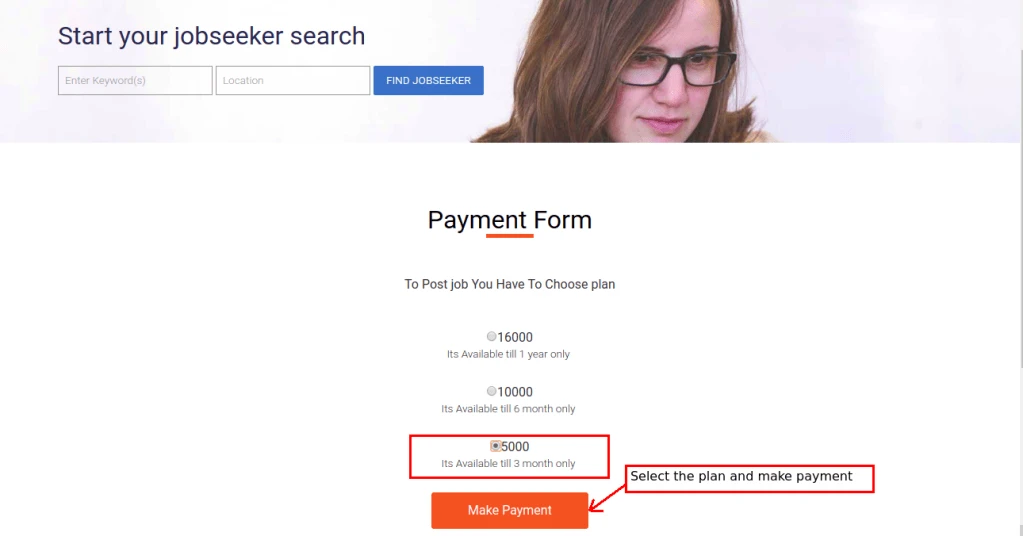
When Company select the option of post job, plans are visible on the screen where company can select the one of them, Company can select plan of yearly basis or monthly basis
Django Jobseeker Select Plan
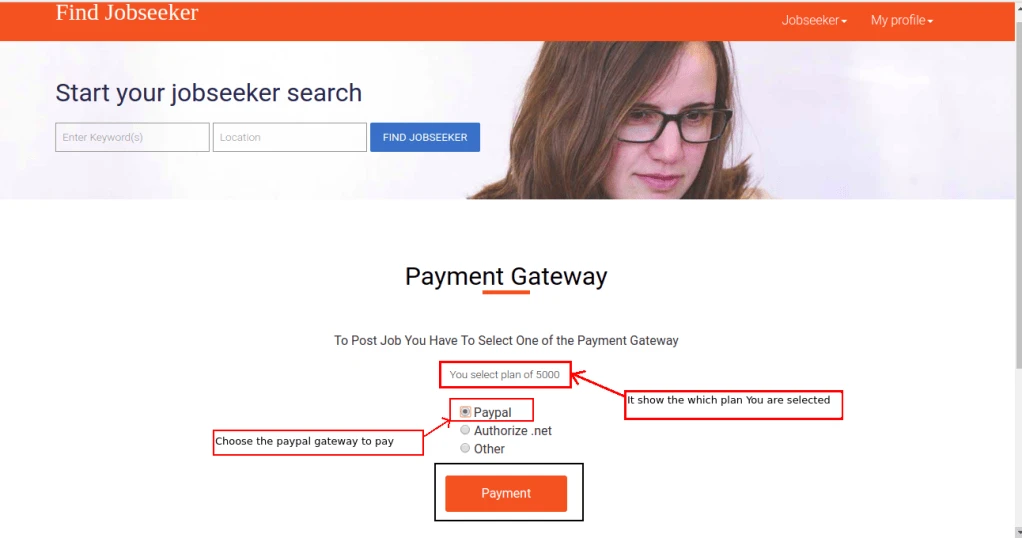
After selecting the plans from plan list company have to choose payment method to pay, If company select the Paypal gateway to pay, It redirect to the Paypal account form
Django Jobseeker Select Gateway
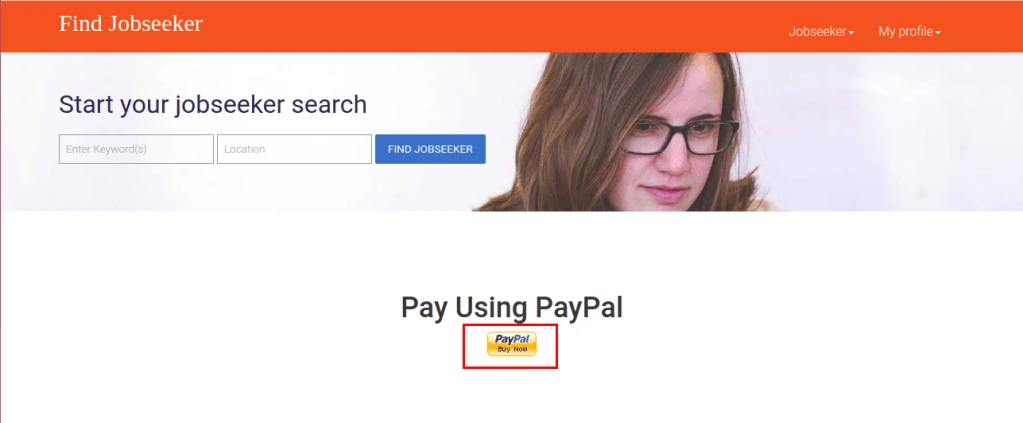
Company selected the Paypal Gateway So It redirect to the Paypal button
Django Paypal button
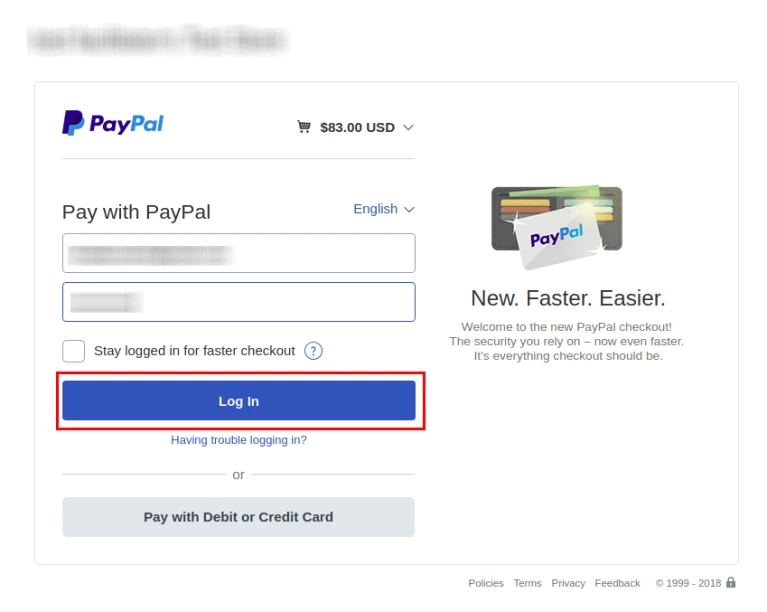
After clicking on paypal Button It redirect to the Paypal login screen where company have to login with their Paypal account
Django Jobseeker Paypal Login Screen
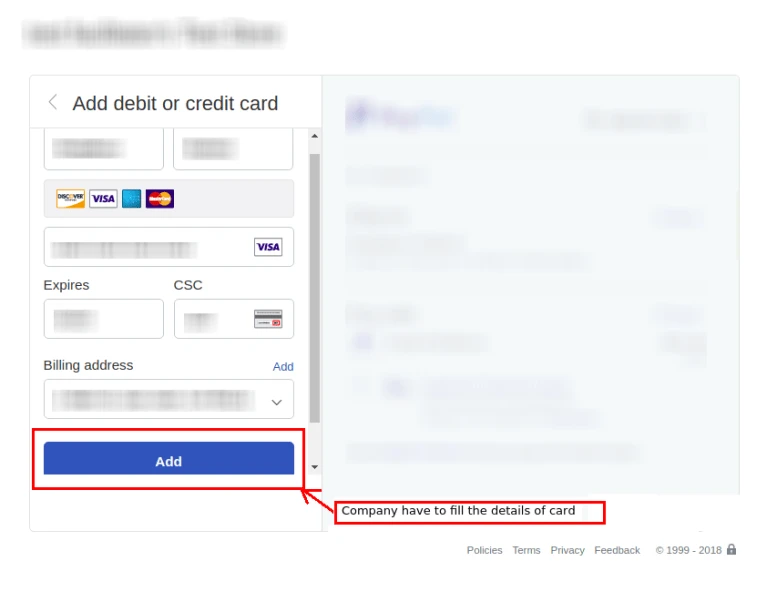
Company Have to Add the payment detail
Django Jobseeker Credit Card Detail
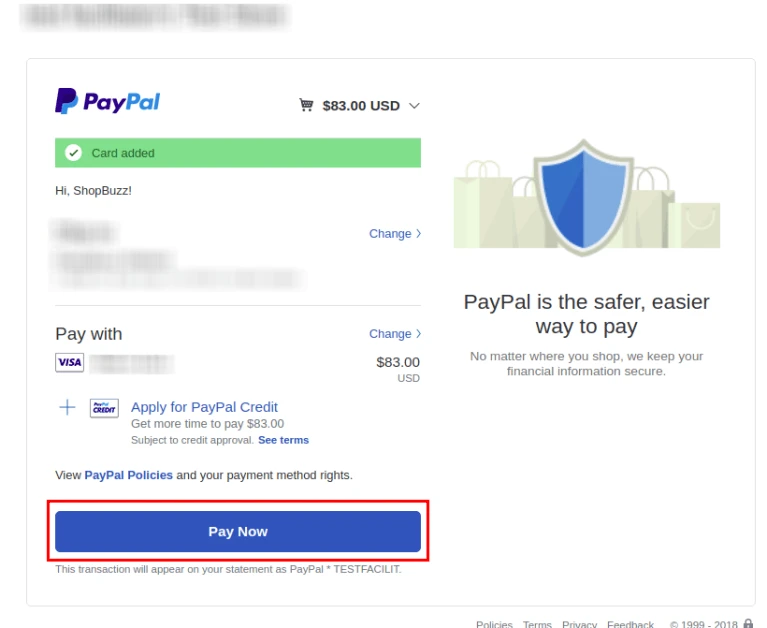
After Adding the detail of payment it show the Pay Now Button
Django Jobseeker Payment Button
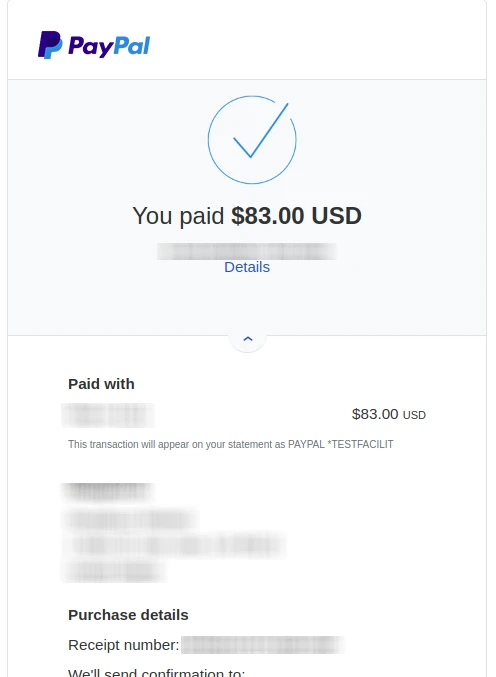
Clicking on Pay Now Button, Payment will be successfully done and It will show the Receipt
Django Jobseeker Receipt
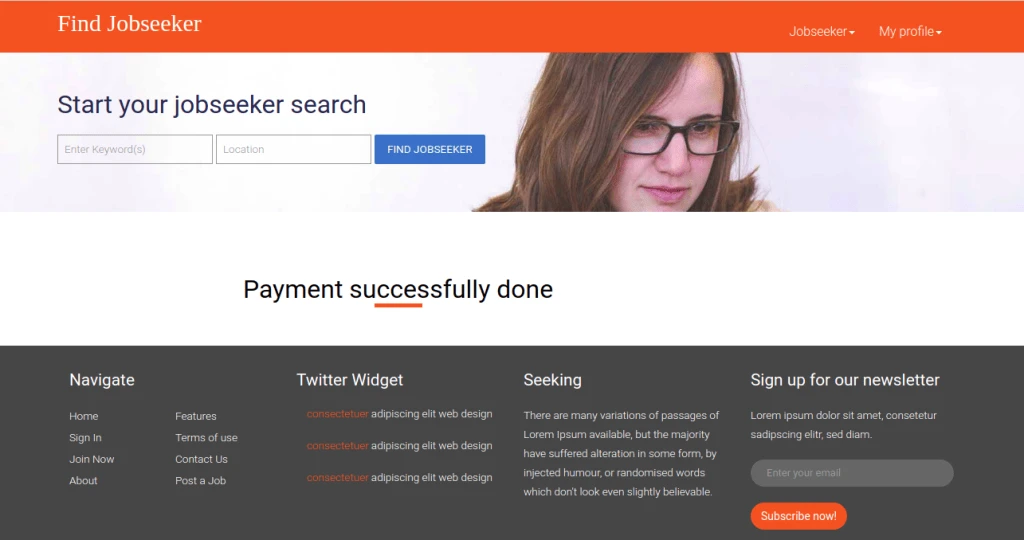
When clicking on return to merchant it redirect to the message of payment successfully done
We have implemented solution for allowing payment process via Authorize.Net from Django. In this post we will show the payment is processed using Authorize.net. We are still improving this module by adding new functionalities. We have a feature where client must buy a plan before the post can be made on the site about the project.
First, we have created an account on Authorize.Net (https://sandbox.authorize.net/) and turn ON TEST mode. For more detail refer: http://developer.authorize.net/
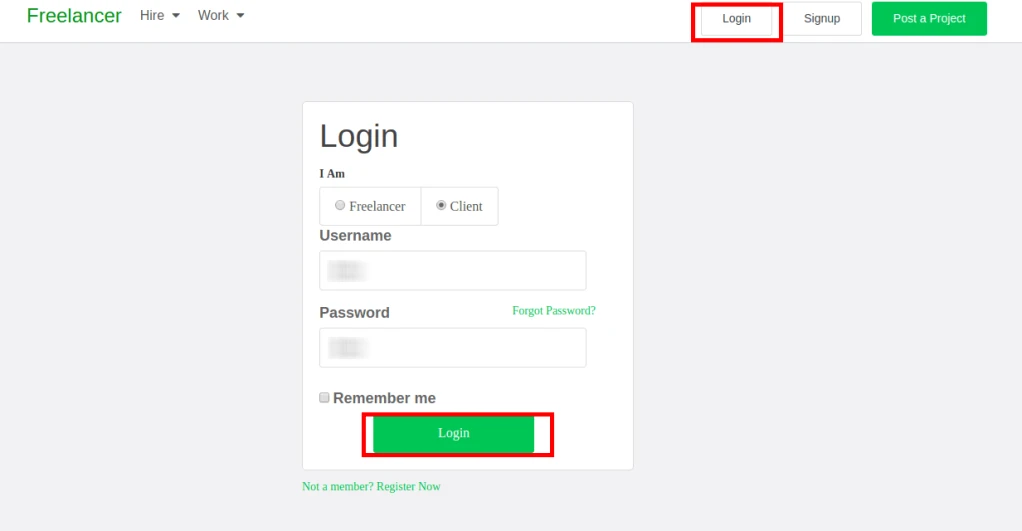
To use the application login is required. Client will login using his credentials.
Django Client Login for Freelancer
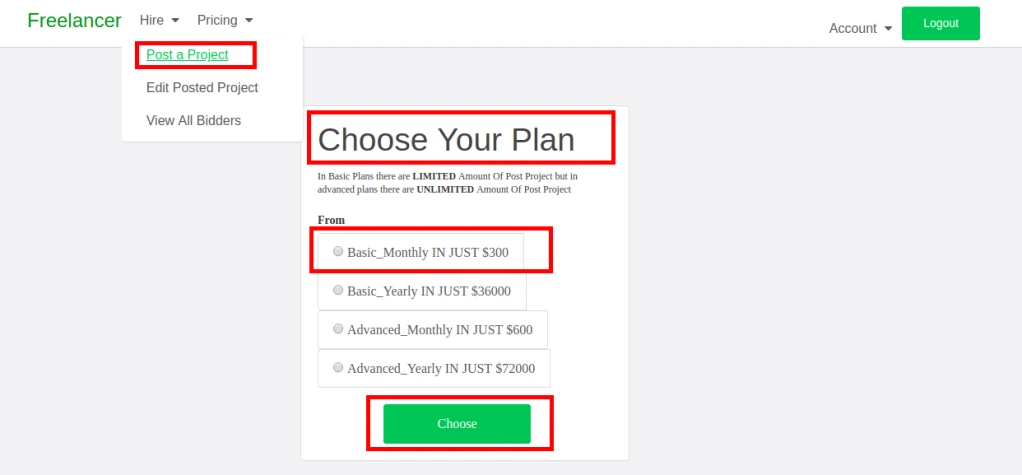
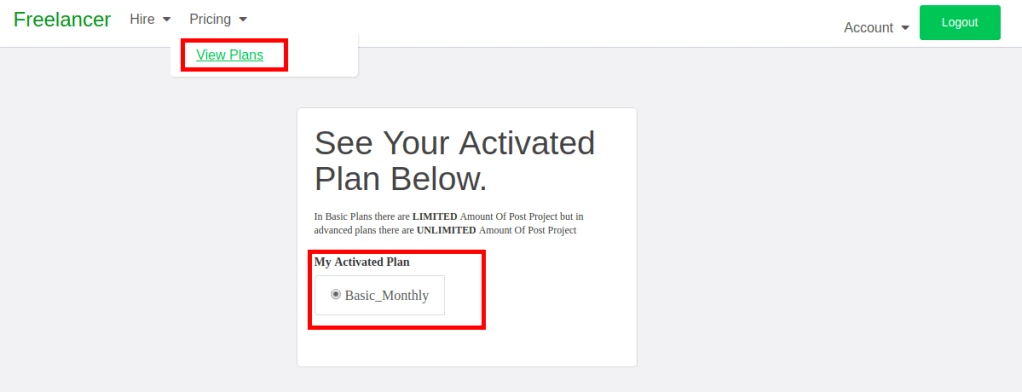
When client first sign in to the web application, plans page is displayed. To post the project client must have an active plan. It can also be accessed via View Plans option in Pricing menu.
If client already have an active plan in that case View Plans will display the Current plan.
Django – Post project before plan activation
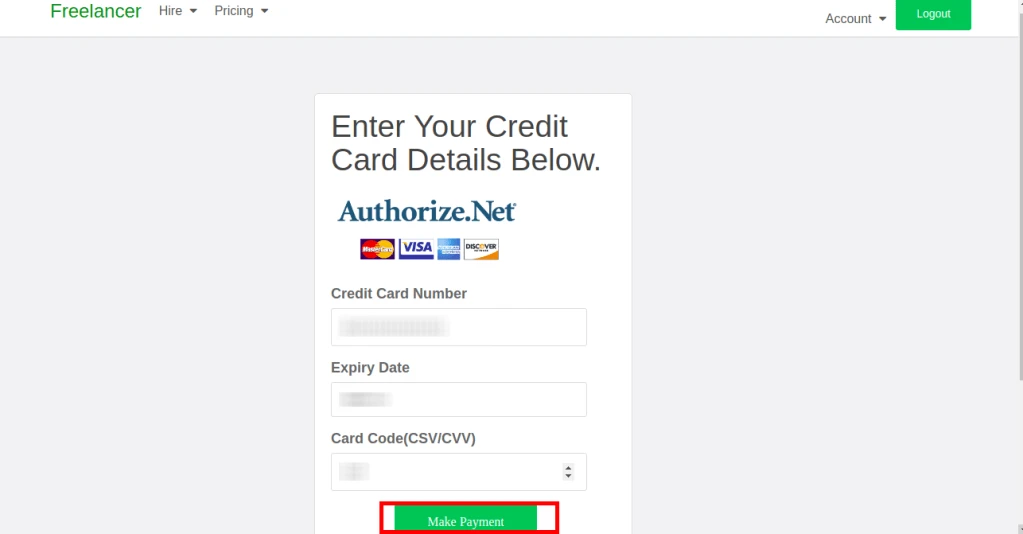
After selecting plan, client is redirected to authorize.net credit card information/checkout page for further processing. Next screen will ask for basic detail about credit card number, expiry data, CVV code. After filling the required details , Make Payment button is pressed which will do all the work of Django.
Django -Aauthorizenet Payment Gateway
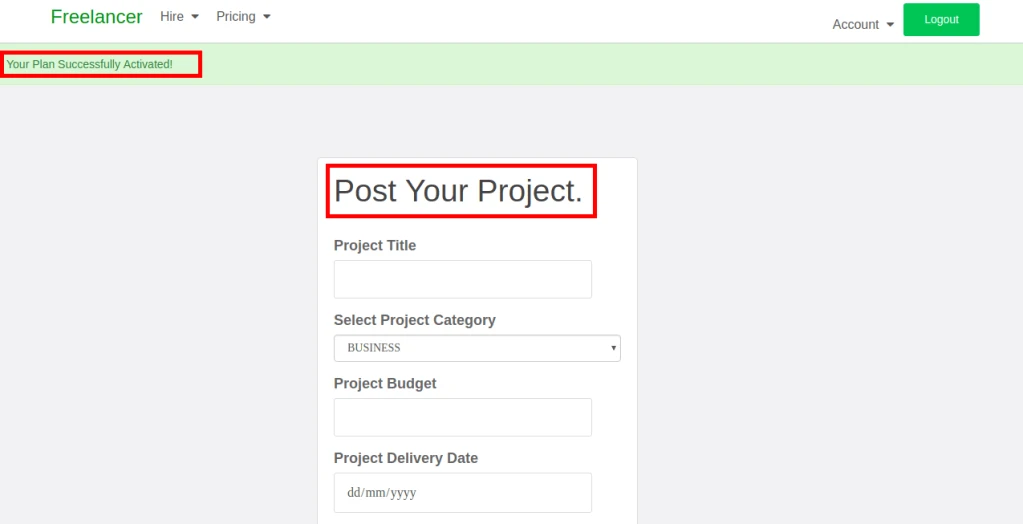
Once the payment is successful, the message will be displayed saying Your Plan Successfully Activated. Now client can post the project details.
Django – Plan successfully activated
‘View Plans’ option can be used to see the activated plan.
Active plan information
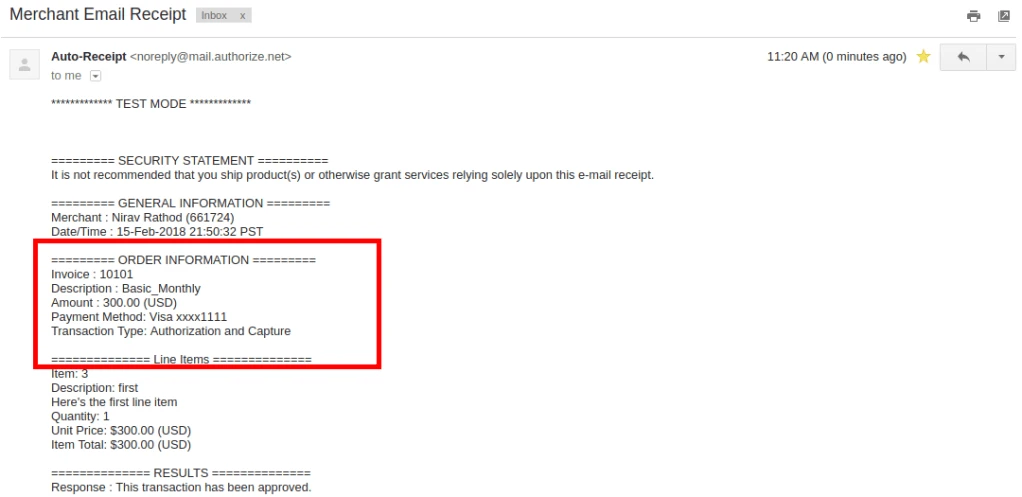
Merchant will receive email notification from authorize.net contains transaction information.